The Noroll Required Easy Sushi Bake Creamy Cheesy Utterly Addictive
- The Ultimate Easy Sushi Bake: Deconstructed Delight Unpacked
- Why This Baked Sushi Casserole is Your New Weeknight Hero
- Assembling Your Building Blocks for the Perfect Easy Sushi Bake
- The Step-by-Step Journey to Baking Perfection
- Elevating Your Easy Sushi Bake Experience: Garnishes and Sides
- Making It Ahead: Storage and Reheating Strategies
- Recipe FAQs
- 📝 Recipe Card
The Ultimate Easy Sushi Bake: Deconstructed Delight Unpacked
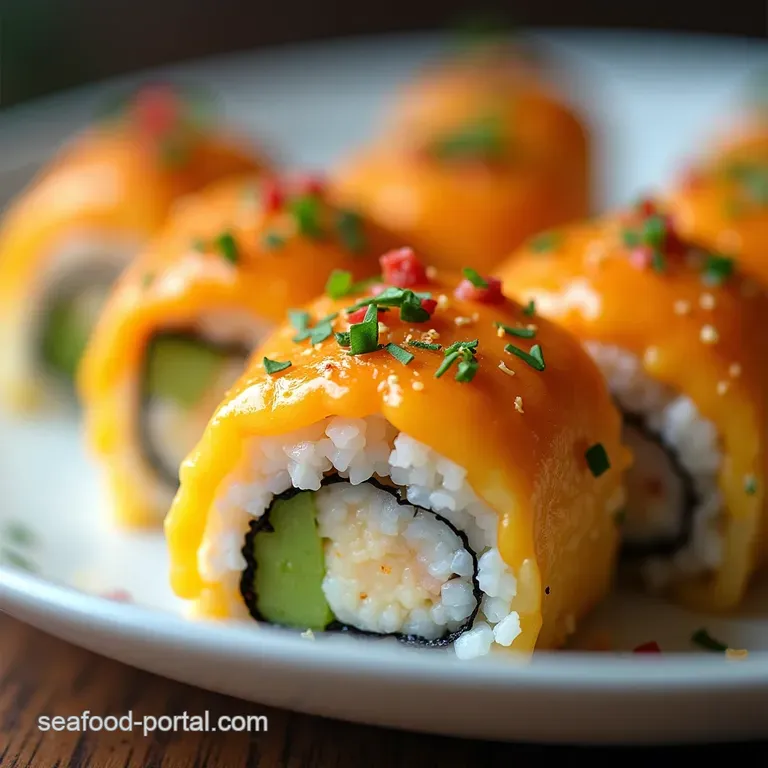
Forget the bamboo mat and the fiddly rolling; this Easy Sushi Bake takes all the beloved components of a classic sushi roll sushi rice, creamy mayo sauce, fresh seafood, and crunchy toppings and layers them into a warm, shareable casserole.
It’s rich, savoury, slightly sweet, and absolutely guaranteed to be a new family favourite. Clocking in at around 50 minutes total time, with only 25 minutes of active assembly, this is the perfect dish for feeding a crowd without breaking a sweat!
This Easy Sushi Bake Recipe turns sushi night on its head, making it approachable for even the most novice home cook.
Why This Baked Sushi Casserole is Your New Weeknight Hero
This Easy Baked Sushi Casserole isn't just a trend; it's a genuine solution for busy weeknights when you crave complex, satisfying flavours without the associated complexity. It delivers massive payoff for minimal effort, leveraging simple pantry staples and accessible ingredients.
Meet the Japanese Inspired Comfort Food Sensation
The inspiration for this creation comes straight from the flavour profiles we adore in our favourite rolls. Imagine the rich, tangy sushi rice, the decadent binder of cream cheese and mayonnaise, and the satisfying texture of imitation crab all baked until golden brown.
It’s truly a Japanese inspired comfort food sensation designed for sharing. This concept is brilliant precisely because it distills the essence of sushi down to its core tastes and presents them in a familiar, casserole format.
Ditching the Mat: The Genius Behind the Casserole Format
The genius here lies in eliminating the single most intimidating part of traditional sushi making: the rolling technique. By transforming the ingredients into layers in a simple 9x13 inch baking dish, we remove all the precision required for individual pieces.
This allows for generous portions and a wonderfully textural contrast between the soft, warm interior and the crisped top layer. It’s the ultimate approach for a casual, crowd pleasing meal.
Flavour Profile: Expecting California Roll Vibes, Served Hot
If you love the classic California Roll, you will adore this bake. The primary flavour focus revolves around that familiar combination: sweet and vinegary rice, savoury seafood (often Sushi Bake with Imitation Crab ), and a rich, creamy binding sauce.
We achieve that signature blend using softened cream cheese, mayonnaise (Kewpie if you can find it!), a hint of Sriracha for warmth, and a dash of sesame oil for nuttiness. The resulting bake is warm, gooey, and deeply satisfying a far cry from cold, delicate rolls.
Assembling Your Building Blocks for the Perfect Easy Sushi Bake
Successfully constructing this casserole relies on properly preparing the three main components: the seasoned rice base, the rich protein filling, and the final crunchy toppings. A little upfront prep work ensures every layer contributes perfectly to the final texture and taste.
Essential Components for That Signature Creamy Topping
The heart of this Homemade Sushi Bake resides in its creamy layer. You’ll need 8 ounces of full fat cream cheese, softened completely, to ensure smooth mixing.
This is combined with about 1/2 cup of mayonnaise using a Japanese Kewpie style mayo elevates the umami and richness beautifully. For the subtle heat that cuts through the richness, incorporate 1 to 3 tablespoons of Sriracha or chili garlic sauce, adjusting based on your preference for spice.
A teaspoon of toasted sesame oil and a tablespoon of low-sodium soy sauce complete this addictive binder.
Sourcing the Best Seafood Substitutes for the Bake Layer
While the imitation crab (surimi) is a fantastic, cost effective starting point for a classic California Roll Bake Recipe , there are many ways to adapt the protein. If you opt for fresh seafood, ensure it is cooked first.
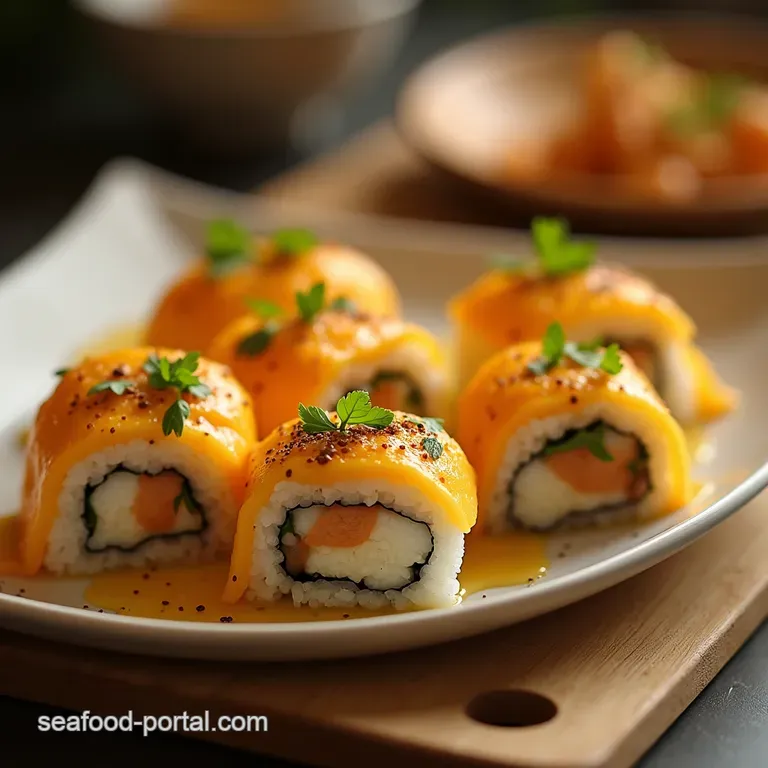
For an Easy Sushi Bake Salmon version, use about 12 ounces of cooked, flaked salmon, mixing it gently with the cream cheese mixture. Alternatively, for a Sushi Shrimp Bake , use small, cooked, chopped shrimp instead of the crab.
The key is that the seafood should be flaky and easily incorporated into the creamy binder without being mushy.
Perfecting the Sushi Rice Foundation: Vinegar and Seasoning Ratios
The base layer is crucial; without properly seasoned rice, the dish loses its sushi identity. Start with 2 cups of short grain sushi rice, cooked according to package instructions.
While it is piping hot, gently fold in the seasoning blend: 4 tablespoons of rice vinegar, 2 tablespoons of sugar, and 1 teaspoon of fine sea salt. Use a rubber spatula and a slicing motion to mix do not stir vigorously, or you will crush the grains.
This seasoned rice must be allowed to cool slightly before layering, preventing it from dissolving the creamy layer beneath it.
The Essential Toolkit: Pans and Prep Gear You'll Actually Need
Fortunately, this recipe doesn't demand specialized equipment. You will need a standard 9x13 inch baking dish or a similar 3-quart casserole pan. If you regularly make rice in a cooker, that’s ideal, otherwise, a heavy bottomed saucepan works well.
Large mixing bowls for combining the sauce and the crab, and a reliable rubber spatula for gentle mixing and layering, are your primary tools for this Easy Sushi Bake Recipe .
Related Recipes Worth Trying
- The Ultimate Loaded Baked Potatoes Crispy Skin Fluffy Inside — Ditch the foil Master the properly pampered Loaded Baked Potatoes recipe for a fluffy centre and shatteringly crisp skin Perfect for a hearty standalone...
- Easy Shrimp Tacos with Zesty Slaw Ready in 20 Mins — Whip up these sensational Easy Shrimp Tacos faster than you can decide what to watch on telly They feature a quick chililime shrimp and tangy slaw Perfect...
- Easy Air Fryer Honey Garlic Salmon Recipe Ready in 25 Mins — Need a weeknight hero This Crispy Air Fryer Honey Garlic Salmon recipe delivers a sticky flavourful glaze in minutes Foolproof cooking guaranteed
The step-by-step Journey to Baking Perfection
With your components prepped, the assembly moves quickly. Think of this as building a layered lasagna, just much faster and infinitely tastier!
Layering Logic: Achieving Structural Integrity in Your Bake
First, take about two-thirds of your seasoned sushi rice and gently press it evenly across the bottom of your prepared baking dish. This forms a solid foundation. Next, carefully spread the entire creamy seafood mixture over the rice layer, ensuring even coverage from edge to edge.
Finally, take the remaining one-third of the seasoned rice and spread it gently over the filling. This top rice layer acts as a protective barrier, ensuring the filling stays moist while the top browns perfectly.
Prepping the Flavor Base: Mixing the Seafood and Creamy Binder
While you assemble the layers, ensure the creamy binder is perfectly smooth before adding the seafood. Mix the cream cheese, mayo, Sriracha, soy, and sesame oil until no lumps remain. Only then should you fold in the flaked imitation crab or alternative seafood.
If you are making a Sushi Bake No Cream Cheese variation (perhaps using sour cream or heavy cream thickened slightly with cornstarch), ensure the addition is robust enough to hold its shape during baking.
Baking Times and Temperatures: Achieving Golden Perfection
Preheat your oven to 375° F ( 190° C). Once assembled, the casserole needs about 20 to 25 minutes in the oven.
The goal isn't just to heat it through; you want the creamy interior to become piping hot and bubbly, and the top rice layer to set nicely. For that irresistible golden finish, generously sprinkle about 1 cup of shredded Monterey Jack or mozzarella cheese over the final rice layer just before it goes into the oven.
The Crucial Cooling Period Before Serving the Casserole
Resist the urge to slice into the Easy Sushi Bake immediately upon removing it from the oven! A brief resting period of about 5 minutes is essential.
This allows the layers to firm up slightly, ensuring that when you scoop it out, the rice base doesn't completely collapse. It retains enough residual heat to remain perfectly warm while firming up just enough for neat serving.
Elevating Your Easy Sushi Bake Experience: Garnishes and Sides
What truly transforms this bake from a simple casserole into a sushi experience are the finishing touches. The fresh, crunchy textures and bright flavours sprinkled on top are non-negotiable.
Creative Toppings That Take Your Sushi Casserole to the Next Level
After it comes out of the oven, immediately garnish liberally. Sprinkle the top with black and white sesame seeds, and crucially, a generous dusting of Furikake (Japanese rice seasoning, often containing dried seaweed, sesame, and fish flakes). Thinly sliced green onions (scallions) add a welcome sharp freshness.
For an authentic touch, chiffonade (cut into thin ribbons) two sheets of nori seaweed and scatter them over the top as well. These Sushi Bake Toppings provide essential textural contrast.
Vegetarian and Vegan Adaptations for Plant Based Lovers
While the classic version leans heavily on seafood, this concept is highly adaptable. For a vegetarian take, skip the imitation crab and use 12 ounces of finely chopped, sautéed shiitake or oyster mushrooms, seasoned well with soy sauce and garlic powder before mixing into the cream sauce.
Vegan adaptation requires swapping the dairy cream cheese for a firm, high-quality vegan cream cheese alternative and ensuring your mayonnaise is plant based. The flavour profile remains remarkably similar!
Shelf Life: How Long Does Leftover Sushi Bake Actually Last?
Portions of this Homemade Sushi Bake are fantastic as leftovers. Store covered tightly in the refrigerator for up to 3 days. Reheating is best done in the microwave for short bursts (about 60 90 seconds) or covered lightly with foil in a low oven ( 300° F/ 150° C) until warmed through.
Because the rice softens further upon cooling, the texture will be slightly softer than when first baked, but the flavour remains excellent.
Making It Ahead: Storage and Reheating Strategies
Planning ahead? You can assemble the entire Easy Sushi Bake —layers and cheese up to 24 hours in advance. Cover the unbaked dish tightly with plastic wrap and refrigerate.
When ready to bake, allow it to sit on the counter for about 30 minutes to take the chill off, or add 5– 10 minutes to the required baking time. Do not add the fresh toppings (like green onions) until after it has baked and rested.
Vegetarian and Vegan Adaptations for Plant Based Lovers
While the classic version leans heavily on seafood, this concept is highly adaptable. For a vegetarian take, skip the imitation crab and use 12 ounces of finely chopped, sautéed shiitake or oyster mushrooms, seasoned well with soy sauce and garlic powder before mixing into the cream sauce.
Vegan adaptation requires swapping the dairy cream cheese for a firm, high-quality vegan cream cheese alternative and ensuring your mayonnaise is plant based. The flavour profile remains remarkably similar!
Shelf Life: How Long Does Leftover Sushi Bake Actually Last?
Portions of this Homemade Sushi Bake are fantastic as leftovers. Store covered tightly in the refrigerator for up to 3 days. Reheating is best done in the microwave for short bursts (about 60 90 seconds) or covered lightly with foil in a low oven ( 300° F/ 150° C) until warmed through.
Because the rice softens further upon cooling, the texture will be slightly softer than when first baked, but the flavour remains excellent.
Recipe FAQs
How can I make this Easy Sushi Bake even creamier if I don't have Kewpie mayo?
No need to fret if the Japanese mayo isn't lurking in your fridge; you can certainly make do! Use full fat, good quality standard mayonnaise and perhaps add an extra teaspoon of rice vinegar and a tiny pinch of sugar to mimic that subtle tang and richness Kewpie offers.
The cream cheese base is doing most of the heavy lifting anyway, so it’ll still be delicious!
Can I prepare the Easy Sushi Bake ahead of time?
Yes, absolutely, this is a brilliant dish for prepping when you have a moment spare! You can assemble all the layers rice, filling, and the top rice layer in your baking dish, cover it tightly with cling film, and pop it in the fridge for up to 24 hours.
Just remember to let it sit on the counter for about 30 minutes before baking so it loses that fridge chill, or you may need to add an extra 5-10 minutes to the cooking time.
My rice base seems a bit sticky after baking; did I do something wrong?
That's a common hiccup, often down to over mixing the sushi vinegar into the hot rice, which can break down the grains and make them gluey. To avoid this next time, fold the seasoning in gently using a large spatula, rather than stirring vigorously.
Also, make sure you are using proper short grain sushi rice, as long grain varieties just won't hold up as well for this kind of layering.
What are some good protein swaps if I can't find imitation crab?
You have loads of smashing options here! Cooked, flaked salmon (tinned or leftover roasted) works a treat and adds a lovely rich flavour. Alternatively, you can use cooked, chopped shrimp or even shredded rotisserie chicken if you want a simpler, less fishy take.
Just make sure whatever you choose is well drained before mixing it into your creamy sauce.
How should I serve this once it’s out of the oven? Is it meant to be eaten hot?
It’s best served warm, rather than piping hot straight from the oven, as letting it rest for 5 10 minutes allows the layers to set up a bit. Scoop generous portions onto plates, making sure to get rice, topping, and filling in each scoop it’s a casserole, not a traditional roll!
It’s lovely served with a side of crisp pickled cucumber salad for a bit of zest to cut through the richness.
Easy Sushi Bake Casserole