The Ultimate Deconstructed Sushi Bake Creamy Crunchy and Completely Effortless
- The Magic Behind the Tray: Why This Sushi Bake Outshines the Roll
- Ditching the Mat: An Effortless Take on Japanese Favourites
- Gathering Your Culinary Arsenal for the Perfect Bake
- Essential Building Blocks: Components of the Ultimate Sushi Bake
- Step-by-Step Guide to Assembly and Golden Perfection
- The Journey from Prep to Platter: Baking the Magic
- Elevating Your Experience: Customizing Your Baked Delight
- Preserving the Pleasure: Storage and Reheating Tips
- Recipe FAQs
- 📝 Recipe Card
The Magic Behind the Tray: Why This Sushi Bake Outshines the Roll
There’s a certain reverence we hold for traditional sushi. The delicate balance of fish, the perfectly vinegared rice, the act of rolling it all tightly within a sheet of nori it's an art form.
But let's be honest: sometimes, the sheer effort of mastering that delicate technique keeps us from enjoying those flavours on a Tuesday night. Enter the Sushi Bake : a glorious, deconstructed, and utterly comforting casserole version of your favourite Japanese roll.
This isn't just a dinner; it’s a revolution in convenience dining, taking everything you love about sushi and baking it into a golden, creamy masterpiece. It’s an absolute corker of a dish, proving that effortlessness can still taste gourmet.
Ditching the Mat: An Effortless Take on Japanese Favourites
The genius of this Backed Sushi concept lies in its simplicity. We take the core components seasoned rice, luxurious topping, and crunchy garnish and layer them into a baking dish instead of meticulously rolling them by hand.
This transformation makes the complex approachable, turning a dish that usually demands concentration into one that practically makes itself. It’s the perfect bridge between wanting authentic flavour and needing a genuinely fast meal solution.
Meet Your New Weeknight Obsession
If you’ve ever found yourself craving the rich texture of a baked California roll but groaned at the thought of cleaning a bamboo mat, this recipe is your culinary salvation. It moves sushi from the realm of fussy takeout to reliable home cooking.
Preparing this dish is significantly less stressful than crafting individual rolls, yielding a generous, shareable portion that delights everyone at the table. The Sushi Bake recipe transforms an elegant appetizer into a satisfying, substantial main course.
Decoding the Deliciousness: What Makes This Casserole Unique?
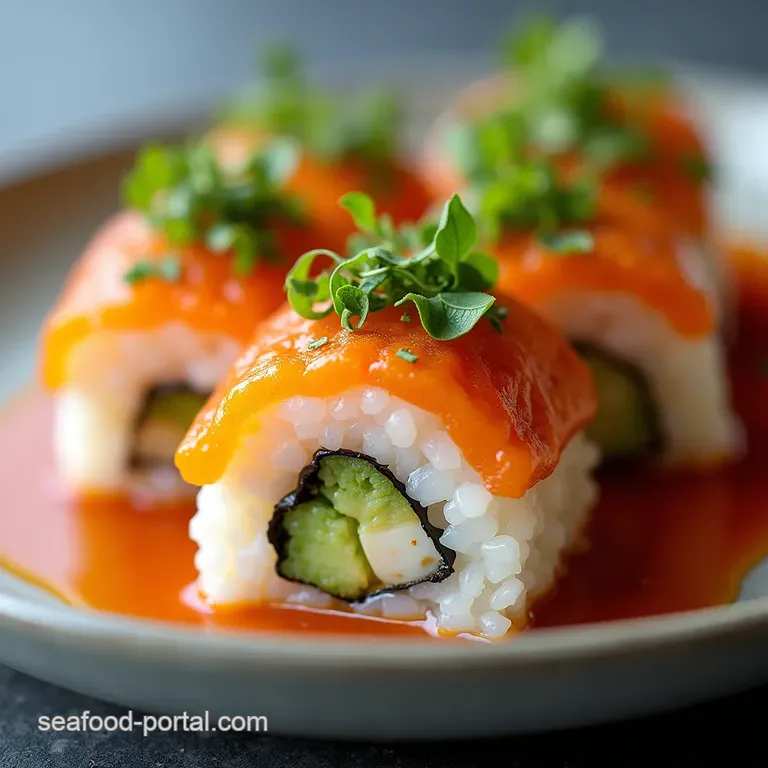
What elevates this beyond a simple rice casserole? It’s the masterful layering of textures and tastes. We start with perfectly seasoned sushi rice, warm and slightly sticky. Then comes the indulgent, umami rich topping, often featuring savory Sushi Bake imitation crab or perhaps flaked salmon.
This creamy mixture is the heart of the dish, providing a richness that perfectly balances the sharp tang of the rice vinegar. Finally, the baked finish creates a bubbly, irresistible golden crust that crunches wonderfully with every scoop.
The No-Fuss Path to Flavour Nirvana
Our goal here is maximum flavour delivery with minimal active cooking time. Because we aren't concerned with tight rolling, the prep time shrinks considerably. We focus on properly cooking the rice and perfectly mixing the topping components.
This Sushi Squares approach means you can have this flavour bomb ready for the oven in about 25 minutes, making it an ideal candidate for busy evenings or unexpected guests who deserve something special without the fuss.
Gathering Your Culinary Arsenal for the Perfect Bake
To ensure your creation achieves that perfect balance of creamy depth and golden crunch, preparing your components accurately is key. A successful bake relies on two main stages: getting the rice just right, and blending the topping into a cohesive, flavourful dream team.
For this recipe, we are aiming for a generous serving size, typically feeding 6 to 8 hungry people. Getting the foundation right means starting with quality ingredients and treating the rice with respect.
Essential Building Blocks: Components of the Ultimate Sushi Bake

Every great structure needs a solid foundation, and in this case, that foundation is wonderfully seasoned short grain rice. Following that, the topping must be rich, savory, and hold together beautifully under heat.
While the full list of Sushi Bake ingredients is extensive, they all serve a clear purpose in building that classic sushi profile.
Mastering the Seasoned Rice Base
Start by rinsing 1 ½ cups of short grain sushi rice until the water runs completely clear; this removes excess starch preventing gummy results. Once cooked (using about 1 ¾ cups of water), we must swiftly season it.
Gently warm 3 tablespoons of rice vinegar, 1 tablespoon of granulated sugar, and ½ teaspoon of fine sea salt until the sugar dissolves completely. Drizzle this mixture over the hot rice and, using a cutting motion with a spatula never stirring or mashing gently fold the seasoning in.
This crucial step ensures every grain has that signature sushi tang. Once seasoned, press this mixture evenly into a lightly greased 8x8 or 9x9 inch baking dish.
The Creamy Core: Assembling the Topping Mix
This is where the richness is built. You’ll need 8 ounces of flaked protein; popular choices include Sushi Bake imitation crab (surimi), cooked salmon, or tuna.
Combine this with ½ cup of Japanese mayonnaise (Kewpie provides superior richness!), 1 to 3 tablespoons of Sriracha (adjusting for heat), 4 ounces of softened cream cheese, 1 teaspoon of soy sauce, and ½ teaspoon of toasted sesame oil. Mix this thoroughly until you have a uniform, luscious spread.
This creamy mixture is then carefully spooned over the cooled rice base, ensuring even coverage right up to the edges of the dish.
Crucial Kitchen Gear for Seamless Preparation
While you don't need a specialized rolling mat, a standard rice cooker or heavy bottomed saucepan is essential for perfect rice. A large mixing bowl facilitates easy blending of the topping without waste. Most importantly, a sturdy, square baking dish (around 2-quart capacity) is needed to contain the layers neatly.
Having these items ready streamlines the 25 minutes of active prep time considerably.
Related Recipes Worth Trying
- The Ultimate Easy Sushi Bake Recipe No Rolling Required — Skip the rolling pin This Easy Sushi Bake recipe delivers all the flavour of a California Roll in a warm shareable casserole So creamy and simple
- The Ultimate Loaded Baked Potatoes Crispy Skin Fluffy Inside — Ditch the foil Master the properly pampered Loaded Baked Potatoes recipe for a fluffy centre and shatteringly crisp skin Perfect for a hearty standalone...
- The Perfect Oven Baked Potatoes with Crispy Skin — Achieve the crispiest skin and fluffiest interior with this foolproof Oven Baked Potatoes Recipe Forget foilthis method guarantees perfection every time
Step-by-step Guide to Assembly and Golden Perfection
Once your rice is seasoned and pressed, and your topping is whipped to creamy perfection, the assembly process is delightfully straightforward. The magic truly begins when this layered creation hits the heat, transforming into that signature, golden brown deliciousness we all crave from a Sushi Bake salmon recipe variant or crab version.
The Journey from Prep to Platter: Baking the Magic
The transformation from layered casserole to piping hot delight takes less than half an hour. Remember, while this dish is relatively forgiving, monitoring the top layer is key to achieving that perfect crunch without burning.
Layering Strategy: Constructing Your Sushi Bake
After pressing the seasoned rice into the base, gently spoon the creamy topping evenly across the top. Do not press this layer down; keep it light and fluffy. Next, for crucial texture, sprinkle ¼ cup of Panko breadcrumbs over the entire surface, followed by 1 teaspoon of black sesame seeds.
This Panko layer acts like a flavour shield and browns beautifully.
Achieving That Irresistible Browned Crust
Preheat your oven to 375° F ( 190° C). Place the assembled dish on the middle rack and bake for 20 to 25 minutes. You are looking for the topping to be bubbling vigorously and heated all the way through.
If the Panko hasn't reached a satisfying golden hue by the time the centre is hot, switch the oven to the broiler setting for just 1 to 2 minutes, watching vigilantly to prevent scorching.
Cooling Times and Serving Suggestions
Resist the urge to dive in immediately! After removing the dish from the oven, allow your Sushi Bake about 5 to 10 minutes to rest. This short period allows the layers to firm up slightly, ensuring you can scoop out neat portions rather than a liquidy mess.
Serve hot, topped generously with freshly crumbled nori sheets and perhaps some thinly sliced green onion for a final pop of colour and freshness.
Elevating Your Experience: Customizing Your Baked Delight
While the classic preparation is sublime, this format invites endless customization. This recipe is highly adaptable, making it excellent for catering to different tastes or dietary preferences. Think of the base and topping as a blank canvas for sushi inspired flavour combinations.
Ingredient Swaps to Match Your Cravings
If you tire of the standard California style, feel free to explore alternatives. A fantastic switch for a heartier meal involves using cooked, flaked salmon instead of imitation crab for a robust Sushi Bake salmon recipe .
For a vegetarian friendly option, sautéed shiitake mushrooms mixed into the creamy base deliver a deep, savory profile. Remember, whether you make a No Rice Sushi Bake version (omitting the rice and substituting it with thin cucumber slices or cauliflower rice) or stick to the classic, the topping remains the star.
Alternative Toppings for Extra Crunch and Zing
The Panko offers crunch, but you can boost this further. Try scattering toasted, unsweetened coconut flakes along with the Panko for a subtle sweetness that pairs surprisingly well with the savory filling.
A drizzle of rich, thick unagi (eel) sauce just before serving adds a depth of caramelized sweetness that contrasts beautifully with the spicy mayonnaise.
Preserving the Pleasure: Storage and Reheating Tips
Leftovers are almost guaranteed, as this dish serves generously. Storing and reheating properly ensures that the next day’s serving is nearly as good as the first.
Best Practices for Leftover Sushi Bake Success
Once completely cooled, cover the baking dish tightly with plastic wrap or transfer individual portions into airtight containers. This Backed Sushi remains fresh in the refrigerator for up to three days. The texture might soften slightly upon refrigeration, but the flavour will deepen overnight.
Ingredient Swaps to Match Your Cravings
When reheating, the goal is to restore warmth without drying out the topping or burning the Panko. The microwave works well for quick reheating, using short 30-second bursts until warmed through.
For the best texture, a brief stint in a toaster oven or a conventional oven set to 300° F ( 150° C) for about 10 minutes is ideal.
If the top looks dry after reheating, a tiny splash of water or soy sauce around the edges of the dish before microwaving can help restore moisture. Enjoying your homemade Sushi Bake again tomorrow is a simple, tasty treat.
Recipe FAQs
Can I make this Sushi Bake ahead of time, or does it need to be served right away?
You can certainly prepare the base and the topping mixture a day ahead and keep them separate in the fridge that’s a great time saver for entertaining! However, it’s best to assemble and bake the Sushi Bake just before serving so the Panko topping stays nice and crisp, avoiding that soggy bottom syndrome.
What can I use instead of imitation crab meat for the topping?
Loads of things work wonderfully! Cooked, flaked salmon or flaked imitation tuna are classic swaps, giving you a nice variation on the California roll vibe. For a richer flavour, try using shredded cooked chicken breast mixed with the mayonnaise base.
My Panko topping looks a bit pale; how do I get that perfect golden brown finish on my Sushi Bake?
Ah, that lovely golden crust is crucial! The best trick is to briefly switch your oven to the "broil" or "grill" setting for the final 1 to 2 minutes after it's fully heated through. Keep a close eye on it, though, as it can go from 'just right' to burnt faster than you can say 'tea time'!
Is this dish very heavy, and what's the best way to serve it so it feels lighter?
Because of the cream cheese and mayo, it can be quite rich, much like a very generous shepherd's pie. To balance it out, serve it with something sharp and acidic on the side, like quick pickled vegetables or a simple side salad dressed with rice vinegar. This cuts right through the creaminess nicely.
How long will leftovers of the Sushi Bake keep in the fridge?
Leftovers will happily keep in an airtight container in the fridge for up to three days a handy lunch sorted! When reheating, I recommend using the oven or an air fryer rather than the microwave, as this helps revive some of that top layer's texture a bit better.
Effortless Sushi Bake Casserole

