The Ultimate Crispy Tuna Melt a Grilled Cheese Masterpiece

Defining the Perfect Comfort Sandwich: Crisp vs. Creamy
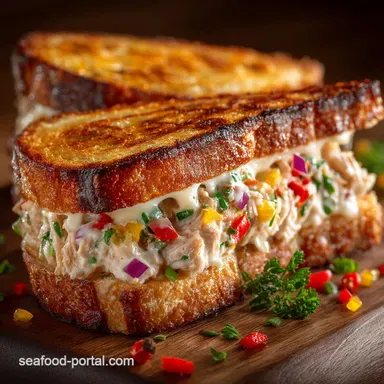
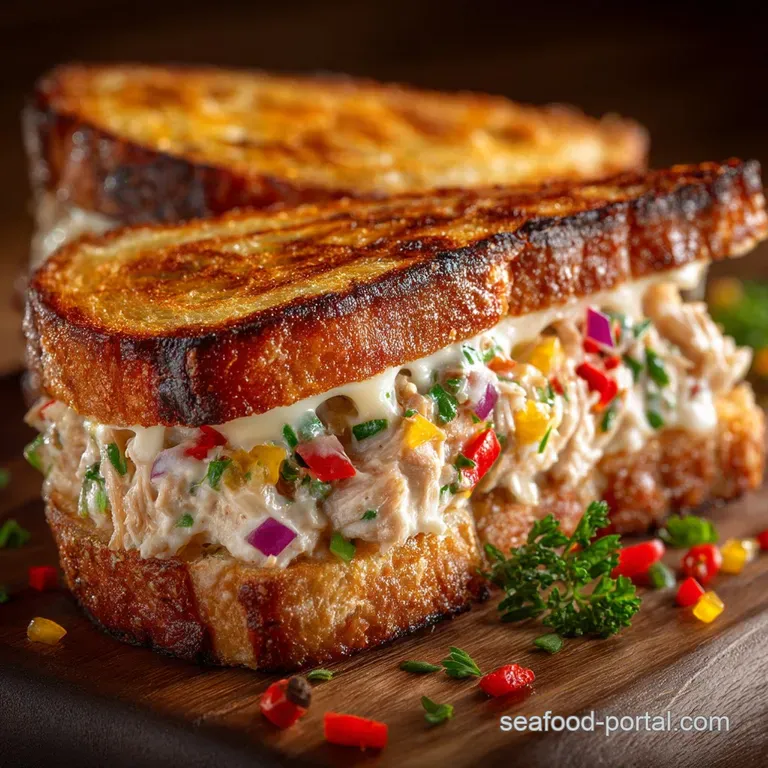
The humble Tuna Melt is often overlooked, relegated to hurried lunch counters and lackluster convenience. However, a truly great Tuna Melt Sandwich should stand proudly alongside any premium grilled cheese, offering a sublime textural dichotomy: a golden, crunchy exterior giving way to a warm, tangy, and deeply satisfying interior.
Achieving this balance is the core challenge. Many attempts fail due to too much moisture, too little seasoning, or high heat grilling that leaves the bread burned before the cheese has even begun to soften.
Our ultimate goal is to eliminate sogginess entirely, ensuring the structural integrity of the sandwich and delivering peak comfort food status.
Elevating the Filling: Crunch, Zing, and Zero Moisture
The success of any Tuna Melt Recipe hinges entirely on the filling. The biggest mistake home cooks make is skipping the crucial step of thoroughly draining the tuna. Whether you use oil- or water packed fish, residual liquid guarantees a steamy, soggy result once heated.
By starting with 12 oz of Albacore that has been pressed bone dry, we create a stable, low-moisture base. Into this dry base, we fold elements designed for texture and flavor elevation: finely diced celery provides a crucial, non-negotiable crunch, while diced red onion offers a pleasant, mild sharpness.
A generous dose of fresh lemon juice, Dijon mustard, and sweet pickle relish provides the necessary zing to cut through the richness of the mayonnaise binder, resulting in a complex, balanced tuna mix that is ready to be transformed into the Best Tuna Melt Sandwich you’ve ever tasted.
The Bread Choice That Makes or Breaks the Meal
While the filling supplies the flavor, the bread is the structural architect. When making a sandwich destined for the grill, thin, flimsy bread simply won't suffice; it collapses under the weight of the filling and burns too quickly.
We require four slices of sturdy bread that can withstand low-and-slow heat and absorb the grilling fat without immediately saturating. Sourdough is an exceptional choice due to its robust crust and tangy flavor profile, but a good, sturdy white sandwich loaf also performs admirably.
The goal is to select a bread with enough structure to hold up the dense, creamy filling and the generous portion of grated cheese (we recommend a blend of Mature Cheddar and Gruyère).
How Low-and-Slow Grilling Ensures Peak Crispness
Patience is not just a virtue here; it is a necessity. The secret to a perfect, evenly golden crust and a fully melted core lies in managing the heat. High heat (medium high or above) will carbonize the exterior of the bread in two minutes flat, leaving the cheese cold and the dense tuna filling lukewarm.
By committing to medium low heat which requires approximately 10 to 12 minutes of total cook time we allow the heat to penetrate slowly. This gentle technique ensures the cheese melts into a glorious, gooey blanket, the filling heats through completely, and the exterior achieves that deep, buttery, golden crispness without a hint of scorching.
Essential Provisions for Building Your Tuna Melt
Moving from theory to practice, stocking your kitchen with the right Tuna Melt Ingredients is the next step toward mastery. Quality ingredients make a noticeable difference in the final product's texture and richness.
Beyond Tuna: Selecting the Perfect Binder and Seasoning
For the ultimate deluxe tuna mix, you'll need 12 oz of high-quality, oil-packed tuna (once drained), which provides superior flavor depth compared to water packed varieties. The binder should be a high-quality mayonnaise about half a cup mixed with key acidic and savory components: one tablespoon of fresh lemon juice, one teaspoon of tangy Dijon mustard, and a teaspoon of sweet pickle relish.
The essential textural components finely diced celery and red onion should be incorporated last to maintain their snap. When choosing the cheese blanket, opt for 4 oz of grated cheese blend.
Grating the cheese, rather than using slices, increases its surface area, which is vital for quick, even melting during the grilling process.
Choosing the Right Loaf: Thickness and Structure Matters
As noted, the foundation requires four slices of structurally sound bread, but preparing the exterior is equally important. To achieve that enviable golden hue and rich flavor, we move beyond simple butter.
Our grilling fat is a secret weapon: a blend of 2 Tbsp of softened unsalted butter combined with 1 Tbsp of mayonnaise. This mixture applies evenly, enhances flavor, and raises the smoke point, making it harder to burn the bread during the necessary low-and-slow cooking time.
Required Kitchen Tools and Utensils (for Prep and Grilling)
You won't need specialized equipment for this Tuna Melt Recipe, but having the right tools on hand streamlines the process and ensures an even cook. Essential prep tools include a sturdy mixing bowl, a sharp knife for the celery and onion, and a reliable cutting board.
For the cooking phase, a large non-stick skillet or, ideally, a cast iron griddle pan, is necessary for maintaining consistent, low heat. Finally, a flat metal spatula is crucial, not just for flipping, but for applying gentle pressure during grilling, a technique that speeds up the internal melting process and guarantees maximum exterior contact.
Related Recipes Worth Trying
- Proper Classic Tuna Noodle Casserole Recipe Made From Scratch — Forget the tinned stuff Our Classic Tuna Noodle Casserole uses a perfect homemade béchamel sauce and egg noodles for the ultimate creamy bake with a golden...
- Six Minute SesameCrusted Ahi Tuna Steak Recipe — Learn how to sear Ahi Tuna Steak perfectly rare with this easy recipe Features a zesty gingersoy drizzle for a restaurantquality dinner
- The Ultimate Creamy Tuna Noodle Casserole Recipe From Scratch — Upgrade your comfort food game with this easy creamy Tuna Noodle Casserole Recipe Rich béchamel and a crunchy toppingready in under an hour
The Method: From Mixing Bowl to Golden Perfection
Mastering the perfect Tuna Melt requires adherence to a precise, step-by-step methodology focused on layering and heat management.
Crafting the Tangy, Low-Moisture Tuna Filling
The preparation begins with Step 1: achieving maximum dryness. Press the canned tuna thoroughly to remove every drop of liquid or oil. Flake the dry tuna into your mixing bowl. Next, combine the wet ingredients (mayonnaise, lemon, Dijon, relish, and seasoning) before folding in the celery and red onion.
Gentle mixing is paramount; overmixing the Tuna Melt Ingredients can turn the mixture pasty. Once combined, the filling is ready to be portioned evenly onto the interior of the bread.
Prepping the Exterior: Our Secret Butter Mayonnaise Rub
Step 2 involves the creation of the crisp exterior. Combine the softened butter and the reserved tablespoon of mayonnaise until perfectly smooth. This butter mayo rub must be spread evenly and thoroughly onto one side of all four slices of bread this will be the grilling side.
Assembly is straightforward: place two slices butter side-down, pile the tuna mix evenly, leaving a slight border, and top with half of the grated cheese blend. The remaining cheese goes onto the interior surface of the top bread slices, acting as a second layer of glue.
Grilling Technique: Pressing and Timing for Maximum Crunch
Preheat your skillet or griddle pan over the required medium low heat. Place the assembled sandwiches (butter side-up) into the pan. This is Step 3: grilling. Cook undisturbed for 4 to 5 minutes until the bottom crust is a rich, golden brown.
Carefully flip the sandwiches, then immediately use the flat metal spatula to gently press down. This contact ensures the exterior achieves peak crispness and transfers heat more efficiently to the center, facilitating the melt.
Continue cooking for another 4 to 5 minutes, or until the second side matches the first in color and the cheese is fully bubbling out the sides.
The Crucial Final Step: Slicing and Serving Hot
Once the sandwiches are removed from the heat, perform Step 4: allow them to rest briefly on the cutting board for just one minute. This minute of rest allows the superheated filling to stabilize, preventing an eruption of tuna and cheese when you slice.
Use a sharp knife to slice the sandwiches diagonally, corner to corner, and serve immediately alongside your chosen accompaniments.
Expanding Your Tuna Melt Horizons: Troubleshooting and Sides
The classic Tuna Melt is fantastic, but there are countless ways to customize this comfort food champion and ensure your leftovers are just as satisfying.
Flavor Twists: Spicy Tuna Melt Options and Add-ins
For those who crave heat, customizing your Tuna Melt Recipe is simple. Adding half a teaspoon of Sriracha or a pinch of cayenne pepper directly to the tuna mix delivers a powerful kick. Alternatively, substituting the sweet relish with finely minced pickled jalapeños provides a milder, fruitier heat profile.
For adventurous cooks looking for different Tuna Sandwich Recipes, consider flaked, drained canned salmon or even seasoned, mashed chickpeas as protein substitutes; simply follow the same methodology regarding moisture control and binding.
Best Practices for Storage and Reheating Without Sogginess
While the Best Tuna Melt Sandwich is eaten fresh, leftovers are inevitable. The key to preserving the structural integrity of your Tuna Melt is avoiding the microwave. Microwave reheating introduces steam, turning your perfectly crisp bread instantly soggy.
If you have prepared extra filling, store the tuna mix separately from the bread. If reheating a whole sandwich, the best methods for crispy restoration are either the toaster oven or a short burst in the Tuna Melt Air Fryer .
Alternatively, if you want to make Tuna Melts In The Oven , preheat the oven to 350° F ( 175° C) and bake for 8 to 10 minutes until heated through and the crust has re-crisped.
Perfect Pairings: What Salads and Soups Complement This Meal?
Because the filling is rich and creamy, pairing the Tuna Melt with items that offer acidity or a temperature contrast elevates the experience. The classic accompaniment remains a simple, robust tomato soup a perfect dunking partner.
For a more substantial soup choice, a creamy New England clam chowder echoes the oceanic notes of the sandwich. If opting for a salad, select something sharp: simple mixed greens dressed heavily with a bright, acidic vinaigrette (like red wine or balsamic) expertly cuts through the richness of the cheese and the mayonnaise.
Answering FAQs About Bread, Heat, and Timing
The most common questions surrounding Tuna Melt perfection involve temperature control. Remember, the medium low heat is crucial; it takes 10 to 12 minutes to cook, and attempting to rush this will result in burnt bread. Why use grated cheese?
Grated cheese has a higher melt rate than sliced cheese, which means it fully melts in the allotted time before the bread overcooks. If you are struggling with a slippery filling, try the open faced variation: place the tuna mix and cheese on a single slice of toasted bread and finish it under a hot broiler until the cheese bubbles a faster, though less crispy, route to achieving a melted tuna treat.
Recipe FAQs
Right, how do I stop my Tuna Melt from turning into a soggy mess?
Sogginess is the arch nemesis of a great sandwich, and it usually comes down to moisture. The biggest culprit is often the canned tuna itself, so make sure you drain it until it’s bone dry think of it as being completely gutted before mixing!
Secondly, cook the sandwich low and slow over medium low heat; cooking too quickly creates internal steam that turns your beautifully toasted bread rubbery.
I'm not a fan of celery; can I leave it out, or should I swap it for something else?
While the celery in this Ultimate Crispy Tuna Melt recipe is mainly there for that essential crunchy texture, it’s not mandatory if it makes you wince. If you ditch it, replace it with another finely diced vegetable that holds its structure.
Try finely diced water chestnuts or even a bit of fennel bulb; both provide a nice, clean snap that cuts through the richness of the mayonnaise and cheese.
Is it cheating if I make the tuna filling the day before? How long does it keep?
Not at all that’s just being brilliantly organised! Preparing the tuna mix 24 hours ahead is a superb time saver, and it actually allows the flavours (especially the lemon and Dijon) to meld and deepen nicely overnight.
Store the mixture in an airtight container in the refrigerator, and it will keep perfectly for 2 3 days, ready to be deployed for a lightning fast lunch or tea.
What's the secret to getting that proper golden, crispy crust like the sandwich shop?
The magic is in the grilling fat and the patience, mate. Mixing softened butter with mayonnaise creates a superior exterior coating; the mayo has a higher smoke point than butter alone, helping you achieve that beautiful, uniform golden colour without burning.
Always use medium low heat and press gently with your spatula while cooking to ensure maximum crispness and even melting inside.
The recipe calls for mature cheddar and Gruyère that sounds a bit posh! Can I use standard cheese slices?
While that particular blend offers a fantastic depth of flavour and superior melt quality, don't worry if you only have standard cheese slices in the fridge. If using everyday cheddar or Jack, grate it rather than slicing it; grated cheese melts much faster and more evenly than thick slices.
This guarantees maximum ooze and stops you having to cook the bread for too long!
Ultimate Crispy Tuna Melt Sandwich