Quick N Crusted Restaurantquality Seared Ahi Tuna with Gingerlime Drizzle
- Demystifying the Michelin-Star Sear: Why This Ahi Recipe Shines
- The Science Behind That Perfect Red Center
- Sourcing Superior Seafood: Essential Ingredient Checklist
- The Crucial Prep Phase: Temperature and Coating Application
- Mastering the Sear: Achieving the Ideal Temperature Gradient for Seared Ahi Tuna
- Elevating the Plate: Pairing Suggestions for Your Seared Ahi Tuna
- Storage Secrets: Keeping Leftover Slices Flavorful
- Recipe FAQs
- 📝 Recipe Card
Demystifying the Michelin Star Sear: Why This Ahi Recipe Shines
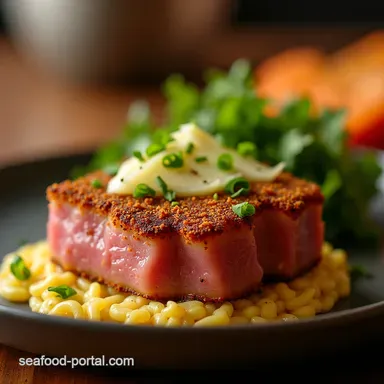
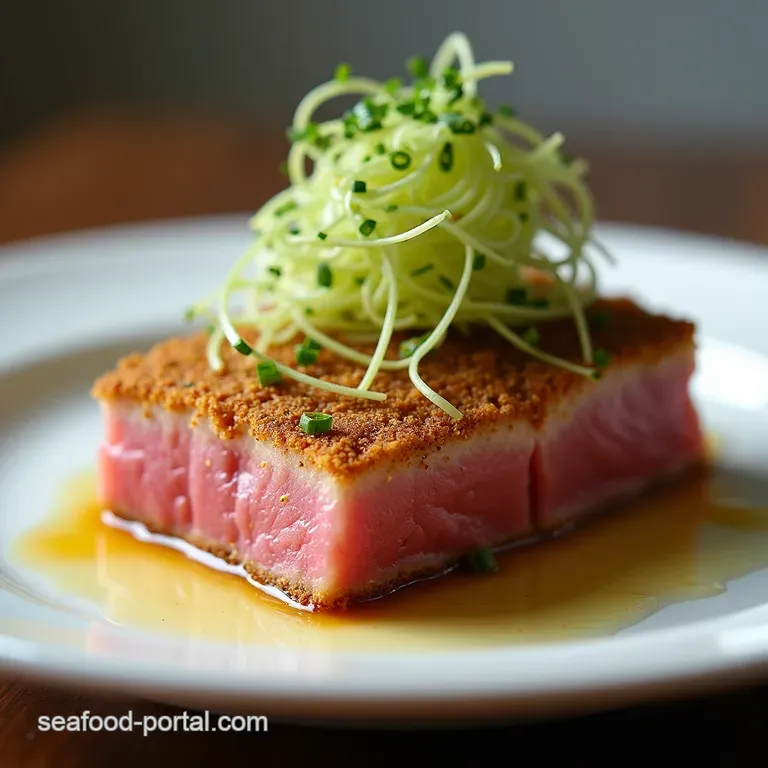
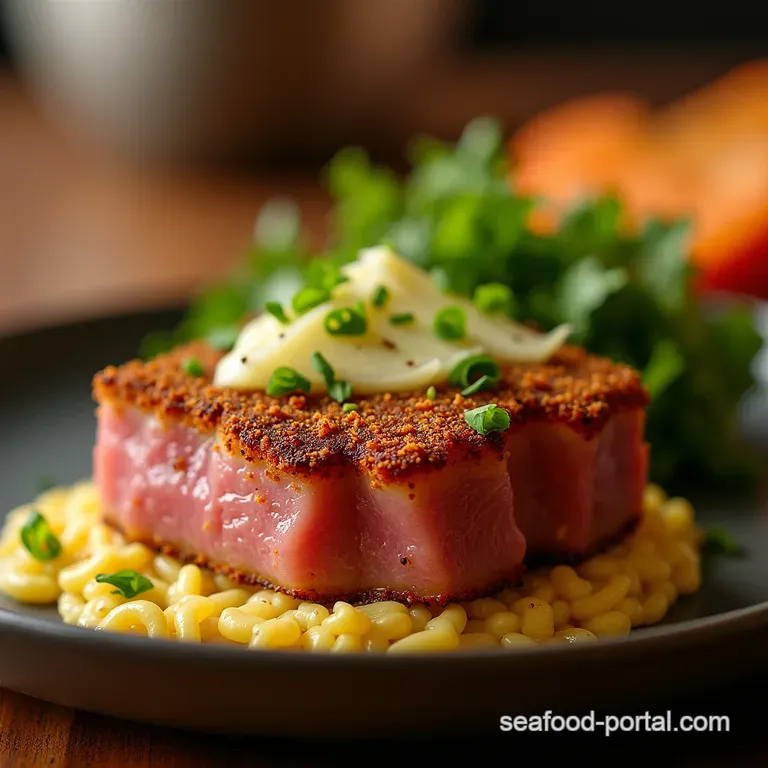
That first encounter with perfectly cooked Seared Ahi Tuna —crisp, dark edges yielding to a cool, crimson center is transformative. It’s a dish often relegated to high end dining menus, yet the secret to achieving this restaurant grade texture at home lies not in complex sauces, but in rigorous temperature control and speed.
This Seared Ahi Tuna Recipe is designed to strip away the intimidation, focusing purely on technique. We are chasing that ideal mi-cuit (half cooked) status, where the exterior is intensely flavoured by a bold crust, and the interior remains buttery and raw.
Preparing this Easy Ahi Tuna Dinner doesn't require hours; it demands mere minutes of focused, high heat action, proving elegance doesn't have to equate to extensive effort.
The Science Behind That Perfect Red Center
Achieving the desirable contrast in a Seared Ahi Tuna Steak is a delicate balance of physics. Tuna, being a lean fish, cooks rapidly. The goal is to create a thermal gradient: super hot outside, barely warmed inside.
This is only possible when your pan temperature significantly exceeds the internal temperature you are aiming for. When you apply direct, ferocious heat to the crusted surface, the outside caramelizes and firms up almost instantly, creating a barrier that prevents the heat from penetrating too deeply before the timer runs out.
This precise technique is what distinguishes an amateur attempt from a successful Ahi Tuna Steak Recipe .
Beyond Fancy: Preparing Restaurant Grade Tuna at Home
The perception that this dish is overly fussy stems from a lack of understanding regarding the required heat levels. Think of it like blacksmithing rather than baking; you are shocking the surface of the fish.
If you attempt this Seared Ahi Tuna on medium heat, the crust will burn long before the heat has time to create a sear, resulting in a uniformly grey, overcooked piece of fish.
True restaurant quality is achieved by understanding that we are only kissing the fish with the pan often just 90 seconds per side to develop that mandatory crust while preserving the jewel like centre.
Understanding Ahi: Choosing the Best Yellowfin for Searing
When embarking on this culinary adventure, the quality of the primary ingredient dictates the success of the entire meal. You absolutely must source sushi grade or sashimi grade Ahi, which is typically Yellowfin tuna.
This designation guarantees the fish has been handled and frozen appropriately to eliminate parasites, making it safe for raw consumption in the middle. Look for a deep, vibrant red or purplish red colour, which signifies freshness and proper handling.
Avoid any tuna that appears brownish or watery; that is the first sign that it will not hold up to the high heat demands of the sear.
The Five Minute Magic Trick: Speed and Precision Cooking
The cooking phase for this Seared Ahi Tuna Steak is breathtakingly fast truly a five minute magic trick. Once your pan is screaming hot, the process moves from prep to plate with minimal downtime. This speed is your ally.
The accompanying Seared Ahi Tuna Marinade (or more accurately, a dry crust) does the heavy flavour lifting before cooking, allowing the pan to focus purely on texture.
This efficiency makes it an ideal candidate for an Easy Ahi Tuna Dinner when you need something sophisticated on the table rapidly.
Sourcing Superior Seafood: Essential Ingredient Checklist
While the cooking method is precise, the quality of the inputs determines the final outcome. Since the centre of the tuna remains uncooked, the flavour is inherently driven by the fish itself and the bold crust we apply.
This is where you invest slightly more time and money to secure the best product possible, ensuring every bite of your Seared Ahi Tuna sings with freshness.
Tool Talk: What Equipment Guarantees a Flawless Crust?
The right pan is non-negotiable for developing that deep, dark exterior. You need a heavy bottomed skillet cast iron is the champion here due to its superior heat retention, although a thick bottomed stainless steel pan performs admirably.
This mass ensures that when the cool tuna hits the surface, the temperature does not plummet, allowing the Maillard reaction (browning) to occur rapidly. A wire rack or clean cutting board will be necessary for the essential resting period post sear.
Selecting Premium Tuna: Eyeing Freshness and Cut Quality
For the best result in a Seared Ahi Tuna Recipe , look for a centre cut loin that is thick and uniform, ideally about 1.5 inches deep. This consistency allows for even searing on all sides. The texture should be firm to the touch, almost springy.
If you are buying pre-cut steaks, check the edges for discoloration. When slicing the loin yourself, always use a very sharp chef’s knife, cutting against the grain to ensure the final slices are tender, not chewy.
Balancing the Sesame Crust: Spice Ratios That Matter
The crust is the primary flavour vehicle for the outside of the fish. We rely on coarsely cracked black peppercorns for sharp heat and texture, complemented by a mix of black and white sesame seeds for nutty crunch.
When learning How To Season Ahi Tuna Steak , remember that salt should be applied sparingly and just before searing, as salt draws out moisture, which hinders crust development.
The ratio here is deliberate: heavy on the pepper for bite, light on the sesame for visual appeal and secondary flavour notes.
Prepping the Ahi: Essential Trimming and Drying Techniques
This step is perhaps the most critical non-cooking element. If any moisture remains on the surface of the Seared Ahi Tuna Steak , steam will replace sear, resulting in a pale, sad exterior.
Take your sushi grade loin and aggressively pat every single surface dry with multiple layers of paper towels. You want the surface to feel slightly tacky before you begin the coating process.
Only after the fish is bone dry should you roll it firmly through your pepper and sesame mixture, ensuring an even, thick blanket of crust adheres completely.
Related Recipes Worth Trying
- Quick Cheery PanSeared Lemon Butter Cod Fillet Recipe — Master the best lemon butter sauce for fish with this easy 20minute recipe Get perfectly flaky fish fillets every time Click for details
- The Proper Posh Picnic Tuna Melt Recipe Elevated Tangy — Forget soggy lunches This Gourmet Tuna Sandwich recipe uses sharp mustard and fresh celery for the best Homemade Tuna Sandwich youll ever make Easy cooking...
- The Quintessential Creamy Tuna Salad Recipe Flavour Without Fuss — Discover the Best Tuna Salad Recipe for a truly perfect Classic Creamy Tuna Salad Packed with crunch tang and zero fussideal for an easy tuna sandwich
The Crucial Prep Phase: Temperature and Coating Application
Before the heat even comes on, you need to manage two variables: the tuna’s temperature and the glaze components. While the tuna needs to be cool enough to resist rapid cooking internally, leaving it frozen solid or refrigerator cold for hours will cause the crust to burn before the interior warms at all.
Take the crusted fish out about 10 minutes before you plan to cook. Simultaneously, prepare your Seared Ahi Tuna Sauce —a bright, zesty counterpoint made from low-sodium soy sauce, fresh lime juice, grated ginger, and a touch of honey or maple syrup.
Whisk these together until homogenous; this is your finishing drizzle, not a marinade.
Mastering the Sear: Achieving the Ideal Temperature Gradient for Seared Ahi Tuna
This is the moment of truth. We are moving into the high heat zone, employing a method where high temperature meets minimal contact time to create the perfect Seared Ahi Tuna .
Step-by-step: Building the Peppercorn and Sesame Exterior
Once the tuna is fully crusted, it’s ready for the pan. Ensure every surface top, bottom, and the two long sides is evenly coated. If you are using a whole loin, you will need to sear all four sides to ensure adequate crust coverage.
Don’t worry if some pepper falls off during searing; the remaining crust will adhere to the newly seared sections as you turn the fish.
Pan Preparation: Achieving Non-Stick Perfection Before the Heat Hits
Use a high smoke point oil, such as avocado or grapeseed oil. Place the skillet over high heat. Wait patiently until the oil begins to shimmer, indicating it is just below its smoke point. This temperature is crucial; adding the fish to insufficiently hot oil is the number one cause of sticking and a poor sear.
You want an immediate, audible sizzle when the tuna meets the metal.
The Flip Strategy: Timing the Sear for Maximum Contrast
Place the crusted tuna gently into the hot oil. Immediately set a timer. For a standard 1.5 inch thick loin, sear for 90 seconds on the first side. Do not touch it during this period. After 90 seconds, use tongs to gently rotate the fish onto the next side.
Continue this process for all four major sides, adding perhaps 60 seconds for the smaller side edges, keeping total contact time to a maximum of four to five minutes. If you are using a thermometer, pull the tuna when it reads 110- 115° F (43- 46° C) internally for a perfect medium rare finish.
Resting and Slicing: Techniques for Clean Presentation
Once removed from the pan, transfer the tuna immediately to a cool surface, like a wooden cutting board. Allow it to rest for three minutes. This crucial rest allows the residual heat to distribute slightly and firms up the exterior, ensuring clean, non-ragged slices.
When slicing for your Seared Ahi Tuna Bowl or plate, use your sharpest knife and cut against the grain at a slight diagonal, aiming for slices about 1/4 inch thick.
Elevating the Plate: Pairing Suggestions for Your Seared Ahi Tuna
A dish this bright and flavourful demands companions that either complement its freshness or provide a grounding counterpoint. For a full Seared Ahi Tuna Bowl , start with a base of fluffy coconut rice or quinoa.
Add vibrant green elements like blanched asparagus, lightly massaged kale, or thinly sliced avocado. Drizzle the finished plate generously with your Ginger Lime Drizzle. The bright acidity of the lime in the Seared Ahi Tuna Sauce beautifully cuts through the richness of the high-quality fish.
Storage Secrets: Keeping Leftover Slices Flavorful
Ideally, Seared Ahi Tuna should be consumed immediately after slicing. However, if you have leftovers, store the sliced portions in an airtight container in the refrigerator for up to 24 hours. Keep the sauce separate.
The crust will inevitably soften overnight, but the flavour integrity will remain. Do not reheat leftovers; they are best eaten cold, perhaps tossed into a crisp salad the next day.
Gluten-free Swaps and Vegetable Substitutions for the Glaze
For those needing a gluten-free alternative, utilizing Tamari instead of traditional soy sauce in the Ginger Lime Drizzle is a seamless swap it retains the deep umami note. If fresh ginger is unavailable, a high-quality ginger paste works in a pinch, though the freshness of grated ginger is unparalleled.
For those sensitive to spice, you can omit the pepper entirely from the crust and rely solely on toasted sesame seeds and a tiny pinch of smoked paprika for colour.
Doneness Dial: How to Adjust Cook Time for Thicker Cuts
If you happen to secure an exceptionally thick loin, perhaps 2 inches or more, the cooking time must be increased slightly, but always in incremental steps. Increase the sear time on each side to two full minutes. However, for cuts over 2 inches, using an instant read thermometer becomes mandatory.
You are aiming for the same internal temperature ( 115° F for medium rare), but it will take closer to 6– 7 minutes total contact time.
Troubleshooting Common Searing Mistakes (The Grey Band)
The dreaded 'grey band' is the sign that your sear was too slow or your heat was too low. If you see a thick, greyish white ring encircling the raw centre, it means the heat penetrated slowly, cooking the edges before the crust could fully form and insulate the interior.
The solution is twofold: ensure your oil is hotter before the fish enters the pan, and decrease your individual side sear time slightly.
Nutritional Snapshot: Maximizing Protein Content
This recipe is an outstanding choice for fitness enthusiasts. A typical serving of Seared Ahi Tuna Steak delivers a massive dose of complete protein often over 40 grams while being naturally low in saturated fat and rich in essential Omega-3 fatty acids.
Paired with vegetables, this makes for one of the leanest yet most satisfying, high protein meals available, making this Seared Ahi Tuna Recipe a powerhouse addition to any healthy eating plan.
Recipe FAQs
How do I make sure my Seared Ahi Tuna isn't mushy or raw in the middle?
The trick is all about heat management! You need a smoking hot pan think high heat for a very short blast, typically 90 seconds to 2 minutes per side. For that perfect rare centre, the internal temperature should only reach about 115°F (46°C); it cooks quickly, so keep an eye on it like a hawk!
Can I use regular tuna steaks instead of sushi grade for this recipe?
For this specific recipe, using sushi grade (or sashimi grade) tuna is highly recommended because you are intentionally leaving the centre raw. If you use standard grocery store tuna, you risk food safety issues; stick to the best quality you can find for that beautiful ruby red interior.
What is the absolute secret to getting that gorgeous, crunchy crust on the outside?
There are two vital secrets, chum! First, you must pat the tuna loin bone dry with paper towels until you’re sick of doing it moisture kills the sear. Second, make sure your oil is shimmering hot before the tuna even touches the pan. That initial sizzle locks in that pepper crust beautifully.
I bought too much tuna; how should I store leftovers of the Seared Ahi Tuna?
It’s best eaten fresh, of course, but if you have leftovers, store the sliced tuna in an airtight container in the fridge for no more than a day. When reheating, avoid the microwave! Instead, let it come to room temperature slightly, or serve it cold over a salad to maintain texture.
The glaze recipe looks a bit strong; can I substitute or adjust the ginger and soy?
Absolutely, feel free to tinker! If you find the ginger too punchy, use slightly less, or grate it finer so it blends better. For a lighter flavour profile, swap out half the soy sauce for rice vinegar, or add a squeeze more lime juice to brighten up that savoury depth.
Crusted Ahi Tuna Steak