The Ultimate Crispy Hug Perfectly Fried Ice Cream
The Ultimate Crispy Hug: Perfectly Fried Ice Cream Unveiled
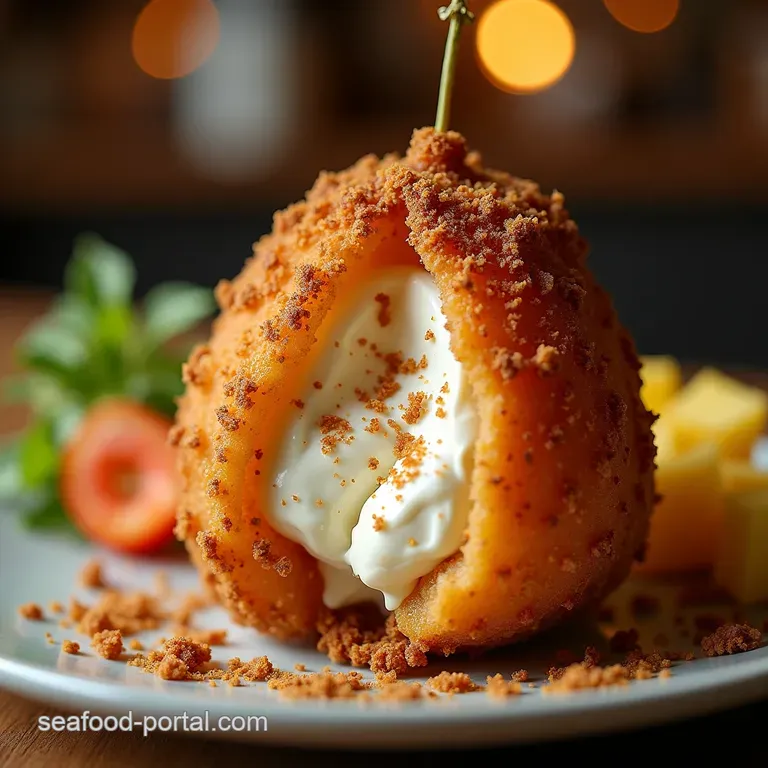
This iconic dessert, often associated with vibrant celebrations and the unmistakable flair of Mexican Fried Ice Cream , manages to achieve what seems impossible: creating a piping hot, golden crust that miraculously protects an interior so cold it’s still perfectly frozen.
It’s a masterclass in textural contrast, a culinary high wire act that, I promise you, is entirely achievable in your own kitchen. We're not just making dessert; we're creating an experience!
2. Brief Description
Forget everything you think you know about tricky desserts. This recipe delivers the classic Mexican favourite right to your kitchen table. We’ll be encasing scoops of premium vanilla ice cream in a crunchy coating made from cornflakes and cinnamon or perhaps a nutty granola if you fancy a bit of texture!
The secret? Extreme cold. Once coated, a lightning fast dunk into hot oil creates a warm, spicy shell while leaving the interior perfectly frozen. It’s warm, cold, sweet, and spiced a true flavour party! This is the definitive Fried Ice Cream Dessert .
3. Difficulty Level: Medium
Why Medium? While the steps themselves are straightforward (mix, coat, fry), the critical element here is temperature control . Freezing the ice cream balls solid enough to survive the brief but intense heat of the fryer requires patience and a solid freezer.
It’s not hard , but it demands precision, otherwise, you end up with sweet soup! Achieving that perfect moment in a Deep Fried Ice Cream session requires respect for the deep freeze.
4. Time Estimates
- Prep Time: 30 minutes active prep, minimum 4 hours chilling/freezing (overnight is best for guaranteed success!)
- Cook Time: 1 minute per batch (very fast!)
- Total Time: Approximately 4 hours 30 minutes (mostly inactive chilling time)
5. Serving Size: 6 Servings
6. Ingredient List
(We’ll keep this classic, focusing on a crisp, cinnamon heavy coating.)
For the ice cream base, you’ll need 1.5 quarts (about 1.4 litres) of Premium Vanilla Ice Cream —make sure it is dense and high quality, as softer ice creams melt faster.
For the coating dredge, prepare 1 cup (120 g) of All-Purpose Flour, 3 large Eggs lightly beaten, and 4 cups (120 g) of Fine grain Corn Flakes. To these flakes, we’ll add 1 Tablespoon (15 ml) of Ground Cinnamon and 1 Tablespoon (15 ml) of Granulated Sugar to build that signature flavour.
Finally, for frying, you’ll need 3 4 cups (700 950 ml) of a neutral oil like Canola or Vegetable oil, enough to allow for proper submersion of the Fried Ice Cream Balls .
7. Equipment
Success in How To Make Fried Ice Cream hinges on having the right tools ready. You will need a sturdy baking sheet lined with parchment paper to handle the freezing process. A strong ice cream scoop is necessary for forming uniform Fried Ice Cream Balls .
For the coating process, line up 3 shallow dishes for the dredging station. The most crucial pieces of equipment are a deep, heavy bottomed pot (or an actual deep fryer) and, most importantly, a candy or deep fry thermometer. Finally, have a slotted spoon or a spider strainer ready for quick retrieval.
Beyond the Basics: Equipment for Unfailing Success
Selecting the Right Ice Cream Base (Hint: It Must Be Rock Solid)
When tackling How To Make Deep Fried Ice Cream , the quality and density of your ice cream matter immensely. Avoid overly airy, soft serve style products. You want a high butterfat, premium vanilla ice cream that is capable of holding its shape under pressure.
The denser the product going into the fryer, the better its internal structure will resist heat. This density is your primary defence against a meltdown.
The Crunchy Armour: Best Coatings for Deep Frying
The classic, delicious shell comes from a mixture of crushed cornflakes, cinnamon, and a touch of sugar, providing that unmistakable spiced crunch. However, feel free to experiment!
Crushed graham crackers offer a honeyed note, while finely ground pecans or walnuts introduce healthy fats and an earthy texture that complements the sweetness beautifully. The key is that whatever you choose, it must be crushed finely enough to adhere securely in a uniform layer around the scoop.
Essential Tools for Perfect Scooping and Sealing
The act of scooping itself needs to be decisive. Use a sturdy scoop to cut firm, even portions. Once scooped, the coating process must be quick. The triple dredge flour, egg, coating is designed to create an insulating barrier.
The flour first draws out minimal surface moisture, the egg acts as the glue, and the final coating layer provides the thermal buffer. A proper seal is non-negotiable for achieving that perfect Fried Ice Cream outcome.
Related Recipes Worth Trying
- The Ultimate Fried Ice Cream Recipe Rock Solid Centre — Stop soggy centres This easy Fried Ice Cream Recipe delivers a perfectly crisp warm coating every time inspired by traditional Mexican Fried Ice Cream Dessert
- The Proper Picnic Pal Ultimate Creamy Tuna Pasta Salad — Ditch the dull This is the best Tuna Pasta Salad recipe featuring a tangy dill dressing and essential celery crunch Simple to make and perfect for lunch
- The Ultimate Extra Crispy Buttermilk Fried Chicken Tenders — Stop settling for soggy Master the doubledredge technique for Extra Crispy Fried Chicken Tenders that stay crunchy Perfect comfort food
The step-by-step Flight Plan to Golden Perfection
Creating this famous Fried Ice Cream Recipe is less about cooking and more about freezing, building a protective shell, and then frying with incredible speed. The timeline is skewed heavily towards the freezer.
Phase One: Deep Freezing the Scoops (Patience is Golden)
Begin by scooping your very firm vanilla ice cream into 6 equal balls onto your parchment lined baking sheet. Place this immediately into the coldest part of your freezer ideally - 10° F or lower for at least 2 hours.
They need to be fully hardened, almost rock like. Do not rush this stage; it is the single most important part of the entire preparation.
Building the Triple Layered Fortress Coating
Set up your three dredging dishes sequentially: flour, beaten eggs, and the cinnamon cornflake mixture. Working one scoop at a time, carefully roll the rock hard scoop first in flour, ensuring a light, even dusting and shaking off the excess.
Next, dip swiftly into the egg wash, allowing any excess to drip off completely. Finally, roll the scoop firmly into the cornflake mixture, pressing gently to ensure the entire surface is thickly coated. Return the coated ball to the baking sheet and freeze again for a minimum of 2 hours.
For true structural integrity, overnight freezing is highly recommended for this Fried Ice Cream Dessert .
Oil Temperature Calibration: The Non-Negotiable Element
While your final batch of scoops finishes hardening, prepare your frying station. Fill your deep pot with 3 4 inches of neutral oil. Insert your thermometer and bring the temperature up to precisely 375° F ( 190° C) .
If the oil is cooler, the coating will become soggy and melt the ice cream. If it’s significantly hotter, the coating will burn before the thermal shock can even begin to set the shell. Maintaining this temperature is the key to the Fried Ice Cream Origin effect.
Serving Suggestions: Finishing Touches for Your Fried Ice Cream
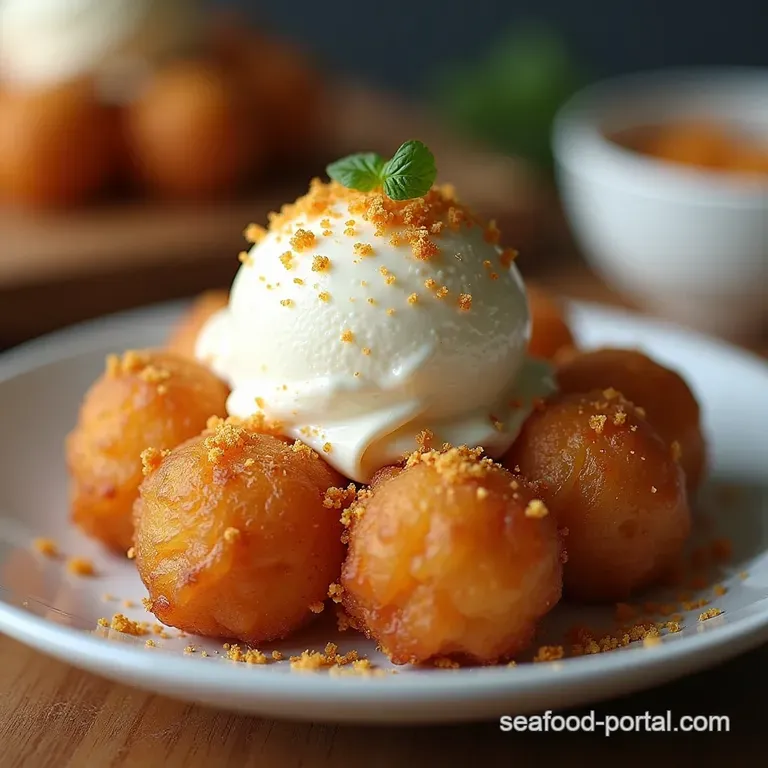
As soon as the golden shells emerge from the oil, blot them quickly on paper towels to remove surface grease. The magic is instant serve immediately! While the shell is warm and crisp, top generously.
The classic pairing involves a drizzle of warm chocolate syrup and a generous cloud of Fried Ice Cream With Whipped Cream . A sprinkle of cinnamon dust or chopped nuts elevates the presentation beautifully.
Troubleshooting and Pro Tips for Next Level Results
Expert Secrets to Prevent Melting During Frying
If you find your ice cream is softening during the coating process, try this trick: place your flour, egg, and coating bowls into a larger tray filled with ice water while you work. Keeping the components cool slows down the heat transfer as you handle the scoops.
Also, ensure your freezer is set to its absolute coldest setting before you start. Remember, we are fighting physics here, and cold is your greatest weapon against the heat of the fryer.
Nutritional Snapshot: Understanding Your Indulgence
As an indulgence, Fried Ice Cream is certainly rich, primarily due to the oil absorbed during the brief fry time and the sugar content of the ice cream itself. It’s a celebratory dish, not an everyday staple.
Generally, a single serving lands in the higher range for fats and sugars, so enjoy the glorious contrast without counting every bite!
Creative Toppings and Flavor Variations (Beyond Vanilla)
While vanilla is the canvas, feel free to paint bolder pictures. Consider using coffee ice cream and coating it in crushed Oreos for a "Midnight Fry." For a bolder flavor profile typical of some authentic recipes, try coating the scoops in a mixture of cornflakes and crushed cinnamon sugar tortilla chips.
Always serve with something sharp a tart fruit sauce cuts through the richness perfectly.
Preparing Ahead: Storing Unfried Portions Successfully
One of the best aspects of this Fried Ice Cream Recipe is that the preparation can be done entirely in advance. Once your coated balls are fully frozen (after the second freeze), transfer them immediately to an airtight container, separating layers with parchment paper.
They can be stored safely in the freezer for up to two weeks. When it’s time for dessert, all you need to do is fire up the oil and perform that quick, satisfying fry!
Recipe FAQs
What is the absolute secret to getting my Fried Ice Cream coating crispy and not melted mush?
The secret lies entirely in the deep freeze you need to treat your ice cream like it’s solid gold! Ensure the scoops are frozen rock solid (ideally overnight) after the final coating, and keep your frying oil absolutely scorching hot, around 375°F (190°C).
This guarantees a lightning fast cook time where the outside sets instantly before the inside has a chance to weep.
Can I make this Fried Ice Cream ahead of time, or do I have to cook it right away?
You absolutely must prepare the coated balls ahead of time; that’s the long chilling part of the recipe! Once coated, store them on a parchment lined tray in the deepest part of your freezer.
You can safely store them like this for up to a week, just remember they need to be absolutely solid when they hit the hot oil.
I don't want to deep fry; is there a way to bake or air fry these without them turning into soup?
While traditional Fried Ice Cream relies on the shock of the oil, you can try the oven for a much healthier, albeit different, result. Bake at the highest temperature your oven allows (usually 450°F or 230°C) for about 8 10 minutes, brushing the coating lightly with melted butter halfway through.
The air fryer works similarly well on high heat; just be sure to freeze them well beforehand!
My coating fell off the ice cream as soon as it hit the oil! What did I do wrong?
This is a common mishap, usually down to two things: either the ice cream wasn't cold enough, or your dredging technique was too hasty. Make sure you press the cornflake mixture on firmly after the egg wash, ensuring every bit of moisture is covered.
Also, make sure your flour coat is just a light dusting, not a thick clump.
What are some good topping alternatives besides chocolate sauce?
If chocolate isn't your cup of tea, you have plenty of options for a proper finish! Try drizzling with warm caramel sauce mixed with a dash of sea salt for a salted caramel effect. Alternatively, a bright, sharp fruit sauce like a tart cherry or mango coulis cuts through the richness beautifully.
Crispy Fried Ice Cream 2

