The Frozen Firework Perfectly Crisp Fried Ice Cream with Cinnamon Sugar Crunch
- Unveiling the Paradox: Why This Fried Ice Cream Recipe Triumphs
- The Alchemy of Temperature: Mastering the Cold-Hot Contrast
- The Essential Arsenal: Sourcing Your Crunchy Coating Components
- Curating the Core: Selecting the Perfect Ice Cream Base
- Phase One: Sculpting and Solidifying Your Frozen Spheres
- The Critical Coating Procedure: Building the Insulating Barrier
- Executing the Flash Fry: Achieving Instant Perfection
- Troubleshooting Common Pitfalls in Fried Ice Cream Preparation
- Elevating Your Presentation: Serving Suggestions and Sauces
- Recipe FAQs
- 📝 Recipe Card
Unveiling the Paradox: Why This Fried Ice Cream Recipe Triumphs
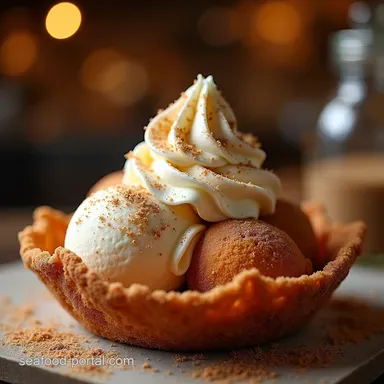
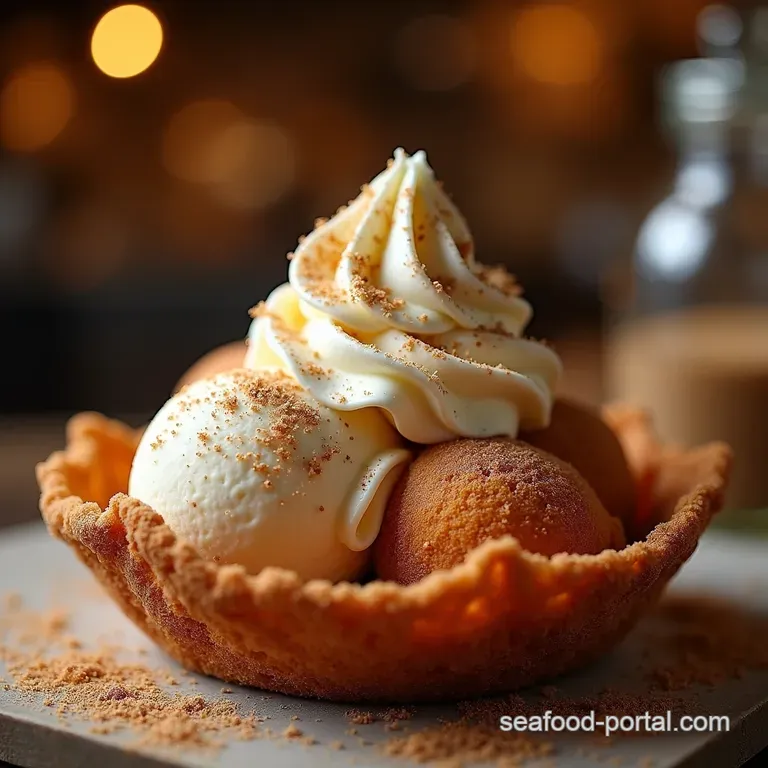
There is perhaps no dessert that elicits a more satisfying gasp of surprise than biting into a perfectly executed Fried Ice Cream . It’s the ultimate culinary magic trick: an intensely hot, crisp, spiced exterior that shatters instantly to reveal a core of luxurious, velvety cold.
This delightful paradox transforms a simple scoop into an unforgettable experience. Many believe this Fried Ice Cream Dessert is too challenging for the home kitchen, reserved only for bustling Mexican restaurants, but I’m here to tell you that with a few key technical maneuvers, you can achieve this showstopper right in your own home.
This Homemade Fried Ice Cream isn’t just about temperature; it’s about texture, precision, and maximizing flavour contrast.
The Alchemy of Temperature: Mastering the Cold Hot Contrast
The success of this entire operation hinges on controlling the battle between the scorching hot oil and the frozen core. If you rush the freezing stages, you end up with soup; if you fry for too long, the creamy interior melts before the shell crisps. We are aiming for a flash transformation.
Why This Dessert is the Ultimate Conversation Starter
When you present this Fried Ice Cream creation, you immediately elevate the dining experience. It moves beyond mere consumption into performance art. Whether you are hosting a casual gathering or aiming to impress on a holiday, the sheer novelty of consuming something simultaneously hot and cold guarantees immediate conversation.
It’s an inherently fun and slightly theatrical dish, perfect for those looking to push beyond standard desserts.
A Quick Guide to Achieving Next Level Crispness
While some recipes suggest using just breadcrumbs, we’re aiming for something truly shatteringly crisp. This involves a combination of specific coatings. We will utilize a mix that incorporates crushed Corn Flakes —or, for an even finer, more delicate crunch, Panko breadcrumbs blended generously with sugar and cinnamon.
This blend caramelizes beautifully during the rapid fry, locking in the cold like an edible suit of armour.
From Freezing to Frying: Setting the Stage for Success
Before we even think about the fryer, preparation is everything. Our Fried Ice Cream Recipe requires us to transform easily scoopable ice cream into dense, frozen orbs capable of surviving thermal shock. This means planning ahead is essential.
We start with premium, high butterfat Vanilla Fried Ice Cream base, as leaner varieties melt faster. The time spent ensuring these spheres are rock hard is arguably the most important step in achieving an Easy Fried Ice Cream outcome.
The Essential Arsenal: Sourcing Your Crunchy Coating Components
Creating that signature crunchy shell requires a structured approach to the coating process. You need three distinct elements: a binder (flour), an adhesive (egg), and the texture (the cereal/crumb mix).
We will combine sugar and cinnamon directly into the crunch component to ensure that flavour penetrates the coating immediately upon hitting the oil.
Curating the Core: Selecting the Perfect Ice Cream Base
Choosing the right ice cream is the foundation of this Fried Ice Cream Dessert . I strongly advocate for a high-quality, dense vanilla. If you feel adventurous, you can soften your chosen ice cream slightly and mix in about a half teaspoon of ground cinnamon before re-freezing; this ensures that even if the center thaws slightly, you have a deeper flavour profile running through the core.
Tool Check: Essential Equipment for Safe Frying
Safety and consistency are paramount when dealing with hot oil. You absolutely must have a deep, heavy bottomed pot or Dutch oven to maintain oil temperature. Crucially, a reliable deep fry or candy thermometer is non-negotiable. Without this tool, you are guessing, and guessing leads to oil absorption or burnt shells.
We also need a medium ice cream scoop to ensure uniform sizing for even cooking times.
Beyond Vanilla: Exploring Alternative Ice Cream Selections
While Vanilla Fried Ice Cream is the classic, feel free to experiment once you master the core technique. Coffee, pistachio, or even strawberry ice cream can work beautifully, provided they are dense.
The key is balancing strong flavours: a tart sorbet usually won't hold up well, but a rich caramel or chocolate base can offer sophisticated depth beneath the cinnamon spice.
The Golden Ratio for Cinnamon Sugar Dusting
Our perfect coating relies on a balanced marriage of texture and spice. The ideal ratio for the dry crunch mix is roughly 10 parts crushed coating (Panko/Corn Flakes) to 1 part sugar, with about 2 parts cinnamon distributed evenly throughout. This ensures a powerful aromatic hit without the sugar burning prematurely.
Related Recipes Worth Trying
- The Proper Pintos Truly Authentic Homemade Refried Beans — Ditch the tin Learn how to make truly authentic homemade refried beans from scratch Rich creamy and deeply savourythe backbone of great Recetas Mexicanas
- Foolproof Creamy Tuscan Scallops Restaurant Quality at Home — Achieve perfectly seared Creamy Tuscan Scallops in under 35 minutes This restaurantquality Tuscan Scallops Recipe features garlic butter and spinach Get the...
- The Posh Fishcake Salmon Patties with Creamy LemonGarlic Sauce — Elevate your weeknight dinner with these crispy Salmon Patties Paired with a luscious simple Lemon Garlic Sauce recipe this comfort food is utterly foolproof
Phase One: Sculpting and Solidifying Your Frozen Spheres
This initial freezing stage cannot be rushed. First, let your vanilla ice cream soften for just 5 to 10 minutes on the counter long enough to be scooped evenly, but no longer. Scoop 1/3 cup portions onto a parchment lined baking sheet.
Immediately transfer these freshly formed spheres into the coldest part of your freezer. We require a minimum of four hours, though an overnight freeze is best, to achieve that vital, rock solid structure.
The Critical Coating Procedure: Building the Insulating Barrier
Once your ice cream balls are frozen solid, we implement the Triple Dredge Technique . Set up three shallow dishes: one with flour, one with lightly beaten eggs (whisked with a touch of vanilla extract for flavour), and the final one containing your cinnamon sugar Panko/Corn Flakes mixture.
Speed is essential here to prevent the ice cream from warming up significantly.
The Triple Dredge Technique for Maximum Crunch Protection
Take one frozen ball and quickly dust it thoroughly in the flour, shaking off any excess. Next, dip it into the egg wash, ensuring full coverage. Finally, press the sticky surface firmly into the cinnamon sugar crunch mixture, rotating it until it is completely encased in a thick, even layer.
This multi layer barrier is what protects the interior from the high heat. Immediately place the coated ball back onto a clean, parchment lined tray and return it to the freezer for a final, deep freeze of at least 60 minutes.
Executing the Flash Fry: Achieving Instant Perfection
This is where technique pays off. When frying, speed is your best friend. We are aiming for a rapid sear, not a gentle bake.
Oil Temperature Mastery for the Perfect 30-Second Fry
Heat your neutral frying oil Canola or Peanut oil are excellent choices to precisely 375° F ( 190° C) . This specific temperature is crucial; it’s hot enough to crisp the coating almost instantaneously, but not so hot that the exterior turns black before the interior can even register the heat.
Final Polish: The Immediate Sugar Shower Application
Using a slotted spoon or spider strainer, gently lower one or two coated balls into the shimmering oil. Fry for approximately 45 to 75 seconds, turning them constantly until they achieve a beautiful, uniform golden brown hue.
Once removed, immediately place them on a wire rack set over paper towels to allow excess oil to drip away. The moment they hit the rack, sprinkle them liberally with a final dusting of plain granulated sugar or extra cinnamon sugar for that quintessential Fried Ice Cream Origin finish.
Troubleshooting Common Pitfalls in Fried Ice Cream Preparation
If your Fried Ice Cream melts, nine times out of ten it is due to insufficient pre-freezing or oil that wasn't hot enough. If the coating seems soggy or absorbs too much oil, the temperature was too low. If the coating burns instantly, the temperature was far too high.
Always work in small batches; overcrowding the pot causes the oil temperature to drop dramatically, leading to greasiness.
Elevating Your Presentation: Serving Suggestions and Sauces
This dessert demands a dramatic presentation. Serve it immediately the temperature contrast fades quickly! While the Fried Ice Cream Recipe focuses on the coating, the topping completes the experience.
Pairing Perfection: Recommended Chocolate and Caramel Drizzles
While the cinnamon crunch is vibrant, it pairs classically with deep, rich sauces. A warm Chocolate Fudge Sauce Recipe , made slightly thin, drizzles beautifully over the crunchy sphere.
For a sophisticated alternative, a homemade salted caramel sauce offers a wonderful salty counterpoint to the sweet spice.
Making Ahead: Can I Prep My Fried Ice Cream Balls in Advance?
Yes, you absolutely can prep ahead! The beauty of the triple freeze process is that the coated, frozen balls can be wrapped tightly in plastic wrap and stored in an airtight container in the freezer for up to two weeks.
This makes this spectacular dessert surprisingly viable for entertaining, as all the intensive work is done before your guests arrive; the frying itself takes minutes.
Nutritional Snapshots and Storage Secrets for Leftovers
It must be said, this is an indulgent treat. The caloric count will naturally be higher due to the frying oil absorbed by the coating. As for leftovers (if you are so fortunate!), the cooked coating will soften significantly once it warms up.
If you must store any, place them uncovered in the freezer for an hour; they won't return to their original perfection, but they will firm up enough to be manageable for a quick reheating attempt in a very hot oven or air fryer, though I strongly advise against attempting to refry them.
Recipe FAQs
My ice cream keeps melting straight away! What am I doing wrong with the Fried Ice Cream?
Ah, the eternal struggle! This is almost always down to temperature control. Your ice cream needs to be absolutely rock solid think frozen concrete before you even start coating it. Furthermore, you must deep freeze the coated balls for at least an hour before frying.
That second freeze acts as vital insulation against the heat.
What is the absolute perfect oil temperature for frying so it doesn't burn or soak up oil?
You need that deep fry thermometer, mate, there's no winging it here! Aim for precisely 375°F (190°C). If the oil is too cool, the coating gets soggy and greasy, and if it's too hot, the outside will turn black before the centre even thinks about thawing. Keep it steady!
Can I make this ahead of time? How should I store the prepared balls?
You absolutely can, and frankly, you should make the balls ahead! Once they are fully coated and have had their final deep freeze (Step B.4), store them in an airtight container in the freezer for up to a week.
Just ensure they are wrapped well so they don't pick up any funny freezer smells nobody wants fishy ice cream!
Is there a way to make this Fried Ice Cream recipe without deep frying?
While deep frying gives you that authentic, near instantaneous temperature contrast, you can try the oven or air fryer method if you’re avoiding lots of oil. Set your oven to a blistering 425°F (220°C) and bake for about 8 to 10 minutes, flipping halfway.
Be warned, the crust won't be quite as shatteringly crisp as the traditional method.
What can I use instead of Corn Flakes for the crunchy coating?
For an extra golden crunch that really holds up, Panko breadcrumbs are an excellent substitute they are lighter and absorb less oil. If you fancy a twist, try finely crushed toasted pecans or even crushed shortbread biscuits for a richer, buttery flavour in your crunch layer!
Crisp Fried Ice Cream