The Ultimate Ovenkissed Sweet Potato Fluffy Perfection Every Time
- Unlocking the Magic: Why Slow Baking Transforms the Humble Root
- Your Essential Companion to Perfect Baked Sweet Potato Preparation
- Gathering Your Star Players: Components for Stellar Spuds
- The Step-by-Step Alchemy of Baking Your Sweet Potato
- Monitoring Doneness: Gauging When They're Ready to Serve
- Elevating Your Baked Sweet Potato: Topping & Serving Ideas
- Recipe FAQs
- 📝 Recipe Card
Unlocking the Magic: Why Slow Baking Transforms the Humble Root
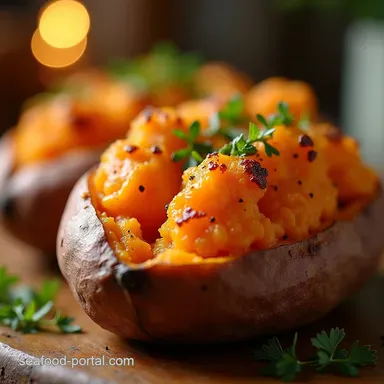
There is something profoundly satisfying about a perfectly Baked Sweet Potato . It’s an elemental food simple, nourishing, and deeply comforting. While the convenience of the microwave beckons, rushing this process robs you of the true potential held within that vibrant orange flesh.
True mastery of cooking sweet potatoes lies in patience, allowing the oven’s ambient heat to work its magic slowly. This gentle, sustained heat breaks down the complex starches into simple sugars, leading to that characteristic, almost custardy sweetness and a light, fluffy texture that simply cannot be replicated under duress.
Your Essential Companion to Perfect Baked Sweet Potato Preparation
Achieving the best baked sweet potato is less about complicated steps and more about understanding the physics of the bake. Our focus here is on maximizing internal fluffiness while ensuring the skin remains sturdy enough to hold its contents.
The Secret to Velvety Interior Texture
The velvety texture we seek is a direct result of moisture management during the long bake. When the potato heats up, moisture turns to steam. If that steam cannot escape, the interior becomes gummy.
By piercing the skin strategically many small holes are better than a few large gashes we create controlled vents, allowing the steam to escape gradually. This process ensures the internal structure sets into a light, almost whipped consistency rather than becoming dense.
Why This Classic Method Reigns Supreme Over Quick Fixes
Quick methods, such as boiling or microwaving, introduce external moisture rapidly, often resulting in a waterlogged exterior and an unevenly cooked interior. The Baked Sweet Potato in Oven method, however, dries the surface slightly while slowly coaxing the interior starches to convert.
This contrast a slightly chewy, seasoned skin giving way to sweet, silken flesh is the hallmark of the perfect baked sweet potato . This foundational technique also makes them excellent candidates for transforming into impressive Twice Baked Sweet Potatoes later on.
Setting Expectations: Caramelization vs. Softness
It is important to distinguish between the desired outcome and simple burning. When baked correctly, you will notice a slight sheen and deep amber spots on the skin this is natural caramelization of the sugars migrating outward. This flavour depth is what elevates the dish beyond a simple starch.
However, the primary goal remains extreme internal softness; the skin is merely the delicious, edible container holding the creamy reward.
Gathering Your Star Players: Components for Stellar Spuds

The beauty of this staple potato side dishes recipe lies in its minimalism. We are not disguising the sweet potato; we are celebrating it. The goal is to use the fewest ingredients necessary to enhance its natural attributes before it hits the oven.
Selecting the Right Sweet Potato Variety for Baking
For the best results, choose firm, uniform sweet potatoes, such as the Beauregard or Jewel varieties, which are typically bright orange and slightly tapered. Uniformity is paramount.
If you place a very small potato next to a giant one, the small one will dry out and become tough before the large one is finished cooking. Aim for all four potatoes in your batch to be roughly the same mass and shape.
The Minimalist Seasoning Strategy: What You Actually Need
For the initial bake, salt is your best friend. We are only seasoning the exterior. A light coating of olive oil (about one teaspoon spread across four potatoes) helps the coarse sea salt adhere and promotes a crisper skin texture.
That salt draws moisture from the surface, concentrating flavour right where you want it. Beyond this, the sweetness will develop naturally.
Tool Checklist: Ensuring Even Heat Distribution
The right equipment ensures that the heat penetrates evenly. You will need a sturdy baking sheet, preferably lined with parchment paper or foil for simple cleanup. Crucially, if you have one, place a wire cooling rack on the baking sheet and set the potatoes on the rack.
This slight elevation allows air to circulate underneath the spuds, preventing the bottom from steaming and becoming damp.
Related Recipes Worth Trying
- Zesty Garlic Herb Baked Rainbow Trout Recipe Easy Moist — Forget dry fish This easy baked trout recipe uses garlic butter and fresh herbs for a simple rainbow trout dinner that flakes perfectly every time
- Easy Texas Roadhouse Style Baked Salmon Recipe — Get that sweet garlicky Texas Roadhouse Style Baked Salmon flavour in under 30 minutes This easy baked salmon recipe nails the copycat taste perfectly
- Effortless Baked Salmon with Zesty Lemon Dijon Sauce 25 Mins — Need a cracking Seafood Dinner Inspiration This Easy Baked Salmon with Lemon Dijon Sauce is foolproof and ready faster than queuing at the Post Office See...
The step-by-step Alchemy of Baking Your Sweet Potato
With our ingredients assembled and our understanding solidified, the actual execution of this Baked Sweet Potato Recipe is delightfully straightforward, focusing on precise temperatures and timings.
Pre-Bake Prep: Cleansing and Piercing the Skins
Begin by thoroughly scrubbing your sweet potatoes under cool water to remove any lingering grit; use a vegetable brush if necessary. Dry them completely with a clean towel moisture hinders crisping. Next, armed with a sharp fork or skewer, pierce each potato deeply 6 to 8 times around its circumference.
This critical step releases steam safely during the cooking sweet potatoes process, preventing any potential mishaps in the oven.
Oven Temperature Calibration for Optimal Cooking
Preheat your oven to a steady 400° F ( 200° C). This medium high temperature strikes the perfect balance, ensuring the interior cooks thoroughly without scorching the exterior sugars too quickly.
Arrange the prepared, lightly oiled, and salted potatoes onto the wire rack atop your baking sheet.
The Crucial Resting Period Post Baking
Once removed from the heat source, do not immediately slice into your masterpiece. Allow the Baked Sweet Potato to rest on a cutting board for 5 to 10 minutes.
This crucial resting phase allows the extreme internal heat to equalize, completing the cooking process internally and ensuring the flesh is wonderfully fluffy rather than wet when finally opened.
Monitoring Doneness: Gauging When They're Ready to Serve
Timing is variable, but texture is constant. You are looking for complete tenderness throughout.
The cooking time will range from 45 minutes for smaller specimens up to 75 minutes for very large ones. The definitive test is physical: gently squeeze the sides of the potato between your thumb and forefinger (using a towel if it’s too hot).
If the sides yield easily with little resistance, they are done. Alternatively, insert a thin wooden skewer through the thickest part; if it slides in effortlessly, you have reached the promised land of soft starch.
Elevating Your Baked Sweet Potato: Topping & Serving Ideas
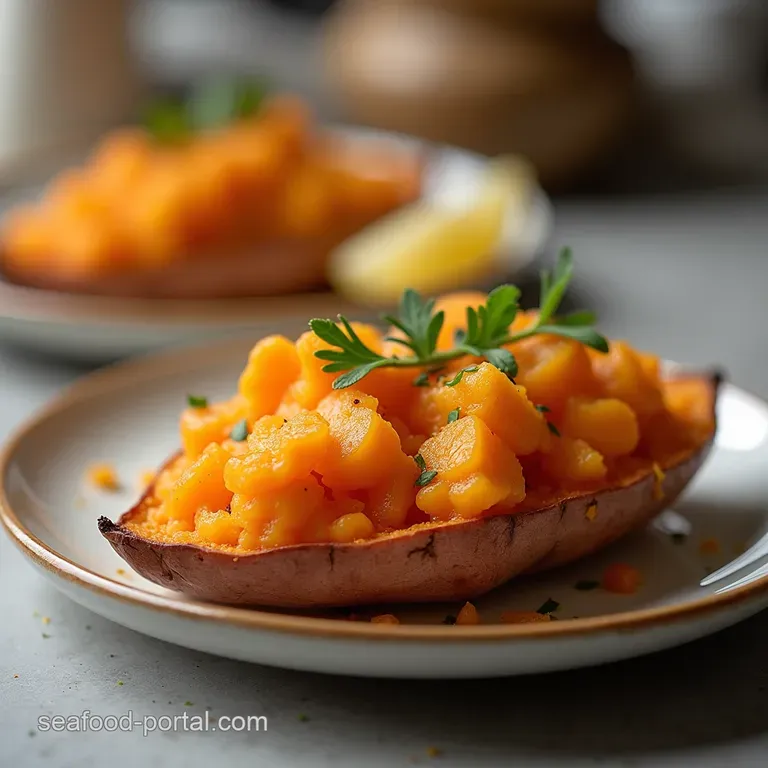
Once slit open, the fluffy interior of the Baked Sweet Potato begs for flavour enhancement. The beauty of this dish is its adaptability, serving equally well as a light lunch or a hearty dinner component.
Savory Inspirations: Beyond Butter and Brown Sugar
While butter and brown sugar offer classic sweetness, don't overlook savory applications. Try topping your warm spud with sharp cheddar, crumbled bacon, and chives for a hearty experience.
Alternatively, a dollop of goat cheese, toasted pecans, and a drizzle of balsamic glaze creates an elegant contrast of textures and tastes. These creative Baked Sweet Potato Toppings make the simple side dish the star of the plate.
Nutrition Deep Dive and Optimal Storage Solutions
This versatile root vegetable contributes significantly to a balanced diet. Understanding the Baked Sweet Potato Calories content (roughly 180-200 kcal per medium potato, unadorned) highlights its status as a nutrient dense food, rich in Vitamin A and fibre.
It offers substantial energy without excessive fat, making it a fantastic choice for any meal plan.
Guidelines for Freezing and Reheating Your Perfectly Baked Sweet Potato
If you’ve made a large batch, these potatoes freeze remarkably well. After baking and resting, allow them to cool completely. Scoop the flesh out, mash it lightly with a splash of water or milk if desired, and store it in an airtight, freezer safe container for up to three months.
To reheat, thaw overnight and warm gently in the oven at 350° F ( 175° C) until heated through, preserving that wonderful texture for another meal.
Recipe FAQs
How long should I bake my sweet potato to make sure it’s fluffy, not dry?
For medium sized potatoes, aim for about 50 to 60 minutes at 400°F (200°C). The key is to check for doneness by easily piercing the thickest part with a fork; if there’s any resistance, pop it back in for another 10 minutes.
Don't rush it a steady temperature yields that lovely, velvety interior we’re after.
Do I really need to pierce the skin of the Baked Sweet Potato before putting it in the oven?
Absolutely, yes! Think of it like venting a pressure cooker; piercing the skin allows the steam generated inside to escape safely. If you skip this step, you risk the potato splitting dramatically and nobody wants that mess spoiling their Sunday baking session!
Can I bake a huge batch of these Baked Sweet Potatoes at once?
You certainly can, but ensure you give them plenty of space on the baking sheet don't let them touch each other. If you’re making a massive pile, it’s best to use two trays and rotate them halfway through cooking.
Overcrowding lowers the oven temperature and steams the potatoes rather than baking them properly.
How should I store leftover baked sweet potatoes if I have too many?
Once they have cooled down completely, you can store them in an airtight container in the fridge for up to four days. For longer storage, scoop out the flesh, let it cool, and freeze it in a sealed bag; it’s brilliant for adding to smoothies or mixing into next week's shepherd's pie topping!
My potatoes are done, but the skin seems a bit soggy what went wrong?
Soggy skin usually means steam couldn't circulate properly, often because the potatoes were crowded or sitting directly on foil for the entire bake. Next time, try placing them on a wire rack set over your baking sheet; this simple trick lets air dry out the bottom and gives you a much nicer textural contrast.
Fluffy Baked Sweet Potato 2