The Ultimate Fluffy Baked Sweet Potato Perfectly Caramelised Skin Creamy Interior
- Unlocking Peak Sweetness: Why Oven-Baked is Non-Negotiable
- The Pursuit of Perfection: Defining the Fluffy Baked Sweet Potato Experience
- Essential Components for Optimal Roasting
- Selecting Your Star Ingredient: Choosing the Perfect Spud
- Mastering the Oven: Step-by-Step Baking Blueprint
- The Crucial Prep Work for Superior Skin Crispness
- Elevating Your Spud: Savory and Sweet Topping Configurations
- Preservation Strategies for Leftover Baked Goodness
- Recipe FAQs
- 📝 Recipe Card
Unlocking Peak Sweetness: Why Oven Baked is Non-Negotiable
There is a fundamental difference between a sweet potato that has been rushed in a microwave and one that has been patiently coaxed to perfection in the oven. While convenience certainly has its place, when aiming for that iconic, velvety interior paired with a slightly savoury, caramelised skin, the oven is your only true ally.
Baking slowly at a higher temperature isn't just a cooking method; it’s a chemical reaction that transforms the starches locked within the root vegetable. We aren't just cooking this ingredient; we are elevating it to create the perfect baked sweet potato experience, resulting in a naturally sweet canvas ready for any topping imaginable.
The Pursuit of Perfection: Defining the Fluffy Baked Sweet Potato Experience
Achieving the legendary fluffiness everyone craves requires attention to detail and respect for the process. This journey transforms a firm, dense root vegetable into something almost custardy inside a truly delightful textural contrast.
Ditching the Microwave: A Textural Revolution
The microwave cooks by rapidly vibrating water molecules, which steams the potato from the inside out. This results in a uniform, often gluey texture and prevents the necessary surface dehydration that leads to a satisfyingly crisp exterior.
By contrast, the dry, radiant heat of the oven draws moisture away from the skin while simultaneously tenderising the flesh gently. This distinction is key to making a fluffy baked sweet potato .
Understanding the Science of Starch Conversion
The magic happens because of heat. As the internal temperature of the sweet potato rises, naturally occurring enzymes begin to break down complex starches into simpler sugars. This process, known as saccharification, is what imbues the flesh with that deep, almost honeyed sweetness you simply cannot replicate by steaming or boiling.
A baked sweet potato recipe relies heavily on this high heat conversion to reach its flavour peak.
Beyond a Side Dish: Imagining Your Sweet Potato Supper Star
While often relegated to the supporting cast, a properly baked sweet potato deserves the spotlight. Once you master this fundamental technique, you realise its versatility. It stands powerfully on its own as a light, nutritious lunch when stuffed with feta and greens, or it anchors a hearty winter meal.
It is the foundation for a wonderfully healthy sweet potato side dish or the main event.
Essential Components for Optimal Roasting
To ensure success with this sweet potato baking guide , we need to focus on three pillars: the correct heat setting, thorough preparation, and selecting the right specimen.
Our foundational method involves using high heat to achieve that beautiful caramelisation, ensuring you get the most out of how long to bake sweet potatoes at 400 °F or slightly higher. The basic framework requires only a few simple items, but their quality matters greatly.
Selecting Your Star Ingredient: Choosing the Perfect Spud
Not all sweet potatoes bake identically. For the most consistent results when making baked sweet potatoes in oven , opt for uniformity.
The Minimalist's Shopping List: What You Truly Need
For this most basic, yet sublime, iteration of the recipe, you require only four things: firm, medium sized sweet potatoes (ideally of similar weight so they finish cooking together), a light coating of high heat oil (like avocado or olive oil), coarse sea salt, and freshly ground black pepper.
That is the entirety of the flavour base we build upon before any toppings are added.
Tool Checklist: Oven Prep Essentials
You will need a sturdy baking sheet, ideally lined with aluminum foil for simple post bake cleanup. Crucially, if you have one, set the potatoes on a wire cooling rack placed on top of the baking sheet.
This single addition allows hot air to circulate completely around the spud, ensuring the bottom doesn't steam or stay soggy a vital step for a crispy skin.
Sweetness Spectrum: Matching Potato Variety to Desired Outcome
The most common variety found in US grocery stores, the deep orange fleshed Garnet or Jewel sweet potatoes, are perfect for this method due to their high sugar content and moist texture when baked.
If you stumble upon the paler, firmer Japanese or white varieties (often called Hannah potatoes), they have a drier, more chestnut like texture post bake. Stick to the orange varieties for the ultimate creamy result.
Related Recipes Worth Trying
- French Onion Funeral Potatoes Gruyère Potato Gratin — Take classic Funeral Potatoes to the next level with slowcooked caramelized onions and rich Gruyère cheese A deeply comforting side dish perfect for any...
- The Ultimate Crispy Oven Baked Zucchini Slices Recipe — Learn how to bake zucchini slices with crispy edges This easy Oven Baked Zucchini Slices Recipe is healthy simple and perfect for any weeknight meal
- Easy Baked Shrimp Toast Recipe Crispy Healthier Appetizer — Ditch the deep fryer for this simple Oven Baked Shrimp Toast recipe Get that classic Cantonese flavour with an addictive golden crunch in under 35 minutes...
Mastering the Oven: step-by-step Baking Blueprint
The goal here is to leverage the best temperature to bake sweet potatoes to achieve tenderness within about an hour. We preheat our oven aggressively to 425° F ( 220° C).
After prepping the potatoes as detailed below, they go directly onto the prepared baking sheet or rack. Begin the clock, baking for an initial 30 minutes. At this point, carefully turn each potato over. Continue baking for another 15 to 35 minutes, depending on size.
You are looking for that moment when the skin is slightly wrinkled and browned, and the potato yields significantly under gentle pressure.
The Crucial Prep Work for Superior Skin Crispness
The preparation phase is brief but essential; rushing here is what separates an adequate bake from an outstanding one.
Preheating Rituals for Consistent Heat Distribution
Always allow your oven at least 20 minutes to fully reach and stabilise at 425° F ( 220° C) before placing the potatoes inside.
Placing them into an oven that hasn't reached temperature guarantees a longer cook time and potentially uneven cooking, leading to areas that are tough.
Puncturing Technique: Preventing Mid-Bake Explosions
Using a sturdy fork or skewer, you must pierce the skin deeply about four to five times around the circumference of each potato. This allows trapped steam to escape during the high heat cooking process. Skipping this step is dangerous and will result in ruptured, messy potatoes rather than a tidy, intact bake.
Timing Secrets: Knowing When Your Baked Sweet Potato is Done
While the 45-to-65-minute window is a good guide for medium spuds, the true test is tactile. Wearing an oven mitt, give the potato a gentle squeeze near the middle. If it gives easily and feels soft all the way through not just near the surface it is ready.
If you encounter any resistance when testing with a skewer, slide them back in for 5-to-10-minute increments.
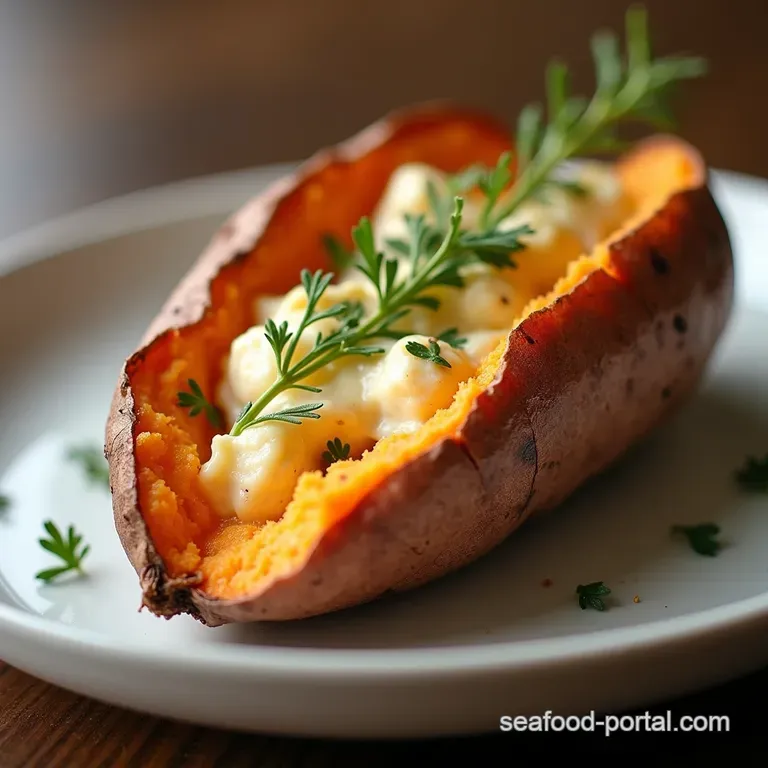
The Fluffing Finale: Achieving Maximum Creaminess Post Bake
Once removed from the oven, resist the urge to slice immediately. Let them rest for about five minutes on a cutting board. This slight cooling period allows the internal moisture to redistribute. Then, slice lengthwise down the middle, taking care not to cut through the bottom skin.
Use a fork to gently rake or "fluff" the interior flesh before adding any butter or seasonings.
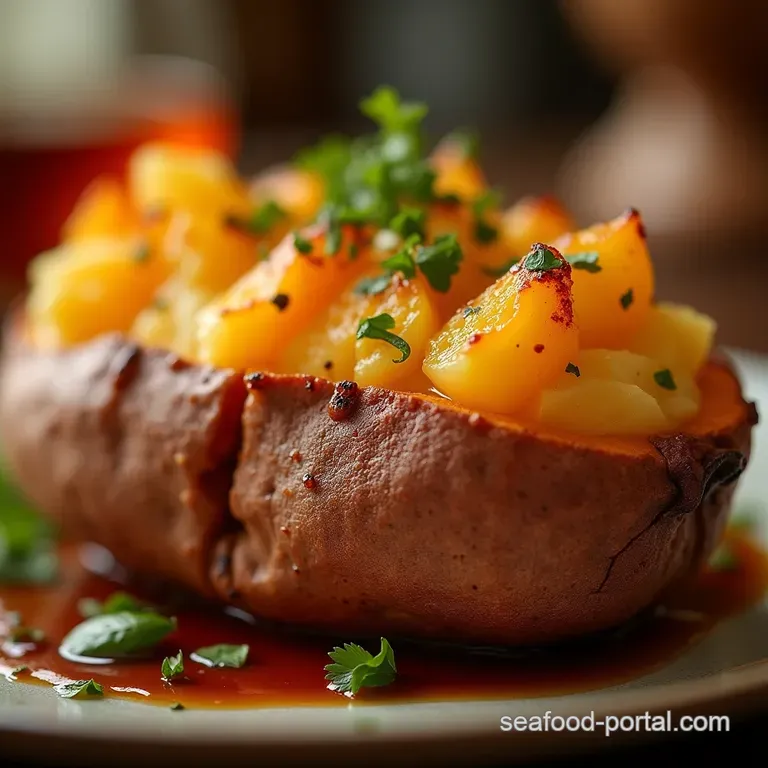
Elevating Your Spud: Savory and Sweet Topping Configurations
The base baked sweet potato recipe is neutral enough to accommodate nearly any flavour profile. For a savory approach, consider topping with smoked paprika, a crumble of goat cheese, and toasted pecans.
If you lean toward sweetness, a drizzle of real maple syrup, a generous pat of salted butter, and a sprinkle of cinnamon transforms it into a satisfying dessert like experience.
Preservation Strategies for Leftover Baked Goodness
Leftovers are inevitable when you master this technique, and fortunately, baked sweet potatoes store beautifully. They can be refrigerated in an airtight container for up to four days.
Flavor Pairings That Complement Natural Sweetness
The natural sweetness pairs exceptionally well with tangy dairy products like sour cream or Greek yogurt, which cut through the richness. Conversely, salty elements like bacon crumbles, cured ham, or Parmesan cheese create a wonderful salty sweet tension that keeps you reaching for another bite.
Troubleshooting Common Baking Flaws (Tough or Dry Results)
If your sweet potato emerges dry, it likely spent too long in the oven or was baked at too low a temperature, preventing proper starch conversion. If the skin didn't crisp, it was likely rushed or the potato wasn't sufficiently dried before oiling.
The solution for a tough interior is always more time at the existing high temperature until that skewer glides right through.
Nutritional Snapshot: Health Benefits of the Humble Sweet Potato
Beyond taste, this is an incredibly fortifying food. Sweet potatoes are powerhouse sources of Vitamin A (in the form of beta carotene), Vitamin C, and dietary fibre. Even when prepared with a little oil and salt, they remain a significantly healthier carbohydrate option compared to refined starches.
Freezing and Reheating Your Perfectly Baked Creation
To freeze, cool the baked potatoes completely. Slice them open and scoop out the flesh. Place the flesh into a freezer bag, pressing out all the air. Frozen sweet potato puree is excellent for smoothies or quick side dishes and reheats perfectly in the microwave or oven.
If reheating a whole, cooled, baked spud, wrap it loosely in foil and reheat at 350° F ( 175° C) until heated through usually about 20 minutes.
Recipe FAQs
How long do I actually need to bake a medium sweet potato?
For a medium sized sweet potato at 425°F (220°C), you're generally looking at 50 to 65 minutes total. The trick is to start checking around the 45-minute mark if the skewer slides in easily without any resistance, you're golden. Remember, larger potatoes will always take longer, so be patient!
My Baked Sweet Potato skin always seems soggy, not crispy like yours! What am I doing wrong?
Ah, the dreaded soggy skin! This usually happens for two reasons: either the potato was wet when it went in, or you didn't use enough heat. Make absolutely certain you dry the spuds thoroughly after washing, and give the skin a good rub with oil and coarse salt before baking at that high 425°F temperature.
That high heat is crucial for crispness!
Can I prepare the Baked Sweet Potato ahead of time, perhaps the day before?
Absolutely, that's a brilliant idea for meal prepping! You can bake them completely ahead of time, let them cool, and store them in an airtight container in the fridge for up to four days.
To reheat, split them open and pop them back in a 375°F oven for about 10-15 minutes to revive that fluffy texture, or just zap them quickly in the microwave if you’re in a rush.
Is it better to wrap my sweet potatoes in foil or bake them naked?
For the ultimate fluffy interior AND crispy skin, ditch the foil! Wrapping them traps steam, which steams the potato rather than baking it, resulting in very soft skin. Wrapping them is only useful if you are cooking many potatoes and want to keep the baking tray exceptionally clean, but you sacrifice that lovely texture.
What are some good, non-sweet toppings for a savoury Baked Sweet Potato?
If you're treating this like a proper dinner centerpiece rather than a side, think savoury! Try topping it with Greek yogurt mixed with chilli flakes, some crumbled feta and fresh dill, or even some leftover slow cooked pulled pork. It’s wonderfully versatile, much like a proper roast dinner side!
Can I cook these faster if I microwave them first before baking?
While you certainly can microwave them briefly to soften them up before baking, it rather defeats the purpose of achieving that deep caramelisation and fluffy, dry texture that baking provides.
For the best results, stick to the oven method it’s hands off cooking, so you can put the kettle on while you wait!
Fluffy Baked Sweet Potato

