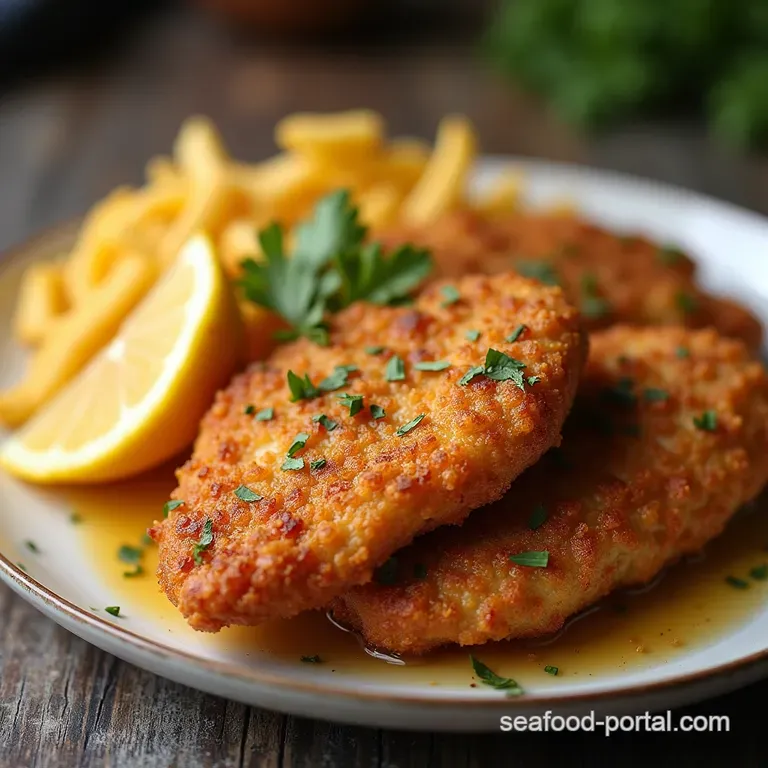
Better Than Sunday Roast Ultracrispy Buttermilk Fried Chicken Breasts
- The Secret to Juiciness: Why Buttermilk Reigns Supreme
- Unlocking That Authentic Southern Crunch Factor
- Assembling Your Dream Dredge and Marinade Components
- Essential Gear for Perfect Deep Frying
- Step-by-Step Guide to Achieving Peak Buttermilk Fried Chicken Breast Texture
- Troubleshooting & Pro-Tips for Next-Level Results
- Pairing Perfection: Side Dishes That Complement This Fried Feast
- Recipe FAQs
- 📝 Recipe Card
The Secret to Juiciness: Why Buttermilk Reigns Supreme
When we talk about achieving that mythical Juicy Fried Chicken Breast , the conversation must start and end with buttermilk. Many home cooks reach for a quick egg wash, but that offers only temporary adhesion. Buttermilk, on the other hand, performs two crucial, magical functions.
First, its inherent acidity begins the process of denaturing the proteins in the chicken breast, which tenderizes the muscle fibers long before the heat even touches them. Second, the thicker consistency of the cultured milk clings tenaciously to the meat, providing the perfect moist bedding for the flour dredge to grab onto.
This extended soak is the non-negotiable first step in crafting a truly memorable Buttermilk Fried Chicken Breast Recipe .
Unlocking That Authentic Southern Crunch Factor
The appeal of well executed fried chicken isn't just about flavour; it's about texture. We are aiming for shatteringly crisp coatings that stand up to the moist meat inside. Achieving this requires more than just tossing the chicken in flour; it demands a deliberate layering technique designed to build structure.
This method, often called the “craggy dredge,” is what separates the merely good from the truly phenomenal Crispy Buttermilk Chicken .
Moving Beyond Dry Poultry: Our Breasts Promise
Chicken breast is notoriously lean, making it highly susceptible to drying out under high heat. This is precisely why our recipe places such an emphasis on preparation time. By starting with appropriately sized breasts or lightly pounding them to an even ¾-inch thickness we ensure that the centre cooks through at nearly the same rate as the exterior crust sets.
The buttermilk marinade does the heavy lifting here, ensuring that even when fully cooked to the safe 165° F internal temperature, the meat remains succulent, fulfilling the promise of a Juicy Fried Chicken Breast .
Midweek Mastery: Streamlining Your Classic Chicken Dinner
While the best results come from an overnight rest, this Buttermilk Chicken Recipe is designed to fit into a busy schedule. If time is tight, you can effectively prepare the chicken in the morning for an Easy Weeknight Fried Chicken dinner that evening, ensuring at least a four hour marinade.
The active preparation time is minimal about 20 minutes meaning the majority of the effort is hands off marinating, leaving you free to focus on your sides.
This streamlined process makes the Best Fried Chicken Breast accessible any night of the week, not just holidays.
Assembling Your Dream Dredge and Marinade Components
The flavour profile of this Buttermilk Fried Chicken Breast comes from two distinct areas: the wet marinade and the dry coating. Both must be aggressively seasoned.
For the marinade, we are mixing two cups of full fat buttermilk with one tablespoon of your preferred hot sauce and a teaspoon of kosher salt. The tang of the sauce complements the acid in the buttermilk beautifully.
For the dredge, we use two cups of all-purpose flour as the base, enriched with smoked paprika for colour and depth, garlic powder, onion powder, freshly cracked black pepper, a teaspoon of salt, and a modest half teaspoon of cayenne pepper for a subtle background warmth.
Ensure every component is thoroughly whisked together so there are no bland pockets in your final crust.
Related Recipes Worth Trying
- Pub Grub Perfection Crispy Fried Ravioli Appetizer — Transform storebought ravioli into irresistible Crispy Ravioli Bites using this foolproof breading method Serve with zesty homemade marinara for a perfect snack
- Foolproof Crispy Fried Ravioli Recipe with Zesty Marinara — Master the authentic St Louis Fried Ravioli Recipe These are shatteringly crispy and served with a bright homemade marinara dip Perfect appetizer
- The Best Homemade Popeyes Chicken Sandwich Recipe — Stop queuing Master the legendary Popeyes Chicken Sandwich at home with our foolproof brine and spicy mayo Get that signature craggy crunch
Essential Gear for Perfect Deep Frying
Frying requires a specific mindset and the right tools. Forget thin frying pans; you need mass and depth. A heavy bottomed Dutch oven or a deep, sturdy cast iron skillet is your best ally here. It retains heat far better than lighter cookware, which is crucial when introducing cold chicken.
You will also need a quality wire rack set over a baking sheet never rest your finished fried goods directly on paper towels, as the trapped steam will immediately turn that crisp bottom soggy.
Most importantly, an instant read digital thermometer is mandatory; it moves this process from guesswork to precise culinary science, ensuring you achieve the perfect Boneless Fried Chicken Breast texture.
The Buttermilk Bath: Acidity and Tenderization Breakdown
As mentioned, the buttermilk bath is where the magic begins. Ensure your four large chicken breasts are trimmed of any significant fat deposits. Submerging them completely ensures even treatment. The lactic acid in the buttermilk works slowly to break down the tough connective tissues.
This chemical breakdown doesn't just tenderize; it creates tiny fissures in the meat structure that allow it to absorb moisture, guaranteeing a Juicy Fried Chicken Breast that resists drying out, even if your timing is slightly off.
Seasoning Secrets: Crafting the Ultimate Spice Blend
While the marinade seasons the meat internally, the dry dredge is the vehicle for the surface flavour. The smoked paprika is key here it adds a deep, rustic hue that suggests long cooking, even though the actual frying time is brief.
Remember, when you are building a Buttermilk Fried Chicken Breast Recipe , you must season for texture as much as flavour. The salt in the dredge must be generous because it seasons the crust that shields the meat.
Choosing the Right Fat for Maximum Sizzle
For deep frying poultry, you need a neutral oil with a high smoke point. Peanut, canola, or vegetable oils are excellent choices because they allow the complex flavours of your seasoning blend to shine without imparting any off-notes.
You need enough oil roughly 1.5 inches deep in your pot to completely cover the chicken pieces, allowing them to float freely for even cooking. The initial heat must be precisely right, but we will discuss that critical temperature management shortly.
Step-by-step Guide to Achieving Peak Buttermilk Fried Chicken Breast Texture
This recipe moves from preparation to plating through a series of timed steps designed to maximize crust development and moisture retention. Proper technique here turns this into the Best Fried Chicken Breast you’ve ever made.
The Mandatory Overnight Soak for Maximum Flavor Penetration
While four hours is the minimum, aiming for an overnight soak (12 to 24 hours) in the refrigerator allows the buttermilk acids to deeply penetrate the meat.
Before cooking, take the chicken out of the fridge about 30 minutes prior to dredging to let the chill come off slightly; placing ice-cold chicken directly into hot oil is another recipe for temperature disaster.
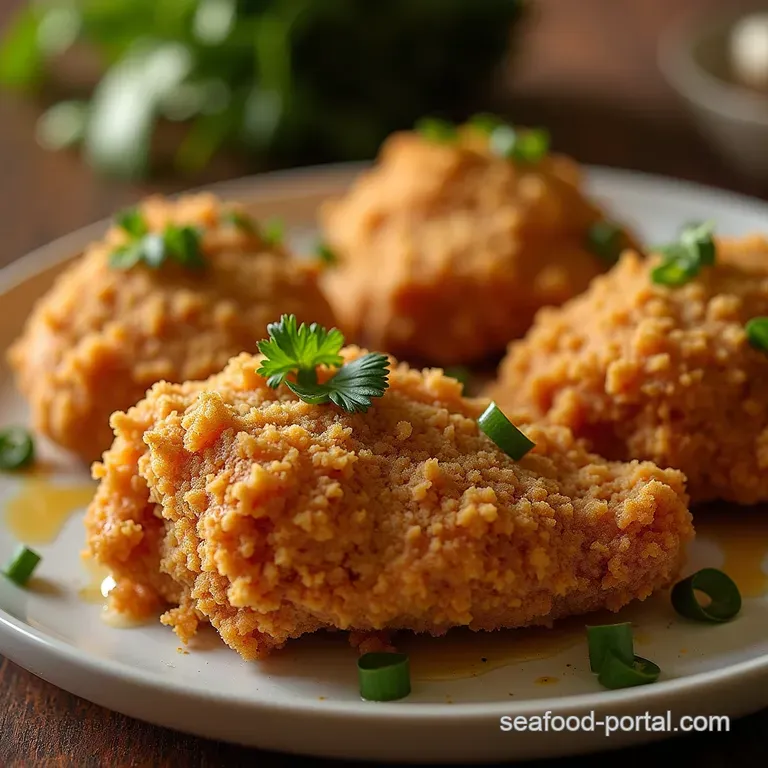
Achieving the Craggy Coating: The Double Dredge Technique
This is where you build the signature texture for your Crispy Buttermilk Chicken . First, pull a piece of chicken from the marinade, letting the thick liquid drip off naturally do not shake it completely dry. Press it firmly into the seasoned flour mixture until it is thickly coated.
Next, take that floured piece and briefly dunk it back into the leftover buttermilk, no more than two or three seconds; this re-wets the surface unevenly. Immediately return it to the flour, pressing down hard and wiggling it slightly.
These motions encourage the wet spots to clump and create those desirable, jagged, craggy edges that catch the hot oil perfectly. After this second coat, set the breaded pieces aside on a plate for about ten minutes; this "rest" allows the coating to hydrate slightly and adhere firmly to the meat, preventing fallout during frying.
Initial Fry: Setting the Crust Structure Firmly
Before you introduce the chicken, your oil must be preheated to 325° F ( 163° C) . Gently lower two pieces of the prepared Boneless Fried Chicken Breast into the oil using tongs. The oil temperature will drop immediately.
Your goal now is to manage the heat to keep the oil stabilized between 300° F and 315° F. This initial phase, about four minutes, is crucial for setting that beautiful, rigid crust structure.
Finishing the Cook: Ensuring Internal Doneness Without Burning
After the first side has achieved a deep golden hue, carefully flip the pieces. Continue frying for another five to eight minutes, constantly monitoring the thermometer. The goal is to reach an internal temperature of 160° F ( 71° C) when measured in the thickest part of the breast.
Since this is Boneless Fried Chicken Breast , it cooks faster than bone-in cuts. Once it hits 160° F, immediately remove it from the oil, as carryover cooking will bring it up to the safe 165° F while it rests.
Troubleshooting & Pro-Tips for Next Level Results
If your chicken crust falls off, it is almost always due to one of two issues: either the oil was too cool, leading to over absorption before the crust set, or you failed to let the double dredged chicken rest for 10 minutes before frying.
If your oil begins smoking, it is too hot reduce the heat immediately. For the Best Fried Chicken Breast , never overcrowd the pot; cooking in batches is essential for maintaining that precise oil temperature needed for Crispy Buttermilk Chicken .
Pairing Perfection: Side Dishes That Complement This Fried Feast
The richness of Buttermilk Fried Chicken Breast demands something bright, acidic, or creamy to balance the palate. Skip overly heavy sides. Instead, opt for a vinegary, crisp coleslaw or a simple platter of quick pickled vegetables.
A creamy, slightly sweet counterpoint, like perfectly seasoned mashed potatoes topped with a light, savoury gravy, also provides the classic comfort factor that elevates this Fried Chicken Sandwich Recipe component into a full meal.
Reviving Leftover Goodness: Reheating Your Crispy Breasts
Leftover fried chicken can be tricky, but the buttermilk marinade helps immensely. To restore the crispness, avoid the microwave entirely. The absolute best method is to reheat the chicken in a 375° F ( 190° C) oven for about 10– 12 minutes, or ideally, give it 5 minutes in an air fryer.
This dries out the crust again without compromising the tender interior of the Juicy Fried Chicken Breast .
Flavor Variations: Introducing Tangy or Spicy Twists
To customize this Buttermilk Chicken Recipe , consider adding dry ingredients directly into the buttermilk soak. A tablespoon of curry powder or a teaspoon of dried, crushed rosemary added to the marinade infuses the meat with deeper, more complex base notes.
For a serious kick suitable for a next level Fried Chicken Sandwich Recipe , blend 2 tablespoons of gochugaru (Korean chili flakes) into the flour dredge.
The Golden Rule of Rest: Why You Must Wait Before Serving
Once the chicken emerges from the oil, resist the urge to tear into it immediately. Every piece of fried food needs a mandatory rest period of at least five to ten minutes on the wire rack. During this time, the internal steam dissipates, and the exterior crust finishes crisping up without becoming soft.
If you cut it too soon, the trapped moisture will steam the crust from the inside, ruining the texture you worked so hard to achieve.
A Note on Oil Management After Frying
Once you have finished your final batch, turn off the heat. Allow the oil to cool completely this takes several hours. Once cool, you can strain the oil through a fine mesh sieve lined with cheesecloth to remove any browned flour particles, which preserves its clarity and usability for future frying projects.
This diligent maintenance is part of the lifecycle of delicious Easy Weeknight Fried Chicken .
Recipe FAQs
Why does my Buttermilk Fried Chicken Breast end up soggy instead of crispy?
Sogginess usually stems from oil temperature dropping too low, causing the coating to absorb grease rather than crisp up. Make sure your oil is consistently between 300°F and 315°F while frying, and never overcrowd the pan; fry in small batches to maintain that crucial heat.
Can I use chicken thighs instead of breasts in this recipe?
Absolutely, thighs are often preferred by purists as they stay moister, but you'll need to adjust the cooking time. Since they are naturally fattier and less uniform, allow them an extra few minutes per side, ensuring they reach an internal temperature of 175°F (80°C) for optimal texture.
How long do I really need to marinate the chicken in the buttermilk?
While four hours is the minimum to get a decent flavour infusion, if you have the time, an overnight soak (12 to 24 hours) makes a huge difference. The lactic acid in the buttermilk breaks down the proteins beautifully, guaranteeing a noticeably tender and juicy Buttermilk Fried Chicken Breast.
What's the secret to getting those rough, craggy bits on the crust?
That's all down to the double dip technique mentioned in the steps! After the first flour coating, give the chicken a very quick, brief dunk back into the buttermilk, then return it to the flour and press hard. This creates uneven layers that fry up into those lovely, chunky shards.
Can I cook this in an air fryer instead of deep frying?
You can try, but it won't taste quite the same it’ll be more like baked, crunchy chicken than true fried chicken. If you must use the air fryer, spray the coated chicken heavily with cooking oil, preheat to 375°F (190°C), and cook for about 20-25 minutes, flipping halfway through.
How should I store leftovers of the fried chicken breast?
The best way to store leftovers is uncovered on a wire rack for about an hour to let any residual steam escape, then transfer to an airtight container in the fridge for up to three days. To reheat, the oven or air fryer is your best bet to crisp that crust back up never the microwave!
Crispy Buttermilk Chicken Breast

