The Sushi Blueprint Mastering the Classic Maki Roll
- Unlocking Restaurant-Quality Flavor: Your At-Home Sushi Journey Begins
- Ditching Bland Basics: Why This Maki Recipe Stands Apart
- The Essential Components for Perfect Sushi Construction
- Phase One: Achieving Culinary Perfection with Sushi Rice
- The Assembly Line: Step-by-Step Rolling Methods for Every Style
- Pro Tips for Avoiding Sticky Disasters and Dry Rice
- Creative Flavor Twists: Beyond the Classic Salmon and Avocado Rolls
- Storing Your Homemade Sushi for Peak Enjoyment
- Recipe FAQs
- 📝 Recipe Card
Unlocking Restaurant Quality Flavor: Your At-Home Sushi Journey Begins
Making sushi at home might sound a bit like trying to perform a magic trick in your kitchen, but trust me, once you’ve mastered the rice, the rest is just artistic flair. Forget those dreary, bland supermarket rolls; we're making proper, restaurant quality Sushi that’ll have your mates queuing up for seconds.
This journey isn't about imitation; it’s about elevating simple ingredients through careful technique. We're going to break down every crucial step, from washing that temperamental grain to achieving razor sharp cuts. Get ready to Learn To Make Sushi that genuinely impresses.
Ditching Bland Basics: Why This Maki Recipe Stands Apart
The secret to truly exceptional Homemade Sushi isn't the fish; it's the Shari , the seasoned rice. Many novice attempts fail here, resulting in rice that is either too mushy or too hard, lacking that signature tangy sweetness.
This comprehensive blueprint demystifies the art of crafting classic Maki rolls, covering both the traditional nori (seaweed) on the outside and the popular inside out Uramaki style.
Our focus is heavily vested in achieving perfectly seasoned, glossy Sushi Rice —the absolute bedrock of good sushi. Flavour profiles range from clean and oceanic to bright and crisp, all tied together with that essential whisper of rice vinegar tang.
The difficulty level is Medium, primarily because achieving the perfect texture and seasoning for the Sushi Rice Recipe requires precision and patience, but with our guidance, you’ll conquer it.
This entire process, from prep to the final roll, should take approximately 1 hour 30 minutes, yielding about 4 standard rolls.
Setting the Stage: What Makes This Roll Recipe Essential
This recipe is essential because it targets the two most common pitfalls: under seasoned rice and poorly constructed rolls. We focus on the correct washing and cooking ratios for Japanese short grain rice, ensuring it binds beautifully without becoming gluey.
By mastering this base, you gain the confidence to tackle any variation. We will be using the classic combination of sushi grade salmon and creamy avocado, providing a rich, satisfying textural experience that perfectly complements the seasoned grains.
From Intimidation to Inspiration: Demystifying the Home Roll Technique
The perceived difficulty in Sushi How To Make often stems from the rolling stage. People assume a professional level of strength is required. In reality, successful rolling hinges on gentle consistency rather than brute force.
You need enough pressure to create a tight cylinder that won't unravel when sliced, but not so much that you crush the delicate rice grains. We will use a bamboo mat ( Makisu ) to provide the scaffolding necessary to apply this exact, even pressure, transforming an intimidating task into a rhythmic, satisfying assembly line.
The Essential Components for Perfect Sushi Construction
Before we even look at a knife, we need to assemble the right tools and ingredients. Remember, great Sushi Rolls depend on quality inputs. We need the right grain, the right vessel for mixing, and the right rolling apparatus.
If you invest time in these fundamentals, the subsequent steps in How To Make Sushi Rolls At Home become significantly easier.
The Alchemy of the Grain: Vinegar, Sugar, and Japanese Short Grain Rice
The absolute non-negotiable item here is the rice itself. You must use Japanese short grain rice; Arborio or Basmati simply will not work due to their starch structures. For the seasoning ( Sushi-zu ), we combine ⅓ cup of rice vinegar (unseasoned), 2 tablespoons of granulated sugar, and 1 teaspoon of sea salt.
This mixture must be gently heated until the solids dissolve, creating the flavour agent that transforms plain cooked rice into flavourful Shari .
Beyond Nori: Necessary Implements for Rolling Mastery
To execute the roll properly, certain equipment is highly beneficial. The most crucial implement is the Makisu , or bamboo rolling mat. For inside out rolls ( Uramaki ), it is wise to cover this mat completely in plastic wrap to prevent the rice from sticking to the bamboo slats.
On top of that,, avoid using metal bowls when mixing the rice and seasoning; metal can react with the vinegar, imparting an unpleasant flavour. A wooden or large glass bowl is ideal for this process.
Freshness First: Preparing Your Proteins and Produce
When selecting fillings, freshness is paramount. If you choose fish, only use fish explicitly labeled as sushi grade or sashimi grade, sourced from a reputable fishmonger.
For this recipe, we focus on 8 ounces of salmon or tuna, which should be sliced into neat batons, roughly ¼ inch thick. Equally important are the vegetables: one large, ripe but firm avocado, thinly sliced, and one cucumber, seeded and cut into matching batons.
Removing the watery seeds from the cucumber prevents your final rolls from becoming soggy.
Phase One: Achieving Culinary Perfection with Sushi Rice
This phase demands patience. We start by taking 2 cups of short grain Sushi Rice and washing it rigorously in cold water. This rinsing ritual continuing until the water runs nearly clear is non-negotiable to remove excess starch.
Cook the washed rice with 2 ¼ cups of cold water until done (rice cooker works best, or simmered for 15 minutes followed by a 10-minute rest, lid strictly on). While the rice cooks, gently warm your vinegar, sugar, and salt mixture until dissolved do not boil.
Related Recipes Worth Trying
- Easy California Roll Sushi Bowls Recipe No Rolling Required — Ditch the fussy rolling mat This California Roll Sushi Bowls Recipe is the deconstructed classic you need for healthy home lunches So fresh and vibrant
- Perfect Sushi Rice Instant Pot or Stovetop NoFail Recipe — Master Sushi Rice Instant Pot or stovetop at home This easy recipe guarantees perfect results every time Fluffy slightly sticky and subtly sweet the base...
- Sushi Rice Nirvana My Secret to Perfect Rice Every Time — Unlock Sushi Rice Nirvana with my foolproof guide to Perfect Sushi Rice Every Time Fluffy sticky and tangy just like it should be Ditch the dodgy takeaway...
The Assembly Line: step-by-step Rolling Methods for Every Style
With your perfectly cooked and seasoned rice resting, it's time for assembly. The goal is always a compact, even roll, regardless of the style. Keep a small bowl of Tenzui (water mixed with a splash of vinegar) nearby to dampen your hands, which prevents the sticky rice from adhering everywhere.
Rinsing Rituals and The Perfect Cook Time
The 10-minute rest period after the rice is cooked is just as important as the cooking itself. This allows the residual steam to redistribute moisture evenly throughout the grain. Immediately transfer this hot rice to your Hangiri or wide, non-metallic bowl to begin cooling and seasoning.
Seasoning the Stars: Folding in the Vinegar Mixture Gently
When drizzling the Sushi-zu over the hot rice, the technique must be precise. You must use a slicing or cutting motion with a rice paddle, almost like chopping, while simultaneously fanning the rice rapidly.
This dual action cools the rice quickly achieving that glossy sheen and incorporates the seasoning without smashing the grains. Once cooled to room temperature, cover the rice with a damp towel until ready to use.
Mastering the Traditional Nori Out Roll Technique
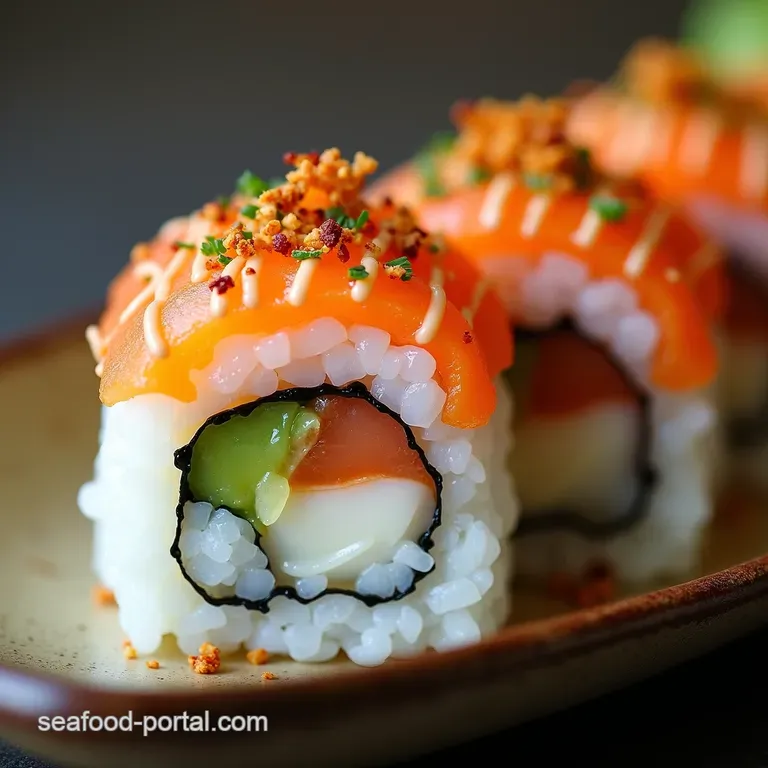
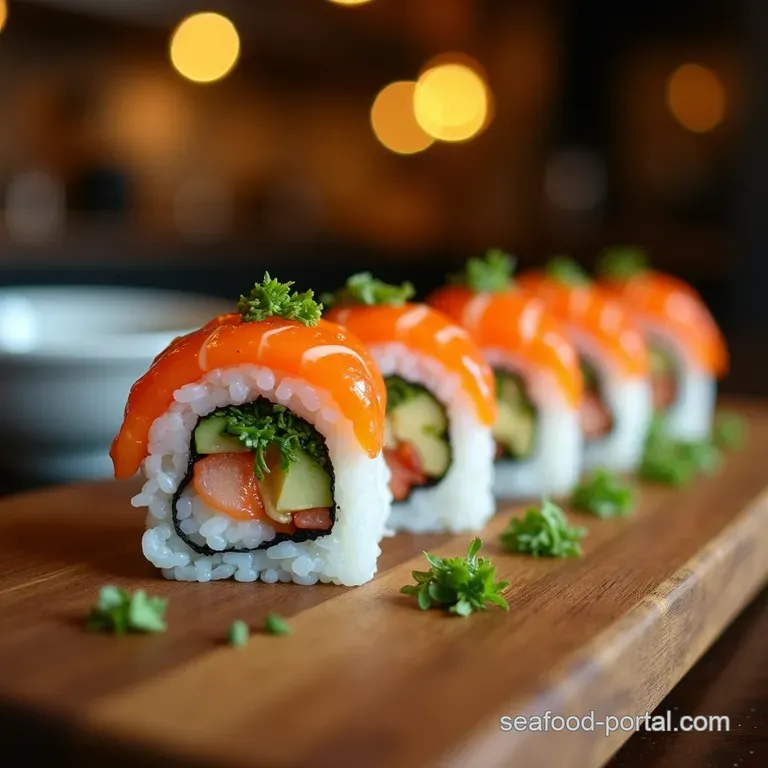
Lay a sheet of nori, rough side up, on your Makisu . Dampen your hands and spread about ¾ cup of seasoned rice evenly over the nori, crucially leaving a 1 inch strip of bare nori along the far edge. Arrange your fillings (salmon, avocado, cucumber) in a neat line across the centre.
Lift the edge of the mat nearest to you, folding it up and over the fillings, using your fingers to tuck the edge of the rice firmly around the ingredients. Roll forward, using the mat to shape the cylinder, and use a bit of water on the bare strip to seal the edge shut.
Flipping the Script: Crafting the Inside Out (Uramaki) Style
To create the popular inside out roll, first cover your Makisu entirely with plastic wrap. Place the nori sheet down, and then cover the entire surface of the nori (no bare edges!) with a thin, even layer of rice. Sprinkle toasted sesame seeds over the rice if desired.
Carefully flip the entire sheet over so the rice side is now facing down onto the plastic wrapped mat. Place your fillings near the edge closest to you. Roll exactly as you would the traditional style, applying pressure through the plastic wrap, which keeps the rice neat on the exterior.
Pro Tips for Avoiding Sticky Disasters and Dry Rice
The number one mistake is rushing the rice cooling process; if it's too hot, it steams and becomes gluey. If it's too cold, it won't adhere properly. Aim for slightly above room temperature.
Next,, always wipe your knife blade clean and re-dampen it between every single slice when cutting the finished roll; this prevents dragging and tearing your creation. A wet, sharp blade is the key to clean presentation.
Creative Flavor Twists: Beyond the Classic Salmon and Avocado Rolls
Once you have the rolling technique down, the possibilities for Healthy Homemade Sushi are limitless. Experimentation is encouraged!
Vegan Inspiration: Plant Forward Fillings That Wow
If you are looking for plant forward options, skip the fish entirely. Try using roasted sweet potato matchsticks combined with a touch of vegan cream cheese for a rich mouthfeel. Another excellent choice involves blending cooked quinoa with a little sesame oil and using that as a base for fillings like pickled daikon radish, crisp bell peppers, or marinated tofu strips.
This keeps the spirit of Sushi vibrant and accessible.
Shelf Life Considerations for Homemade Seafood Preparations
It is critical to understand that Homemade Sushi , especially when prepared with raw fish, should be consumed the same day it is made for optimal safety and texture. The quality of the rice begins to degrade quickly once seasoned.
Do not attempt to store these rolls overnight; the texture will suffer immensely.
Storing Your Homemade Sushi for Peak Enjoyment
While consumption should be immediate, understanding how to handle the rolls before serving is important. Keep the finished rolls loosely wrapped in plastic wrap or under a slightly damp tea towel at cool room temperature for up to an hour before slicing and serving.
Refrigeration dries out the rice aggressively, making it hard and unpalatable.
Knife Skills 101: Achieving Clean, Non-Crushed Slices
The final presentation relies heavily on your cutting technique. Use a long, very sharp, non-serrated knife. Dip the knife tip into your Tenzui bowl, letting the water coat the blade, then slice through the roll with one long, smooth pulling motion avoid sawing back and forth.
Clean and re-wet the knife between each cut to ensure the rice on the outside remains pristine. This attention to detail separates a casual attempt from true Sushi Rolls artistry.
Recipe FAQs
Why is my homemade Sushi rice so sticky and mushy, not glossy like in restaurants?
This is usually down to two things: not washing the starch off the short grain rice properly, or overworking the rice when seasoning it. Give the rice a good rinse until the water runs clear, and when adding the vinegar mixture, use a slicing or cutting motion rather than stirring, otherwise you'll bruise the grains and make it gummy.
Can I use regular raw fish from the supermarket for my Sushi rolls?
Absolutely not this is a big no-no for food safety! You must source "sushi grade" or "sashimi grade" fish, which means it has been handled and frozen to kill off any parasites.
Always buy from a reputable fishmonger who knows what you plan to use it for; think of it as being as fussy as if you were buying prime Sunday roast beef!
How long can I keep leftover Sushi before it’s not safe to eat?
For safety, especially with raw fish fillings, homemade sushi should ideally be eaten the day it is made. If you have leftovers, cover them tightly and keep them in the coldest part of your fridge for no more than 24 hours.
Never leave it sitting out at room temperature for more than two hours, or it risks going off quicker than a damp tea towel!
I can’t find a bamboo rolling mat (Makisu); can I still make Sushi?
You can certainly manage without one, though it takes a bit more care! A great alternative is to tightly roll up a clean, sturdy tea towel or a piece of thick cardboard wrapped securely in cling film.
The trick is applying even, gentle pressure to get a tight cylinder, so use whatever you have to mimic that rolling action.
Is Sushi generally considered a healthy meal?
Yes, Sushi can be very healthy it's lean protein from the fish, healthy fats from the avocado, and carbohydrates from the rice. However, watch out for heavy additions like cream cheese or excessive amounts of sugary sauces, which turn it from a light bite into something more akin to a proper takeaway!
Master Classic Sushi Rolls

