Smoked Spiced Perfection the Ultimate Grilled Corn on the Cob
- Why Charred Sweetness Trump Boiling: An Introduction to Superior Flavor
- Unlocking the Secret to Perfectly Tender Kernels Before Grilling
- Essential Components for Robust Flavor Profiles
- Gathering Your Toolkit: What You Need for Success
- Step-by-Step Technique: From Prep to Perfect Char
- The Crucial Pre-Grill Bath: Preparing the Corn for Heat
- Elevating the Experience: Creative Topping Combinations
- Troubleshooting & Preservation: Keeping That Summer Taste Alive
- Recipe FAQs
- 📝 Recipe Card
Why Charred Sweetness Trump Boiling: An Introduction to Superior Flavor
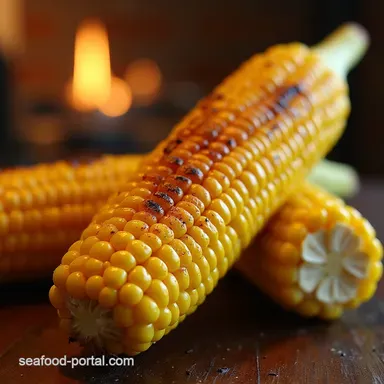
There are few sights or smells that scream "summer barbecue" quite like perfectly prepared Grilled Corn on the Cob . Too often, home cooks default to boiling corn, which results in sweet kernels swimming in hot water, washing away all that natural, vibrant flavour.
As a chef, I firmly believe that heat management and char development are the keys to unlocking its true potential. Grilling transforms the simple ear of corn, caramelizing the sugars on the surface to deliver a smoky depth that boiling can never replicate.
This Grilled Corn on the Cob Recipe is designed not just to cook the corn, but to enhance it, ensuring every bite offers a satisfying snap and smoky finish. Forget the pale imitations; we are aiming for char, tenderness, and vibrant zest.
Unlocking the Secret to Perfectly Tender Kernels Before Grilling
The secret to achieving that ideal combination of tenderness and char lies in a two-stage cooking process. Raw corn, even when fresh, can sometimes become tough or unevenly cooked on the grill. By introducing a brief pre-soak, we are essentially giving the corn an initial steam bath.
This ensures that by the time it hits the heat, the kernels are already plump and juicy, ready to absorb the grill’s smoky essence without drying out. This meticulous preparation is what elevates this from a simple side to the Best Grilled Corn Recipe on your menu this season.
The Chef's Philosophy: Mastering the Grill Marks
Grill marks aren't just for aesthetics; they are concentrated pockets of intense caramelization. Achieving them requires a clean, hot cooking surface. We aim for those dark, beautiful crosshatches, signifying perfect searing, while maintaining a moist interior.
The process involves quickly searing the corn directly over heat before allowing it to finish cooking, often indirectly or wrapped slightly, to achieve that foundational tenderness.
What Makes This Grilled Corn on the Cob Recipe Essential Summer Fare?
This particular preparation, featuring a bright, zesty butter finish, channels the spirit of vibrant Mexican Street Corn Grilled flavours, adapted perfectly for the patio. Utilizing fresh lime juice and coriander right at the end brightens the heavy smokiness of the grill.
This dish is incredibly versatile, pairing perfectly with everything from slow cooked ribs to light grilled fish, cementing its place among the most sought after Summer BBQ Side Dishes .
It’s wonderfully Easy Grilled Corn to execute, yet impressive enough to wow guests.
Essential Components for Robust Flavor Profiles
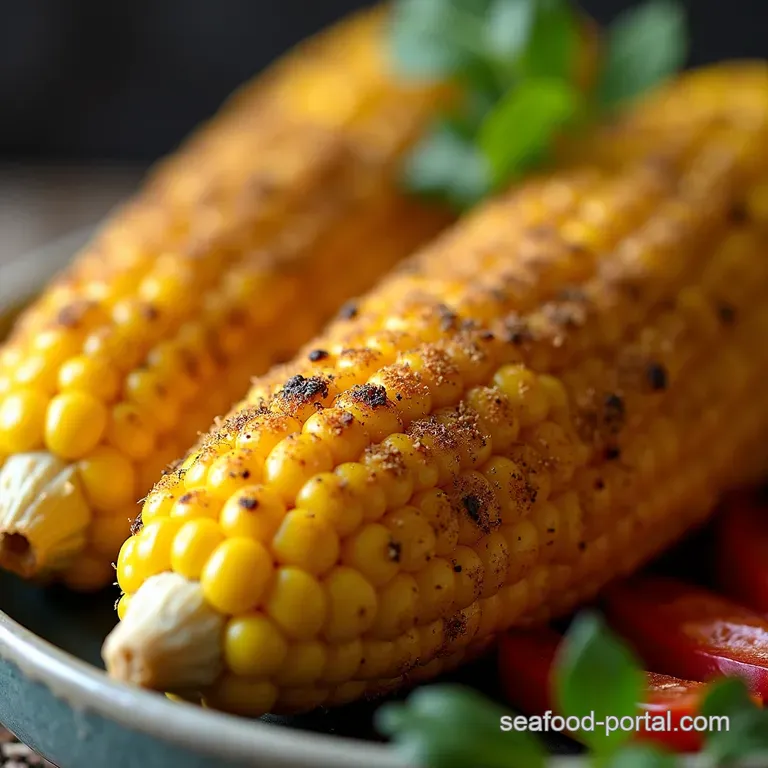
Flavor development here comes from two distinct sources: the initial smokiness imparted by the grill and the bright, herbaceous coating applied immediately after cooking. We are creating a synergy where heat meets freshness. For this Smoky Grilled Corn , we rely on simplicity executed perfectly.
Gathering Your Toolkit: What You Need for Success

Preparation is paramount, and having the right ingredients and tools ready before you fire up the heat ensures a smooth cooking process. We are using 6 ears of fresh corn, and the accompanying compound butter is simple yet transformative.
Selecting Peak Season Corn Cobs: A Freshness Checklist
The success of any Fresh Corn Recipes hinges entirely on the quality of the raw ingredient. When shopping, look for ears that are tightly wrapped in bright green husks avoid any with dry, brown, or loose paper like husks.
When you press gently near the base, the kernels should feel firm and plump beneath the husk. If you can peel back a small section, the kernels should look milky and moist, not dull or dried out.
The Spice Rub Matrix: Beyond Just Salt and Pepper
While salt and pepper are foundational, our flavour boost comes from a custom Lime Chilli Butter. This involves softening 4 tablespoons of unsalted butter and mixing it thoroughly with the zest and juice of one fresh lime, 2 tablespoons of finely chopped coriander, 1 teaspoon of chilli powder (or smoked paprika for less heat), salt, and pepper.
This zingy coating cuts through the richness of the butter and complements the char beautifully.
Must Have Equipment for the Barbecue Arena
You’ll need a large bowl for the soaking phase, a smaller bowl for mixing your butter, tongs for careful turning on the grill, and ideally, a clean pastry brush to apply the finishing butter.
Ensure your grill grates are meticulously clean and lightly oiled; this is crucial for achieving those desirable grill marks without sticking.
Related Recipes Worth Trying
- Authentic Crispy Shrimp Toast Recipe Haam Si To — Master homemade Shrimp Toast This recipe delivers bouncy flavourful prawn paste on perfectly golden crispy bread An easy Chinese takeaway classic
- Baked Feta Pasta with Vegetables The Ultimate OnePan Dinner — Elevate the viral Baked Feta Pasta with Roasted Veggies This easy healthy pasta dinner is packed with flavour and ready in an hour
- Authentic Spanish Seafood Paella Recipe with Perfect Socarrat — Master a true Spanish Paella This recipe delivers deep sofrito flavour and that essential crispy socarrat Learn how to make paella seafood beautifully
Step-by-step Technique: From Prep to Perfect Char
Our Easy Grilled Corn technique breaks down into three manageable phases: preparation and soaking, the dual stage grilling process, and the final flavour coating.
The Crucial Pre-Grill Bath: Preparing the Corn for Heat
Before any heat is applied, we must address moisture and husk integrity.
Executing the Initial Steam/Soak for Maximum Juiciness
Start by prepping your corn: remove most of the husks and the silk, but critically, pull the husks back down toward the base, leaving them attached like a little skirt or handle. Place these prepared ears into a large container and cover completely with cool water.
Let them soak for at least 30 minutes. This hydration step is non-negotiable; it prevents the husks from immediately igniting and simultaneously steams the kernels gently, guaranteeing a tender result.
Achieving Signature Grill Marks on Your Grilled Corn on the Cob
After the soak, drain the corn well and pat the kernels lightly dry you don't want excess water steaming off, which hinders the char process. Preheat your grill to a medium high setting (around 375° F to 400° F). Place the cobs directly onto the hot grates.
You’ll want to cook them naked (husks pulled down) for the first 4 to 6 minutes, turning them a quarter turn every minute or so until you see attractive, dark sear marks develop on multiple sides.
Knowing When to Rotate: Avoiding the Burn Zone
Once you have those initial sear marks, it’s time to protect the husks while ensuring the interior finishes cooking. Gently pull the husks back up around the corn, effectively wrapping it slightly for a handle. Continue grilling for another 5 to 8 minutes, turning frequently.
The corn is done when the kernels are plump, slightly wrinkled, and you can pierce them easily with a fork. Total cook time should hover around 10 to 15 minutes, depending on your heat intensity.
Elevating the Experience: Creative Topping Combinations
The application of the Lime Chilli Butter must happen immediately upon removal from the grill while the corn is still blistering hot. This allows the butter to melt instantly and coat every crevice.
For an authentic flourish reminiscent of Mexican Street Corn Grilled style, crumble a little salty Cotija cheese over the top. The sharp salinity of the cheese against the sweet, smoky corn and bright lime is truly sensational.
Troubleshooting & Preservation: Keeping That Summer Taste Alive
If you find your corn is charring too quickly on the outside before the inside is tender, move the corn to a cooler section of the grill (indirect heat) after the initial searing stage. Remember, our pre-soak mitigates most drying issues, but high, direct heat needs careful management.
Serving Suggestions: Ideal Pairings for Your Smoky Side Dish
This Grilled Corn Seasoning profile works wonderfully alongside robust proteins. It is a mandatory accompaniment to pulled pork sandwiches or steak. For a fresher contrast, pair it with a vibrant black bean and avocado salad, which complements the zesty lime notes.
Savvy Storage Solutions for Leftover Delights
If you manage to have leftovers (unlikely!), store cooled corn in an airtight container in the refrigerator for up to three days. Reheat quickly on a lightly oiled cast iron skillet over medium heat to re-crisp the exterior rather than using the microwave, which can soften the texture too much.
Flavor Twists: Global Inspirations for Next Time
Don't stop here! Explore other Grilled Corn Seasoning ideas. Try brushing the corn with miso butter mixed with a touch of maple syrup for a deep umami profile, or substitute the coriander with tarragon and thyme for a more French inspired take on your Summer BBQ Side Dishes .
The versatility of perfectly grilled corn is endless.
Recipe FAQs
How do I stop the husks from burning to a crisp when making Grilled Corn on the Cob?
Ah, the age-old issue! The trick is soaking the corn for at least 30 minutes beforehand, as the moisture in the husks prevents them from catching fire instantly. Also, pull the husks down loosely around the base after soaking, which acts like a natural heat shield while you cook the kernels.
Can I cook this corn if I don't have a grill? What’s the best alternative?
You absolutely can! If the weather has you stuck indoors, the oven broiler or an indoor grill pan works a treat. Broil on high for about 10-12 minutes, turning every few minutes until you get a nice char, though you’ll miss that authentic smoky depth.
The corn is cooked, but the kernels look a bit pale how do I get those professional looking char marks?
For proper char, you need direct, high heat right at the end. Once the corn is tender (thanks to the initial soak and steaming), remove the husks and place the cobs directly onto the hottest part of the grate for 2-3 minutes per side. Watch it like a hawk, as high heat cooks fast!
I bought pre-shucked corn; can I still use it for this recipe, or do I need the husks?
While the husks offer fantastic moisture retention and a handy handle, you can certainly use pre-shucked corn. Just wrap the bare cobs tightly in aluminium foil with a teaspoon of water before grilling, or place them directly on the grates for a faster, smokier cook without the steaming element.
How long can I store leftover grilled corn, and can I reheat it properly?
Leftover corn, brushed with the butter, keeps well in an airtight container in the fridge for up to three days perfect for a cheeky lunch the next day. To reheat without drying it out, slice the kernels off the cob and quickly sauté them in a little extra butter or wrap them in foil and bake at 350°F for about 10 minutes.
Is the Lime Chilli Butter better applied before grilling or after, like the recipe suggests?
Always apply the herby, fresh butter after the corn comes off the grill! If you put it on too early, the fresh coriander and lime zest will burn and turn bitter, which would be a proper shame. Applying it hot ensures it melts right into those crevices.
Smoky Lime Grilled Corn