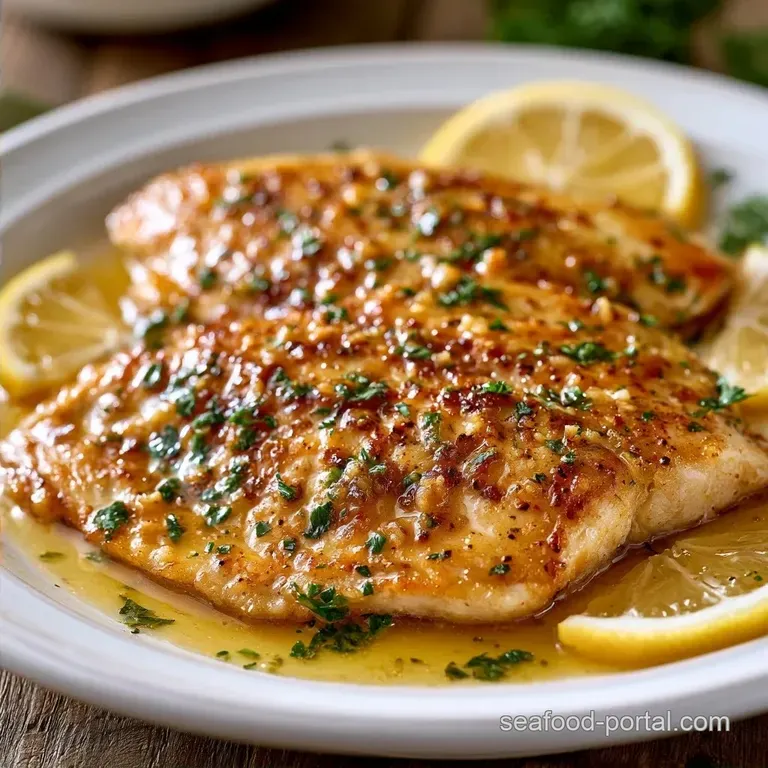
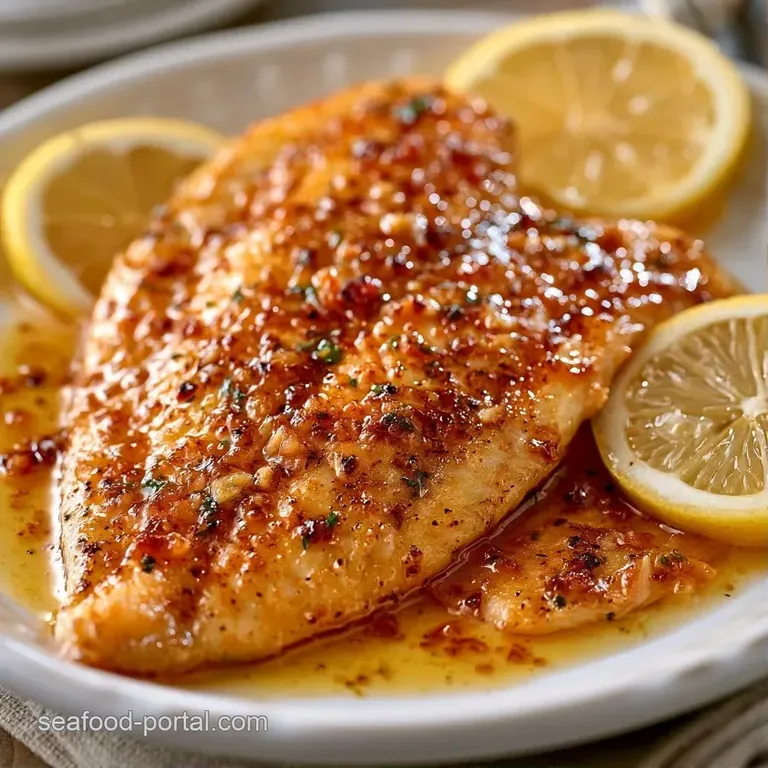
Pan Seared Lemon Tilapia with Garlic Butter
- Time: 5 min active + 10 min cook
- Flavor/Texture Hook: Zesty, buttery glaze with a golden crust
- Perfect for: Weeknight dinner, beginner friendly, healthy meal prep
- How to Make Lemon Tilapia
- The Logic Behind the Sear
- What Each Ingredient Does
- What You'll Need
- Necessary Kitchen Gear
- Cooking the Fish
- Fixing Common Issues
- Troubleshooting Common Issues
- Taste Variations
- Scaling Your Batch
- Debunking Fish Myths
- Storage and Waste
- The Best Sides
- Recipe FAQs
- 📝 Recipe Card
The smell of bubbling butter and fresh garlic hitting a hot pan is the best part of this meal. I used to think fish was a chore because it either ended up dry or stuck to the pan in a million pieces.
I spent way too long thinking you needed expensive equipment or fancy techniques to make it taste like something from a bistro.
Forget the idea that white fish is bland or needs a heavy breading to be interesting. The real trick is just managing your heat and moisture. When you get that first sear right, you build a crust that locks in the juice and gives you a satisfying contrast to the soft center.
You can expect a meal that feels fancy but actually takes about 15 minutes. This Lemon Tilapia is light, bright, and doesn't require you to spend your whole evening in the kitchen.
How to Make Lemon Tilapia
The process for a great Lemon Tilapia relies on a few specific cues. First, you want to see the oil shimmer in the pan, which tells you it's hot enough to sear. When the fish hits the oil, it should sizzle loudly immediately. If it doesn't, your pan isn't hot enough, and the fish will likely stick.
I once tried to rush this by adding the lemon juice at the beginning. All that happened was the fish steamed instead of searing, and I ended up with a grey, mushy fillet. Now, I always save the citrus for the very end. This ensures the acid doesn't break down the protein too early and keeps the sauce glossy.
Making Lemon Tilapia is all about timing. You only have a few minutes before the fish goes from juicy to rubbery. By adding the butter and garlic during the last few minutes, you baste the fillets in flavor while they finish cooking through.
The Logic Behind the Sear
Since this is such a fast process, a few simple things make it work.
Dry Surfaces: Water on the fish creates steam, which prevents browning. Patting the fillets dry means they sear in 3-4 minutes instead of boiling in their own juices.
Butter Basting: Adding butter at the end provides a rich fat that carries the garlic flavor deep into the meat. It's similar to how a butter sauce tilapia gets its richness.
Residual Heat: Taking the pan off the heat before adding lemon juice prevents the sauce from breaking. The heat from the pan is enough to emulsify the butter and juice into a silky glaze.
| Fillet Type | Prep Effort | Texture | Best For |
|---|---|---|---|
| Fresh Tilapia | Low | Flaky and tender | Immediate dinner |
| Frozen Tilapia | Medium (Thawing) | Slightly softer | Meal prep / Budget |
What Each Ingredient Does
| Ingredient | What It Does | Best Swap |
|---|---|---|
| Tilapia Fillets | Provides a mild, lean base | Cod or Halibut |
| Unsalted Butter | Adds richness and helps baste | Ghee or Vegan butter |
| Lemon Juice | Cuts through fat with acidity | Lime juice |
| Paprika | Adds a hint of smokiness and color | Cayenne (for heat) |
What You'll Need
For the best results, use these exact amounts.
For the Seasoning
- 4 (6 oz / 170g) tilapia fillets
- 1 tsp (5g) saltWhy this? Essential for drawing out moisture and seasoning the meat
- ½ tsp (2g) black pepper
- 1 tsp (2g) garlic powderWhy this? Adds a base layer of savory flavor
- ½ tsp (1g) paprika
For the Pan Sear - 2 tbsp (30ml) olive oil Why this? High smoke point prevents burning at high heat - 3 tbsp (42g) unsalted butter
For the Lemon Butter Sauce
- 2 cloves (6g) garlic, minced
- 1 tbsp (15ml) fresh lemon juiceWhy this? Fresh juice has a brighter pop than bottled
- 1 tsp (5ml) lemon zest
- 1 tbsp (3g) fresh parsley, chopped
| Original Ingredient | Substitute | Why It Works |
|---|---|---|
| Tilapia | Cod | Similar mild flavor. Note: Cod is thicker, may need 1 extra minute per side |
| Unsalted Butter | Olive Oil | Keeps it dairy-free. Note: Lacks the creamy richness of butter |
| Fresh Parsley | Dried Parsley | Adds color. Note: Use 1/3 the amount; lacks fresh brightness |
Necessary Kitchen Gear
You don't need a professional kitchen for this, but a few tools help. A heavy skillet, like cast iron or stainless steel, is my go to because it holds heat better than non stick. If you use non stick, just be careful not to overheat the oil.
A fish spatula is also a lifesaver. Tilapia is delicate, and a wide, thin spatula lets you get under the fillet without breaking it. If you don't have one, a thin metal turner works, but be gentle when you flip.
Cooking the Fish
Let's get this Lemon Tilapia moving. Follow these steps for the best crust.
- Pat each fillet thoroughly dry with paper towels on both sides. Note: This is the most important step for a good sear.
- In a small bowl, mix the salt, pepper, garlic powder, and paprika.
- Sprinkle the mixture evenly over both sides of the fish, pressing gently so the spices adhere to the flesh.
- Place your skillet over medium high heat and add the olive oil.
- Once the oil shimmers, carefully lay the fillets in the pan.
- Sear undisturbed for 3–4 minutes until a golden brown edge forms around the bottom.
- Flip the fillets gently.
- Immediately reduce the heat to medium and add the butter and minced garlic to the empty spaces in the pan.
- As the butter melts and foams, use a spoon to continuously drizzle the garlic butter over the fish for another 3 minutes.
- Turn off the heat. Stir in the fresh lemon juice and lemon zest, allowing the residual heat to emulsify the sauce. Garnish with fresh parsley and serve.
Fixing Common Issues
Even with a simple recipe, things can go sideways. If your Lemon Tilapia isn't coming out right, it's usually a heat or moisture issue.
Troubleshooting Common Issues
| Issue | Solution |
|---|---|
| Why Your Fish Sticks | If the fillets glue themselves to the pan, you likely put them in before the oil was hot enough. The proteins need to sear and release. |
| Why Tilapia Gets Rubbery | Overcooking is the main culprit here. Tilapia cooks very quickly. Once the fish is opaque and flakes easily with a fork, take it off the heat. |
| Why the Sauce Separates | If the butter looks oily and separated instead of a glossy sauce, the pan was too hot when you added the lemon juice. Turning off the heat first prevents the emulsion from breaking. |
When making an Easy Pan Seared Lemon Tilapia, remember that the pan should never be crowded. If the fillets are touching, they will steam rather than sear, and you'll lose that golden crust.
Taste Variations
You can easily tweak this to change the vibe. If you want a "Lemon Pepper" version, skip the paprika and double the black pepper in the seasoning mix. For a Mediterranean twist, add a handful of halved cherry tomatoes and a few kalamata olives to the pan when you add the garlic.
If you want something even richer, try this butter sauce tilapia. For a totally different flavor profile, check out everything bagel cream sauce for your fish.
You can also try a pan fried Lemon Tilapia by dredging the fish in a tiny bit of flour first. This gives a thicker crust, though the Pan Seared Tilapia No Flour method is lighter. Other ideas include Pan Seared Tilapia Lemon Butter with added capers or a Pan Seared Lemon Garlic Tilapia with a splash of white wine. For those who love a kick, Pan Seared Lemon Pepper Tilapia with red pepper flakes is a winner.
If you're making a Pan Seared Tilapia with Lemon Butter Sauce for a crowd, work in batches. Seared Lemon Tilapia loses its heat quickly, so keep the first batch in a warm oven while you finish the rest.
Scaling Your Batch
When you're doubling a batch of Lemon Tilapia, don't just double the pan size. It's better to cook in two turns. If you crowd the pan, the temperature drops, and the fish will boil in its own juices.
For a smaller batch, like two fillets, reduce the butter and oil by half. You can also reduce the cook time by about 20% if the fillets are thinner than 6 oz. Just keep an eye on the opacity of the meat.
Seared Lemon Tilapia is best served immediately, but if you're scaling up for a party, you can keep them on a platter and pour the fresh lemon butter sauce over them right before serving.
Debunking Fish Myths
Some people think you need to "seal in the juices" by searing. In reality, searing adds flavor and texture, but it doesn't actually lock moisture inside. The moisture stays because you aren't overcooking the fish.
Another common myth is that tilapia is too bland to be the star of the show. The truth is that its mildness makes it a blank canvas. The combination of garlic, butter, and lemon is what makes it stand out.
Storage and Waste
Leftover Lemon Tilapia stays good in the fridge for 2-3 days. Store it in an airtight container with a bit of the leftover sauce to keep it from drying out.
To reheat, avoid the microwave if you can. It makes the fish rubbery. Instead, put it in a pan over low heat with a teaspoon of butter for 2-3 minutes just to warm it through.
For zero waste, don't toss your lemon peels. You can zest them and freeze them in a small bag for future recipes, or use the peels to clean your cutting board by scrubbing it with the citrus side.
The Best Sides
This dish pairs well with things that can soak up that extra butter sauce. I love serving it with steamed asparagus or a simple sauté of spinach. If you want a starch, jasmine rice or roasted baby potatoes are the way to go.
For another seafood focused meal, you might enjoy an Easy Fried Smelt Recipe for a bit of contrast. The lightness of the Lemon Tilapia makes it a great match for a heavier side like a creamy polenta.
Ultimately, the beauty of Lemon Tilapia is how it fits into any meal. Whether you're serving it with a fresh garden salad or a side of quinoa, the zesty flavors always hit the mark. This Pan Seared Lemon Tilapia is a reliable, fast, and flavorful way to get more fish into your diet without the stress.
Recipe FAQs
How long should you pan sear tilapia?
3 4 minutes for the first side. Sear undisturbed until a golden brown edge forms, then flip and baste with garlic butter for another 3 minutes.
How to cook tilapia fillets in a pan?
Pat each fillet thoroughly dry with paper towels. Season with salt, pepper, garlic powder, and paprika before searing in shimmering olive oil over medium high heat.
Is it better to bake or pan sear tilapia?
Pan searing is recommended for flavor. This method creates a golden brown crust and allows for a rich garlic butter baste that baking cannot replicate.
What are common mistakes when frying tilapia?
Adding fillets to oil that isn't hot enough. This prevents the proteins from searing and releasing, which causes the fish to stick to the pan.
How to cook tilapia fillets in an oven?
Arrange seasoned fillets on a lined baking sheet. Bake until the fish is opaque and flakes easily with a fork.
Is tilapia good for triglycerides?
Yes, it is a lean protein. Its low saturated fat content makes it a healthier choice than richer seafood appetizers like creamy clam dip.
What are the quickest recipes to cook tilapia?
Pan-searing is the fastest method. This specific preparation takes only 15 minutes from start to finish.
Lemon Tilapia Fillets

