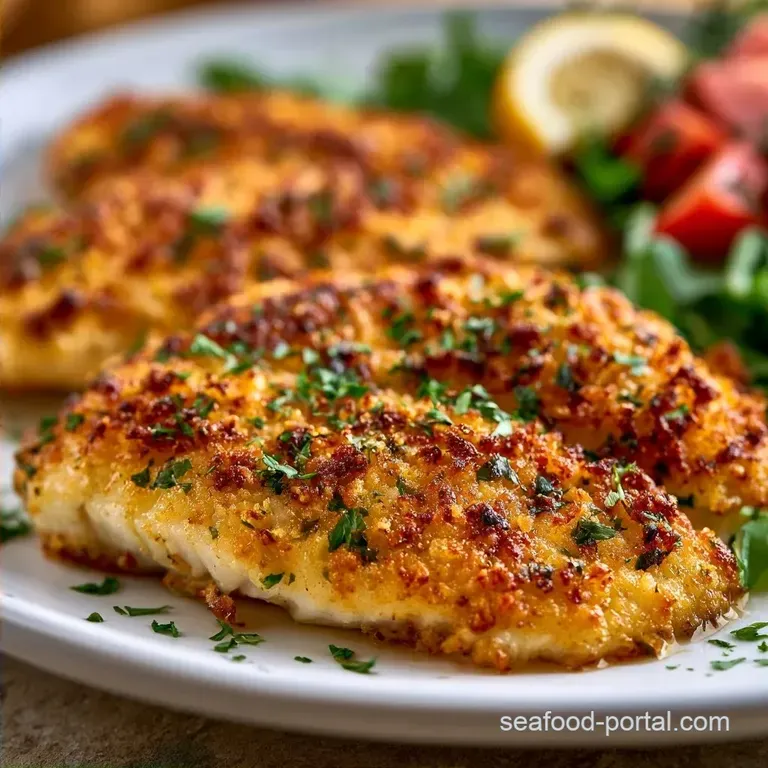
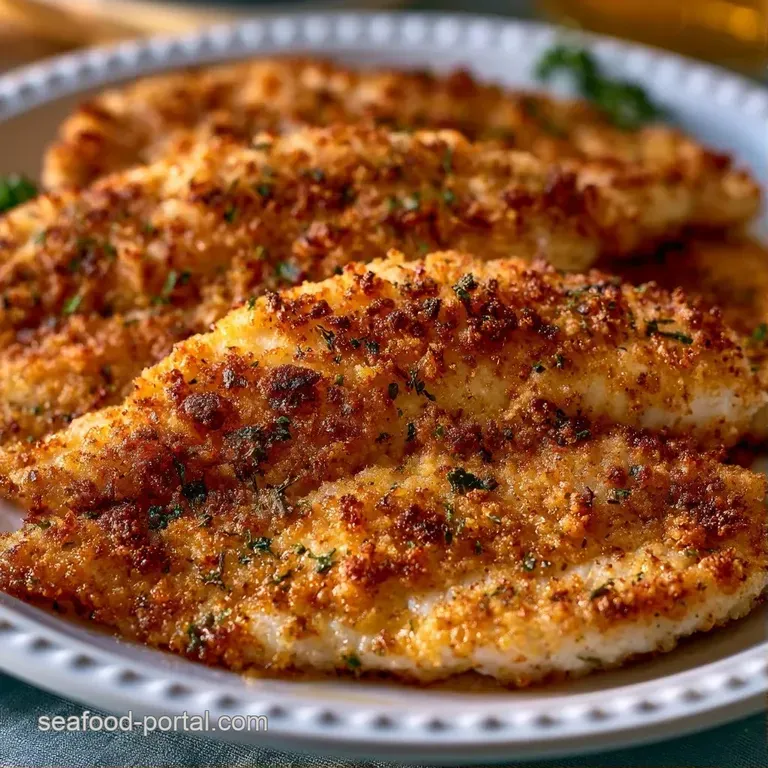
Crispy Oven Baked Tilapia with Parmesan
- Time: 10 min active + 15 min baking
- Flavor/Texture Hook: Savory Parmesan crunch with a hint of smoke
- Perfect for: Fast weeknight dinners and picky eaters
The smell of smoked paprika hitting a hot oven is one of those scents that immediately makes a house feel like a home. For a lot of us, tilapia was the first "grown up" fish we learned to cook.
It's a mild, accessible fillet that doesn't intimidate anyone, making it a staple in kitchens from the American South to coastal Mexico. In those traditions, the goal was always to hide the simplicity of the fish behind a bold, crackling crust.
I used to think you had to fry fish to get that specific snap, but that usually ended with a grease splattered stovetop and a heavy feeling in my stomach. This version gives you that same satisfaction without the mess.
It's all about the contrast - the tender, flaky white fish inside and the jagged, salty Panko exterior.
You can expect a meal that comes together in under 30 minutes. We're focusing on a over high heat bake that toasts the breadcrumbs quickly so the fish doesn't overcook and turn rubbery.
This is the kind of meal that works whether you're feeding kids or trying to impress a guest with something that feels effortless.
Nailing Crispy Oven Baked Tilapia
Getting that crunch requires a bit of strategy. It isn't just about the crumbs; it's about how the layers bond to the fish.
Dry Surface: Moisture is the enemy of a crust. Patting the fish bone dry prevents the breading from steaming and sliding off.
The Panko Edge: Unlike standard breadcrumbs, Panko is flakier and creates larger air pockets. These pockets allow the oven heat to circulate and crisp the edges faster.
Parmesan Integration: The cheese doesn't just add salt. As it melts, it binds the crumbs together and browns deeply due to the fat content.
| Fish Type | Texture | Prep Effort | Best For |
|---|---|---|---|
| Fresh Fillets | Firm and flaky | Low | Maximum flavor |
| Frozen (Thawed) | Softer | High (needs drying) | Budget meals |
| Frozen (Direct) | Mushy | Extreme | Avoid this method |
What These Ingredients Do
The combination of flour, egg, and Panko creates a physical barrier that keeps the juices inside while the heat toasts the outside.
| Ingredient | What It Does | Best Swap |
|---|---|---|
| All purpose flour | Creates a grip for the egg | Cornstarch (crispier) |
| Large eggs | Acts as the glue | Buttermilk (tangier) |
| Panko crumbs | Provides the structural crunch | Crushed cornflakes |
| Parmesan cheese | Adds salt and gold color | Pecorino Romano |
What You'll Need
Gather these items before you start. Having your dredging station ready prevents the fish from sitting in egg too long, which can make the coating gummy.
- 4 (6 oz / 170g) tilapia fillets Why this? Mild flavor that takes on seasonings well
- ½ tsp (3g) salt
- ¼ tsp (1g) black pepper
- 1 tbsp (15ml) olive oil Why this? Prevents sticking and helps browning
- ½ cup (65g) all purpose flour
- 2 large (100g) eggs, beaten
- 1 cup (60g) Panko breadcrumbs Why this? Lighter and crunchier than regular crumbs
- ¼ cup (25g) grated Parmesan cheese
- 1 tsp (2g) garlic powder
- 1 tsp (2g) smoked paprika
- 1 lemon, cut into wedges
- 1 tbsp (4g) fresh parsley, chopped
Essential Equipment
You don't need a professional kitchen for this, but a few specific tools make the process cleaner.
- Rimmed Baking Sheet: A high edge prevents oil or crumbs from dripping onto your oven floor.
- Parchment Paper: This is non negotiable. Fish sticks to metal, and parchment ensures a clean release.
- Three Shallow Bowls: This keeps your flour, egg, and crumb stations separate to avoid "clumping."
- Paper Towels: You'll need a whole stack to get the fillets truly dry.
From Prep to Plate
Follow these steps in order to keep the coating intact. If you're cooking for a crowd, prep all the fillets first before moving them to the baking sheet.
Phase 1: Setting the Stage
- Preheat your oven to 400°F (205°C) and line a large rimmed baking sheet with parchment paper.
- Pat the tilapia fillets bone dry with paper towels to remove excess moisture. Note: This is the most important step for a crispy crust.
- Season both sides of the fillets lightly with salt and pepper.
Phase 2: The Three Step Coating
- Set up a dredging station. Place flour in the first bowl, beaten eggs in the second, and a mix of Panko, Parmesan, garlic powder, and smoked paprika in the third.
- Dredge each fillet in the flour, shaking off any excess to create a thin veil.
- Dip the floured fish into the beaten eggs until fully submerged.
- Press the fillet firmly into the Panko and Parmesan mixture, ensuring the top and sides are fully coated. Note: Use your palms to really push the crumbs in.
Phase 3: The Golden Bake
- Place the fillets on the prepared baking sheet, ensuring at least 2 inches of space between each fillet.
- Bake for 12-15 minutes until the crust is mahogany colored and the internal temperature reaches 145°F (63°C).
- Serve immediately with lemon wedges and chopped fresh parsley.
Chef's Tip: To get an even more golden color, lightly spray the tops of the breaded fillets with a bit of olive oil spray right before they go into the oven.
Fixing Common Issues
Even with a plan, things can go sideways. Most issues with Crispy Oven Baked Tilapia come down to moisture or oven hotspots.
If the Crust is Soggy
Sogginess usually happens because the fish was too wet or the fillets were crowded on the pan. When fillets touch, they steam each other instead of roasting. This creates a damp layer of breading on the sides.
If the Fish is Rubbery
Rubbery fish is the result of overcooking. Tilapia is thin and cooks fast. Once it hits 145°F, take it out. It will continue to cook for a minute or two on the counter.
If the Breading Slides Off
This happens when the flour layer is too thick. If you leave a heavy coating of flour, the egg can't bond the flour to the fish, and the whole crust slides off like a blanket.
| Problem | Root Cause | Solution |
|---|---|---|
| Pale Crust | Oven temp too low | Use an oven thermometer to verify 400°F |
| Wet Bottoms | Too much oil/juice | Use a wire rack on top of the baking sheet |
| Bland Taste | Under seasoned fish | Season fillets before flouring |
Customizing the Flavor
You can easily pivot this recipe to fit whatever you have in the pantry. If you're looking for more white fish ideas, my baked white fish guide has some great variations on timing.
For a Spicy Kick
Swap the smoked paprika for cayenne pepper or add a pinch of crushed red pepper flakes to the Panko mix. Serving it with a side of sriracha mayo adds a creamy heat that cuts through the richness of the Parmesan.
For a Zesty Twist
Add the zest of one whole lemon directly into the breadcrumb mixture. This embeds the citrus flavor into the crust rather than just relying on the squeeze at the end.
For a gluten-free Option
Use almond flour or a 1:1 gluten-free flour blend for the first dredge. Swap the Panko for crushed gluten-free crackers or cornmeal. Note that the texture will be slightly denser and less "airy" than Panko.
For a Low Carb Twist
Replace the flour and Panko with almond flour and grated Parmesan. Since you lose the structural crunch of the breadcrumbs, increase the Parmesan to 1 cup to ensure a sturdy crust.
Adjusting the Batch Size
Scaling this recipe is straightforward, but you have to be careful with the pan space.
Scaling Down (2 Fillets): Use a smaller baking sheet and reduce the bake time by about 2 minutes. Beat one egg and use half of it, as two eggs are too many for just two pieces of fish.
Scaling Up (8+ Fillets): Work in batches. If you crowd the pan, you'll end up with steamed fish rather than crispy fish. For the seasonings, only increase the salt and paprika to 1.5x the original amount to avoid over salting the batch.
If you're baking multiple trays at once, lower the oven temp to 375°F (190°C) and extend the time by 3-5 minutes. This prevents the top tray from burning before the bottom tray is cooked through.
Debunking Fish Myths
There are a few old wives' tales about baking fish that can actually ruin your dinner.
Myth: You need to sear fish in a pan first to "lock in juices." Truth: Searing adds flavor, but it doesn't seal the fish. In fact, over searing can dry out a thin fillet like tilapia before it even hits the oven.
Myth: Frozen tilapia is always "low quality." Truth: Many frozen fillets are flash frozen at sea, which preserves them better than some "fresh" fish that has spent days on a truck. Just make sure they are fully thawed and dried.
Storage and Zero Waste
Leftovers are great, but the crunch is the first thing to go.
In the Fridge: Store leftovers in an airtight container for up to 2 days. Don't stack them too tightly, or they'll compress and get mushy.
In the Freezer: You can freeze the breaded (unbaked) fillets. Place them on a tray to freeze individually first, then move them to a freezer bag. They'll last about 2 months.
To Reheat and Restore Crunch: Never use a microwave; it turns the crust into a sponge. Use an air fryer at 350°F (175°C) for 3-5 minutes, or a toaster oven until the edges sizzle again.
Zero Waste Tip: Don't toss the lemon rinds. After you squeeze the wedges, zest the remaining peel and add it to a jar of olive oil or salt for a bright, citrusy seasoning you can use on vegetables.
Serving Suggestions
This dish is a blank canvas. Because the tilapia is mild, it pairs well with almost anything bright or acidic.
The Classic Pair: Serve it alongside steamed asparagus and a scoop of quinoa. The earthiness of the quinoa balances the salty Parmesan crust.
The Fresh Approach: Put the fillets on a bed of arugula with a light lemon vinaigrette. The peppery greens cut right through the fried texture of the fish.
If you want something more decadent, you can try a butter sauce tilapia as a side for a dinner party, but for a Tuesday night, the crispy version is the winner. Just remember to serve it immediately. The moment that fish hits the plate, the clock starts ticking on the crunch.
Recipe FAQs
How to get tilapia crispy in the oven?
Pat the fillets bone dry with paper towels before dredging. Removing surface moisture prevents the breading from steaming, allowing it to crisp up instead.
How long to bake breaded tilapia at 400 degrees?
Bake for 12-15 minutes. The fish is done when the crust is mahogany colored and the internal temperature reaches 145°F.
How to cook tilapia fillets in the oven?
Preheat your oven to 400°F and bread the fillets using a flour, egg, and Panko Parmesan dredging station. Bake on a parchment lined sheet until golden and flaky.
Is it true that tilapia is good for lowering triglycerides?
Yes, lean proteins like tilapia are generally heart healthy. Their low saturated fat content makes them a better choice for managing triglyceride levels than fatty red meats.
How to cook tilapia fillets in a pan instead of the oven?
Sear them in a hot skillet with olive oil until golden on both sides. If you enjoy stovetop methods, you can apply similar zesty pan sauce techniques to keep the fillets moist.
How to store and reheat leftover baked tilapia?
Store in an airtight container for up to 2 days and reheat in an air fryer at 350°F for 3-5 minutes. Avoid using a microwave, which turns the crispy crust spongy.
How to prevent the breading from falling off the fish?
Press the Panko and Parmesan mixture firmly into the egg-dipped fillet. Ensure the initial flour coating is a thin veil, as excess flour prevents the egg from adhering.
Crispy Oven Baked Tilapia

