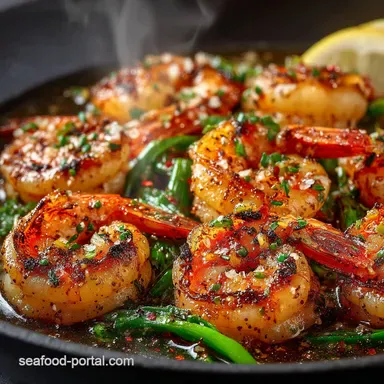
Sizzling Samurai Prawns Restaurantstyle Hibachi Shrimp
- Bringing the Steakhouse Sizzle Home: Why Hibachi Works in Your Kitchen
- The Essential Cast: Purity and Flavor Building Blocks
- Mastering the High-Heat Sear: Step-by-Step Cooking
- The Full Hibachi Experience: Pairing and Presentation
- Expert Tips and Troubleshooting for Flawless Hibachi Shrimp
- Recipe FAQs
- 📝 Recipe Card
Bringing the Steakhouse Sizzle Home: Why Hibachi Works in Your Kitchen
There is a unique theatre to the Japanese steakhouse experience that mesmerizing showmanship, the clatter of steel on the griddle, and, most importantly, the instantaneous, intense burst of savory flavour.
The beauty of the Hibachi Shrimp Recipe is that it doesn't rely on specialized equipment or elaborate techniques; it relies on speed and heat. By using a screaming hot skillet or a flat top griddle at home, you can replicate that signature "sizzle" which flash cooks the shrimp, locking in moisture and delivering maximum caramelisation.
This method ensures that the delicate seafood is never rubbery, achieving a restaurant quality sear that forms the perfect canvas for our rich, signature glaze. This quick cooking style makes genuine Easy Hibachi Recipes achievable even on the busiest weeknights.
Decoding the Umami Rich Hibachi Flavor Profile
The magic of this cuisine lies in its deceptive simplicity. The authentic flavour profile of classic hibachi combines intense savoriness (umami) with a crucial touch of sweetness and brightness.
We build this profile using three key components: high-quality butter for richness, soy sauce for deep salinity and umami, and fresh garlic for aromatic punch. A small addition of Mirin or sake adds depth and subtle sweetness, which, when combined with fresh lemon juice, cuts through the fat from the butter to create a perfectly balanced, addictive glaze.
When these ingredients hit the high heat of the pan, they emulsify into the gorgeous, glossy Hibachi Shrimp Sauce that defines the dish.
Why This Recipe Beats Takeout by a Mile: Speed and Freshness
While ordering takeout is tempting, this Hibachi Shrimp Recipe requires only about 25 minutes from prep to plate. The cooking time itself is a swift six to eight minutes. The primary advantage of cooking at home is, naturally, the freshness.
Store-bought hibachi often uses shrimp that has been pre-cooked or frozen. By starting with raw, quality prawns and rapidly searing them exactly when needed, you control the texture entirely. The resulting shrimp is succulent and perfectly snappy, a quality often lost during restaurant transport.
Replicating the distinct taste of a high end experience like Hibachi Shrimp Benihana is easily achievable when you prioritize fresh ingredients and the immediate application of high heat.
The Essential Cast: Purity and Flavor Building Blocks
Achieving superior Hibachi Shrimp requires focus not just on the method, but on the calibre of the components, particularly how the prawns are prepared before they meet the searing heat.
Selecting and Preparing Your Prawns for High Heat
For this recipe, selecting large or jumbo shrimp (approximately 450 grams, or 1 pound) is highly recommended, as they handle the high heat better without overcooking instantly. Whether you leave the tail on or off is a matter of presentation preference, but ensuring they are fully peeled and deveined is necessary.
The most critical step in preparation is drying. You must aggressively pat the raw shrimp with paper towels. Any residual moisture will lower the pan temperature and cause the shrimp to steam rather than sear, ruining the chance of developing that coveted caramelised crust.
Once dry, the prawns are tossed simply with a tablespoon of vegetable oil, a teaspoon of sesame oil, salt, and pepper no complicated Hibachi Shrimp Marinade needed here, as the flavour will be applied at the very end.
Crafting the Signature Soy-Garlic Butter Glaze
The heart of the entire dish is the finishing glaze. This is the liquid gold that transforms simple seared seafood into true hibachi fare. We start with four tablespoons of unsalted butter, which melts down to carry the flavour of three finely minced cloves of garlic.
This infusion is then activated by two tablespoons of low-sodium soy sauce (or Tamari for a gluten-free option), combined with Mirin or sake for fermented sweetness, one teaspoon of fresh lemon juice for essential acidity, and a half teaspoon of sugar or honey to balance the intense saltiness.
Preparing this simple liquid mixture ahead of time allows for the rapid final coating, ensuring the shrimp doesn't languish in the pan while you scramble for ingredients.
Choosing Your Surface: Skillet vs. Griddle (Including Blackstone Tips)
While professional hibachi chefs use enormous flat top griddles, home cooks can achieve the same results with a heavy duty 12 inch cast iron skillet or a stainless steel pan. The key is thermal mass the surface must be able to retain extremely high heat even after the cool shrimp is introduced.
For outdoor enthusiasts utilizing a gas griddle, cooking Hibachi Shrimp on Blackstone is perhaps the most authentic home experience. Ensure your Blackstone is set to high heat and fully preheated for at least five minutes.
Using a metal spatula allows you to scrape up the delicious browned bits (fond) from the pan surface, integrating them back into the final glaze for maximum depth of flavour.
Related Recipes Worth Trying
- Classic New Orleans Shrimp Creole The Proper Way to Build Flavour — This authentic Shrimp Creole recipe delivers rich complex New Orleans flavour using the Holy Trinity Follow our foolproof method for a stunning sauce and...
- The Ultimate WineFree Shrimp Scampi Pasta Ready in 30 Minutes — This easy shrimp scampi recipe delivers silky restaurantquality lemongarlic sauce without wine in just 30 minutes Foolproof technique for the best shrimp scampi
- Ultimate 18Minute Garlic Butter Shrimp Scampi with Lemon — This easy Garlic Butter Shrimp recipe delivers a glossy rich sauce and perfectly seared shellfish in under 20 minutes Learn the chefs trick for a...
Mastering the High Heat Sear: step-by-step Cooking
The process is fast, furious, and relies entirely on disciplined timing. Get everything ready before you turn on the heat.
Prepping the Proteins: Marination vs. Immediate Seasoning
Unlike preparing chicken or beef, which often benefits from a long soak in a Hibachi Chicken and Shrimp Recipe , shrimp requires only immediate, surface level seasoning. As noted, we tossed the dry shrimp with oil, sesame oil, and basic seasoning.
The objective is not tenderization (as the cooking time is too brief for significant tenderizing) but achieving a thin coat of fat to promote searing and prevent sticking. The intense flavour profile of the finished dish comes solely from the quick toss in the decadent garlic butter glaze at the finish line, not from prior marination.
The Rapid Cook: Achieving Perfect Pink Doneness
Once the skillet or griddle is ripping hot a drop of water should evaporate instantly add 1 tablespoon of butter and half the minced garlic. Immediately swirl and then add half the prepared shrimp in a single layer. Crucially, avoid crowding the pan, which is the fastest way to drop the temperature.
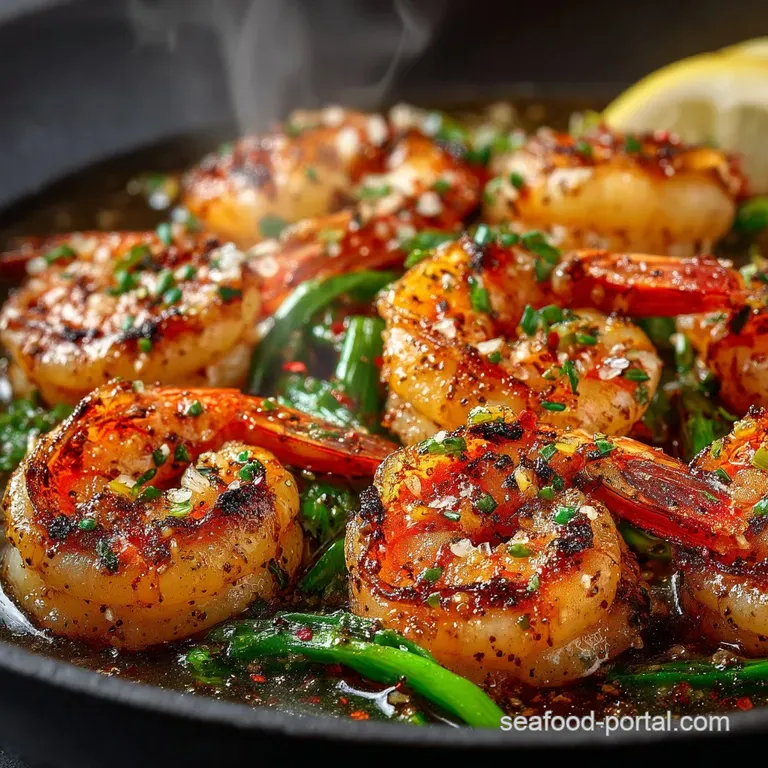
Sear the shrimp for 90 seconds to 2 minutes per side. They should turn opaque pink orange and display beautiful brown edges where the sugars have caramelised against the hot surface.
Remove the first batch to a warm plate and repeat with the remaining shrimp and another tablespoon of butter, ensuring all the seafood is perfectly cooked before moving to the final step.
Toss and Glaze: Finishing Your Hibachi Shrimp Masterpiece
With the cooked shrimp resting, reduce the heat to medium. Add the remaining 2 tablespoons of butter and the rest of the minced garlic to the pan, cooking only until fragrant (about 30 seconds), taking care not to burn the garlic.
Now, pour in the pre-mixed liquid components of the Hibachi Shrimp Sauce —the soy, mirin, lemon, and sugar mixture. Stir rapidly; the sauce will thicken and become a glossy glaze almost instantly as the butter emulsifies with the soy liquid.
Return all the cooked shrimp to the pan and toss vigorously for just 10 to 15 seconds to fully coat them in the rich glaze. Serve immediately while the butter is still sizzling.
The Full Hibachi Experience: Pairing and Presentation
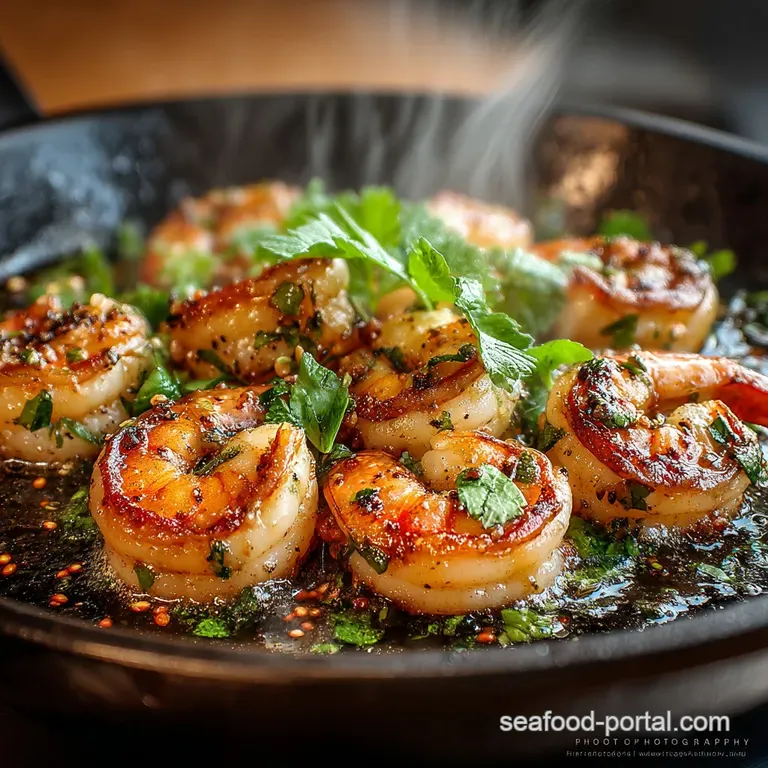
To truly capture the atmosphere of the steakhouse, presentation matters. Once transferred to the serving dish, the vibrant pink shrimp, glistening with the butter glaze, should be garnished liberally with toasted sesame seeds and finely sliced spring onions. This adds visual contrast and a fresh, crunchy element.
The quintessential pairing for this meal is, of course, homemade Hibachi Shrimp Fried Rice loaded with zucchini and carrots, or a pile of sautéed hibachi noodles.
And while the star of the show is the seafood itself, no hibachi experience is complete without a generous side serving of homemade Yum Yum Sauce that creamy, tangy, and slightly sweet condiment is the perfect finishing dip for the prawns and rice alike.
Expert Tips and Troubleshooting for Flawless Hibachi Shrimp
Even simple recipes benefit from insider knowledge that ensures perfection every time.
Beyond Fried Rice: Creative Sides to Serve
While Hibachi Shrimp Fried Rice is traditional, don't limit yourself. For a lighter approach, serve the shrimp over simple steamed jasmine rice and a side of quick seared broccoli florets finished with a touch of sesame oil and soy.
You could also pair it with a light, vinegary cucumber salad, or serve it atop sautéed, garlic heavy lo mein noodles for an Asian noodle bowl feel. For those utilizing the Hibachi Chicken and Shrimp Recipe approach, serving both proteins with just a side of grilled zucchini and mushrooms keeps the focus squarely on the meat and seafood.
Quick Flavor Swaps and Seasoning Variations
If you prefer a little heat, stirring in half a teaspoon of Gochugaru (Korean chilli flakes) or a dash of sriracha into the finishing glaze will yield fantastic results for a spicy Hibachi Shrimp .
If you are avoiding soy, Tamari or coconut aminos are excellent substitutes, though you may need to adjust the sugar content slightly. For those avoiding alcohol, the Mirin or sake can be swapped out for 1 tablespoon of good quality chicken or vegetable broth mixed with a tiny pinch of sugar.
Alternatively, if you want a complete meal in one, consider a 'Surf & Turf' variation by searing thin strips of sirloin steak first, removing them, cooking the shrimp, and then combining them for the final toss in the savory butter.
Handling Leftovers and Safe Storage Guidelines
Hibachi Shrimp is best consumed immediately, straight from the pan, to enjoy its crisp texture and high heat aroma. If you do have leftovers, place them in an airtight container and refrigerate within two hours of cooking. They will keep safely for up to two days.
When reheating, avoid the microwave, as it tends to make the shrimp rubbery. Instead, reheat very briefly (30-60 seconds) in a hot, lightly oiled skillet until just warmed through.
Be mindful that even without side dishes, each generous serving of this rich, flavorful Hibachi Shrimp comes in at an estimated 220 calories, providing approximately 24 grams of protein.
Recipe FAQs
Blimey, shrimp cooks fast! What’s the secret to achieving that restaurant quality sear on my Hibachi Shrimp without turning them rubbery?
High heat is absolutely key, old chap! Make sure your skillet (cast iron is ideal) is ripping hot before the shrimp even touches the surface. Crucially, you must aggressively pat the shrimp bone dry before seasoning; any moisture leads to steaming, not searing.
Cook the Hibachi Shrimp for only 90 seconds to 2 minutes per side the second they curl into a 'C' shape and turn fully pink, get them out of the pan!
I don't have Mirin kicking about the cupboard. Can I swap out some of the sauce ingredients, and must I use raw shrimp?
You must stick to raw shrimp for this specific technique, as pre-cooked prawns will turn tough and chewy when subjected to the high searing heat. If you’re short on Mirin (Japanese rice wine), you can substitute with dry sherry or white wine, or simply use a tablespoon of chicken stock mixed with a tiny pinch of sugar to replicate that necessary hint of sweetness and depth.
I've made a huge batch how should I store leftover shrimp, and can I freeze it for later?
Cooked Hibachi Shrimp keeps beautifully in an airtight container in the fridge for about 2 3 days, which is handy for quick lunches. However, freezing is a bit of a culinary sin here, as the texture of shrimp always turns rubbery and mushy upon thawing.
To reheat leftovers, simply toss them quickly in a dry skillet over medium heat for a couple of minutes until just warmed through, avoiding any further cooking.
I’m watching my salt and butter intake. Are there easy tweaks to make this recipe a bit healthier or gluten-free?
Certainly. To drastically cut down on sodium, swap out standard soy sauce for Tamari (which also makes the dish gluten-free) or lower sodium Coconut Aminos. While butter is vital for flavour, you can halve the amount and use extra sesame oil to maintain richness.
If you’re counting carbs, skip the optional sugar/honey entirely the dish will still be packed with fantastic savoury umami.
Sizzling Garlic Butter Hibachi Shrimp