Honey-Garlic Butter Salmon: Pan-Seared and Baked
- Time: Active 10 minutes, Passive 12 minutes, Total 22 minutes
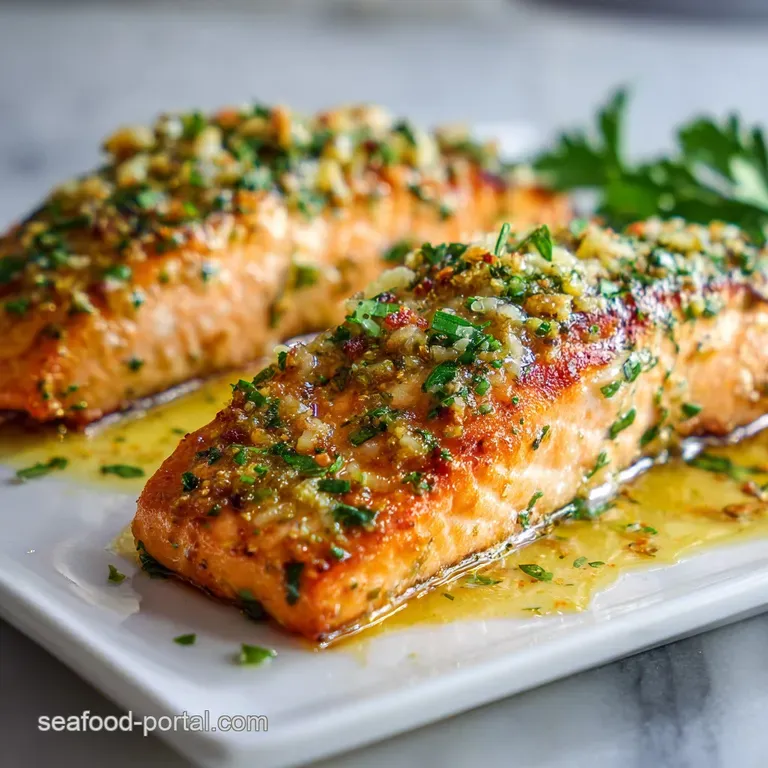
- Flavor/Texture Hook: A shatter crisp exterior with a velvety, honey kissed center
- Perfect for: A fast weeknight dinner that feels like a weekend celebration
- Creating the Best Recipe for Salmon Fish
- Vital Stats for This Meal
- Deep Look at Essential Components
- Essential Gear for Great Results
- Step Instructions for Perfect Fish
- Solving Potential Cooking Hiccups
- Creative Ingredient Swaps
- Storing Your Leftovers Correctly
- Best Sides for This Dish
- Recipe FAQs
- 📝 Recipe Card
Creating the Best Recipe for Salmon Fish
That sharp, aggressive hiss when cold protein hits a shimmering cast iron pan is the most rewarding sound in my kitchen. It’s the sound of a crust forming, of sugar and heat working together to build layers of flavor that a simple bake just can’t touch.
I remember the first time I got this right; the kitchen smelled of toasted garlic and sweet lemon, and for the first time, my salmon didn't stick to the pan or turn into a dry, chalky mess. It was a revelation that changed how I view weeknight seafood forever.
The absolute hero of this dish isn't just the technique, but the salmon fillet itself. I always go for center cut fillets because they are uniform in thickness, which means they cook evenly. If you pick the thin tail pieces, they’ll overcook before your glaze has a chance to bubble and caramelize.
This recipe is all about respecting that fish keeping it simple but using a few smart tricks to make it taste like you spent hours at the stove when you really only spent 22 minutes.
I've made the mistake of using cold fish or a lukewarm pan more times than I care to admit. Those errors led to pale, soggy skin and fish that tore apart when I tried to flip it. But once you understand how to manage the heat and the moisture, you’ll realize this is the only way to cook salmon.
We’re going to build a mahogany crust that practically shatters under your fork, giving way to a buttery, melt in-your mouth interior that’s been gently infused with honey and smoked paprika.
The One Step Most People Skip: Most cooks forget to pat the fish dry. Even a tiny bit of moisture on the skin causes it to steam rather than sear, which is the enemy of a crispy crust.
- Moisture Barrier: Patting the fish dry removes surface water, allowing the oil to immediately start the browning process instead of boiling away moisture.
- Caramelization Engine: The honey in the glaze has a low burning point, so we add it after the initial sear to prevent it from turning bitter while still getting that sticky, syrupy finish.
- Thermal Carryover: Finishing the salmon in a 200°C oven allows the internal temperature to rise slowly, ensuring the middle stays velvety while the glaze sets.
- Acid Balance: Lemon juice breaks down the heavy fats in the butter and salmon, keeping the flavor profile bright rather than greasy.
| Method | Time | Texture | Best For |
|---|---|---|---|
| Hybrid (This Recipe) | 22 minutes | Crispy skin, juicy middle | Getting that professional "crust" |
| Sheet Pan Bake | 15 minutes | Uniformly soft/flaky | Hands off meal prep |
| Stovetop Only | 10 minutes | Very crispy but risky | Experienced cooks who watch the clock |
The hybrid method is truly the gold standard because it gives you the best of both worlds. You get the intense heat of the pan to crisp the skin and seal the top, followed by the gentle, surrounding heat of the oven to finish the thickest part of the fillet without drying out the edges.
Vital Stats for This Meal
When you’re standing at the seafood counter, the options can be overwhelming. For this specific recipe, I highly recommend skin on fillets. The skin acts as a natural insulator, protecting the delicate flesh from the direct heat of the pan.
Plus, when done right, that skin becomes a salty, crispy treat that provides a necessary textural contrast to the soft fish. If you’re worried about the "fishy" taste, look for fillets that are bright pink or deep red (depending on the variety) and smell like the ocean, not like a damp basement.
| Component | Science Role | Pro Secret |
|---|---|---|
| Salmon Fillets | Provides healthy fats and structure | Let them sit at room temp for 15 minutes before cooking to ensure even heat penetration. |
| Raw Honey | Acts as a humectant and sweetener | Whisk it into the butter while warm so it incorporates without clumping. |
| Butter | Adds milk solids for browning | Use unsalted so you can control the seasoning perfectly with your sea salt. |
| Smoked Paprika | Provides "wood fired" depth | Toast it briefly in the garlic butter to release the fat soluble flavor compounds. |
Choosing the right fat for your pan is also key. We use a combination of olive oil for the sear and butter for the glaze. Olive oil has a higher smoke point than butter, which is why we start the sear with oil.
If we used butter from the start, those milk solids would burn and turn bitter before the salmon was even halfway done. The butter comes in later, creating a velvety sauce that coats the fish and helps the garlic and honey stick to every nook and cranny.
Deep Look at Essential Components
Let's talk about the lineup. Every ingredient here has a job to do. We aren't just throwing things in a pan; we are building a flavor profile that hits the back of your throat with spice and the tip of your tongue with sweetness.
- 4 (6 oz) Salmon Fillets: Center cut, skin on. Why this? Skin on protects the meat from drying out during the over high heat sear.
- 1 tbsp Olive Oil: For the initial sear. Why this? High smoke point prevents the kitchen from filling with smoke.
- 1 tsp Sea Salt: Use flaky sea salt if you have it. Why this? It draws out moisture and seasons the deep layers of the fish.
- 1/2 tsp Cracked Black Pepper: Freshly cracked is non negotiable. Why this? Pre ground pepper tastes like dust; fresh has floral, spicy notes.
- 3 tbsp Unsalted Butter: The base of our glaze. Why this? Fat carries flavor better than water based liquids.
- 3 tbsp Raw Honey: For that sticky, mahogany finish. Why this? It creates a glossy coating that clings to the seared surface.
- 4 cloves Garlic: Grated or finely minced. Why this? Grating releases more oils, making the glaze intensely aromatic.
- 1 tbsp Fresh Lemon Juice: To cut the richness. Why this? The acidity balances the sugar in the honey and the fat in the fish.
- 1/2 tsp Smoked Paprika: For a hint of campfire. Why this? Adds a complex "seared over wood" flavor without the grill.
- 1 tbsp Fresh Parsley: For the final pop of color. Why this? Provides a fresh, grassy contrast to the deep, cooked flavors.
If you’re out of honey, maple syrup is a fantastic alternative. It has a slightly more earthy, woody sweetness that pairs incredibly well with the smoked paprika. However, avoid using pancake syrup, which is mostly corn syrup and won't give you that same thick, syrupy reduction that raw honey provides.
Essential Gear for Great Results
You don't need a professional kitchen, but a few specific tools will make your life a whole lot easier. The star of the show here is a large cast iron skillet (like a Lodge). Cast iron is incredible because it holds onto heat.
When you drop a cold piece of fish into a regular thin pan, the pan's temperature drops instantly. A cast iron skillet stays hot, which is exactly what you need for that "shatter crisp" skin.
You’ll also want a small saucepan for the glaze. I’ve tried making the glaze in the same pan as the fish, but it’s too hard to control. By making it separately, you can ensure the garlic is perfectly sautéed and the honey is dissolved before it ever touches the salmon.
A good fish spatula the kind with the long, thin slots is also a life saver. It’s flexible enough to get under the skin without tearing it, unlike a thick plastic spatula.
Finally,, an instant read meat thermometer is the only way to be 100% sure your fish is done. Salmon can go from perfect to overcooked in about 60 seconds. We are aiming for 145°F (63°C), but I actually pull mine at 140°F because the temperature will continue to rise as it rests.
This is called carryover cooking, and it's the secret to why restaurant fish is always juicier than what you make at home.
Step Instructions for Perfect Fish

- Dry the fish. Use paper towels to pat the salmon fillets extremely dry on all sides, especially the skin. Note: Surface moisture is the enemy of a good sear.
- Season the fillets. Sprinkle sea salt and cracked black pepper over the flesh side of the salmon immediately before you plan to cook it.
- Melt the butter. In a small saucepan over medium heat, melt the 3 tbsp of butter until it starts to foam and bubble.
- Aromatize the garlic. Add the 4 cloves of minced garlic to the butter and sauté for exactly 30 seconds until the kitchen smells fragrant but the garlic isn't brown.
- Simmer the glaze. Whisk in the honey, lemon juice, and smoked paprika. Let it simmer for 2 minutes until it thickens into a syrupy consistency.
- Heat the skillet. Add 1 tbsp of olive oil to your cast iron skillet over medium high heat until the oil is shimmering and just starting to wisps of smoke.
- Sear the flesh. Place salmon fillets skin side up in the pan. Sear for 3-4 minutes until a mahogany colored crust has formed.
- Flip carefully. Turn the fillets over so the skin side is down. Immediately brush the honey garlic glaze generously over the seared tops.
- Oven finish. Move the skillet into your preheated 200°C oven. Bake for 5-8 minutes until the fish flakes easily with a fork and reaches 145°F.
- Rest and serve. Remove from the oven and let the fish rest for 3 minutes. Garnish with parsley and extra lemon wedges before serving.
Chef's Tip: If you want the skin to be even crispier, you can actually start the sear skin side down for 5 minutes, then flip for only 1 minute before glazing. This method ensures the skin is totally rendered and crisp, though you lose a bit of that "crust" on the flesh side.
The transition from the stovetop to the oven is where the magic happens. While the salmon is in the oven, the honey in the glaze starts to bubble and caramelize, forming a sticky coating that locks in all the juices.
You’ll see the edges of the glaze turning a dark, rich brown that’s where all the flavor lives. Just keep an eye on it; every oven is different, and you don't want the sugar in the honey to burn.
Solving Potential Cooking Hiccups
Even with the best instructions, things can go sideways. The most common issue people have is the salmon sticking. If your fish is sticking, it’s usually because you tried to flip it too early. Protein "releases" from the pan naturally once the sear is complete. If you feel resistance, give it another 30 seconds.
Why Your Salmon is Dry
This is almost always a result of overcooking. Because salmon is a fatty fish, it feels moist when it's warm, but once those fats cool down, overcooked fish becomes tough and stringy. Always use a thermometer to check for 145°F.
Another sign of overcooking is the appearance of "white stuff" (albumin) pushing out of the sides of the fish. A little is normal, but a lot means the muscle fibers have contracted too tightly from excess heat.
Why Your Glaze is Burning
Honey has a lot of natural sugar, and sugar burns at high temperatures. If your glaze is turning black instead of mahogany, your oven might be running too hot, or you might have simmered the glaze for too long in the saucepan.
If it looks too thick before it even hits the fish, add a teaspoon of water or lemon juice to thin it back out.
| Problem | Root Cause | Solution |
|---|---|---|
| Skin is soggy | Too much moisture or low heat | Pat skin dry and ensure the oil is shimmering hot before adding fish. |
| Garlic is bitter | Garlic was burnt in the butter | Only sauté garlic for 30 seconds and keep the heat at medium. |
| Fish is falling apart | Fillets were moved too much | Do not touch the fish for the first 3 minutes of searing. |
Common Mistakes Checklist:
- ✓ Never cook salmon straight from the fridge; let it take the chill off for 15 minutes.
- ✓ Use a heavy bottomed pan (cast iron is best) to maintain consistent heat.
- ✓ Don't overcrowd the skillet; cook in batches if your pan is small to avoid steaming.
- ✓ Always season the fish right before cooking, as salt can draw out moisture if left too long.
- ✓ Let the fish rest for a few minutes after cooking to allow the juices to redistribute.
If you find yourself in a situation where the skin is stuck to the pan, don't panic! Just take the pan off the heat for a minute. Often, the slight change in temperature will cause the metal to contract and release the skin. If that fails, use a very thin metal spatula to gently wiggle underneath.
Even if the skin stays behind, the fish will still taste incredible.
Creative Ingredient Swaps
Sometimes you don't have exactly what's on the list, or you want to change things up for a different vibe. That’s the beauty of cooking! You can easily pivot this into a spicy version or a more herbal version depending on what's in your pantry. If you are looking for a totally different texture, you could even try this same glaze on a pan seared cod recipe which is much milder and flakier than salmon.
| Original Ingredient | Substitute | Why It Works |
|---|---|---|
| Raw Honey | Maple Syrup (Grade A) | Provides a similar sugar content with a deep, autumnal flavor profile. |
| Smoked Paprika | Chipotle Powder | Adds a smoky element but with a significant kick of heat. Note: Use half the amount. |
| Lemon Juice | Lime Juice | Keeps the acidity but adds a more tropical, zestier note to the glaze. |
If you need to make this dairy-free, you can swap the butter for a high-quality vegan butter or even coconut oil. If using coconut oil, be aware that it will add a slight coconut flavor, which actually tastes pretty great with the honey and lime swap mentioned above.
Just avoid using margarine, as it has a high water content and won't brown or emulsify into a proper glaze.
- If you want more spice
- Add 1/2 tsp of red chili flakes to the butter while sautéing the garlic.
- If you want a deeper umami flavor
- Add 1 tsp of soy sauce to the glaze during the simmer step.
- If you want a "cleaner" taste
- Omit the butter and honey, and just use olive oil, lemon, and fresh herbs.
Storing Your Leftovers Correctly
Cooked salmon is actually one of the few fish that tastes great the next day, provided you don't dry it out during the reheat. I love flaking leftover salmon into a cold salad or even using it in a morning omelet.
Fridge Storage: Place your cooled fillets in an airtight container. They will stay fresh for up to 3 days. I like to pour any extra glaze from the pan over the fish before sealing the container to keep it moist.
Freezing: While you can freeze cooked salmon, the texture will change slightly. If you must, wrap it tightly in plastic wrap and then foil, and store it for up to 2 months. Thaw it overnight in the fridge before eating.
Zero Waste Tip: Don't throw away the salmon skin if it falls off! You can pop it back into a dry pan over medium heat until it's as crispy as a potato chip. It's packed with Omega-3s and makes a great snack or salad topper.
Also, if you have leftover glaze, it's incredible drizzled over roasted carrots or broccoli.
Reheating: The best way to reheat is in the oven at a low temperature (around 275°F/135°C) with a splash of water or a lid on the dish to create steam. Microwave reheating usually makes the fish rubbery and smells quite strong, so avoid it if you can!
Best Sides for This Dish
This salmon is the star, so you want sides that are supportive but not overwhelming. I usually go for something green and something starchy. A bed of fluffy jasmine rice is perfect for soaking up all that extra honey garlic glaze that drips off the fish.
If you want something a bit lighter, a simple cucumber salad with vinegar and dill provides a cold, crunchy contrast to the warm, rich fish.
Speaking of dill, if you find that you love the combination of fish and herbs, you might want to try making a creamy dill sauce to serve on the side. While this recipe has its own glaze, a cool yogurt or cream based sauce can be a lovely addition if you're serving this at a dinner party. It adds a "velvety" layer that complements the "shatter crisp" skin perfectly.
Another classic pairing is roasted asparagus. You can actually toss the asparagus in the same pan as the salmon during the oven finish step if your skillet is large enough. The asparagus will pick up the garlic and honey flavors, making for a cohesive one pan-style meal.
Just make sure the asparagus is trimmed and thin so it cooks in the 5-8 minutes the salmon is in the oven.
| Comparison | Fast Version | Classic Version (This) |
|---|---|---|
| Technique | Air Fryer only | Sear + Oven Finish |
| Glaze | Bottled Teriyaki | Homemade Honey Garlic |
| Result | Decent but skin is often chewy | Professional crust, moist center |
Why This Saves You Money
Cooking salmon at home using the best recipe for salmon fish costs about a third of what you'd pay at a high end bistro. Because the technique focuses on building flavor through caramelization and proper heat management, you don't need to buy the most expensive "King" salmon to get a spectacular result.
Even standard Atlantic salmon becomes a gourmet experience when you treat it with the right science and a little bit of honey.
The Truth About Searing
Many people believe that searing "seals in the juices." In reality, searing is all about the Maillard reaction a chemical reaction between amino acids and reducing sugars that gives browned food its distinctive flavor.
Moisture is actually lost during searing, but the trade off is worth it for the incredible depth of flavor and texture that the crust provides. The moisture is preserved by not overcooking the fish in the final oven stage, not by the sear itself.
Sourcing Fresh vs Frozen
Don't be afraid of the freezer aisle! Most "fresh" fish at the grocery store was actually frozen on the boat and thawed behind the counter. Buying high-quality "flash frozen" fillets can often be fresher than the stuff sitting in the display case.
Just ensure you thaw it slowly in the refrigerator for 24 hours before you plan to cook it to maintain the integrity of the muscle fibers.

Recipe FAQs
What is the tastiest way to cook salmon?
Pan-searing followed by a brief oven finish provides the best texture. This method creates a mahogany crust while keeping the inside buttery and tender. If you want to master this professional sear, see how the same principles apply in our Pan Seared Salmon guide.
Is grilled salmon good for high blood pressure?
Yes, it can be a healthy addition. Salmon is rich in omega-3 fatty acids, which are beneficial for heart health, though you should be mindful of your total salt intake from seasoning.
How to cook salmon for a diabetic?
Prepare the fillets using the official sear and roast method without modifying the honey content significantly. Because salmon is a lean protein source, it pairs well with non-starchy vegetables to keep blood sugar levels stable.
Can salmon skin lower cholesterol?
No, this is a common misconception. While the skin contains healthy fats, it does not have unique properties to actively lower cholesterol levels, though eating fish regularly is a heart healthy choice.
How to get the skin crispy when cooking?
Pat the fillets extremely dry with paper towels before placing them in the hot oil. Moisture is the enemy of crispiness, so ensuring the surface is dry before it hits the skillet is the most important step.
How to tell when the salmon is fully cooked?
Use a meat thermometer to check for an internal temperature of 145°F. Alternatively, the fish is ready if it flakes easily when pressed gently with a fork.
How to store leftover salmon?
Place cooled fillets in an airtight container and refrigerate for up to 3 days. Pouring any leftover honey garlic glaze over the fish before sealing helps retain moisture for the next day.
Honey Garlic Salmon 2

Ingredients:
Instructions:
Nutrition Facts:
| Calories | 508 kcal |
|---|---|
| Protein | 34.6g |
| Fat | 32.4g |
| Carbs | 14.8g |
| Fiber | 0.3g |
| Sugar | 13.2g |
| Sodium | 615mg |
