Homemade Sushi Sauce: Rich and Glossy
- Time: Active 2 minutes, Passive 15 minutes, Total 17 minutes
- Flavor/Texture Hook: A velvety, syrupy reduction with a punchy umami finish
- Perfect for: Finishing dragon rolls, glazing grilled proteins, or an easy weeknight DIY sushi night
- Achieving the Bold Depth of Professional Sushi Sauce
- Essential Metrics for Your Homemade Glaze Batch
- The Flavor Components for High Impact Umami
- Tools Required for a Perfectly Reduced Glaze
- Mastering the Simmer for a Velvety Finish
- Correcting Consistency and Balancing Intense Salt Profiles
- Bold Flavor Tweaks and Dietary Ingredient Swaps
- Preserving Freshness and Maintaining the Ideal Viscosity
- Creative Ways to Drizzle and Layer Flavors
- Dispelling Common Glaze Misconceptions
- Recipe FAQs
- 📝 Recipe Card
Achieving the Bold Depth of Professional Sushi Sauce
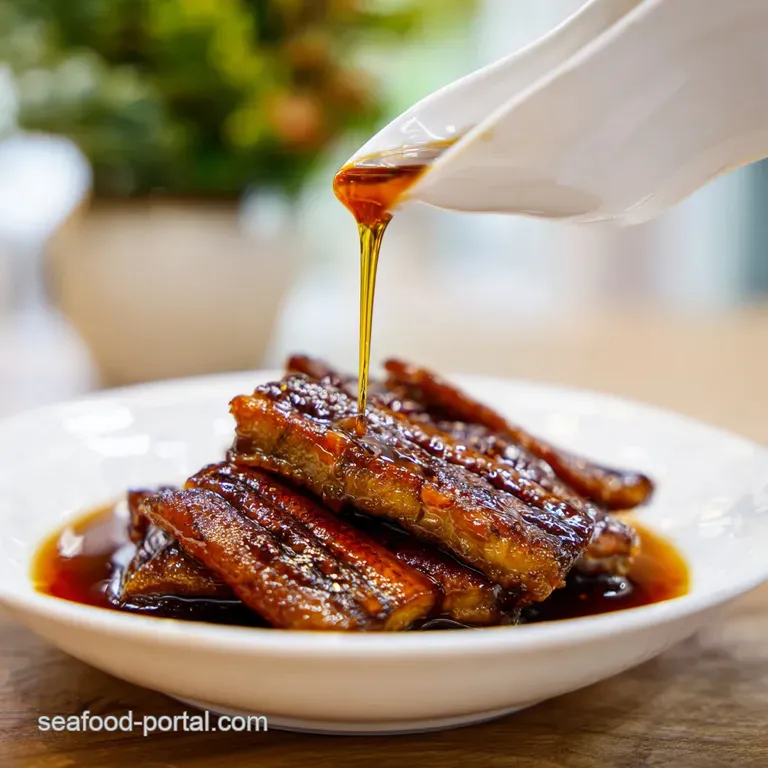
Ever wondered why the dark, glossy drizzle at your favorite sushi spot tastes like a concentrated burst of liquid gold while the soy sauce on your table feels thin and one note? Most people assume it is just "eel sauce," but the truth is far more interesting.
This syrupy elixir, often called Nitsume in traditional Japanese kitchens, is the backbone of street style sushi culture, providing a vibrant contrast to the fresh, cool fish and vinegared rice.
It is not just about sweetness; it is about building layers of fermented depth that cling to the food rather than soaking into the rice and making it a soggy mess.
When I first tried to recreate this at home, I made the classic rookie error of just adding sugar to soy sauce and calling it a day. The result was a thin, harsh liquid that tasted like syrup flavored salt. It lacked that velvety body and the complex, woodive aroma that you get when you actually reduce the liquids.
The magic happens when the alcohol in the sake and mirin burns off, leaving behind a concentrated essence that interacts with the sugar to create a thick, mirror like finish. It is the difference between a plain suit and a tailored one; it just fits the dish better.
We are going for a bold, adventurous flavor profile here. This is not a mild condiment. We want something that makes a statement the second it hits your tongue. By using a specific reduction technique, we are going to coax out the hidden glutamates in the soy and the kombu, creating a Sushi Sauce that feels sophisticated but remains incredibly approachable for any home cook.
Let's get into the mechanics of why this works so well and how you can avoid the watery pitfalls of store-bought versions.
Essential Metrics for Your Homemade Glaze Batch
Concentration Control: The reduction process physically removes water molecules, which forces the sugar and amino acids closer together. This increases the viscosity and intensifies the flavor profile without needing thickeners like cornstarch.
Umami Extraction: Using kombu (dried kelp) introduces natural glutamates. When these interact with the fermented soy sauce, they create a synergistic effect that makes the sauce taste "meatier" and more savory.
Sugar Stability: Whisking the granulated sugar into the cold or room temperature liquids before heating ensures that the crystals dissolve evenly. This prevents a grainy texture and helps the sauce achieve a smooth, velvety consistency as it bubbles.
Alcohol Evaporation: Boiling the sake and mirin is critical. The ethanol evaporates at 78°C, leaving behind the fruity and floral notes of the rice wine while removing the harsh "burn" of raw alcohol.
| Method | Total Time | Texture | Best For |
|---|---|---|---|
| Stovetop Reduction | 17 minutes | Thick, syrupy, and glossy | Glazing rolls and drizzling |
| Oven Concentration | 45 minutes | Deeply caramelized, darker | Large batches or marinades |
| Quick Whisk (No Heat) | 2 minutes | Thin and watery | Quick dipping only |
The stovetop method is vastly superior for this specific recipe because it allows for immediate visual feedback. You can see the bubbles change shape and size as the water evaporates, giving you total control over how thick the final product becomes.
While the oven provides a hands off approach, it is much easier to accidentally burn the sugars around the edges of the pan.
The Flavor Components for High Impact Umami
| Component | Science Role | Pro Secret |
|---|---|---|
| Soy Sauce | Provides the salt base and liquid volume | Use a naturally brewed soy for complex fermentation notes |
| Mirin | Adds shine and a subtle, honey like sweetness | Look for "Hon mirin" to get real rice wine depth |
| Culinary Sake | Breaks down proteins and adds acidity | Never use "cooking sake" with added salt; buy drinking grade |
| Granulated Sugar | Creates the syrup structure and viscosity | Darker sugars can be used for a more molasses heavy finish |
For this recipe, you will need exactly 1/2 cup soy sauce. If you are watching your sodium, you can swap this for a reduced sodium version, but keep in mind that the reduction process will concentrate whatever salt is already there.
You also need 1/2 cup mirin, which is the secret to that glossy sheen that catches the light. Unlike plain sugar water, mirin contains complex carbohydrates that give the sauce a unique "cling" factor.
Next, grab 1/4 cup culinary sake. This adds a clean, crisp finish that cuts through the richness of the sugar. To sweeten the deal, we use 1/2 cup granulated sugar. It might seem like a lot, but this is a glaze, not a soup! Finally, one 2 inch piece of kombu is essential.
Why this? It provides the baseline umami that makes the sauce taste professional. If you don't have kombu, a tiny splash of fish sauce can work, but it will slightly alter the traditional flavor profile.
Tools Required for a Perfectly Reduced Glaze
You don't need a high tech lab to make a killer Sushi Sauce, but the right pan makes a massive difference. I highly recommend using a small, non reactive saucepan, preferably stainless steel or enamel coated.
Avoid reactive metals like unlined aluminum or copper, as the acidity in the sake and the salt in the soy can react with the metal, giving your sauce a weird, tinny aftertaste that ruins the whole vibe.
A silicone coated whisk is your best friend here. It allows you to scrape the bottom and corners of the pan effectively, ensuring that no sugar gets trapped and burns. If you've ever tried to scrub burnt sugar off a pan, you know that's a nightmare you want to avoid.
A heat resistant spatula is also great for doing the "line test" on the back of a spoon to check for doneness.
Finally,, have a clean glass jar ready for storage. Plastic containers tend to absorb the dark pigments and strong aromas of the soy and sake, making them nearly impossible to clean later. A Mason jar or a recycled glass sauce bottle works brilliantly and looks great in the fridge.
Mastering the Simmer for a Velvety Finish
- In a small non reactive saucepan, combine the 1/2 cup soy sauce, 1/2 cup mirin, 1/4 cup culinary sake, and 1/2 cup granulated sugar. Note: Mixing them while cold helps the sugar dissolve more evenly as the temperature rises.
- Place the pan over medium heat and whisk continuously until the sugar crystals have completely dissolved and the liquid is a uniform dark color.
- Bring the mixture to a gentle boil until the surface is covered in large, frothy bubbles, then immediately reduce the heat to low.
- Add the 2 inch piece of kombu to the liquid. Note: Adding it after the boil prevents the kelp from becoming bitter or slimy.
- Maintain a simmer with small bubbles. Watch for the liquid to transition from watery to a slightly viscous state.
- Allow the sauce to simmer for approximately 15 minutes. You will see the volume drop by about a third.
- Test the consistency by dipping a metal spoon into the liquid. It should coat the back of the spoon in a velvety, dark layer.
- Remove the pan from the heat and take out the kombu piece immediately.
- Let the sauce cool in the pan for at least 10 minutes. It will continue to thicken significantly as the temperature drops.
- Pour the finished glaze into a glass jar and let it reach room temperature before sealing.
Chef's Note: If you want to take the flavor to a street food level, try adding a single clove of smashed garlic or a slice of ginger during the simmer. Just remember to strain them out at the end!
Correcting Consistency and Balancing Intense Salt Profiles
The most common mistake people make is pulling the sauce off the heat too early or letting it go way too long until it turns into hard candy. If your sauce is too thin, it's usually because the heat was too low or you didn't give it the full 15 minutes. But what about the sogginess?
If you find your sauce is making your rice fall apart, it's likely not reduced enough to create that protective barrier.
To Fix a Sauce That is Too Thin
If you've reached the 15 minute mark and it still feels like water, don't panic. Sometimes the humidity in your kitchen or the specific brand of soy sauce can affect the evaporation rate. Simply increase the heat back to medium low and simmer for an additional 3 to 5 minutes.
The goal is to see those bubbles become "lazy" and thick. If it still won't thicken, a tiny cornstarch slurry (1 teaspoon starch to 1 teaspoon water) can save it, though it will lose some of its translucent clarity.
To Fix a Sauce That is Too Salty
Reduction concentrates everything, including salt. If the final product is a bit too punchy for your liking, you can balance it out after the fact. Stir in a tablespoon of extra mirin or a teaspoon of honey while the sauce is still warm.
This adds "rounding" flavors that mask the sharp saltiness without thinning the sauce out too much.
| Problem | Root Cause | Solution |
|---|---|---|
| Grainy texture | Sugar didn't dissolve | Whisk more vigorously during the initial heating phase |
| Bitter aftertaste | Kombu boiled too long | Ensure the heat is on low once the kelp is added |
| Sauce is like glue | Over reduction | Stir in a splash of sake or water to thin it out while warm |
For another vibrant addition to your Japanese inspired kitchen, you might want to try making a Japanese Shrimp Curry which uses similar umami building principles but in a thicker, stew like format.
Common Mistakes Checklist:
- ✓ Avoid boiling the kombu at high heat; it releases a soapy texture.
- ✓ Use a pan with high sides to prevent the sugar bubbles from foaming over.
- ✓ Don't walk away during the last 5 minutes of simmering; it can burn in seconds.
- ✓ Always let the sauce cool completely before judging the final thickness.
- ✓ Use a clean spoon for every taste test to prevent contaminating the batch.
Bold Flavor Tweaks and Dietary Ingredient Swaps
If you are looking for a sauce a sushi that fits a specific diet or just want to experiment with different flavor profiles, this recipe is incredibly flexible. The base ratio of soy, sugar, and rice wine is your foundation, but the house you build on top of it can look many different ways.
For instance, if you're a fan of those creamy, neon orange sauces found at sushi trucks, you can actually use this reduction as a base for a more complex drizzle.
| Original Ingredient | Substitute | Why It Works |
|---|---|---|
| Soy Sauce (1/2 cup) | Tamari (1/2 cup) | Makes the recipe 100% gluten-free with a richer color |
| Granulated Sugar | Brown Sugar | Adds deep molasses notes and a darker, grittier sweetness |
| Culinary Sake | Dry Sherry | Provides a similar acidic punch and fermented depth |
For a gluten-free Teriyaki Sauce for Sushi
If you need to keep things gluten-free, simply swap the soy sauce for a high-quality Tamari. Tamari actually has a higher protein content than standard soy sauce, which means it develops a even more velvety texture when reduced. It is a fantastic choice for people who want a bold, "extra dark" glaze. You can use this version on Sushi Rolls with Salmon and Avocado for a meal that everyone can enjoy regardless of dietary restrictions.
To Create a Spicy Mayo Sauce for Sushi
You can use a few tablespoons of this cooled reduction and whisk it into a cup of Japanese mayo (like Kewpie) with a squeeze of Sriracha. This creates a "bridge" flavor that combines the sweet umami of the glaze with the creamy heat of the mayo. It is the ultimate hack for making those fancy "volcano" rolls at home.
Trust me, the depth of the reduced sauce makes regular spicy mayo taste boring.
Preserving Freshness and Maintaining the Ideal Viscosity
Because of the high sugar and salt content, this Sushi Sauce has a fantastic shelf life. In the fridge, it will stay vibrant and safe to eat for up to 3 weeks. However, because it is a reduction, it will become quite firm when cold almost like a jelly. This is totally normal!
Storage: Keep it in an airtight glass jar in the back of the fridge where the temperature is most stable. Do not store it in the door, as the constant temperature fluctuations can cause condensation inside the jar, which might lead to spoilage over time.
Zero Waste Tip: If you have a tiny bit of sauce stuck to the bottom of the jar that you can't scrape out, don't wash it away. Pour a little bit of hot water or leftover rice vinegar into the jar, shake it up, and use that liquid as a base for a quick salad dressing or a marinade for tofu.
Those leftover kombu pieces you removed? You can slice them thinly and simmer them with a little water and ginger to make a chewy, savory snack called Tsukudani.
Reheating: When you're ready to use it again, you can either let it sit on the counter for 30 minutes to soften, or place the jar in a bowl of warm water for a few minutes.
I don't recommend microwaving the whole jar as it can easily boil over and create a sticky mess, but a 10 second blast for a small portion is usually fine.
Creative Ways to Drizzle and Layer Flavors
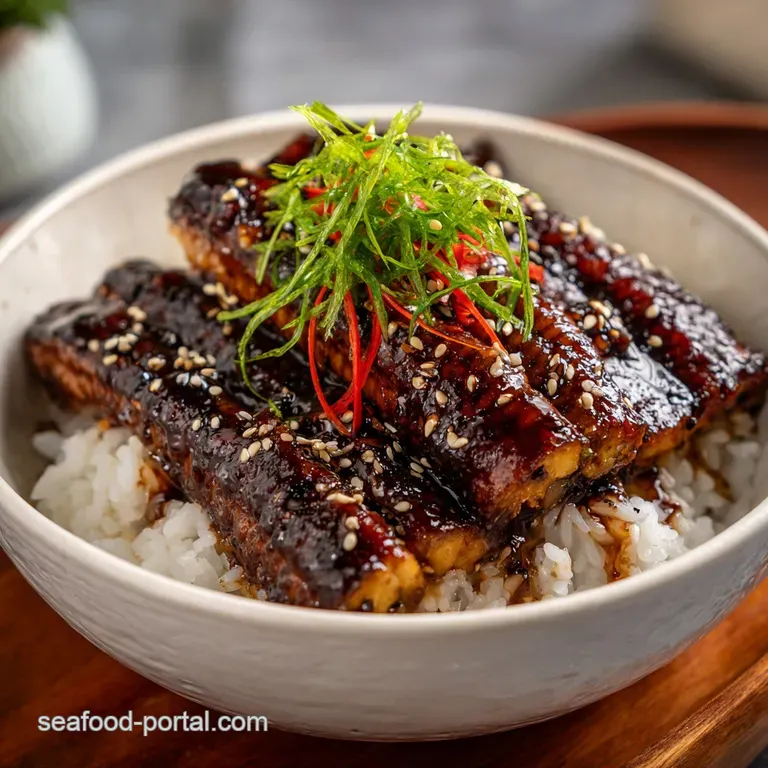
The classic way to use this glaze is, of course, the drizzle. But if you want to eat like a pro, think about layering. Instead of just dumping it on top of the roll, try brushing a thin layer onto the fish before you slice the roll.
This allows the sauce to season the protein directly rather than just sitting on the seaweed or rice. It creates a much more integrated flavor experience.
Another bold move is using this as a "glue" for toppings. If you're making a roll with crispy onions or toasted sesame seeds, a light brush of this sauce will hold those crunchy bits in place so they don't fall off the second you pick up the piece with chopsticks.
The syrupy texture acts as a culinary adhesive that also happens to taste incredible.
If you want a lighter finish, try mixing a teaspoon of this sauce with a little lime juice for a zesty, sweet and sour vibe. If you want a smoky edge, add a tiny drop of liquid smoke or a pinch of smoked paprika during the final 2 minutes of simmering.
If you want a gourmet look, use a squeeze bottle with a very fine tip to create those thin, zigzag patterns you see in high end restaurants. It's all about the presentation!
Dispelling Common Glaze Misconceptions
One of the biggest myths in the kitchen is that you need actual eel bones or extract to make a "sushi sauce" or "eel sauce." Historically, Nitsume was made by reducing the liquid used to simmer eel, but in modern cooking, the flavor profile is achieved entirely through the combination of soy, sugar, and rice wine.
You get all that savory, sea inspired depth from the kombu without needing any actual seafood components. This makes the recipe much more accessible and vegetarian friendly.
Another misconception is that all soy sauces are created equal for reductions. If you use a chemically hydrolyzed soy sauce (the kind that is often very cheap and has a long ingredient list), it won't have the natural proteins and sugars needed to create a complex glaze.
It will just taste like "salty." Always look for "naturally brewed" or "traditionally fermented" on the label. The science of fermentation is what provides the precursors for those bold, street style flavors we are chasing.
Finally,, some people think you have to use cornstarch to get a thick sauce. While cornstarch works for a quick fix, it results in an opaque, somewhat cloudy appearance and a slightly "muted" flavor. A true reduction is clear, jewel toned, and has a much sharper, more defined taste.
It takes a few extra minutes, but the results are visually stunning and much more vibrant on the palate.

Recipe FAQs
What is the sauce that goes on sushi?
It is typically a reduction called Nitsume. This savory sweet glaze is made by simmering soy sauce, mirin, sake, sugar, and kombu until it thickens into a glossy, velvety consistency.
Can sushi lower cholesterol?
No, sushi is not a cholesterol lowering food. While fish provides healthy omega-3 fatty acids, sushi often contains white rice and sweet glazes that do not contribute to lowering cholesterol levels.
What sauces typically go on sushi?
The most common are soy sauce, wasabi, and the sweet reduction known as Nitsume. These condiments are designed to complement the umami flavors in the fish and rice without overpowering the delicate ingredients.
What sauce do I eat with sushi?
Use the sweet reduction glaze for rolls or a light dip of soy sauce for nigiri. If you enjoy the savory depth of this reduction, you might also appreciate the velvety roux used in other classic Japanese dishes.
How to thicken the sauce properly?
Simmer the mixture over low heat for 15 minutes. Whisking continuously ensures the sugar dissolves and the liquid reduces into a syrupy glaze that coats the back of a spoon.
Is it true I must boil the sauce vigorously?
No, this is a common misconception. You should only bring it to a gentle boil before immediately reducing to low heat to maintain a simmer, preventing the sugars from burning.
How to infuse the best flavor?
Add a piece of kombu to the liquid during the simmering stage. This infuses the glaze with deep umami glutamates, providing the signature professional finish that clings perfectly to your rolls.
Homemade Sushi Sauce
Ingredients:
Instructions:
Nutrition Facts:
| Calories | 50 kcal |
|---|---|
| Protein | 0.8 g |
| Fat | 0 g |
| Carbs | 11.1 g |
| Fiber | 0.1 g |
| Sugar | 10.4 g |
| Sodium | 532 mg |
