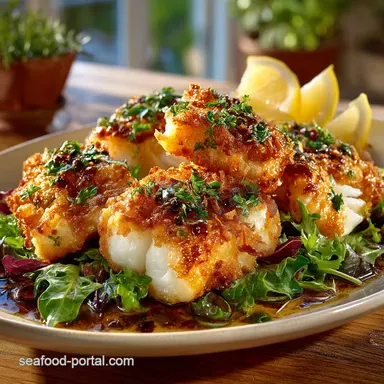
Golden Crumb Flaky Heart the Ultimate Crispy Fried Cod
- Achieving the Perfect Crackle: Why This Recipe Works
- Essential Components for the Golden Crust
- Required Equipment and Frying Safety Protocols
- Step-by-Step: Crafting Your Crispy Fried Cod
- Perfecting the Fry and Final Resting
- Troubleshooting Common Fried Fish Mishaps
- Complete the Meal: Serving Suggestions and Recipe Variations
- Recipe FAQs
- 📝 Recipe Card
Achieving the Perfect Crackle: Why This Recipe Works
There is nothing quite like the audible satisfaction of biting into flawlessly prepared Crispy Fried Cod . We’re moving beyond the disappointing, oil-logged coatings of typical attempts and focusing instead on methods guaranteed to deliver that coveted, chip shop-quality crunch.
The key to this success lies not just in the ingredients, but in the specific technique a foolproof process that ensures moisture stays in the fish and crispness adheres firmly to the exterior.
This approach elevates a simple Fried Cod dish into a masterpiece of texture and flavour, making it a standout among all Cod Fillet Recipes .
Ditching the Soggy Coating Forever
The primary culprit behind soggy fried fish is internal moisture migration combined with poor coating adhesion. When hot oil hits the surface of a wet or poorly prepared fillet, steam immediately pushes the crust away, resulting in pockets of grease and flabby coating.
To combat this, we begin by ensuring the Crispy Fried Cod Fillets are patted bone dry. Then, instead of a simple water or egg wash, we employ a buttermilk soak.
The mild acidity in the buttermilk lightly tenderizes the fish while its viscosity creates a tacky, non-slippery surface for the flour to cling to, preventing separation during the volatile cooking process.
The Science of the Double Dredge
Our secret weapon for guaranteed crispness is the "double dredge" technique. This method maximizes the thickness and rugged surface area of the coating. The first pass through the seasoned flour creates a base layer that binds to the buttermilk.
A quick second dip back into the buttermilk activates that first layer of flour, turning it into a glue. The final pass through the dry dredge mixture builds a thick, shaggy crust with maximum surface area.
This extra surface area is crucial, as it’s what turns golden brown and shattering crisp when exposed to the high heat of the oil. On top of that,, incorporating cornstarch (half a cup mixed with 1.5 cups of all-purpose flour) into the dredge significantly limits gluten development and provides a lighter, airier, and ultimately crunchier crust than flour alone.
Unlocking Restaurant Quality Crispy Fried Cod at Home
Achieving professional results in this Crispy Fried Cod Recipe is entirely dependent on attention to detail, particularly temperature management. By combining our robust double dredge with strict oil temperature monitoring (aiming for a steady 350° F or 175° C), we ensure the coating sets instantly and cooks quickly to a rich golden brown before the delicate Crispy Fried Cod Loin within has a chance to dry out.
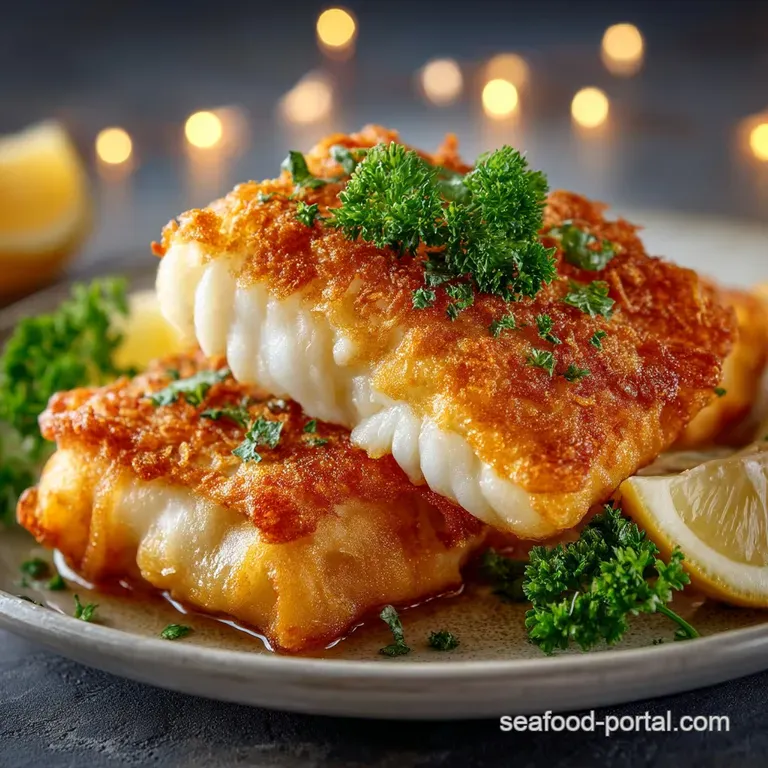
The result is a stunning contrast: a deeply golden, durable exterior protecting a perfectly steamed, moist, and flaky heart, solidifying its place as one of the very best Fried Cod Fish Recipes you can make.
Essential Components for the Golden Crust
The flavor and texture of the outer crust are just as important as the quality of the fish. The dry dredge is engineered not just for crunch, but for savory depth. We rely on 1.5 cups of all-purpose flour mixed with a substantial half cup of cornstarch for optimal lightness.
To ensure the coating puffs slightly when fried, one teaspoon of baking powder is included. Flavour is layered in with a generous tablespoon of smoked paprika, plus supporting notes from garlic and onion powder, ensuring the final product is rich, savory, and beautifully colored.
Required Equipment and Frying Safety Protocols
While deep frying might seem daunting, having the correct equipment makes the process safe and enjoyable. You will need a heavy bottomed pot, such as a Dutch oven, or a dedicated deep fryer. The wide, heavy base distributes heat evenly and prevents rapid temperature fluctuations.
Critically, you must have an instant read deep fry thermometer to monitor the oil temperature constantly. Safety protocols dictate filling the pot with oil to a maximum of one-third full (about 4 6 cups total, depending on pot size, to achieve a 2 inch depth), ensuring there is ample space for the oil to bubble without risk of overflow once the fish is added.
Selecting and Preparing Your Flaky Cod Fillets
For the best results, select four medium Cod Fillet Recipes pieces, roughly 6 to 7 ounces each, with the skin removed. If possible, opt for the thicker cuts of the loin, which hold up better to the frying time.
The most important preparation step is ensuring the fish is thoroughly dry before it even touches the buttermilk. Use paper towels to wick away all surface moisture; remember, moisture is the greatest impediment to crispness.
Mastering the Seasoned Flour Blend
Our flavorful blend is what turns simple white fish into a sensational meal. In addition to the flour and cornstarch base, we incorporate specific seasonings to build a complex profile: one tablespoon of smoked paprika provides warmth and color, while one teaspoon each of garlic powder and onion powder deliver foundational savoriness.
A combination of sea salt and fresh black pepper is added for immediate seasoning of the crust, making this the perfect shell for your Crispy Fried Cod .
The Buttermilk Soak: Key to Adhesion
The buttermilk soak serves a triple function: it subtly seasons the fish (with 1 teaspoon of salt and half a teaspoon of pepper), it provides a binder for the coating, and the 30-minute chill time aids in firming the fillet.
The optional addition of one tablespoon of hot sauce (like Frank’s Red Hot) adds flavor complexity without noticeable heat, ensuring a supremely tasty Fried Cod finish.
Must Have Utensils for Deep Frying Success
Beyond the pot and thermometer, a few key utensils guarantee successful frying. Long metal tongs are essential for carefully lowering and removing the fish. A spider strainer is also excellent for gently turning the fish and retrieving any small bits of fallen coating (which can burn and contaminate the oil).
Finally, a wire rack placed over a baking sheet is non-negotiable for draining the finished product.
Choosing the Right High Smoke Point Oil
To achieve a clean, crisp product, select a neutral oil with a high smoke point that can withstand 350° F ( 175° C) without burning. Canola, peanut, or vegetable oil are ideal choices.
You will need enough oil (approximately 4 to 6 cups) to ensure the fish is fully submerged and the temperature remains stable throughout the cooking process.
Related Recipes Worth Trying
- The Secret to Crispy Skin PanFried Salmon Brown Butter Basting — Learn how to pan fry salmon perfectly every time This pan fried salmon recipe guarantees shatteringly crispy skin and a flaky moist fillet finished with a...
- Shatteringly Crisp Fried Jumbo Shrimp with Lemon and Old Bay — Stop making greasy pub grub This is the best Fried Jumbo Shrimp recipe Our foolproof tripledredge guarantees a shattering crispy coating every time Lets cook
- The Bees Knees Hot Honey Shrimp Sticky Crispy and Perfectly Balanced — Achieve superior crunch with our Hot Honey Glazed Crispy Shrimp This easy recipe pairs spicy sweet honey chili sauce with perfectly golden jumbo prawns Stop...
Step-by-step: Crafting Your Crispy Fried Cod
This systematic process takes roughly an hour from start to finish (including the necessary 30-minute marinade and rest periods), proving that the ultimate Crispy Fried Cod Recipe is within reach for an Easy Fish Dinner .
Perfecting the Fry and Final Resting
Phase One: The Buttermilk Marinade and Initial Dredge
After patting your cod fillets dry, submerge them in the prepared buttermilk and spice marinade, and chill them for the mandatory 30 minutes. This chilling time is vital for adhesion.
Once marinated, remove a fillet, letting the excess liquid drip off, and immediately place it into the dry dredge mixture. Press the mixture firmly onto all sides to ensure a comprehensive, thick initial coat.
The Critical Second Dip and Coating Technique
Now comes the layering step: quickly dip the first coated fish back into the remaining buttermilk for just 2 to 3 seconds. This wets the flour without washing off the coating. Immediately return the fillet to the dry dredge and press firmly again.
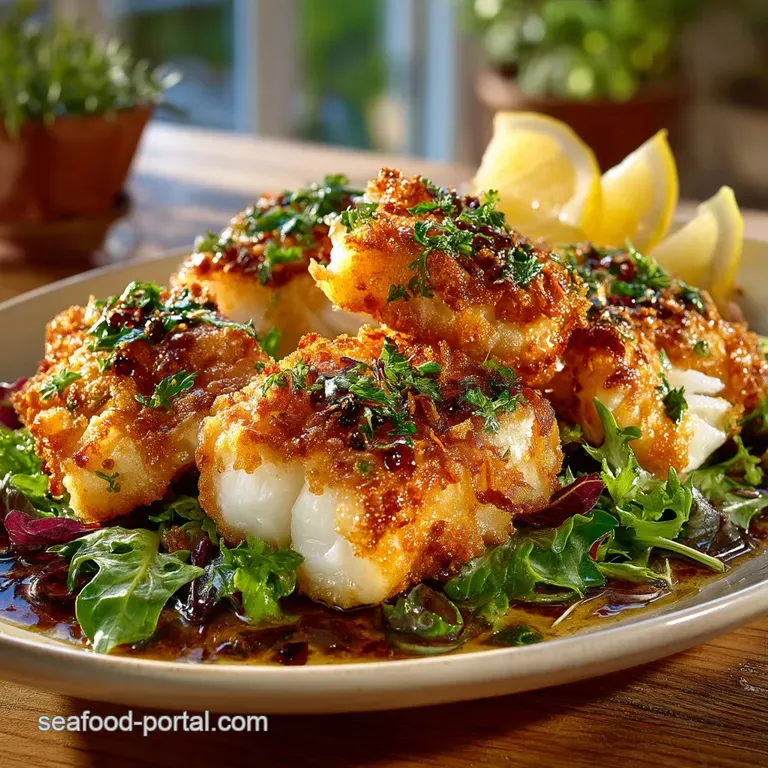
The goal is to create a thick, shaggy, and continuous crust that looks slightly uneven and rough this texture maximizes the ultimate crunch. Place these doubly coated fillets on a clean wire rack and let them rest for 10– 15 minutes while your oil heats.
This resting period allows the coating to properly adhere and ‘set,’ preventing it from falling off in the hot oil.
Monitoring Oil Temperature for Maximum Crunch
Pour the high smoke point oil into your pot and heat it to a stable temperature of 350° F ( 175° C) . Maintain this temperature rigorously. Never overcrowd the pot; fry only 2 fillets at a time.
Overcrowding causes a rapid temperature drop, resulting in greasy, less crisp fish.
Knowing When Your Cod is Perfectly Cooked
Carefully lower the fish into the hot oil using tongs. The Crispy Fried Cod will require 4 to 5 minutes of frying on each side, turning once halfway through.
The coating should be a rich, deep golden brown and the internal temperature of the cod should register 145° F ( 63° C) . The fish will be beautifully cooked through and will flake effortlessly.
The Importance of Proper Draining and Seasoning
Once cooked, use your tongs or spider strainer to remove the fish and transfer it immediately to a clean wire rack lined with paper towels underneath. Crucially, do not drain the fish directly onto paper towels; the rack allows air circulation, preventing the residual steam from making the bottom crust soggy.
While the fish is still sizzling hot, immediately sprinkle it liberally with fine sea salt or flake salt. The heat and residual oil ensure the salt adheres perfectly, maximizing flavor right out of the fryer.
Troubleshooting Common Fried Fish Mishaps
Mastering deep frying involves anticipating common issues. These expert tips will help ensure your Fish Dinner Recipes are always successful.
Preventing the Coating From Slipping Off
If the coating separates from the fish during frying, it usually means one of three things went wrong: the fish wasn't dried enough initially, the buttermilk soak was skipped or too short, or most commonly, the coated fish wasn't allowed to rest.
That final 10 to 15-minute rest period on the wire rack is non-negotiable; it creates a sturdy bond between the wet layers and the dry dredge, locking the crust in place before it hits the high heat.
Keeping Your Fried Cod Crispy After Cooling
Deep fried foods are always best eaten immediately, but if you must hold them, avoid covering them or placing them in a warm, moist container. Place the Fried Cod on a clean wire rack on a baking sheet in a low oven (around 200° F or 93° C).
For reheating leftover fish, skip the microwave entirely. A quick blast in an air fryer at 400° F ( 200° C) for 3– 5 minutes will revitalize the crust beautifully.
Complete the Meal: Serving Suggestions and Recipe Variations
Turning this excellent recipe into a full meal is simple, whether you prefer classic accompaniments or lighter, modern pairings.
Pairing Your Fish: Classic and Modern Side Dishes
For a truly traditional British fish supper, serve your Crispy Fried Cod alongside chunky, homemade oven chips, a side of rich mushy peas, and a tangy homemade tartar sauce heavy on the gherkins.
If you're looking for lighter, more modern Easy Fish Dinners , pair the richness of the fried fish with a crisp, refreshing coleslaw dressed in cider vinegar, lemon juice, and fresh dill. To drink, a crisp Pilsner or lager cuts through the richness wonderfully.
How to Adapt This Recipe for gluten-free Needs
It is straightforward to adapt this recipe for specific dietary needs. To make a gluten-free version of this Crispy Fried Cod Recipe , substitute the all-purpose flour in the dredge with a high-quality 1:1 gluten-free flour blend.
Ensure your blend contains Xanthan gum to maintain structure, and keep the cornstarch ratio the same for maximum crispness. Alternatively, for a lighter, healthier approach that still delivers crunch, lightly mist the buttermilk coated fish with oil spray and cook it in an air fryer at 400° F ( 200° C) for 10 to 12 minutes, flipping halfway.
Recipe FAQs
My batter often slides off the fish. How can I ensure I get truly Crispy Fried Cod?
Good heavens, that's a common frying faux pas! The secret to chip shop quality is twofold: dryness and resting. Firstly, pat your cod bone dry before the buttermilk soak. Secondly, the 'double dredge' ensures maximum adhesion, but you must let the coated fish rest on a wire rack for at least 10 15 minutes before it hits the oil.
This resting time allows the flour to fully hydrate and bond to the fish, making the coating tenacious.
What’s the best way to reheat leftovers so they don't taste like old boots?
If you put it in the microwave, you'll ruin that lovely crunch, guaranteed. The best way to resurrect leftover fried cod is in a very hot oven or an air fryer. Pop the fish on a rack in a 400°F (200°C) oven for about 8 10 minutes until piping hot and the crust is revitalised.
This draws out any residual moisture and makes the coating shatteringly crisp again just like when you first fried it!
Do I really need a thermometer, and what happens if my oil is too hot or cold?
Absolutely, a thermometer isn't optional for deep frying; it's the difference between a proper supper and a greasy disappointment. If the oil is too cold (below 325°F), the fish absorbs oil and becomes greasy before the crust can set.
If it’s too hot (above 375°F), the outside burns to a crisp while the centre remains disappointingly raw. Stick religiously to 350°F (175°C) for perfection.
I'm trying to be healthier. Can I make this in the air fryer instead of deep frying?
You can certainly get a delightfully crunchy texture without all the fat! Follow the exact same double dredge procedure. Before cooking, mist the coated fish generously with cooking oil spray (this helps the coating brown). Air fry at 400°F (200°C) for 10 12 minutes, flipping halfway through.
While it won’t quite have the deep, decadent flavour of a properly fried fillet, it’s a marvellous, guilt free alternative.
Is buttermilk necessary for the marinade, or can I use regular milk?
The buttermilk is crucial for two reasons. Firstly, its acidity lightly tenderises the cod, ensuring a supremely flaky interior. Secondly, its thickness and tacky quality create the perfect sticky surface for the flour to adhere to during the initial dredge.
If you’re caught short, simply mix 1 cup of whole milk with a tablespoon of vinegar or lemon juice and let it curdle for five minutes a proper Brit’s work around!
Crispy Fried Cod With Double Dredge