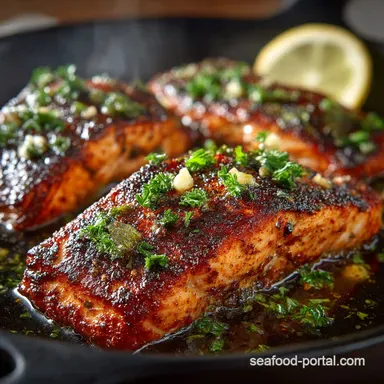
Cast Iron Charmer 20Minute Smoky Blackened Salmon Fillets
- Unlocking Deep Flavour: The Magic of Stovetop Blackening
- Why This Quick Blackened Salmon Recipe Will Become Your Weeknight Hero
- Assembling Your Aromatic Blackening Rub Components
- Essential Gear: Tools Needed for Flawless Execution
- The Preparation Phase: Coating for Maximum Crust Adhesion
- Achieving the Signature Sear: Stovetop Mastery Step-by-Step
- Perfecting the Internal Flake: Timing the Cook
- Elevation Your Plate: Serving Suggestions Beyond the Basics
- Troubleshooting and Tips for Handling High Heat Cooking
- Storage Insights: Keeping Leftover Blackened Salmon Flavorful
- Recipe FAQs
- 📝 Recipe Card
Unlocking Deep Flavour: The Magic of Stovetop Blackening
There is something undeniably primal and deeply satisfying about a perfectly seared piece of fish, especially when it’s enveloped in a dark, heavily spiced crust. This preparation, known as blackening, isn't about burning the food; it’s a high heat cooking technique that locks in moisture while caramelizing the complex spices applied to the surface.
Today, we are diving deep into the Best Salmon Recipe for achieving this textural masterpiece right on your own stovetop. Forget fussy oven techniques; we’re aiming for speed, flavour impact, and a crust that shatters beautifully with every bite of this Blackened Salmon .
Why This Quick Blackened Salmon Recipe Will Become Your Weeknight Hero
If you're looking for an Easy Blackened Salmon solution that feels restaurant quality but requires minimal cleanup, you’ve found it. This method transforms humble salmon fillets into something truly spectacular in under 25 minutes total.
It’s robust enough for company yet fast enough for a Tuesday evening when time is tight.
Demystifying the 'Blackened' Technique: More Flavour, Less Smoke
The term "blackened" often frightens home cooks because of the intense smoke historically associated with traditional Cajun methods, often involving ovens or large amounts of butter flaring up. Our stovetop adaptation manages this beautifully.
The goal is to create a heavily seasoned, dark crust using a blend of spices primarily paprika that darkens dramatically under intense heat, creating that signature visual appeal and complex, earthy flavour profile.
It is crucial to understand that the dark colour comes from the spices charring gently, not the salmon burning.
The Essential 20-Minute Promise: Speed Meets Culinary Sophistication
With only 10 minutes required for prep which mainly involves mixing the spices and coating the fish and roughly 10 minutes of active cooking time, this Weeknight Dinner Salmon comes together faster than most takeout options.
This speed is thanks to the high thermal conductivity of a cast iron pan, which transfers heat directly and aggressively to the exterior of the fish.
A Sensory Preview: What to Expect from the Perfect Crust
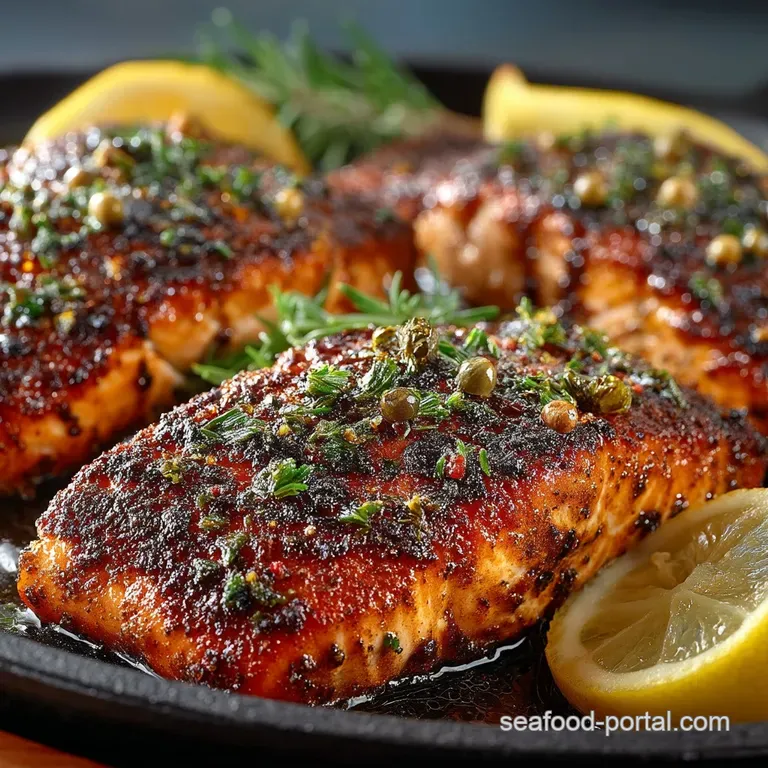
When you master this technique, the sensory experience is multi layered. First, you get the intoxicating aroma of toasted spices paprika, garlic, and thyme mingling in the air. Next, the visual impact: a deep mahogany to ebony crust.
Finally, the texture: a slight, pleasant resistance from the crust giving way instantly to moist, flaky, perfectly cooked fish inside. It is an excellent base, easily adaptable for those wanting to try Blackened Salmon Tacos later in the week.
Assembling Your Aromatic Blackening Rub Components
The heart and soul of any great Blackened Salmon Seasoning lies in the quality and balance of its components. We are aiming for depth, warmth, and a slight kick, ensuring that the final crust is rich without being overwhelmingly spicy.
To craft this signature blend for four generous 6-ounce fillets, you will whisk together 2 tablespoons of robust smoked paprika this is non-negotiable for that deep, smoky background note. Complementing this, add 1 tablespoon of garlic powder and 1 teaspoon each of onion powder, dried thyme, and dried oregano.
For warmth and heat, incorporate about ½ teaspoon of cayenne pepper (adjust this carefully based on your spice tolerance) and finish the dry mixture with 1 teaspoon of kosher salt and ½ teaspoon of freshly ground black pepper.
Whisk these elements thoroughly in a small bowl until they are completely uniform in colour and consistency.
Essential Gear: Tools Needed for Flawless Execution
Success in high heat cooking is often dictated by your equipment. While you can use a heavy stainless steel pan, the undisputed champion for this job is cast iron.
Crafting the Signature Spice Blend: Ratios That Matter
As detailed above, the ratios are designed to create a thick coating that adheres well to the fish without being so dense that it burns before the fish cooks through. Using high-quality, fresh spices is vital; stale spices will only steam rather than char.
We are using butter as the binder, which, when mixed with the spices, forms a thick paste that locks onto the salmon’s surface.
Selecting the Right Salmon Fillets for Optimal Results
For the best results when making Blackened Salmon , choose fillets that are relatively uniform in thickness, ideally centre cut portions around 6 ounces each.
Whether you choose skin-on or skin off depends on your preference; skin-on offers slightly more protection against high heat on the flesh side, but skin off allows for a more even coating all around. Ensure the fish is fresh and firm before starting the preparation.
Understanding the Right High Smoke Point Fat
While the seasoning is bound with melted butter which adds invaluable flavour we need a neutral, high smoke-point fat for the actual searing process. Adding 2 tablespoons of a neutral oil like canola, grapeseed, or avocado oil directly to the screaming hot pan is what facilitates the aggressive sear without immediately burning the oil before the fish is added.
The Preparation Phase: Coating for Maximum Crust Adhesion

This step is where the magic begins to adhere to the fish. First, take your salmon fillets and use several sheets of paper towel to pat them aggressively dry. I cannot stress this enough: any residual moisture on the surface will turn to steam when it hits the hot pan, preventing that beautiful crust from forming.
Next, brush every surface of the fillet liberally with 4 tablespoons of melted unsalted butter. Finally, take your prepared spice mix and press each buttered fillet firmly into the mixture, turning and coating thoroughly. You want a thick, slightly chunky layer of seasoning sticking fast to the flesh.
Related Recipes Worth Trying
- The Proper Flake Bright Herby Flaky Salmon Salad — Ditch the dry stuff This Flaky Salmon Salad uses fresh dill and bright lemon to create a sophisticated creamy but light lunch A smashing recipe
- Quick and Easy Sushi Bake Foolproof Salmon Casserole — Need a satisfying food fix fast This Quick and Easy Sushi Bake uses salmon and crab for a creamy flavourpacked dish Perfect for easy sushi recipes for beginners
- The Best Oven Baked Salmon Recipe 15Minute Flaky Perfection — Stop serving dry fish This Oven Baked Salmon Recipe uses fresh lemon and dill for unbelievably moist fillets Perfect for healthy dinners salmon in just 25...
Achieving the Signature Sear: Stovetop Mastery step-by-step
This is where technique separates a good meal from a great one. We rely on extreme heat for rapid crust development. Start by placing your cast iron skillet over high heat. Add your 2 tablespoons of high heat oil and let it preheat until it shimmers slightly, perhaps just starting to show the first wisps of smoke.
This indicates the pan is ready to accept the fish.
How to Thoroughly Pat Dry for that Deep Colour
Reiterating the importance of dryness: a bone dry surface interacts with the hot oil to immediately begin the Maillard reaction, which is crucial for the deep colour we seek. Moisture simply cools the pan and steams the surface, leading to a pale, gummy coating instead of a true blackened crust.
Preheating Protocols: Getting Your Pan Fiercely Hot
Do not rush this part. Cast iron takes time to reach and maintain its searing temperature. If you add the seasoned salmon before the pan is hot enough, the butter binder will melt away before the spices can set, resulting in your Blackened Salmon Seasoning floating sadly in oil rather than clinging to the fish.
Flipping Strategy: When to Turn Your Blackened Salmon
Carefully place the seasoned fillets into the hot pan, presentation side down first. Leave them utterly undisturbed for 3 to 4 minutes. You will hear a vigorous sizzle this is good.
Do not attempt to move them until you see the edges of the seasoning darkening significantly and the fillet releasing easily from the pan. Once released, flip gently. At this stage, you may reduce the heat slightly to medium high to ensure the centre cooks without incinerating the crust you just built.
Perfecting the Internal Flake: Timing the Cook
After flipping, the residual heat in the pan and the initial sear will finish the cooking process quickly. For 1 inch thick fillets, this usually takes another 3 to 5 minutes on the second side.
The key to keeping this gluten free Blackened Salmon moist is using an instant read thermometer. Aim for an internal temperature of 135° F ( 57° C) if you prefer medium rare, allowing it to rise slightly during resting.
Pull it off the heat immediately when it hits that mark.
Elevation Your Plate: Serving Suggestions Beyond the Basics
This intensely flavoured fish deserves sides that can either complement its boldness or provide a refreshing counterpoint.
Pairing Recommendations: Sauces That Complement the Spice
While the flavour is strong enough to stand alone, a cool, creamy sauce is fantastic for balancing the warm spice. A simple, bright lemon dill yogurt sauce works wonders, providing tang and coolness. Alternatively, a fresh squeeze of lime juice right before serving adds necessary acidity.
Smoke Management: Keeping Your Kitchen Ventilated During Blackening
Since we are cooking at high temperatures, ventilation is paramount. Turn on your extractor fan to its highest setting, crack open a nearby window, and if possible, stand near an open door.
Be patient; managing the smoke is part of the process that allows us to achieve that authentic crust without setting off detectors.
Nutritional Snapshot: What You’re Eating
This dish is inherently healthy. Salmon is packed with Omega-3 fatty acids, making this a satisfying meal rich in protein. The majority of the calories come from the healthy fats in the fish itself, with the spice rub contributing minimal overall caloric load, making this a great choice for any balanced diet plan.
Making it Your Own: Simple Variations on the Classic Rub
If you find yourself making this often, feel free to experiment. For a smokier, slightly sweeter take, substitute half the smoked paprika with sweet paprika and add 1 teaspoon of brown sugar to the mix it will promote even deeper caramelization.
For an extra layer of depth, you can replace the cayenne with smoked chipotle powder to lean into that profound smoky heat profile.
Troubleshooting and Tips for Handling High Heat Cooking
If your crust is burning before the fish is done, your heat is too high, or your fillets are too thin. Use a slightly lower heat after the initial 3-minute sear on the first side, or, better yet, reduce the cooking time slightly and finish the fish in a 400° F oven for 3 minutes if you struggle to regulate stovetop consistency.
Also, remember to never overcrowd the pan; cook in batches if necessary to maintain that searing temperature.
Storage Insights: Keeping Leftover Blackened Salmon Flavorful
Leftover Blackened Salmon stores surprisingly well. Allow the cooked fish to cool completely, then store it in an airtight container in the refrigerator for up to three days.
The best way to enjoy leftovers is to flake the cold fish into crisp lettuce wraps or utilize it in those aforementioned Blackened Salmon Tacos the next day, served with fresh cabbage slaw.
Reheating should be done very gently, perhaps in a low oven or a non-stick pan with a tiny bit of oil, just enough to warm it through without hardening the texture.
Recipe FAQs
Why does my Blackened Salmon smoke so much when I cook it?
That’s completely normal, mate it means you're doing it right! Blackening requires screaming hot cast iron to create that signature crust quickly, and high heat inevitably produces smoke from the spices and fat.
Make sure your extractor fan is on full blast and perhaps crack a window open. If you’re worried about the smoke alarm going off, try cooking on a medium high setting rather than maximum, though it will take a smidge longer to achieve that dark crust.
I’m worried about burning the spices; how do I get a crust without making the Blackened Salmon taste bitter?
The key is speed and ensuring the butter/oil coating is thick enough to protect the spices from direct, prolonged contact with the pan bottom.
Ensure your fillets are well coated in butter before dredging them heavily in the spice mix. Cook hot and fast usually only 3 4 minutes per side and aim for an internal temperature of 140°F (60°C).
If the spices look like they are turning black too fast, reduce the heat slightly for the second side.
Can I make the blackening spice mix for this Blackened Salmon recipe ahead of time?
Absolutely, that’s a cracking idea for saving time on a busy evening!
You can mix up all your dry spices and store them in an airtight container in a cool, dark cupboard for up to three months. Just remember that the flavour will be best if used within a month, much like a decent brew.
What temperature should the salmon be internally, and what happens if I overcook it?
For that perfect, flaky texture, aim for an internal temperature of 140°F to 145°F (60°C to 63°C) when tested with a thermometer inserted into the thickest part.
Overcooked salmon, especially when prepared this way, tends to dry out and become tough. It's a real shame when you’ve managed such a beautiful crust, so resting it for a couple of minutes after it comes off the heat is also vital for carrying on the cooking gently.
I don't have a cast iron skillet; what's the best substitute for making Blackened Salmon?
A cast iron skillet is the gold standard because it retains heat so brilliantly, but a heavy bottomed stainless steel frying pan will work in a pinch.
Just be aware you might need to monitor the heat a little more closely. Avoid non-stick pans, as they often can’t handle the high temperatures required for a true sear without damaging the coating.
Smoky 20minute Blackened Salmon