The Flawless Poach How to Achieve the Perfect Runnyyolked Egg Every Single Time
- Banish the Bunches: Unlocking the Secret to Seamless Egg Poaching
- Why This Method Guarantees a Silky Cloud Texture
- The Essential Arsenal: What You Need for Impeccable Results
- Step-by-Step Choreography: The Method for Unfurling Perfection
- Creating the Ideal Poaching Environment
- Troubleshooting Common Poaching Pitfalls
- Beyond the Basics: Serving Suggestions and Storage Secrets
- Recipe FAQs
- 📝 Recipe Card
Banish the Bunches: Unlocking the Secret to Seamless Egg Poaching
Welcome to the kitchen! Learning to poach an egg perfectly is one of those culinary rites of passage a real game changer that elevates everything from a simple piece of toast to a fancy brunch centerpiece.
It might seem like something only a Michelin starred chef can manage, but I promise you, with a few clear pointers, you’ll be turning out silky smooth, runny yolked beauties in no time. Forget those wispy, messy white trails!
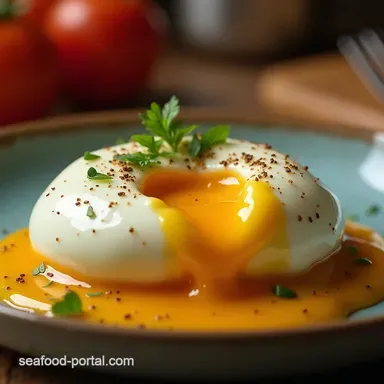
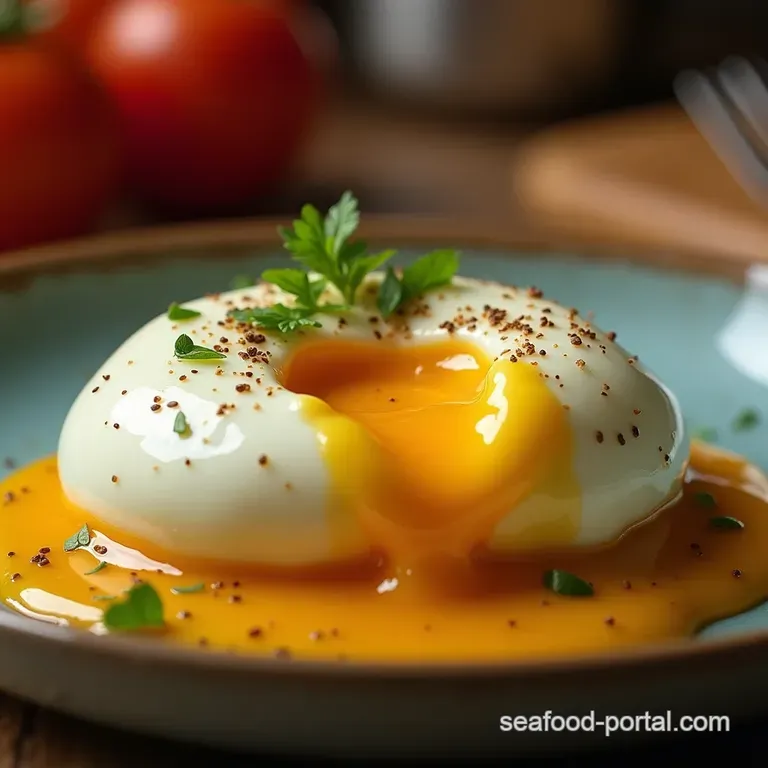
This recipe is your essential guide to producing the quintessential Poached Egg : a tightly wrapped, cloud like white encasing a molten, golden yolk. We’ll demystify the process, whether you prefer the traditional vinegar bath or the modern sieve method.
It’s the perfect cornerstone for Eggs Benedict, or just a glorious start to a Sunday morning fry-up.
Why This Method Guarantees a Silky Cloud Texture
The key to success lies not just in the cooking, but in the preparation preceding the immersion. We are aiming for a cohesive shape, and that means addressing the weakest link: the thin, watery part of the egg white that tends to feather out upon hitting the hot water.
This method detailed below in our Poached Egg Tutorial —relies on careful selection and a little mechanical intervention to ensure the albumen sets immediately and neatly.
The Culinary Rite of Passage: Mastering the Poached Egg
This process is an Easy difficulty level skill once you know the trick. While traditionally viewed as tricky, the steps outlined here especially the use of a sieve take away the guesswork associated with weak egg whites, making the actual Poached Eggs How To Make process remarkably straightforward for a novice cook.
In about 10 minutes total, including a mere 5 minutes of prep time for water setup and egg cracking, you will gain a skill that lasts a lifetime.
Elevating Brunch: What a Perfect Poach Can Do For Your Plate
When you achieve that perfect, shimmering dome, you unlock incredible culinary versatility. Imagine slicing into that perfectly cooked sphere, watching the rich, vibrant yolk flow onto avocado toast or melting into the crisp edges of smoked salmon.
This single component transforms basic meals into sophisticated fare, and the resulting Poached Egg Calories count remains impressively low, making it a healthy protein powerhouse.
Dispelling the Myths: It’s Easier Than You Think
Many home cooks believe they need specialized gadgets, like a Poached Egg Maker , to achieve good results. While tools exist, they are unnecessary. We achieve superior results using common kitchen items paired with fresh ingredients.
Understanding the physics of coagulation is far more useful than buying any single device; it’s about temperature control and managing the structure of the white.
The Essential Arsenal: What You Need for Impeccable Results
To begin crafting your Perfect Poached Eggs , you need to gather your components and tools. Remember, this foundational recipe is highly adaptable and yields one perfect egg per cycle, making batch cooking simple.
Crucial Components: Selecting the Freshest Eggs Possible
Quality really counts here. You will need 1 to 4 large eggs for the recipe, ensuring they are as fresh as you can possibly find. Older eggs have whites that have broken down and spread too thinly, making them impossible to contain neatly.
For this method, if you can’t source farm fresh eggs, aim for those purchased within the last week.
The Water & Vinegar Ratio: A Non-Negotiable Measurement
You’ll need about 6 cups (1.4 litres) of water in your saucepan, enough to allow the eggs to float freely. To this, we must add 1 teaspoon (5 ml) of white vinegar. This acidity is crucial because it helps the proteins in the egg white coagulate faster upon contact with the hot liquid, minimizing the chance of those wispy strands forming.
Necessary Gear: Tools Beyond the Pot
Beyond your medium saucepan (deep enough for a good float), the most critical pieces of equipment are a small fine mesh sieve and a slotted spoon. The sieve is the secret weapon in our How To Make A Poached Egg guide, ensuring only the firmest part of the white enters the water.
A small bowl or ramekin is also needed to hold the egg safely before it meets the water.
Related Recipes Worth Trying
- How To Poach Eggs Perfectly Every Time Runny Yolk — Stop wrestling with wispy whites Learn the foolproof technique for perfect poached eggs with a gloriously runny yolk Essential tips for your best brunch spread
- Easy Mediterranean Baked Feta Eggs Recipe Ready in 40 Mins — Forget the fuss This easy baked feta eggs recipe delivers sundrenched Greek flavour for brunch or breakfast Perfectly runny yolks guaranteed Find out how to...
- Foolproof Baked Feta Eggs Recipe Easy Brunch Perfection — Master these simple Baked Feta Eggs in under 35 minutes A foolproof vegetarian breakfast bursting with sunripened tomatoes Get the creamy texture now
Step-by-step Choreography: The Method for Unfurling Perfection
This Poached Egg Recipe is best executed with calm precision. We separate the process into two distinct phases: preparation and the actual poaching.
Creating the Ideal Poaching Environment
First, fill your saucepan with the water and bring it to a gentle simmer this is vital. We are looking for small, gentle bubbles rising slowly from the bottom, not a furious, rolling boil. A rolling boil will batter the delicate egg apart. Once shimmering, stir in your teaspoon of white vinegar.
Pre-Poaching Prep: Cracking and Straining the Egg Whites
This step removes the watery outer albumen, which is responsible for all those messy trails. Gently crack one egg into the fine mesh sieve set over a clean bowl. Allow the egg to sit for about 30 seconds; you will physically see the very thin, watery white drip away.
Once it stops dripping, gently slide the now-concentrated egg from the sieve into a small ramekin. Repeat this for all eggs you plan to cook in that batch.
The Gentle Vortex: Mastering the Water Swirl Technique
If you are poaching just one egg, you can skip this, but for multiple eggs, or just to ensure the neatest shape, use a wooden spoon to stir the simmering water vigorously in one direction to create a gentle whirlpool or vortex.
Once the swirl is established, gently slide the egg from its ramekin directly into the centre of that swirling motion. The motion helps the water immediately wrap the remaining whites neatly around the yolk.
Timing Is Everything: Knowing When to Retrieve Your Poached Egg
Once the egg is settled in the water, stop stirring and reduce the heat slightly to maintain a gentle simmer. Poach undisturbed for precisely 3 to 4 minutes for a perfectly runny yolk. If you prefer a slightly firmer yolk, allow it another 30 seconds.
Use your slotted spoon to gently lift the cooked egg from the water. Immediately dab the bottom of the spoon onto a clean paper towel to wick away any clinging moisture before seasoning with salt and pepper and serving immediately.
Troubleshooting Common Poaching Pitfalls
Even the best chefs occasionally run into trouble. Knowing these quick fixes can save your brunch plans.
When Whites Fray: Fixing Stringy Egg Whites Mid-Poach
If you see thin streamers of white escaping, this almost always points to two issues: either the water is boiling too vigorously, or the egg isn't fresh enough. If the water is too hot, immediately lower the heat.
If you notice the wisps are excessive, you can gently use your slotted spoon to nudge them toward the centre, encouraging them to adhere to the main body of the white, though this is fiddly. The best fix is prevention via the sieve method!
Nutritional Snapshot: The Power of the Poached Egg
A plain large poached egg contains approximately 72 kcal, offering a fantastic 6 grams of high-quality protein with only about 5 grams of fat. This makes it an exceptionally nutrient dense food source, whether you are aiming for a low-carb diet or simply looking for a clean protein boost.
Make-ahead Magic: Can You Prepare Poached Eggs in Advance?
Yes, you absolutely can! To make ahead, poach the eggs until they are just underdone (about 3 minutes). Transfer the cooked eggs immediately into a bowl of ice water to stop the cooking process. Store them submerged in cold water in the refrigerator for up to two days.
Before serving, gently reheat batches by submerging them in hot (but not boiling) water for about 30 seconds until warmed through.
Flavor Variations: Infusing the Poaching Liquid
While water and vinegar work perfectly, you can create an incredible flavour base by substituting the poaching liquid entirely. For a sophisticated twist, gently poach the eggs in simmering, seasoned chicken or vegetable stock instead of plain water.
This imparts a deeper, savoury base note directly into the albumen of the Poached Egg .
Beyond the Basics: Serving Suggestions and Storage Secrets
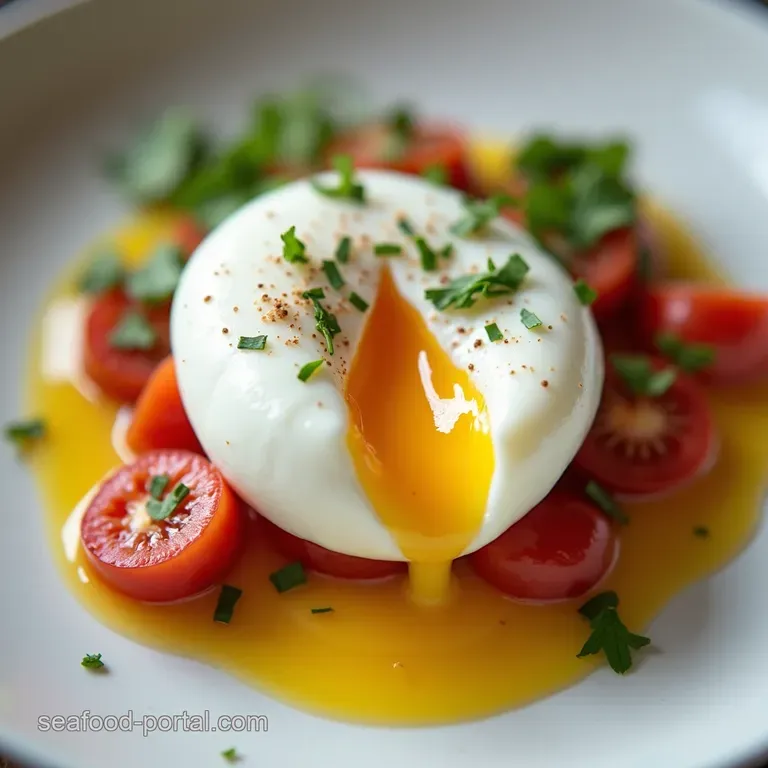
Once mastered, the poached egg is ready for its starring role. The Classic is, of course, Eggs Benedict served atop a toasted English Muffin with Canadian bacon and lashings of homemade Hollandaise sauce.
For a quicker, healthier option, serve it simply on thick, buttered sourdough toast sprinkled with finely chopped chives and coarse sea salt. For a lighter presentation, place the finished egg on a bed of lightly dressed bitter greens, like rocket, ensuring the yolk breaks to dress the leaves when cut open.
Enjoy this wonderful, foundational cooking skill!
Recipe FAQs
Why do my poached eggs always turn into wispy white messes in the water?
Ah, that's a classic kitchen conundrum! This usually happens because your egg whites aren't fresh enough, or you’re using water that’s boiling too vigorously, like the M25 motorway at rush hour.
Make sure your eggs are super fresh, and your water is just simmering gently think soft bubbles, not a raging torrent.
Is using vinegar really necessary for a good poached egg, or is that just old wives' tales?
It's definitely not just folklore; vinegar is a brilliant little trick! The acidity helps the egg white proteins set much faster when they hit the hot water, preventing them from dissolving into feathery bits.
If you skip it, be sure to use the fine mesh sieve trick to drain off the thin, watery white first that’s your insurance policy!
How can I tell when my poached egg is done without cutting into it?
For a perfect, runny yolk, aim for about 3 to 4 minutes in simmering water. You can gently prod the egg white with your slotted spoon; if it feels set and firm but still slightly jiggly in the centre, you’ve nailed it.
If it feels completely solid all over, you’ve overcooked it and it’s heading for a sad, solid yolk.
I’m making a big batch for brunch how do I keep poached eggs warm without overcooking them?
The professional trick here is making an ice bath as soon as they are perfectly poached, plunge them into a bowl of ice water to halt the cooking process immediately. When you’re ready to serve, simply pop them into a pot of hot (but not boiling!) water for about 30 seconds to warm them right through again.
Can I freeze leftover poached eggs, and if so, how should I store them?
While they are best eaten immediately, you absolutely can freeze them for when you fancy a posh breakfast later! Chill the fully cooked eggs first, then place them on a baking sheet to freeze individually before transferring them to a sealed container.
Reheat them gently in a little hot water don’t microwave them, or you’ll have a yolk explosion!
Perfect Poached Egg Guide