The Perfect Poach Foolproof Eggs for the Ultimate Brunch
- Demystifying the Dip: Why Poached Eggs Reign Supreme at Brunch
- The Secret to Silky Whites: What Makes This Technique Unbeatable
- Assembling Your Poaching Arsenal: Essentials and Equipment
- The Masterclass: Step-by-Step Execution for Ideal Poached Eggs
- Techniques to Contain Chaos: Preventing Wispy Whites
- Troubleshooting Common Poaching Pitfalls
- Creative Ways to Feature Your Perfectly Poached Eggs
- Recipe FAQs
- 📝 Recipe Card
Demystifying the Dip: Why Poached Eggs Reign Supreme at Brunch
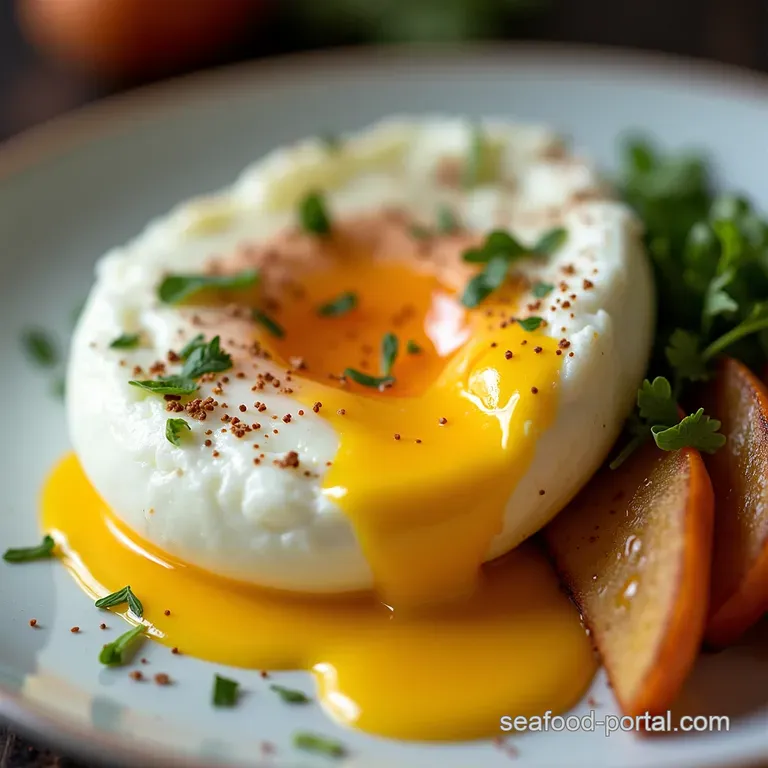
Forget those sad, wispy excuses for poached eggs you might have wrestled with before. This guide strips back the mystery to reveal the foolproof technique for achieving that beautifully contained, silky egg white cradling a molten gold centre.
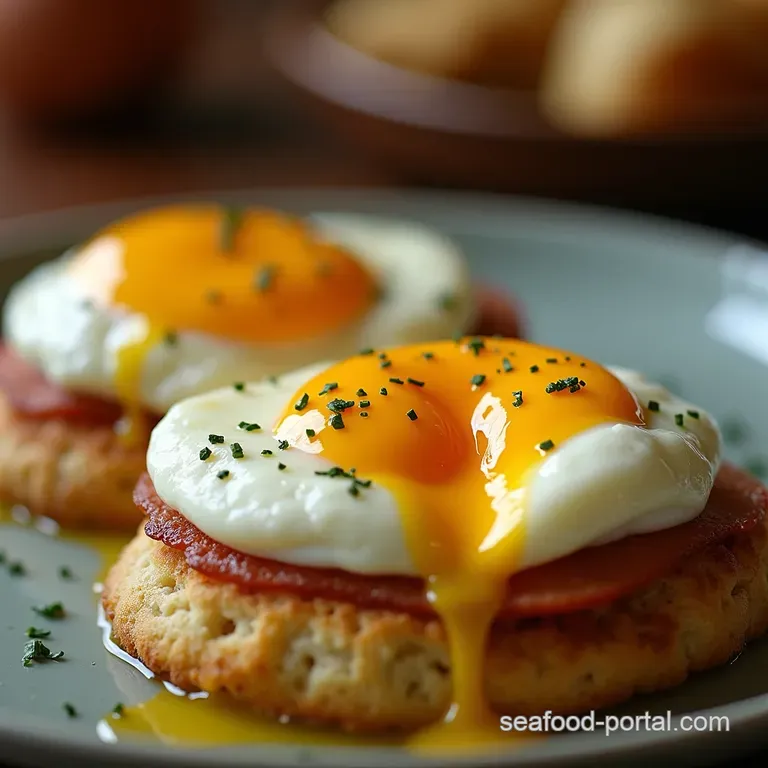
It’s a classic preparation, perfect for elevating everything from a simple piece of toast to a full blown Eggs Benedict. It’s brunch royalty, mate! Mastering the Poached Eggs Recipe is a rite of passage for any home cook looking to up their breakfast game.
The appeal lies in the simplicity of the ingredients just water, vinegar, and an egg yet the execution demands precision, rewarding you with texture contrast that frying simply cannot replicate.
The Secret to Silky Whites: What Makes This Technique Unbeatable
The beauty of this method lies in cooking the egg directly in hot liquid, allowing the albumen (the white) to set gently and evenly around the yolk without the introduction of added fats like butter or oil. This results in a clean flavour profile that lets the freshness of the egg truly shine through.
When you learn How To Poach Eggs correctly, you unlock an incredibly versatile component for countless Brunch Spread Recipes .
Beyond the Fry-Up: Elevating Your Breakfast Game
While a fried egg offers crispy edges and straightforward cooking, the Runny Yolk Poached Eggs deliver something far more elegant. The soft, tender white acts as a delicate casing, and when pierced, the warm, rich yolk cascades out, creating its own luxurious sauce for whatever it rests upon.
This inherent elegance is why they remain a staple in high end breakfast services globally.
The Anatomy of a Flawless Poach: Setting Expectations
To achieve that picture perfect globe, we must understand what we are fighting against: the thin, watery outer layer of the egg white that spreads into ragged strands when submerged in hot water. Our goal is rapid coagulation of this outer layer, holding the thicker inner white close to the yolk.
This is where technique, specifically preparation and temperature control, becomes vital to producing Perfect Poached Eggs .
Why Freshness is Non-Negotiable for Perfect Poached Eggs
Let’s be unequivocally clear: fresh eggs are the foundation of success here. As an egg ages, the albumen naturally loses viscosity, becoming watery. Older eggs spread out into those regrettable, wispy clouds in the poaching liquid.
For superior results in your Poached Eggs How To Make journey, always opt for the freshest eggs available; this single factor dramatically reduces complexity and increases success rates.
Assembling Your Poaching Arsenal: Essentials and Equipment
To successfully tackle this culinary manoeuvre, having the right tools on hand streamlines the process immensely. Remember, while the ingredient list is short, the equipment ensures we control the environment for the delicate egg.
Essential Gear Checklist for Seamless Egg Preparation
For a single serving, you will need two large, very fresh eggs, ideally cracked individually into a small, fine mesh sieve set over a bowl before cooking. This crucial step allows the thin, watery outer whites to drain away, guaranteeing a cleaner, more contained final product.
Following the strain, transfer the egg into a small ramekin or teacup this makes lowering the egg into the water much safer than pouring directly from a large bowl. A slotted spoon and a paper towel lined dish for draining the finished product complete the setup.
Choosing the Right Pot Dimensions for Optimal Water Flow
The depth of your poaching liquid matters significantly. You want sufficient depth at least three inches of water so the egg can sink naturally without immediately hitting the bottom of the pan, which can cause scorching or tearing.
A medium saucepan or deep skillet works perfectly, as it allows for a gentle, contained simmer across the surface area needed.
Vinegar vs. Lemon: Selecting Your Acidity Ally
A small addition of acid to the poaching water is non-negotiable for ensuring quick setting. We recommend one tablespoon of distilled white vinegar per four cups of water. The acid lowers the pH of the water, causing the proteins in the egg white to coagulate faster upon contact, effectively locking the shape in place.
If vinegar is undesirable, a squeeze of fresh lemon juice can serve as an effective substitute, though the vinegar tends to be less flavour intrusive.
Related Recipes Worth Trying
- Easy Mediterranean Baked Feta Eggs Recipe Ready in 40 Mins — Forget the fuss This easy baked feta eggs recipe delivers sundrenched Greek flavour for brunch or breakfast Perfectly runny yolks guaranteed Find out how to...
- Foolproof Baked Feta Eggs Recipe Easy Brunch Perfection — Master these simple Baked Feta Eggs in under 35 minutes A foolproof vegetarian breakfast bursting with sunripened tomatoes Get the creamy texture now
- Easy Butter Poached Shrimp for Garlic Bliss in 20 Minutes — Whip up restaurantquality Easy Butter Poached Shrimp for a quick weeknight treat This Garlic Butter Shrimp Appetizer is ready in 20 Get the recipe now
The Masterclass: step-by-step Execution for Ideal Poached Eggs
Now that our station is prepared, it’s time to dive into the execution. This process, when followed precisely, turns the intimidating task of Poaching Eggs Time management into a simple rhythmic activity.
For two eggs, allocate about 10 minutes total, with the actual cooking time being a swift 3 to 4 minutes each.
First, fill your pot with water to that required depth and add a pinch of fine sea salt along with your chosen acid. Bring the water up to temperature and this is critical to a bare simmer.
This means the surface is just beginning to tremble, showing only tiny bubbles; a full, rolling boil will tear the delicate whites apart.
Next, focus on the egg preparation. Crack your first egg into the fine mesh sieve over a bowl. Let it sit for 30 seconds to drain the watery exterior. Then, gently tip that perfectly strained egg into a small teacup. Repeat with the second egg.
With the water gently simmering, use a spoon to create a gentle vortex or whirlpool in the centre of the pan. Carefully lower the cup right to the surface of the water and gently slide the egg into the centre of that swirling current. The motion helps wrap the white around the yolk immediately.
Techniques to Contain Chaos: Preventing Wispy Whites
Containment is the key differentiator between amateur and expert results. Mastering these small adjustments separates those achieving Easy Poached Eggs from those battling perpetual egg clouds.
Temperature Control: Achieving the Perfect Simmer, Not a Boil
As mentioned, temperature is everything. Aim for a reading between 180° F and 190° F ( 82° C to 88° C). If the water is actively boiling, reduce the heat immediately.
If it’s too placid, raise it slightly. We need constant, gentle movement, not violent agitation.
The Swirl Debate: Do You Actually Need That Vortex?
While some purists argue that a vortex isn't strictly necessary if the egg is perfectly fresh and strained, creating a gentle swirl is highly recommended for beginners. It provides that initial, beneficial wrap around the egg before the heat takes over, significantly helping to shape the Perfect Poached Eggs .
Once the egg is in, stop stirring.
Timing is Everything: Knowing When to Retrieve Your Eggs
The standard Poached Eggs Time for a delightfully runny yolk is 3 to 4 minutes. Use your timer religiously. If you prefer slightly firmer whites but still want that molten centre, push it to 4 minutes.
You can test doneness by gently nudging the egg with your slotted spoon; the white should feel firm, but the yolk beneath should still register movement.
The Gentle Lift: Draining Excess Water Without Damage
Once cooked, use your slotted spoon to carefully lift the egg out. Immediately transfer it to a separate shallow dish lined with a paper towel. This brief contact absorbs the residual water clinging to the outside, preventing your toast or sauce from becoming diluted.
Season with a grind of pepper and salt right at this stage.
Troubleshooting Common Poaching Pitfalls
If your first attempt results in a sad, feathery mess, don't despair it usually points to one of two common issues. If the whites spread widely, your eggs were likely not fresh enough, or your water temperature was too low, failing to set the outer layer quickly.
If the whites are torn and ragged despite using fresh eggs, the water was almost certainly boiling too aggressively, physically tearing the delicate protein structure apart. Adjust your heat next time, and remember the sieve trick!
Creative Ways to Feature Your Perfectly Poached Eggs
Once you’ve mastered Poaching Eggs Tips and can reliably produce beautiful globes, the possibilities expand exponentially. These eggs serve as a magnificent centrepiece for almost any meal.
Scaling Up: Batch Cooking Tips for Large Gatherings
While poaching one or two at a time yields the best quality, you can cook multiple eggs simultaneously provided your pan is large enough to maintain water level and temperature without crowding.
If you are cooking more than three at once, consider poaching them in batches, or use a specialized poaching rack insert if you have one, though the free form method remains superior for texture.
Storage Strategies: Can Poached Eggs Be Made in Advance?
Yes, they can be made in advance! This is a huge time saver for ambitious weekend brunch planning. Poach the eggs for about 30 seconds less than the target time. Immediately plunge them into an ice bath to halt cooking.
Store them submerged in a container of cold water in the refrigerator for up to two days. To reheat, gently drop them into simmering (not boiling) water for 30 60 seconds until warmed through.
Nutritional Snapshot: What You're Gaining with This Lean Protein
Poached eggs are one of the leanest ways to consume high-quality protein and essential nutrients like choline and Vitamin D. Since no fats are added during the cooking process, the calorie count remains low, making them an excellent choice for health conscious cooks looking for a substantial meal base.
Beyond Avocado Toast: Inspired Serving Suggestions
While the classic pairing with avocado toast is fantastic, think bigger! Place them over steamed asparagus with a light vinaigrette. Try them atop crisp potato rösti instead of hash browns. For a lighter lunch, float one or two over a hearty bowl of flavourful lentil soup.
They also form the bedrock of traditional Eggs Benedict or Florentine, proving they are versatile enough for any occasion that calls for elegant, beautifully cooked eggs.
Recipe FAQs
Why do my Poached Eggs always turn into wispy, sad clouds in the water?
That’s usually down to one of two things: either your eggs aren't terribly fresh, or you haven't strained them. Always use the freshest eggs you can find, and the absolute game changer is cracking the egg into a fine mesh sieve first to let the watery outer white drain away before cooking.
What temperature should the water be for poaching? It seems too important!
You are spot on; temperature is everything! You absolutely must avoid a rolling boil, which will shred the egg white. You’re aiming for a gentle simmer the water should be hot enough that small bubbles are just beginning to break the surface, but nothing more.
Do I really need to use vinegar when making Poached Eggs, or is that just nonsense?
It’s not nonsense, but it’s not strictly mandatory if you follow the other steps religiously! Vinegar (like the white distilled kind we use) helps the protein in the egg white coagulate faster, which keeps the shape tight.
If you skip it, make absolutely sure your water is the correct temperature and you've strained the eggs well.
Can I make a batch of Poached Eggs ahead of time for a big brunch?
You certainly can! Poached eggs store brilliantly, provided you handle them carefully. Cook them for about 30 seconds less than usual, plunge them into an ice bath to stop the cooking, and then store them in cold water in the fridge for up to two days.
To reheat, simply dip them into hot (not boiling) water for about 30-60 seconds.
How long do I cook the Poached Eggs for if I like a very runny yolk?
For that textbook, molten gold yolk that runs gloriously over your toast, stick to 3 minutes exactly once the egg hits the water. If you prefer a slightly firmer, jammy yolk (great for Eggs Royale!), aim for 4 minutes. Always pull them out promptly and drain them well!
If I'm not using vinegar, can I add flavourings to the poaching water instead?
Absolutely, give it a go! While the vinegar helps set the whites, you can certainly infuse the water with lovely aromatics. Try adding a bay leaf, a few peppercorns, or even a sprig of thyme to the water while it heats up to give your eggs a subtle, sophisticated flavour.
Foolproof Poached Eggs Recipe

