Parmesan Crusted Cod: Crispy and Buttery

- Time: Active 10 minutes, Passive 12 minutes, Total 22 minutes
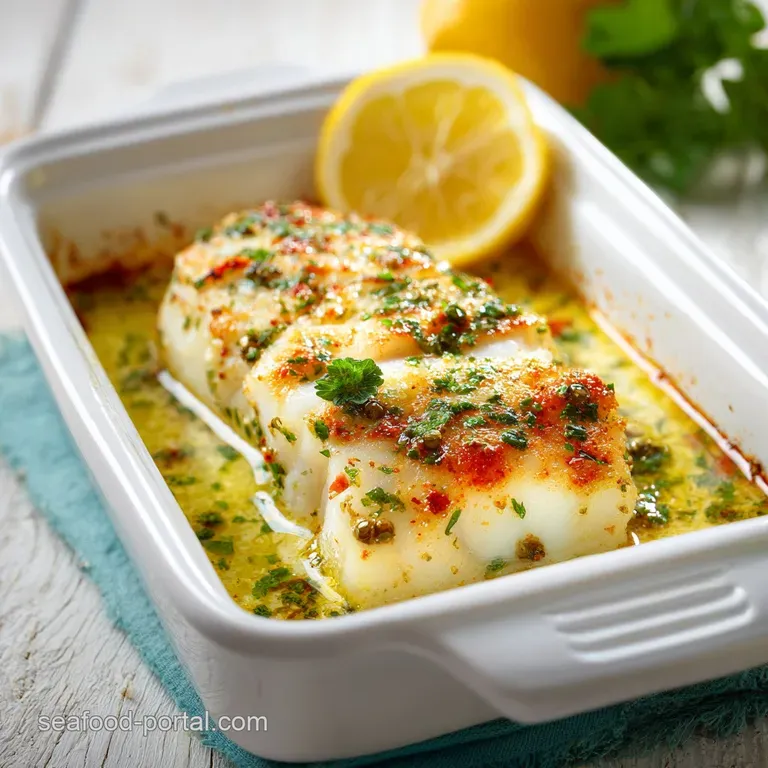
- Flavor/Texture Hook: Shatteringly crispy panko topping over buttery, velvet soft flakes
- Perfect for: A fast weeknight dinner when you need something light but satisfying
- Achieving Flaky Perfection with This Cod Fish Recipe
- The Secret Behind That Perfect Golden Crust
- Essential Components for a Successful Cod Fish Recipe
- Professional Tools for Flawless Results
- Creating Your Perfect Oven Baked Meal
- Fixing Common Issues for Better Seafood Results
- Adjusting This Cod Fish Recipe for Any Crowd
- Creative Twists for Your Easy Baked Cod Dinner
- Debunking Seafood Preparation Myths
- Keeping Your Leftover Cod Fish Recipe Fresh Longer
- Best Sides to Pair with This Simple Fish
- Recipe FAQs
- 📝 Recipe Card
Achieving Flaky Perfection with This Cod Fish Recipe
There is honestly nothing more disappointing than pulling a tray of fish out of the oven only to find it sitting in a pool of gray, unappetizing liquid. I used to have this happen all the time, and it made me want to give up on cooking seafood at home entirely.
The fish would be watery, the topping would be a soggy mush, and the flavor just felt "muted." I realized that most recipes skip the most vital step: getting that excess moisture out of the flesh before it ever touches the heat.
That is why this cod fish recipe is the only one I use now. We are going to treat the fish almost like a steak, seasoning it early to draw out that surface water. When you combine that technique with a punchy garlic oregano butter and a parmesan panko crust, the result is something that actually stays crispy.
You get that satisfying "crunch" when your fork hits the top, followed by fish that just melts away because it hasn't been boiled in its own juices.
We are aiming for a dish that smells like a dream the second you open the oven door. I'm talking about that heavy, savory scent of toasted garlic mixed with the bright, floral notes of lemon zest and oregano.
It's accessible, fresh, and honestly, it's one of those meals that makes you feel like a pro even on a Tuesday night. Let's get into what actually makes this method superior to the standard "toss it in the oven" approach.
The Secret Behind That Perfect Golden Crust
Moisture Displacement: By salting the cod 10 minutes before cooking, we use osmosis to pull deep seated water to the surface. This prevents the fish from "steaming" in the oven, which is the primary cause of soggy coatings.
Protein Coagulation: over High heat roasting at 400°F causes the proteins in the fish to tighten quickly. This locks the natural juices inside while the outside stays dry enough to support a crust.
Starch Insulation: The panko breadcrumbs act as a thermal barrier, protecting the delicate cod from the direct heat of the oven. This allows the fish to reach its ideal internal temperature without drying out.
Fat Based Emulsion: Whisking lemon juice into melted butter creates a temporary emulsion. This thickens the liquid so it clings to the fish instead of just sliding off onto the baking sheet.
| Thickness of Fillet | Internal Temp | Rest Time | Visual Cue |
|---|---|---|---|
| 1/2 inch | 145°F | 2 minutes | Opaque and firm to touch |
| 1 inch | 145°F | 3 minutes | Easily separates with fork |
| 1.5 inches | 145°F | 5 minutes | Milky white center, no translucency |
When you are choosing your fish, the thickness really dictates the success of the crust. If the fillet is too thin, the fish will overcook before the breadcrumbs have a chance to turn golden brown. For this recipe, I always try to find fillets that are at least an inch thick so the timing works out perfectly.
| Component | Science Role | Pro Secret |
|---|---|---|
| Kosher Salt | Moisture Extractor | Use coarse grains to avoid over salting the interior |
| Panko | Texture Structure | Don't crush them; the air pockets create the "shatter" |
| Parmesan | Umami & Binder | Freshly grated cheese melts and acts as "glue" for crumbs |
| Garlic | Aromatic Depth | Grate it into a paste so it distributes evenly in the butter |
Between the chemistry of the salt and the physical structure of the panko, we are building layers of protection for the fish. This ensures that the delicate cod stays velvety on the inside while the exterior provides a needed textural contrast.
Essential Components for a Successful Cod Fish Recipe
To get the results we want, the quality of your ingredients is going to do most of the heavy lifting. Cod is a very mild fish, which means it’s a blank canvas for the flavors we add.
Don't be tempted to use dried out, pre grated parmesan in a green can; the moisture content is different and it won't brown the same way.
- 1.5 lbs fresh cod fillets: Cut these into 4 equal portions for even cooking. Why this? Fresh cod has a cleaner flavor and firmer texture than frozen and thawed options.
- 1 tsp kosher salt: For the moisture wicking step. Why this? Salt is the only way to ensure the fish isn't watery after baking.
- 1/2 tsp freshly cracked black pepper: For a subtle, woody heat.
- 4 tbsp unsalted butter, melted: This is our fat source and flavor carrier. Why this? Butter provides a richness that olive oil just can't match here.
- 3 cloves garlic, finely grated: To infuse the butter with savory aroma.
- 1 tbsp fresh lemon juice: To cut through the fat and brighten the fish.
- 1 tsp lemon zest: This holds the essential oils for a more intense citrus scent.
- 1/2 tsp dried oregano: Adds an earthy, Mediterranean vibe.
- 1/4 cup freshly grated Parmesan cheese: For saltiness and a crisp finish.
- 1/4 cup panko breadcrumbs: The secret to a light, airy crunch.
- 1/2 tsp smoked paprika: This gives the crust a beautiful golden red hue.
- 1 tbsp fresh Italian parsley: Minced finely for a fresh finishing touch.
If you find that you're out of panko, you can technically use regular breadcrumbs, but I have to warn you: the texture will be much denser and less "crispy." For a deeper dive into different methods, you might want to look at this pan seared cod guide which uses a totally different heat application.
Professional Tools for Flawless Results
You don't need a kitchen full of gadgets, but a few specific items make this much easier. A rimmed baking sheet is non negotiable; you don't want any stray butter or fish juices dripping onto the floor of your oven and creating a smoke show.
I also highly recommend using a small glass bowl for your butter mixture so you can see if the lemon and butter have fully combined.
A microplane or fine grater is your best friend here. It turns the garlic into a paste and the lemon zest into fine ribbons that disappear into the butter slather. If you chop the garlic with a knife, you risk getting a big, bitter chunk of half raw garlic in one bite, which isn't the experience we're going for.
Finally, a fish spatula or a wide, thin metal spatula is helpful for lifting the fillets off the tray without breaking them.
Creating Your Perfect Oven Baked Meal
Step 1: The Moisture Wick Prep. Start by patting your 1.5 lbs of cod fillets bone dry with paper towels. Sprinkle the 1 tsp of kosher salt over both sides and let them sit on a plate for 10 minutes.
Note: You will actually see beads of water forming on the surface as the salt works its magic.
Step 2: Preheating and Drying. While the fish rests, preheat your oven to 400°F (200°C). After the 10 minutes are up, use fresh paper towels to pat the fillets dry again, removing all that extracted water.
Place them on a rimmed baking sheet and season with the 1/2 tsp of black pepper.
Step 3: The Garlic Butter Emulsion. In a small bowl, whisk together the 4 tbsp of melted butter, 3 grated garlic cloves, 1 tbsp lemon juice, 1 tsp zest, and 1/2 tsp oregano. Whisk until the mixture looks slightly thickened and cloudy.
Step 4: The Slather. Use a pastry brush or a spoon to coat the top and sides of each fillet generously with the garlic butter. You should smell the sharp garlic and bright lemon immediately as it hits the room temperature fish.
Step 5: The Crust Application. In a separate bowl, toss the 1/4 cup panko, 1/4 cup parmesan, and 1/2 tsp smoked paprika. Press this mixture firmly onto the top of each buttered fillet. Note: Don't be afraid to press it down; we want it to stick to the butter.
Step 6: The Precision Bake. Slide the tray into the oven. Bake for 10 to 12 minutes. Watch for the crust to turn a deep golden brown and the kitchen to fill with the aroma of toasted cheese.
Step 7: The Doneness Check. Check the internal temperature; it should be 145°F. The fish should flake easily when you gently press a fork into the thickest part.
Step 8: The Finishing Touch. Sprinkle the minced fresh parsley over the hot fillets. The residual heat will wake up the parsley's oils, giving you one last burst of fresh scent before you serve.
Fixing Common Issues for Better Seafood Results
Why Your Fish is Rubbery
This is almost always a result of overcooking. Cod is very lean, so once it passes that 145°F mark, the protein fibers tighten up and squeeze out all the remaining moisture, leaving you with a texture like a pencil eraser. Always start checking at the 10 minute mark.
If your fillets are on the thinner side, they might even be done in 8 minutes.
To Fix Soggy Bottoms
If the bottom of your fish feels wet or mushy, it’s likely because the pan wasn't hot enough or there was too much liquid on the tray. To prevent this, make sure the oven is fully preheated to 400°F before the fish goes in.
You can also place the fish on a wire rack set inside the baking sheet; this allows hot air to circulate under the fillet, keeping the bottom much drier.
| Problem | Root Cause | Solution |
|---|---|---|
| Crust falling off | Surface too wet | Pat fish dry a second time after the salt rest |
| Bland flavor | Under seasoning | Salt the fish early and use high-quality parmesan |
| Dry, chalky texture | Overcooking | Pull fish from oven at 140°F; it will reach 145°F while resting |
Common Mistakes Checklist
- ✓ Skipping the 10 minute salt rest (this is why fish gets watery).
- ✓ Using cold butter (melted butter is required for the emulsion to stick).
- ✓ Crowding the pan (leave at least 2 inches between fillets for air circulation).
- ✓ Forgetting to zest the lemon (the juice provides acid, but the zest provides the aroma).
- ✓ Not checking the internal temperature with a thermometer.
Adjusting This Cod Fish Recipe for Any Crowd
If you're cooking for a larger group, say 8 people, you can easily double the ingredients. However, don't just dump double the salt and spices into the mix. For the spices and salt, use about 1.5x the original amount and taste as you go.
When baking two trays at once, you’ll need to rotate them halfway through the 12 minutes to ensure even browning.
When scaling down for one or two people, the cook time remains mostly the same, but you might find the crust browns faster because there is more empty space in the oven for heat to circulate.
If you're using a toaster oven for a single fillet, keep a close eye on it after 8 minutes, as those smaller heating elements can be quite intense.
Creative Twists for Your Easy Baked Cod Dinner
This cod fish recipe is incredibly versatile. If you want a bit of a kick, you can swap the smoked paprika for cayenne pepper or red chili flakes. For a more "herby" version, I love adding fresh dill or chives to the panko mixture.
It changes the profile from Mediterranean to something that feels very "Pacific Northwest."
| Method | Time | Texture | Best For |
|---|---|---|---|
| Oven Baked | 12 minutes | Crispy top, tender middle | Easy cleanup, hands off |
| Stovetop | 8 minutes | Evenly seared, no crust | Getting a deep golden sear |
| Air Fryer | 10 minutes | Maximum crunch | Cooking 1-2 portions quickly |
If you are looking for a more traditional crunch, you could look into a cornmeal fish fry method which gives a much sturdier, Southern style coating. That works beautifully if you want to turn this cod into incredible fish tacos.
Debunking Seafood Preparation Myths
"Fresh is always better than frozen." This isn't strictly true. Most fish is "flash frozen" right on the boat, which actually preserves the texture and flavor better than "fresh" fish that has been sitting in a display case for three days.
If you buy frozen cod, just make sure to thaw it slowly in the fridge overnight and pat it incredibly dry before starting this recipe.
"You must wash your fish before cooking." Please, don't do this. Washing fish in the sink just splashes bacteria around your kitchen and adds more moisture to the surface of the fish, which we are actively trying to remove.
The heat of the oven will take care of any safety concerns, and the paper towel method is much cleaner and more effective for achieving a good sear.
Keeping Your Leftover Cod Fish Recipe Fresh Longer
Storage: You can keep cooked cod in an airtight container in the fridge for up to 2 days. Beyond that, the delicate fats in the fish start to oxidize, and it will develop a much "fishier" smell.
To keep the crust from getting completely soggy, place a piece of paper towel in the container to absorb any rising moisture.
Zero Waste: If you have leftover fillets, don't just microwave them (that will make the fish rubbery and the house smell). Instead, flake the cold fish and mix it with a little mayo, lemon, and celery for a "cod salad" sandwich.
It’s also brilliant folded into a quick pasta with garlic and olive oil.
Reheating: The best way to reheat this is in a 350°F oven or an air fryer for about 5 minutes. This helps the parmesan and panko regain some of their original crunch without overcooking the center of the fish.
Best Sides to Pair with This Simple Fish
Because this cod fish recipe has those rich garlic butter and parmesan notes, it pairs beautifully with something bright and acidic. A simple arugula salad with a lemon vinaigrette is my go to. The peppery greens cut right through the butter.
If you want something heartier, roasted fingerling potatoes or a light rice pilaf works wonders.
Another great option is steamed asparagus or charred broccolini. The snap of the green vegetables complements the soft flakes of the fish. If you’re feeling extra, a small dollop of tartar sauce or a squeeze of fresh charred lemon on the side really rounds out the plate.
It’s all about balance crispy, soft, savory, and bright citrus all working together.

Recipe FAQs
What is the best way to cook cod?
Baking at 400°F is the most reliable method. This approach yields a consistent result with a golden, crisp crust while keeping the interior moist.
Is cod good for HDL?
Yes, cod is an excellent lean protein source. It is low in saturated fat, making it a heart healthy addition to a balanced diet.
What seasoning is best for cod?
Use a blend of garlic, lemon, oregano, and smoked paprika. These aromatics complement the mild flavor of the fish without overpowering its delicate texture.
Can diabetics eat baked cod?
Yes, baked cod is a smart choice for diabetic meal planning. Since it contains zero carbohydrates, it does not spike blood sugar levels when prepared without sugary glazes.
How to keep the cod from getting watery?
Pat the fillets dry and salt them 10 minutes before cooking. This step draws out excess moisture, which you must wipe away again before applying the butter mixture to ensure a perfect bake, similar to the crisping process in our breaded fish guide.
How to know when the cod is done?
Check the internal temperature with a thermometer to ensure it reaches 145°F. You can also look for the fish to flake easily when gently prodded with a fork.
Is it true that I should skip the lemon zest if I have lemon juice?
No, this is a common misconception. While the juice provides the necessary acidity, the zest contains essential oils that provide the vibrant, aromatic profile of the dish.
Parmesan Crusted Cod 2

Ingredients:
Instructions:
Nutrition Facts:
| Calories | 284 calories |
|---|---|
| Protein | 32.6 g |
| Fat | 14.8 g |
| Carbs | 4.2 g |
| Fiber | 0.4 g |
| Sugar | 0.5 g |
| Sodium | 678 mg |
