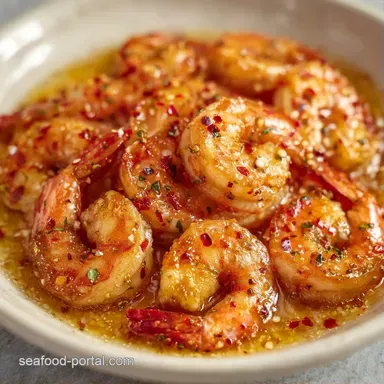
Sautéed Shrimp: Mahogany Sear and Garlic Butter
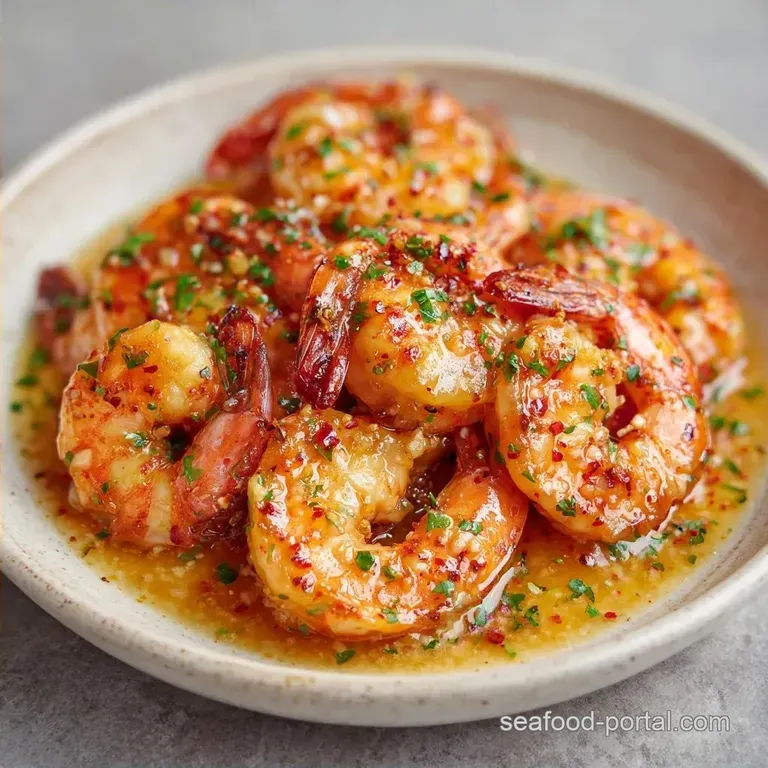
- Time: 5 min active + 5 min cook
- Flavor/Texture Hook: Shatter crisp edges with a velvety garlic butter glaze
- Perfect for: A 10 minute weeknight dinner or an impressive appetizer
Listen, we've all been there. You throw some shrimp in a pan, thinking it'll be a quick win, but ten minutes later you're chewing on something that has the consistency of a pencil eraser.
Or worse, you end up with a pan full of greyish liquid and shrimp that look like they've been boiled in a sad soup instead of seared. It happens when the pan is too crowded or the shrimp are too wet.
The trick is all in the prep and the heat. When I first started cooking seafood, I ignored the "pat dry" rule. I thought the moisture didn't matter. But that water turns into steam the second it hits the oil, and instead of browning, your food just poaches.
Once I realized that moisture is the enemy of a good crust, everything changed.
This Sautéed Shrimp approach is the fix. We're going for a sharp contrast: the deep, savory char of the paprika and salt against the bright, zesty hit of fresh lemon. It's a 10 minute process that feels like a restaurant dish but doesn't require a professional kitchen.
Sautéed Shrimp
Right then, let's talk about why this actually works. Most people treat shrimp like they're cooking chicken, but shrimp are delicate. They overcook in seconds. The goal here is to hit them with high heat fast and then pull them off the fire the moment they turn opaque.
Surface Dryness: Removing water from the surface means the oil hits the protein directly. This allows the temperature to stay high enough to create a sear instead of steaming.
Fat Blend: Using olive oil for the initial sear prevents the butter from burning. We add the butter later to get that velvety richness without the burnt milk taste.
Acid Timing: Adding lemon juice at the very end prevents the acid from "cooking" the shrimp further, which keeps the texture tender.
Temperature Control: The medium high heat ensures the outside browns in exactly 2 minutes, which is usually the sweet spot before the inside gets rubbery.
| Method | Time | Texture | Best For |
|---|---|---|---|
| Fast Sear | 5 mins | Firm & Charred | Weeknight Meals |
| Classic Poach | 8 mins | Soft & Uniform | Seafood Salads |
| Slow Sauté | 12 mins | Tender & Saucy | Pasta Toppings |
When you're making Sautéed Shrimp, you're essentially managing a race between the browning of the exterior and the overcooking of the interior. According to Serious Eats, the key to a great sear is avoiding the "crowding" of the pan, which drops the temperature and ruins the crust.
The Ingredient Breakdown
Before we get into the pan, let's look at what each component is actually doing. It's not just about flavor; it's about how the ingredients react to the heat.
| Ingredient | Science Role | Pro Secret |
|---|---|---|
| Medium Shrimp | Main Protein | Pat them bone dry for a better crust |
| Smoked Paprika | Color & Earthiness | Gives a "grilled" look without a grill |
| Unsalted Butter | Flavor Carrier | Add in two stages to avoid burning |
| Lemon Juice | Brightness/Balance | Stir in after heat is off to keep it fresh |
The balance here is key. The smoked paprika doesn't just add a woody flavor; it helps the shrimp look deeply browned even if they're only in the pan for a few minutes.
Your Shopping List
Stick to these specific items for the best result. Don't bother with low-fat butter or bottled lemon juice, as they won't give you that same punch.
- 1 lb medium shrimp, peeled and deveined Why this? Medium size cooks evenly in 5 minutes (Sub: Large shrimp, but add 1 min per side)
- 1/2 tsp kosher salt Why this? Larger grains are easier to control (Sub: Sea salt)
- 1/4 tsp black pepper Why this? Freshly cracked is best (Sub: White pepper for a milder heat)
- 1/2 tsp smoked paprika Why this? Adds a deep, charred aroma (Sub: Sweet paprika, but you'll lose the smokiness)
- 2 tbsp unsalted butter Why this? Lets you control the salt level (Sub: Ghee for higher smoke point)
- 1 tbsp extra virgin olive oil Why this? Prevents butter from burning (Sub: Avocado oil)
- 3 cloves garlic, minced Why this? Fresh garlic has more punch (Sub: 1 tsp garlic powder, added to seasoning)
- 1 tbsp fresh lemon juice Why this? Cuts through the butter fat (Sub: Lime juice for a tropical vibe)
- 1 tbsp fresh parsley, chopped Why this? Adds a grassy, fresh finish (Sub: Cilantro)
Tools For The Job
You don't need a fancy arsenal here, but the pan choice matters. I prefer a stainless steel or cast iron skillet because they hold heat way better than non stick. If you use non stick, you might find the Sautéed Shrimp doesn't get that deep mahogany color as easily.
A good fish spatula or a wide turner is helpful for flipping the shrimp without breaking them. Also, have your paper towels ready. I cannot stress enough how important it is to get those shrimp dry before they touch the oil.
Step by step Guide
Let's get into it. Keep your ingredients prepped and ready (mise en place) because once the pan is hot, things move fast.
Step 1: Prep and Season
Pat the shrimp dry with paper towels until no moisture remains. In a small bowl, toss the shrimp with salt, pepper, and smoked paprika until evenly coated. Set aside. Note: Drying them prevents the pan from cooling down.
Step 2: The over High heat Sear
Heat the olive oil and 1 tbsp of butter in the skillet over medium high heat until the butter foams and begins to sizzle. Add the shrimp in a single layer- do not crowd the pan. Sear undisturbed for 2 minutes until the bottoms are mahogany colored.
Step 3: The Butter Finish
Flip the shrimp and immediately add the remaining 1 tbsp of butter and the minced garlic. Sauté for another 1-2 minutes, tossing frequently, until the garlic is fragrant and the shrimp are opaque.
Step 4: The Final Glaze
Turn off the heat; stir in the lemon juice and fresh parsley to glaze. Note: The residual heat is enough to merge the flavors without overcooking the protein.
Chef's Tip: If you're doing a huge batch, cook the shrimp in two turns. If you dump a pound of shrimp into a small pan, they'll release water and steam, and you'll lose that beautiful sear we're after.
Fix Your Cooking Mistakes
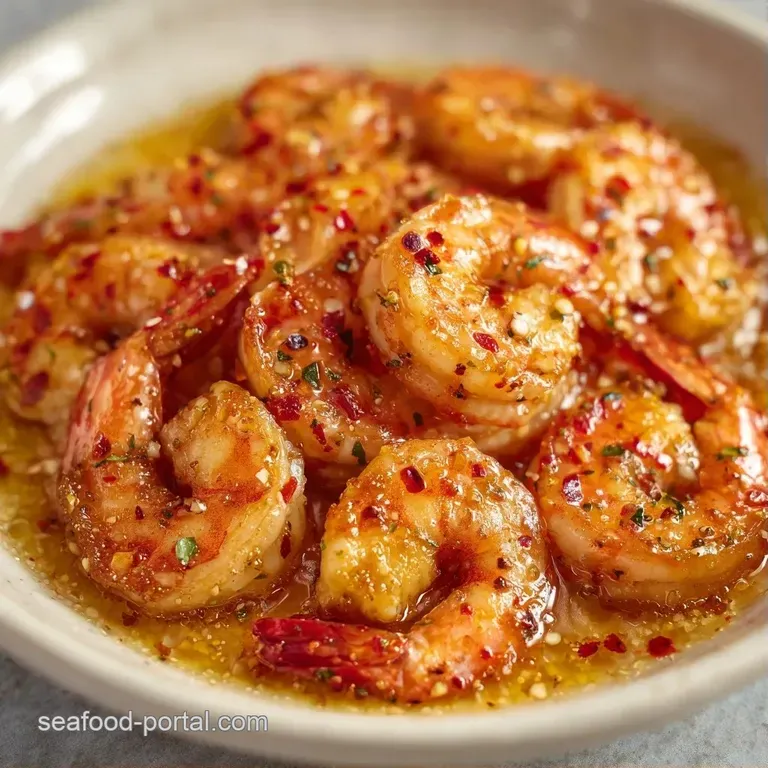
The biggest issue with Sautéed Shrimp is usually texture. If your shrimp feel like rubber, you've likely gone too far. Shrimp are done the moment they curl into a "C" shape. If they curl into a tight "O", they're overdone.
Why Your Shrimp is Rubbery
This usually happens because of overcooking or using "frozen thawed" shrimp that weren't dried properly. When the protein fibers contract too much, they squeeze out all the moisture, leaving you with a chewy texture.
Why the Pan is Watery
If you see a pool of liquid in your pan, you've likely overcrowded the skillet. This drops the temperature of the oil, and the shrimp start releasing their internal juices.
| Problem | Root Cause | Solution |
|---|---|---|
| Rubbery Texture | Overcooked | Pull off heat as soon as they hit a "C" shape |
| Grey Color | Pan too cold/crowded | Cook in batches and use medium high heat |
| Burnt Garlic | Added too early | Add garlic only after flipping the shrimp |
Common Mistakes Checklist
- ✓ Did I pat the shrimp completely dry?
- ✓ Is the pan hot enough that the butter sizzles immediately?
- ✓ Did I leave the shrimp undisturbed for the first 2 minutes?
- ✓ Did I wait to add the lemon juice until the heat was off?
Changing the Portions
When you need to scale this Sautéed Shrimp recipe, you can't just multiply everything and dump it in one pan. That's the fastest way to end up with steamed shrimp.
Scaling Down (½ batch): Use a smaller skillet to keep the oil depth consistent. You can reduce the cook time by about 20 seconds per side since there's less mass in the pan.
Scaling Up (2x-4x batch): Work in batches. I repeat: work in batches. If you're cooking for a crowd, sear the shrimp in 2 or 3 groups, move them to a plate, and then combine them all at the end for the final butter and lemon toss.
Only increase the salt and paprika to 1.5x rather than doubling them, as the flavors concentrate in the pan.
| Batch Size | Pan Strategy | Heat Adjustment | Timing |
|---|---|---|---|
| Single (1lb) | 12" Skillet | Medium High | Standard |
| Double (2lb) | 2 Batches | Medium High | Same per batch |
| Half (0.5lb) | 8" Skillet | Medium | -30 seconds |
Common Kitchen Myths
There's a lot of bad advice out there about seafood. Let's clear a few things up.
"Searing seals in the juices" This is a total myth. Searing doesn't create a waterproof seal. The moisture loss happens regardless of how you start. However, the sear creates a massive amount of flavor through browning, which is why we do it.
"Frozen shrimp are lower quality" Actually, most "fresh" shrimp at the counter were frozen on the boat. The key is how they were frozen. Look for "flash frozen" options to keep the cellular structure intact.
Storage and Waste Tips
If you have leftovers, keep the Sautéed Shrimp in an airtight container in the fridge for up to 3 days. To reheat, don't use the microwave, it'll turn them into rubber. Instead, toss them in a hot pan for 30-60 seconds just to warm through.
For freezing, I don't recommend freezing cooked shrimp as the texture degrades. However, if you buy shrimp with the shells on, don't toss those shells! Toss the shells and heads into a pot with some onion and celery to make a quick shrimp stock. It's a goldmine of flavor for risottos or seafood stews.
Best Side Dish Pairings
Because these are so rich and buttery, you need something to cut through that fat. I love serving this over a bed of garlicky sautéed spinach or with a side of crusty sourdough to soak up the leftover butter in the pan.
If you want a more filling meal, this works great as a protein addition to a Chicken Shrimp Alfredo for a decadent dinner. For something lighter, a simple quinoa salad with cucumber and feta balances the smokiness of the paprika. If you're in the mood for something even more buttery, you might enjoy my Garlic Shrimp Scampi for a classic Italian vibe.
Right then, that's how you nail Sautéed Shrimp every single time. Just remember: dry the shrimp, don't crowd the pan, and watch that "C" shape. Trust me, your dinner guests will think you've been taking secret cooking classes. Let's get cooking!
High in Sodium
1120 mg 1120 mg of sodium per serving (49% 49% of daily value)
The American Heart Association recommends a daily sodium limit of 2,300 mg for most adults to maintain heart health.
Tips to Reduce Sodium
-
Eliminate Added Salt-25%
Remove the kosher salt entirely; the natural sodium in shrimp combined with acidity provides enough flavor.
-
Choose Fresh Shrimp-15%
Ensure you use fresh or frozen unsalted shrimp, avoiding pre-brined options which contain hidden sodium.
-
Increase Lemon Juice-10%
Double the fresh lemon juice to create a zesty profile that mimics the taste of salt on the palate.
-
Enhance Garlic Flavor-5%
Add an extra clove of garlic or use garlic powder (salt-free) to increase the savory depth of the dish.
-
Boost Fresh Herbs
Increase the amount of fresh parsley or add fresh dill to enhance the natural aromatics.
Recipe FAQs
How long should you sauté shrimp?
Sauté for 3–4 minutes total. Sear them undisturbed for 2 minutes, then flip and sauté for another 1–2 minutes until they are opaque.
Is it better to sauté shrimp in oil or butter?
Use a combination of both. Olive oil raises the smoke point to prevent burning, while butter provides the rich flavor and mahogany color.
How to prevent my shrimp from becoming rubbery?
Remove them from the heat immediately once they turn opaque. Overcooking is the primary cause of a tough, rubbery texture.
How to make a garlic-lemon glaze for shrimp?
Stir in fresh lemon juice and chopped parsley after turning off the heat. This preserves the bright flavor of the lemon without overcooking the seafood.
Is it true that shrimp should be cooked for 10 minutes to be safe?
No, this is a common misconception. Sautéing for 10 minutes will severely overcook the meat; 3–4 minutes total is sufficient for both safety and texture.
What can I do with leftover cooked shrimp?
Add them to salads, tacos, or pasta. If you enjoyed the garlic-butter technique here, see how the same principle works in our shrimp scampi.
How to prepare shrimp before sautéing to ensure a good sear?
Pat the shrimp dry with paper towels until no moisture remains. This ensures they sear properly in the pan instead of steaming.
Sautéed Shrimp in 9 Minutes