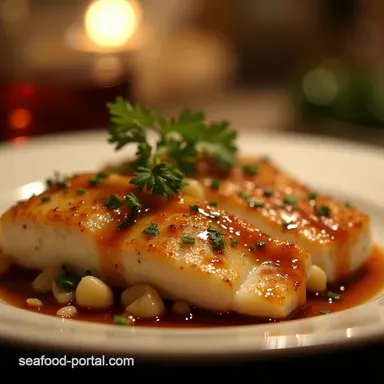
Sticky Sweetheart Quick Glossy Honey Garlic Glazed Tilapia
- Why This Honey Garlic Glazed Tilapia Steals the Show
- The Secret to Achieving Ultimate Flakiness (No Dry Fish Here!)
- Assembling Your Glaze Components: The Essential Pantry List
- Mastering the Honey Garlic Glaze Application Technique
- The Flawless Sear: Cooking Your Tilapia to Perfection
- Elevating Your Plate: Serving Suggestions Beyond the Basics
- Storage Solutions and Reheating Tips for Leftover Brilliance
- Recipe FAQs
- 📝 Recipe Card
Why This Honey Garlic Glazed Tilapia Steals the Show
When weeknight cooking fatigue sets in, you need recipes that perform magic with minimal effort and maximum flavour impact. Enter this Honey Garlic Glazed Tilapia .
It’s a culinary sleight of hand, transforming humble, budget friendly tilapia into a stunning centrepiece that tastes like it took hours of slow reduction. We are not aiming for complexity here; we are aiming for pure, unadulterated satisfaction delivered in under thirty minutes.
This recipe captures that addictive sweet and-salty dynamic often found in high end Asian inspired dishes, making it an instant weeknight superstar.
The Secret to Achieving Ultimate Flakiness (No Dry Fish Here!)
The biggest challenge when cooking white fish, especially a delicate fillet like tilapia, is avoiding that frustrating dry texture. The secret to achieving ultimate flakiness lies in two main areas: meticulous preparation and controlled cooking time.
By ensuring the fillets are patted bone dry before they ever meet the heat, we encourage a rapid sear rather than a steamy cook. On top of that,, because we finish the fish with the sauce rather than cooking it in the sauce for the entire duration, we manage the moisture content beautifully, locking in tenderness.
An Unbeatable Weeknight Winner
This Easy Tilapia Recipe is designed for speed. With just 10 minutes of preparation, you can have the sauce whisked and the fish seasoned before your oven preheats (if you choose that route).
It requires standard pantry staples, meaning last minute trips to the grocery store are usually unnecessary. This efficiency is what elevates the Honey Garlic Tilapia Recipe from a simple meal to a reliable staple.
Flavor Profile: Sweet, Savoury, and Budget Friendly Bliss
The flavour profile hinges on a perfect balance. You get the deep, earthy saltiness from the soy sauce, the bright, floral sweetness of honey, and the sharp pungency of freshly minced garlic.
This combination creates that signature Sticky Honey Garlic flavour that keeps everyone reaching for seconds. Crucially, because tilapia is such an affordable protein, this gourmet taste experience remains firmly in the budget friendly realm.
Understanding Tilapia: Your Versatile Canvas
Tilapia is often misunderstood, but its mild flavour profile makes it the perfect canvas for bold coatings like this glaze. It cooks quickly and absorbs surrounding spices and aromatics with ease.
Whether you choose to pan-sear for a light crust or bake for convenience, tilapia remains forgiving, making it ideal for anyone mastering their Stove Top Tilapia technique or looking for a Quick Tilapia Dinner .
Assembling Your Glaze Components: The Essential Pantry List
To build that rich, complex coating, we rely on straightforward ingredients that pack a powerful flavour punch. The beauty of this Glazed Tilapia is how few items are needed to create such depth.
You will need ¼ cup of good quality honey, 3 tablespoons of low-sodium soy sauce (to manage overall saltiness), and 1 tablespoon of unseasoned rice vinegar to cut through the richness.
The Sticky Sauce Foundation: Honey, Soy, and Garlic Ratio
The cornerstone of this Asian Tilapia Recipe lies in the ratio of its core three elements: honey, soy sauce, and garlic. We use 4 cloves of finely minced garlic don't skimp here; the garlic needs to hold its own against the honey's sweetness.
For an extra layer of aromatic warmth often found in the best takeout sauces, incorporate 1 teaspoon of freshly grated ginger. This foundation is the backbone of our delicious coating.
Essential Equipment Checklist for a Seamless Cook
For this recipe, simplicity reigns supreme in the kitchen tools department. You primarily need a large, heavy bottomed non-stick skillet to ensure the fish releases cleanly after searing. Beyond that, a small bowl and whisk are essential for preparing the glaze base before cooking commences.
Having a fish spatula or reliable tongs on hand will make flipping and removing the delicate fillets effortless.
Pro Tip: Balancing the Sweetness with a Dash of Acidity
While the honey provides the necessary sweetness, without a touch of acid, the flavour can feel flat or cloying. That is where the rice vinegar comes into play. If you find your palate craves even more brightness, consider adding the zest of half a lemon right before serving.
This subtle lift prevents the sweetness from overpowering the delicate fish and enhances the overall flavour complexity.
Related Recipes Worth Trying
- Easy Garlic Butter Baked Scallops Recipe Ready in Under 25 Mins — Make restaurantquality Garlic Butter Baked Scallops tonight This easy recipe uses fresh garlic and lemon for quick elegant weeknight meals scallops
- Zesty Garlic Herb Baked Rainbow Trout Recipe Easy Moist — Forget dry fish This easy baked trout recipe uses garlic butter and fresh herbs for a simple rainbow trout dinner that flakes perfectly every time
- The Ultimate Juicy Garlic Butter Baked Chicken Breast Recipe — Tired of dry chicken This easy baked chicken breast oven recipe delivers tender meat bathing in aromatic garlic butter Ready in 40 minutes Perfect for...
Mastering the Honey Garlic Glaze Application Technique
The technique for applying the glaze is where we transition from simply cooking fish to creating that signature, high gloss finish. We develop the sauce separately and thicken it right at the end to ensure it clings perfectly to the fillet without burning during the main cooking process.
The Flawless Sear: Cooking Your Tilapia to Perfection
For those preferring direct heat, we begin by heating 1 tablespoon of neutral cooking oil in your skillet over medium high heat. Patting the tilapia absolutely dry and seasoning it with ½ teaspoon of salt and ¼ teaspoon of fresh black pepper is non-negotiable for a good sear.
You can lightly dust the fillets with 1 tablespoon of all-purpose flour if you desire a slightly more robust, opaque crust.
Step-by-step Simmering: Reducing the Glaze to Perfection
While the fish sears, whisk together the honey, soy sauce, rice vinegar, garlic, ginger, and a small kick of heat (like ½ teaspoon of Sriracha). Once the fish is removed from the pan and set aside, pour this glaze mixture into the hot skillet. Bring this base to a gentle simmer.
To achieve that characteristic thickness, you must introduce a slurry 1 teaspoon of cornstarch dissolved in 1 tablespoon of cold water. Pour this in slowly while whisking constantly. The sauce will rapidly transform, thickening within about 60 seconds into a rich, glossy liquid ready to coat.
Pan-Searing Secrets for a Golden Exterior
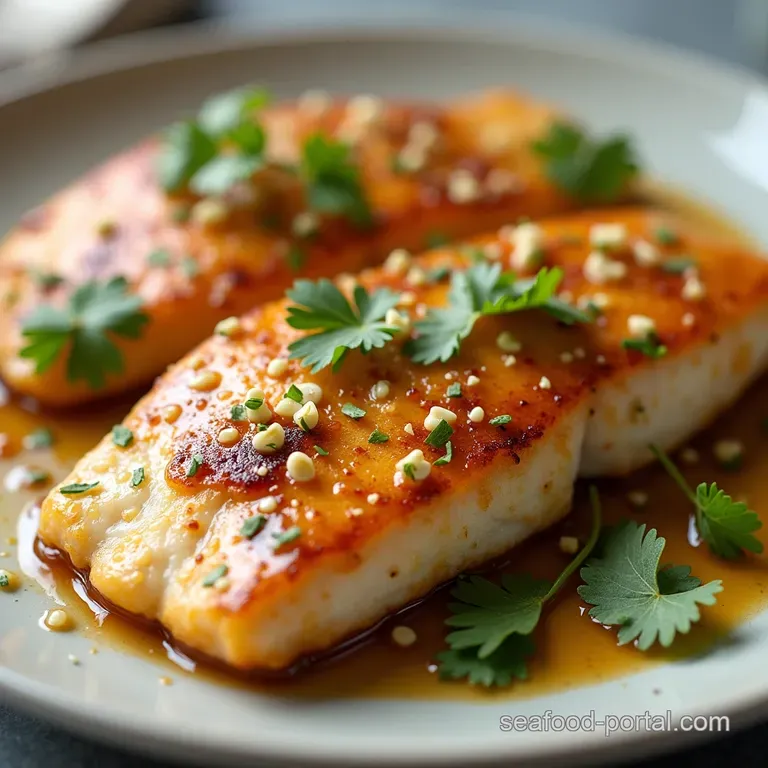
Place the seasoned tilapia into the hot oil and let it sear undisturbed for about 3 to 4 minutes per side. The goal here is not to cook it entirely through, but to develop a beautiful golden exterior that has enough structure to hold up to the sauce.
If you prefer the oven method for ultimate hands off cooking, place seasoned fillets on a lined baking tray and roast at 400° F ( 200° C) for about 10 to 12 minutes until the fish flakes easily.
The Final Toss: Achieving That Signature High Gloss Finish
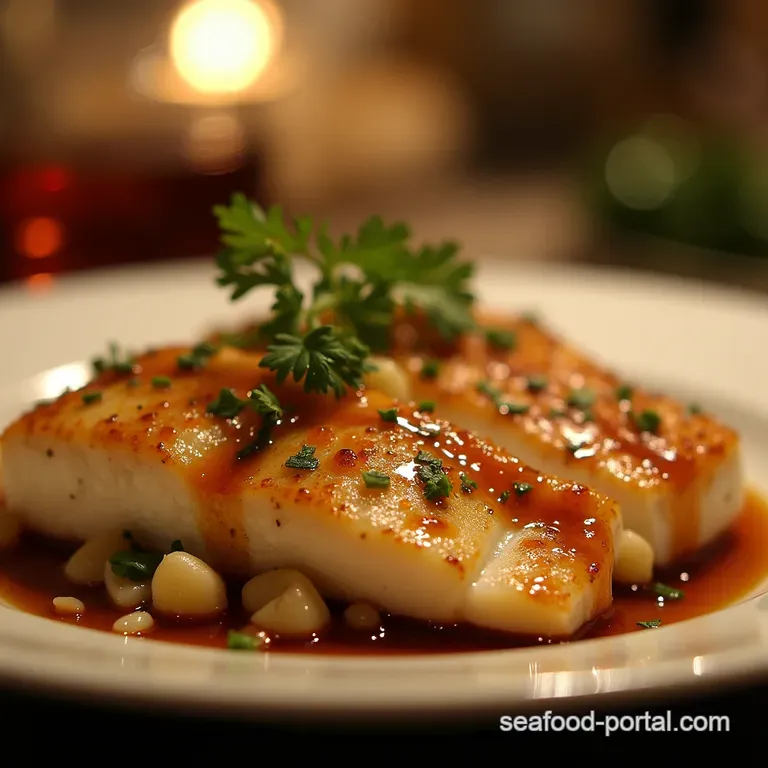
This final step locks in the flavour and visual appeal. Once the glaze has reduced and thickened beautifully, return the seared tilapia fillets back into the pan. Use tongs to gently turn the fish, spooning that thick, Sticky Honey Garlic sauce over the tops until every surface is thoroughly coated and glistening.
Serve immediately while the glaze is hot and vibrant.
Elevating Your Plate: Serving Suggestions Beyond the Basics
While the Honey Garlic Glazed Tilapia is flavour forward enough to stand alone, pairing it correctly ensures a well rounded meal experience. Think of sides that can absorb the excess sauce or offer a fresh contrast.
Perfect Pairings: Sides that Complement the Glaze
The classic partner for any rich, glazed protein is a neutral base. Fluffy Basmati rice or slightly nutty brown rice is perfect for soaking up every last drop of the sticky sauce. For greens, lightly steamed or quickly flash fried Asian vegetables like bok choy or broccoli florets, perhaps finished with a drop of sesame oil, offer a fresh, slightly bitter counterpoint that cleanses the palate between bites of the rich fish.
For a professional presentation, a generous sprinkle of toasted sesame seeds and thinly sliced green onions elevates this simple dish instantly.
Low-Carb and Crispy Variations on the Honey Garlic Theme
For those watching their carbohydrate intake, this recipe adapts easily. You can substitute the honey with a quality zero calorie liquid sweetener designed for cooking, such as monk fruit syrup, ensuring you keep the sauce texture similar by adjusting the cornstarch slightly if needed.
If you want textural variety, try air-frying the tilapia after dusting it lightly in seasoned flour, then toss the crispy fillets gently in the finished glaze just before plating.
Nutritional Snapshot: A Lighter Take on Glazed Fish
This dish offers excellent value nutritionally. Tilapia is a lean source of protein, keeping the fat content low, especially if using a minimal amount of oil for searing. The primary carbohydrate contribution comes from the honey, which is used sparingly as a glaze rather than a primary ingredient.
It’s a satisfying way to enjoy a flavour packed meal without heavy caloric penalties.
Storage Solutions and Reheating Tips for Leftover Brilliance
If you are fortunate enough to have leftovers from this Quick Tilapia Dinner , storing them correctly is key to maintaining texture. Allow any leftover fish and sauce to cool completely before storing them in an airtight container in the refrigerator for up to three days.
When reheating, avoid high heat, which will dry out the fish and potentially burn the sugars in the glaze. A brief stint in the microwave using 50% power, or gently warming the fish in a non-stick pan with an added teaspoon of water or broth to re-activate the glaze, will bring this delightful dish back to life beautifully.
Recipe FAQs
My Honey Garlic Glazed Tilapia always seems a bit dry; what’s the secret to keeping it moist?
Ah, the dreaded dry fish a genuine tragedy! The key is threefold: first, don't overcook it; tilapia is done when it flakes easily, usually around 145°F internal temp. Secondly, pat those fillets bone dry before cooking to ensure a good sear rather than steaming.
Finally, the glaze should be added right at the very end, essentially coating it rather than cooking it in the sauce for ages.
Can I bake this Honey Garlic Glazed Tilapia instead of pan-frying it? I don't want to splatter oil everywhere.
Absolutely, you can bake these beauties; it’s a doddle! Pop the seasoned fish on a lined baking sheet at 400°F (200°C) for about 10 to 12 minutes until cooked through.
Once done, you can either spoon the thickened glaze over the baked fish right before serving, or you can brush it on for the last two minutes of baking for a slight caramelisation.
The glaze is too thin, or conversely, it’s turned into a solid brick! How do I get that perfect glossy thickness?
That’s the magic (or madness) of cornstarch! If it's too thin, simply whisk up another small slurry (half a teaspoon of cornstarch to one tablespoon of cold water) and whisk it slowly into your simmering sauce until it thickens up to coat the back of a spoon.
If it's too thick or gloppy, just stir in a tablespoon of hot water or a splash more rice vinegar to loosen it up.
I don’t have tilapia; what other fish works well with this sticky honey garlic glaze?
This glaze is incredibly versatile; think of it as a universal sauce for white fish! Cod or Haddock fillets work wonderfully, though you might need an extra minute or two of cooking time as they are generally thicker.
Salmon is also a cracking choice, but watch the heat, as the higher fat content means it cooks a bit quicker than tilapia.
How long can I keep leftovers of the glazed fish, and can I freeze it?
Leftovers are best enjoyed the next day, stored in an airtight container in the fridge for up to three days; it reheats nicely in the microwave or a low oven. However, I wouldn't recommend freezing the glazed fish, as the texture of tilapia can become quite soft and watery upon thawing.
Honey Garlic Glazed Tilapia