Homemade Salmon Seasoning: Sweet and Smoky
- Time: Active 5 minutes, Passive 0 minutes, Total 5 minutes
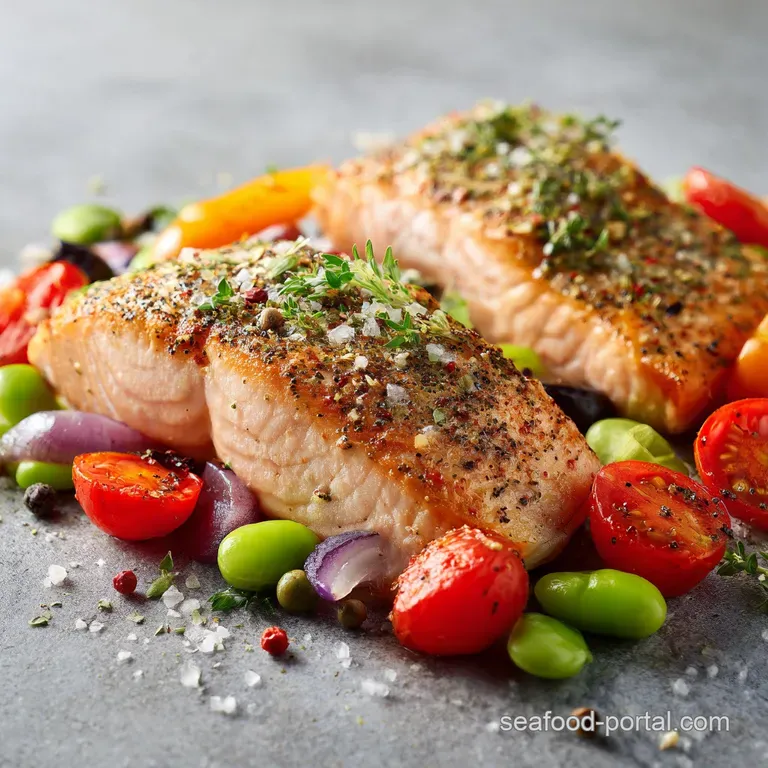
- Flavor/Texture Hook: Smoky, sweet, and citrusy with a shatter crisp finish
- Perfect for: Quick weeknight dinners or impressive meal prep batches
- Creating the Perfect Smoky Salmon Seasoning
- Why These Ratios Work
- Essential Pantry Components
- Ingredients & Substitutes
- Tools for Best Results
- Blending and Application
- Fixes for Common Issues
- Scaling Your Spice Blend
- The Truth About Rubs
- Storing and Reheating Tips
- Best Ways to Serve
- Recipe FAQs
- 📝 Recipe Card
Creating the Perfect Smoky Salmon Seasoning
We’ve all been there: you drop a beautiful piece of fish into a hot pan, hoping for that restaurant quality sear, but instead, you end up with a grey, lackluster fillet that sticks to the metal.
It’s incredibly frustrating when the skin is soggy and the flesh tastes like nothing but "fish." I used to rely on just a pinch of salt, but the results were always hit or-miss, usually ending up dry because I overcooked it trying to find some flavor.
The fix isn't a fancy gadget; it’s all about the surface chemistry of your rub. By combining specific sugars with high-quality aromatics, we create a barrier that browns before the delicate proteins inside toughen up. This Salmon Seasoning is the targeted fix for that "steamed" texture we all want to avoid.
It’s about building layers of taste that stay put even when the heat turns up.
Right then, let's get into how this works. You don’t need a culinary degree to understand that salt and sugar are a power couple in the kitchen. When they hit the moisture on the surface of the fish, they form a concentrated brine that seasons the meat deeply rather than just sitting on top.
This recipe is designed to be your go to pantry staple so you can have dinner on the table in under 15 minutes without any stress.
Why These Ratios Work
Understanding the "why" behind your spice jar makes you a better cook instantly. It’s not just about mixing things together; it’s about how those ingredients react when they hit the pan.
- Osmotic Brining: The kosher salt pulls a tiny bit of moisture to the surface, dissolves the sugar, and then carries those flavors back into the fibers of the fish.
- Maillard Acceleration: Dark brown sugar contains molasses, which caramelizes at a lower temperature, giving you that rich color without needing to overcook the center.
- Aromatic Suspension: Garlic and onion powders are used instead of fresh because they distribute more evenly and won't burn as quickly in a hot skillet.
- Citrus Brightening: Dried lemon peel provides a concentrated zing that cuts through the fatty richness of the salmon without adding liquid that would cause steaming.
| Method | Time | Texture | Best For |
|---|---|---|---|
| Pan Seared | 6-8 mins | Shatter crisp skin | Maximum crunch |
| Air Fryer | 10-12 mins | Evenly browned | Total beginners |
| Oven Baked | 12-15 mins | Silky and tender | Large family meals |
Choosing the right method depends on your mood. If you want that aggressive sizzle and a crust that shatters when your fork hits it, the stovetop is king. But if you’re looking for a "set it and forget it" vibe where the layers stay separate and moist, the oven is your best friend. For another way to use these flavors, you might like this blackened salmon recipe which uses a similar over high heat technique.
Essential Pantry Components
| Ingredient | Science Role | Pro Secret |
|---|---|---|
| Dark Brown Sugar | Lowers caramelization point | Always pack it tight for accurate measurement |
| Smoked Paprika | Adds depth without heat | Use "Pimentón de la Vera" for the best aroma |
| Kosher Salt | Controls moisture migration | Use Diamond Crystal for better surface coverage |
| Dried Lemon Peel | Provides acid without liquid | Zest your own and dry it for a fresher punch |
The interplay between these elements is what creates that "better than a restaurant" vibe. While fresh lemon is great for finishing, the dried peel in the seasoning itself is what survives the heat. It stays stable and potent, ensuring every bite has that citrus backnote.
Ingredients & Substitutes
- 3 tbsp Dark Brown Sugar: Provides the sweet base. Why this? Molasses content ensures a darker, richer crust during the cooking process.
- Substitute: Coconut sugar (same ratio, slightly less sweet).
- 1 tbsp Smoked Paprika: The smoky heart of the rub. Why this? Mimics the flavor of a wood fired grill even in an indoor pan.
- Substitute: Sweet paprika with a drop of liquid smoke in the pan.
- 1 tbsp Kosher Salt: The primary seasoning agent. Why this? Larger flakes allow for better control and don't over salt as easily as table salt.
- Substitute: Sea salt (use slightly less if the grains are very fine).
- 1 tsp Garlic Powder: For savory depth. Why this? Distributes instantly and won't turn bitter like fresh garlic can.
- Substitute: Granulated garlic works just as well here.
- 1 tsp Onion Powder: Rounds out the aromatics. Why this? Adds an earthy sweetness that complements the brown sugar.
- Substitute: Shallot powder for a more gourmet, delicate flavor profile.
- 1 tsp Dried Thyme: The herbal high note. Why this? One of the few herbs that maintains its integrity when dried.
- Substitute: Dried oregano or marjoram for a Mediterranean twist.
- 1 tsp Coarsely Ground Black Pepper: Provides a biting finish. Why this? Large cracks of pepper offer little bursts of heat and texture.
- Substitute: White pepper for a more subtle, floral heat.
- 0.25 tsp Cayenne Pepper: A tiny kick of heat. Why this? Just enough to wake up the palate without being spicy.
- Substitute: Red pepper flakes or a pinch of chipotle powder.
- 1 tsp Dried Lemon Peel: The secret weapon. Why this? Adds brightness without the steam producing moisture of fresh juice.
- Substitute: Fresh lemon zest added after cooking if you don't have dried.
Tools for Best Results
You don't need a kitchen full of gadgets, but a few specific items make a world of difference. A small glass mixing bowl is my favorite for blending because you can see if the sugar is fully incorporated.
Use a fork or a small whisk the tines are perfect for breaking up those stubborn clumps of brown sugar that always seem to form.
For the application, I highly suggest having paper towels on hand. This might sound basic, but patting that fish dry is the difference between a golden crust and a grey, mushy dinner.
If you're cooking the fish immediately after seasoning, a heavy bottomed skillet like a Lodge cast iron or a high-quality stainless steel pan will give you the best heat retention.
If you’re planning on making a big batch of this Salmon Seasoning for later, an airtight glass jar is essential. Plastic can sometimes absorb the strong scent of the smoked paprika, but glass keeps everything neutral and fresh.
I usually keep a small mason jar in my spice drawer labeled "The Good Stuff" because I end up putting this on chicken and shrimp too.
Blending and Application
- Combine ingredients. Place the dark brown sugar, smoked paprika, kosher salt, garlic powder, onion powder, dried thyme, black pepper, cayenne, and dried lemon peel into your bowl.
- Break clumps. Use a fork or whisk to mash any lumps in the brown sugar until the mixture is uniform in color. Note: This ensures every inch of the fish gets the same balance of salt and sugar.
- Dry the fish. Pat your salmon fillets completely dry with paper towels. Note: Moisture is the enemy of a crispy sear.
- Oil the surface. Apply a very thin coating of a neutral oil (like avocado or canola) to the flesh side of the fish.
- Season generously. Sprinkle the rub over the flesh, pressing it down gently with your fingers until it adheres firmly.
- Let it rest. Allow the seasoned fish to sit for 5–10 minutes before it hits the heat. Note: This allows the salt to start the brining process.
- Heat the pan. Get your skillet medium hot until a drop of water flicked onto it sizzles away instantly.
- Sear the flesh. Place the fish flesh side down first for about 2-3 minutes until a dark mahogany crust forms.
- Flip and finish. Carefully turn the fish and cook on the skin side until the skin is crisp and the internal temp is 145°F.
Fixes for Common Issues
Why the Crust Burned
This is almost always a temperature or timing issue. Because of the brown sugar, this rub is sensitive to extreme heat. If your pan is screaming hot (smoking oil), the sugar will carbonize before the fish is even warm. Keep it at a steady medium high.
Also, if you leave the flesh side down for too long, the sugar eventually gives up and burns. Two to three minutes is usually the sweet spot for a perfect Salmon Seasoning crust.
Why Your Fish is Soggy
If you skip the paper towel step, you’re essentially steaming your seasoning. The water on the surface of the fish turns to vapor, which lifts the spices away rather than letting them fuse to the meat. Another culprit is overcrowding the pan.
If you put too many fillets in at once, the temperature of the pan drops, and moisture pools at the bottom.
| Problem | Root Cause | Solution |
|---|---|---|
| Gritty texture | Sugar clumps weren't broken | Use a whisk or fork to sift the blend |
| Too salty | Using fine table salt | Switch to Kosher salt for better volume control |
| Bland flavor | Rub didn't stick | Pat fish dry and use a light oil binder |
Chef's Tip: If you want a deeper flavor profile, let the seasoned fish sit in the fridge uncovered for 30 minutes. This "dry brines" the salmon, making the flakes even more buttery and the surface even drier for a better sear.
Common Mistakes Checklist
- ✓ Never season wet fish; always pat it dry until the paper towel comes away clean.
- ✓ Don't skip the sugar it's what provides the structural "crunch" of the crust.
- ✓ Avoid moving the fish once it hits the pan; let the crust form for at least 2 minutes.
- ✓ Use oil with a high smoke point like avocado or grapeseed, not butter which burns.
- ✓ Check internal temp with a digital thermometer; pull it at 140°F as it will rise to 145°F while resting.
Scaling Your Spice Blend
When you realize how much better this is than store-bought packets, you’ll want to make a massive jar. To scale it down for a single serving, you can essentially use "pinches," but the ratio is what matters most.
For a half batch, beat one egg and use half of it if you were making a breaded version, but for a dry rub, just halve the tablespoons and teaspoons.
When scaling up (like 4x the recipe), be careful with the salt and cayenne. Spices don't always scale linearly in terms of perceived intensity. I usually scale the salt to 1.5x rather than a full 2x to avoid over seasoning, then taste and adjust. For more tips on handling larger portions of fish, check out this crispy salmon dinner which is perfect for groups.
If you’re doubling the recipe for a big party, you don't necessarily need to double the cayenne. Heat can build up quickly. Stick to about 1.5 times the original amount and see if it hits the right level of warmth for you.
The Truth About Rubs
One big misconception is that you need to "marinate" fish in dry rub for hours. Unlike beef, salmon has very delicate fibers. If you leave a salt heavy rub on for too long say, over 4 hours it will actually start to cure the fish, turning it firm and slightly translucent like lox.
5 to 10 minutes is all you need for a standard dinner.
Another myth is that you should only season the flesh. While the skin is usually salted for crispiness, applying a light dusting of this Salmon Seasoning to the skin side actually adds a wonderful charred flavor. Just be careful, as the sugar can make the skin stick to the pan more than usual.
Finally, some people think you can't use sugar on a grill. You absolutely can! The key is indirect heat or a slightly higher rack. The sugar creates a "bark" similar to BBQ brisket, which is incredible with the fatty oils of the salmon.
Storing and Reheating Tips
Because this is a dry rub, it has a fantastic shelf life. Keep it in a cool, dark place like a pantry or spice drawer. In an airtight glass jar, it will stay potent for up to 6 months.
If the brown sugar starts to harden, you can put a small terracotta "sugar saver" or even a piece of bread in the jar for an hour to soften it back up.
For zero waste, don't throw away the leftover spice on your cutting board! If you have extra rub that didn't touch the raw fish, toss it with some roasted chickpeas or even use it on roasted sweet potatoes. The smoky sweet profile is surprisingly versatile for root vegetables.
If you have leftover seasoned salmon, reheating it can be tricky. Avoid the microwave, which will turn the fish rubbery. Instead, wrap the fillet loosely in foil with a splash of water or lemon juice and pop it in a 300°F (150°C) oven for about 10 minutes.
This gently steams the fish from the inside out while keeping the seasoning intact.
Best Ways to Serve
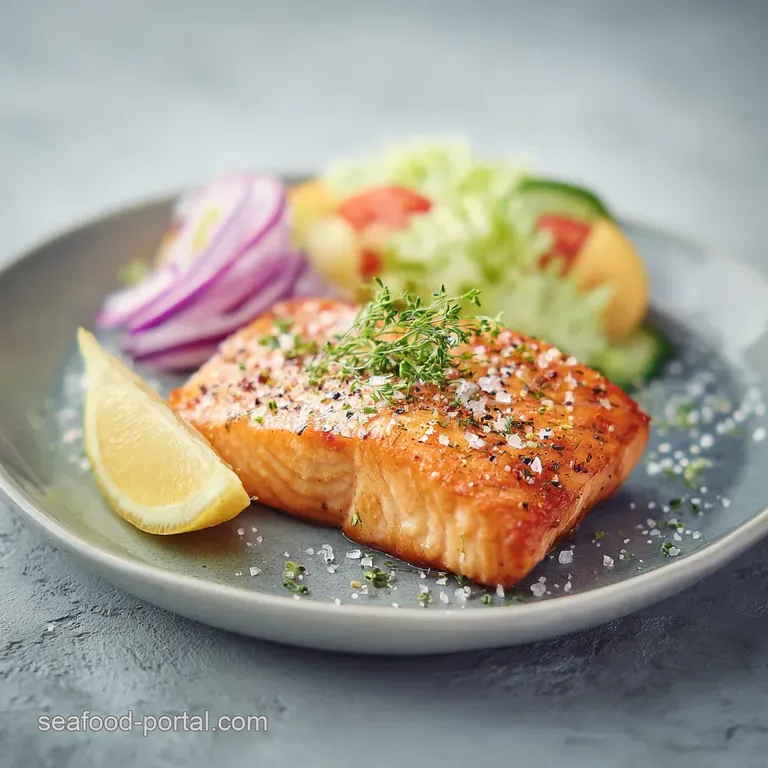
This seasoning creates such a bold flavor that you don't need heavy sauces to accompany it. A simple squeeze of fresh lime or a dollop of Greek yogurt mixed with dill is plenty. It pairs beautifully with light, acidic sides like a cucumber salad or a bright quinoa pilaf.
If you want a more indulgent meal, serve the seasoned salmon over a bed of garlic mashed potatoes. The sweetness of the rub contrasts perfectly with the salty, buttery spuds. Another "If you want X, do Y" trick: If you want a glaze, brush a little honey over the seasoning in the last 2 minutes of cooking.
If you want a taco vibe, add an extra half teaspoon of cumin to the blend. If you want it extra crispy, mix in a teaspoon of cornstarch to the dry rub before applying.
Honestly, once you start using this blend, you'll find yourself reaching for it every time you see salmon at the market. It's the easiest way to turn a basic Tuesday night meal into something that feels like a real treat. Trust me, your kitchen is about to smell amazing.

Recipe FAQs
What seasoning goes well on salmon?
A blend of dark brown sugar, smoked paprika, kosher salt, and aromatics works best. The brown sugar provides a necessary structural crunch, while the paprika and dried lemon peel offer a balanced, smoky finish.
What does Gordon Ramsay season salmon with?
He typically relies on basic kosher salt, freshly ground black pepper, and high-quality olive oil. While he keeps it simple for a classic sear, our blend adds depth with smoked paprika and dried thyme to replicate that professional crust.
How to cook salmon for a diabetic?
Pat the fish dry to ensure a perfect sear without excess fat. Focus on high heat cooking methods that maintain the salmon's nutritional integrity, similar to how we achieve a perfectly crisp skin without breading or heavy coatings.
Is grilled salmon good for high blood pressure?
Yes, as long as you monitor your sodium intake. Salmon is rich in heart healthy omega-3 fatty acids, making it an excellent dietary choice if you use seasonings like smoked paprika and garlic powder instead of excessive salt.
Is it true I should add the seasoning while the fish is wet?
No, this is a common misconception. You must pat the salmon fillets completely dry with paper towels; moisture on the surface creates steam, which prevents the spice crust from forming properly.
How to fix the brown sugar if it hardens in the jar?
Place a small piece of fresh bread into your airtight glass jar for about an hour. The moisture from the bread will naturally soften the sugar, returning your spice mix to a uniform texture.
How to ensure the crust doesn't burn during cooking?
Avoid moving the fish for at least two minutes once it hits the pan. This patience allows the sugars to caramelize into a stable, delicious crust without the spices lifting or burning prematurely.
Homemade Salmon Seasoning Blend

Ingredients:
Instructions:
Nutrition Facts:
| Calories | 24 kcal |
|---|---|
| Protein | 0.4 g |
| Fat | 0.3 g |
| Carbs | 5.1 g |
| Fiber | 0.4 g |
| Sugar | 4.6 g |
| Sodium | 475 mg |
