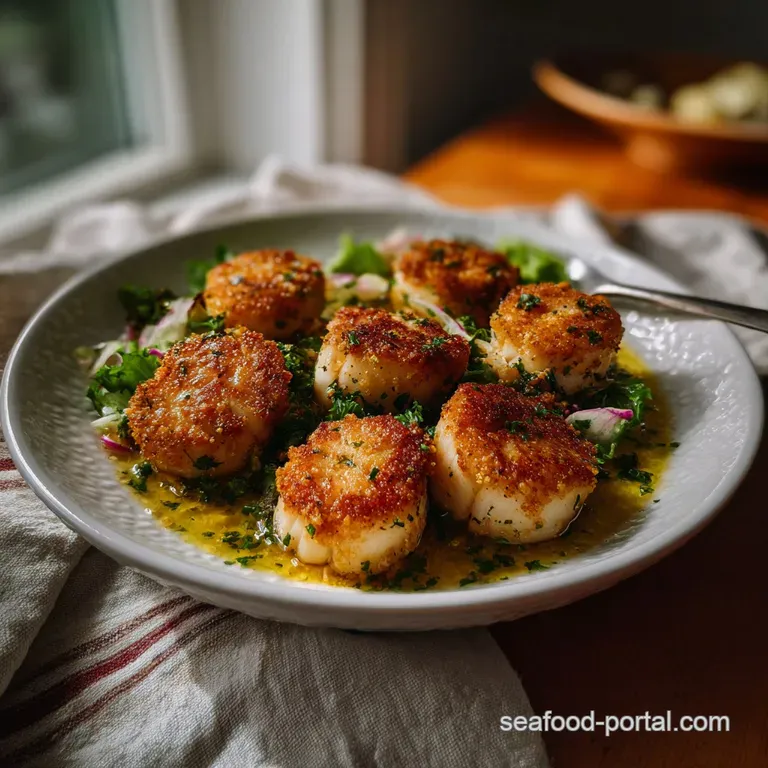
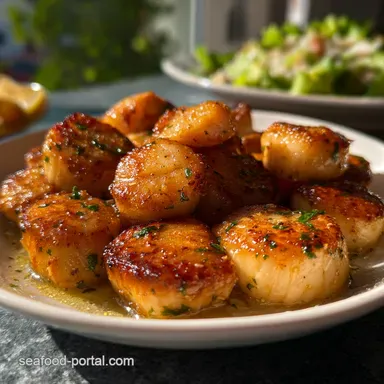
Crispy Fried Scallops in 20 Minutes
- Time: Active 10 minutes, Passive 10 minutes, Total 20 minutes
- Flavor/Texture Hook: Shatter-crisp golden crust with a silky, velvety center
- Perfect for: Impressive date nights or high-protein weeknight meals
- Why This Pan Searing Method Works
- Essential Specs for Searing Success
- Sourcing Your Seafood and Seasonings
- Essential Kitchen Tools for Searing
- Cooking Your Scallops Step-by-Step
- Fix Common Searing Mistakes Quickly
- Creative Ways to Change Flavors
- Myths Regarding Scallop Searing
- Storage and Waste Prevention Tips
- Plating Your Seafood Like Pros
- Common Questions
- 📝 Recipe Card
You know that feeling when you order scallops at a restaurant and they arrive with that gorgeous, caramel colored crust that looks like a literal work of art? Then you try it at home, and they just sort of... weep?
You end up with a puddle of grey liquid in the pan and something that tastes more like a rubber eraser than a delicacy. It's frustrating, but I promise it's not you, it's just the physics of the pan.
Getting Crispy Fried Scallops in 20 Minutes is actually about doing less, not more. We've all been there, hovering over the stove, poking and prodding the seafood because we're worried about burning it. But the secret to that restaurant quality finish is heat and patience.
Once they hit the oil, you have to let them be. Let the heat do the heavy lifting while you just sit back and wait for the magic to happen.
We’re going to walk through exactly how to avoid the "soggy scallop syndrome." By the time we’re done, you’ll be searing these like a pro, with a crust that crackles and a center that melts like butter. It’s one of those skills that feels like a massive win every time you pull it off. Ready?
Let's crack on.
Why This Pan Searing Method Works
- Maillard Reaction: High heat triggers a chemical reaction between amino acids and reducing sugars, creating that deeply flavorful, brown crust.
- Surface Dehydration: Removing every trace of exterior moisture prevents the "steam effect," ensuring the scallop fries instead of boils.
- Protein Denaturation: Rapid, over high heat exposure sets the outer proteins quickly, which traps the internal juices for a velvety texture.
- Thermal Conductivity: Using a heavy pan like a Lodge Cast Iron Skillet provides consistent heat that doesn't drop when the cold protein hits the surface.
- Carryover Cooking: Pulling the scallops 1 minute early allows residual heat to finish the center without toughening the delicate fibers.
| Component Analysis | Chemical/Physical Role (Science) | The Pro Secret (Why This Matters) |
|---|---|---|
| Sea Scallops | Myofibrillar protein structure | "Dry-packed" varieties lack chemical brines that prevent browning. |
| Grapeseed Oil | High smoke point (approx. 216°C) | Allows for extreme heat without the fat breaking down or smoking. |
| Unsalted Butter | Fat-in-water emulsion | Milk solids provide the nutty, brown butter finish during the baste. |
| Fine Sea Salt | Osmotic pressure regulator | Draws out deep seated moisture if applied too early; season right before searing. |
Essential Specs for Searing Success
When you are aiming for Crispy Fried Scallops in 20 Minutes, the prep is actually more important than the cooking. If you start with "wet" scallops (the kind soaked in sodium tripolyphosphate), they will never, ever get crispy. They’ll just shrink and turn white.
Look for "dry" scallops at the fish counter. They might be a bit more expensive, but the results are night and day. Achieving Crispy Fried Scallops in 20 Minutes hinges entirely on this initial dryness.
1. The Moisture Wick Principle
Moisture is the enemy of the sear. If there is water on the surface, the energy from your stove goes into evaporating that water (at 100°C) rather than browning the protein (which needs about 150°C).
I usually sandwich my scallops between layers of heavy duty paper towels for at least 10 minutes before they touch the pan.
2. The High Smoke Point Catalyst
Don't use extra virgin olive oil for this. It burns too quickly and leaves a bitter taste. Grapeseed oil or avocado oil are your best friends here. They can handle the "ripping hot" temperature needed to get that initial shatter crisp texture necessary for Crispy Fried Scallops in 20 Minutes.
3. Thermal Mass Management
If you crowd the pan, the temperature will plummet. If you're cooking for a crowd, do it in batches. It's better to have two batches of perfect scallops than one big batch of rubbery ones. This technique is similar to how we handle Fried Cod Fillets recipe to ensure the coating stays intact and crisp. This strict batching ensures consistent Crispy Fried Scallops in 20 Minutes results every time.
Sourcing Your Seafood and Seasonings
- 1.25 lbs large dry-packed sea scallops (approx. 16 20 count): Why this? Dry-packed scallops don't have added water or chemicals that prevent browning.
- 1 tsp fine sea salt: Why this? Fine grains dissolve instantly into the surface proteins for even seasoning.
- 0.5 tsp freshly cracked white pepper: Why this? White pepper provides heat without the black specks, keeping the crust looking clean.
- 2 tbsp grapeseed oil: Why this? High smoke point fat is essential for the 200°C+ temperatures required.
- 2 tbsp unsalted butter: Why this? Added at the end for flavor and "basting" moisture without burning.
- 2 sprigs fresh thyme
- 1 clove garlic, smashed
- 0.5 fresh lemon, for juicing
Essential Kitchen Tools for Searing
For the best results, you need a pan that holds onto heat. A Lodge 12 inch Cast Iron Skillet is the gold standard because it has immense thermal mass. If you don't have cast iron, a heavy bottomed stainless steel pan like an All-Clad Tri-Ply works beautifully too.
Just avoid non-stick pans; they generally can't handle the high heat required for a true crust, and you'll end up with a pale, sad-looking scallop.
You will also want a pair of precise kitchen tongs. I prefer the OXO Good Grips 9 Inch Tongs because they give you the control to flip the scallops without tearing the delicate crust. Finally, a small spoon for basting is non-negotiable.
You'll use this to shower the scallops in hot, garlic infused butter during the final minute of cooking. This precision is what separates good searing from truly achieving Crispy Fried Scallops in 20 Minutes.
Cooking Your Scallops step-by-step

1. The Critical Dehydration Phase
Pat 1.25 lbs large dry-packed sea scallops dry with a heavy duty paper towel. Note: Any surface moisture will cause the scallop to steam rather than fry.
2. Seasoning the Surface
Sprinkle 1 tsp fine sea salt and 0.5 tsp white pepper over both sides of the scallops. Note: Do this immediately before cooking to prevent the salt from drawing out internal moisture.
3. The Smoking Point Launch
Heat 2 tbsp grapeseed oil in a heavy skillet over high heat for 3 minutes until wisps of blue smoke just begin to rise from the surface.
4. Placing the Protein
Lay the scallops into the pan one-by-one in a clockwise pattern. Note: Starting at "12 o'clock" helps you remember which one went in first for even flipping.
5. The Two-Minute Searing Window
Sear undisturbed for 2 minutes until the bottom edges turn deep mahogany and a visible crust forms around the base.
6. The Precision Flip
Turn each scallop over using tongs. Note: If the scallop resists or sticks, it isn't ready; wait another 15 seconds.
7. Introducing the Aromatics
Drop 2 tbsp unsalted butter, 2 sprigs thyme, and 1 smashed garlic clove into the gaps between the scallops. Note: The butter will foam immediately as the water evaporates.
8. The Butter Baste Finish
Tilt the pan slightly and spoon the foaming butter over the scallops for 1 minute until the butter smells nutty and the centers feel slightly firm but springy. Executing this step correctly is key to the overall success of Crispy Fried Scallops in 20 Minutes.
9. The Acidic Brightness
Squeeze 0.5 fresh lemon over the pan. Note: The acid cuts through the richness of the butter and heightens the sweetness of the seafood.
10. The Final Rest
Remove the scallops to a warm plate immediately. Note: Leaving them in the hot pan will result in overcooked, rubbery centers. Following this final step ensures you truly have Crispy Fried Scallops in 20 Minutes.
Fix Common Searing Mistakes Quickly
Sometimes things don't go exactly to plan. If your pan wasn't hot enough or you used "wet" scallops, you might see white liquid pooling. This is protein rich water being pushed out.
Honestly, don't even bother trying to save the sear if this happens pour the liquid out, wipe the pan, add fresh oil, and try again. This is the moment where most home cooks fail to achieve Crispy Fried Scallops in 20 Minutes.
Why Your Scallops Sticking
If your scallops are sticking to the pan, you are likely trying to flip them too early. As the Maillard reaction completes, the proteins will naturally release from the metal. It’s a physical signal that the crust has formed.
| Problem | Root Cause | The Fix | Pro Protocol |
|---|---|---|---|
| White liquid in pan | Wet-packed scallops or low heat | Pat dry and increase heat to high | Use "dry-packed" only |
| Crust peels off | Moving them too early | Leave undisturbed for 2 mins | Use a fish spatula for lift |
| Tough/Chewy texture | Overcooking past 55°C | Reduce cook time by 30 secs | Pull when center is translucent |
Chef's Tip: Freeze your butter for 10 minutes before adding it to the pan. This slows down the browning process, allowing you more time to baste the scallops without the milk solids burning to a crisp.
Mastering this baste ensures the exterior of your Crispy Fried Scallops in 20 Minutes is perfect.
Creative Ways to Change Flavors
1. The Miso Maple Twist
Mix a teaspoon of white miso with the butter before basting. The fermented funk of the miso paired with the natural sweetness of the scallops is brilliant. It creates a much darker, saltier crust that works beautifully with steamed greens.
2. Mediterranean Herb Crust
Instead of thyme, use fresh oregano and a pinch of red chili flakes. This version pairs incredibly well with a Classic Oysters Bienville recipe if you’re doing a larger seafood spread.
Batch Expansion Logic
- Scaling Up (2x)
- Use two separate pans or work in batches. If you put 32 scallops in one 12 inch pan, you’ll end up with a stew.
- Flavor (Salt/Spices)
- Scale to 1.5x. Large batches of seafood can become overly salty very quickly.
- Batch Timing
- Keep the first batch in a 65°C oven on a wire rack while finishing the second. Don't use a plate, or the bottoms will get soggy. Keeping these portions warm is important so that the final serving maintains the integrity of Crispy Fried Scallops in 20 Minutes.
Myths Regarding Scallop Searing
Myth: You should soak scallops in milk to make them sweeter. Truth: This is an old trick for masking "fishy" older scallops. Fresh, high-quality dry scallops are naturally sweet due to their glycogen content and don't need a soak, which only adds unwanted moisture.
Myth: You must remove the "foot" or it will ruin the dish. Truth: The little side muscle (the foot) is edible, it’s just tougher than the rest of the scallop. It’s a texture thing.
I usually pull it off because it takes two seconds, but if you miss one, it’s not the end of the world.
Storage and Waste Prevention Tips
Storage: Fried scallops are best eaten immediately. If you have leftovers, keep them in the fridge for up to 2 days. Freeze: I don't recommend freezing cooked scallops; the delicate protein structure breaks down and becomes mushy.
Zero Waste: Don't throw away those "feet" or the liquid left in the bag. Transform: Chop the side muscles finely and simmer them with vegetable scraps to make a quick seafood stock.
Science: These bits are packed with concentrated umami and collagen, which adds body to soups or risottos. Successfully executing the Crispy Fried Scallops in 20 Minutes often leaves you wanting more, but this stock helps maximize your seafood usage.
Plating Your Seafood Like Pros
1. The Height Advantage
Don't just lay them flat. Lean them against a small mound of cauliflower purée or pea mash. This creates visual interest and keeps the crispy bottom from sitting in any juices on the plate.
2. The Contrast Garnish
Use something bright and crunchy to contrast the soft scallop. Micro greens or even finely toasted breadcrumbs (pangrattato) add that final layer of texture that makes the dish feel complete. If you are serving these as part of a larger meal, consider how they look next to something like a Mediterranean Fish Fillets recipe for a diverse seafood platter.
3. The Oil Drizzle
Take that leftover browned butter from the pan the stuff with the garlic and thyme and drizzle it over the scallops right before they hit the table. That glossy finish is what gives them that "sizzle" look.
Trust me on this; the extra fat carries the flavor across the palate much better than just the sear alone. This final touch ensures your plate screams "gourmet," even though you made Crispy Fried Scallops in 20 Minutes.
Right then, you've got the science, the steps, and the secrets. Go get that pan screaming hot and enjoy the best scallops of your life!

Common Questions
Can I use frozen scallops instead of fresh?
No, frozen scallops must be completely thawed first. Excess surface moisture from incomplete thawing guarantees steaming rather than searing. Always pat them extremely dry before the oil hits the pan.
What is the absolute highest temperature the pan should reach?
Aim for oil just before its smoke point, around 205°C. This intense heat initiates the Maillard reaction immediately, creating a crust before the interior overcooks.
If you mastered the sensory doneness cues here, apply them to our [Pan Seared Salmon: Ultra Crispy Skin Lemon Butter Sauce Recipe] for perfect results.
Why did my scallops turn tough and rubbery after cooking?
Overcooking is the singular cause of toughness in scallops. Excessive heat denatures the muscle fibers past their tender point, forcing out retained moisture and creating an elastic texture.
- Pull scallops 1 minute early
- Use an instant read thermometer
- Ensure internal temp hits 55°C maximum
Should I use butter or oil to start searing the scallops?
Use oil for the initial high heat sear. Butter contains milk solids that burn rapidly below the required searing temperature, imparting a bitter flavor. Oil provides the necessary thermal stability while the butter is added later solely for flavoring and basting.
Is it necessary to use a cast iron skillet for this recipe?
A heavy stainless steel pan is an acceptable alternative. Cast iron excels due to its superior thermal mass, preventing significant temperature drops when cold scallops are added. Heavy pans ensure consistent heat transfer, which is the principle needed for successful high heat cooking.
Myth: I should salt the scallops hours in advance to draw out moisture.
Myth: Salting hours ahead forces salt deep into the muscle structure, causing rapid moisture release later. Reality: For a sear, salt should only be applied right before the scallop enters the hot oil to draw out only the surface dampness.
Myth: It’s okay to crowd the pan if I cook them slightly longer.
Myth: Crowding the pan guarantees the temperature drops, causing the seafood to steam in its own liquid instead of browning. Reality: Work in small, well spaced batches; this honors the principle of high heat thermal energy transfer required for crispness.
Crispy Scallops In 20 Minutes
Ingredients:
Instructions:
Nutrition Facts:
| Calories | 242 kcal |
|---|---|
| Protein | 17.4 g |
| Fat | 13.9 g |
| Carbs | 3.8 g |
| Fiber | 0.1 g |
| Sugar | 0.2 g |
| Sodium | 765 mg |
