Crispy Golden Tuna Patties
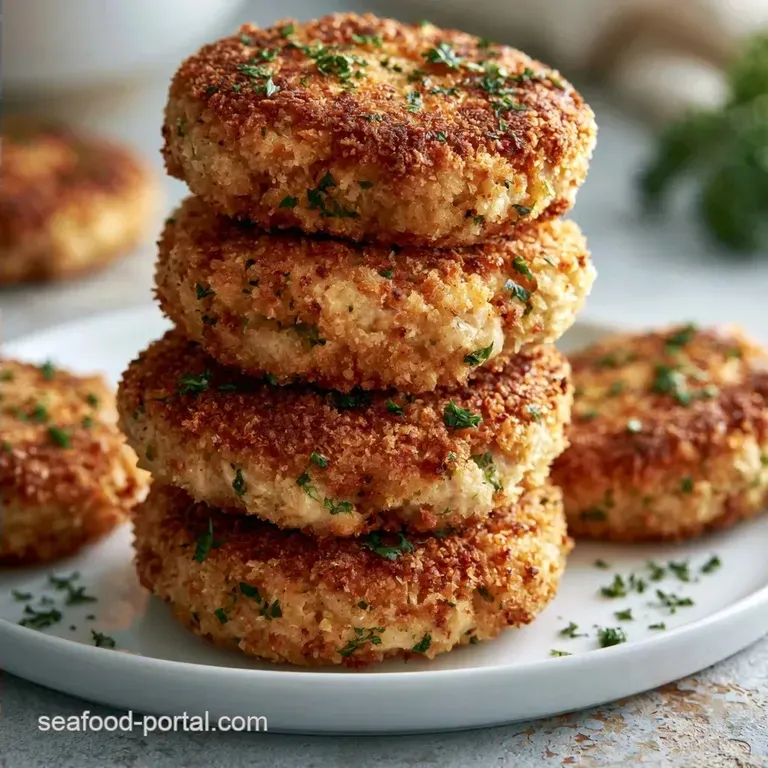
- Time: 10 min prep + 8 min cook
- Sensory Appeal: A deep mahogany crust with a zesty, tangy center
- Ideal for: A rapid weekday meal or a protein-packed lunch
Crispy Golden Tuna Patties Recipe
The sound of fish cakes hitting a hot pan is a staple of coastal kitchens. From the shores of New England to the Mediterranean, these patties started as a way to make a small amount of fish stretch to feed a whole family. It was about using every scrap and adding a bit of binder to turn leftovers into a hearty meal.
For many of us, this dish brings back memories of old-fashioned home cooking. But the modern version often relies on canned tuna, which is a huge shortcut. The challenge is making sure they don't turn into mushy disks that fall apart the second you flip them.
These Tuna Patties hit the mark by balancing a few simple pantry staples. You get a result that feels like a treat but takes less than 20 minutes from start to finish. It's a budget-friendly way to get a lot of protein on the table without spending an hour over the stove.
Basic Recipe Specs
Perfect results depend on a few specific details. First, wait until the oil shimmers in the pan before adding the fish. Second, maintain a thickness of exactly 1 inch for each patty to ensure the interior cooks through without scorching the outside.
Finally, let them sear undisturbed for 3 to 4 minutes to create a sturdy crust.
| Ingredient Source | Convenience | Cost | Texture |
|---|---|---|---|
| Canned Tuna | Very High | Low | Firm and consistent |
| Fresh Tuna | Low | High | Flaky and tender |
Here is a breakdown of the ingredients you will need to get started.
The Core Ingredients
Tuna takes center stage, and how you handle it makes a big difference. USDA FoodData notes that tuna is a lean protein, which can lead to dryness if overcooked, but the addition of egg and breadcrumbs helps seal in the moisture.
- Canned Tuna
- Forms the savory, hearty base.
- Egg
- Serves as the binder to keep the fish and crumbs intact.
- Panko
- Gives the cakes their signature crispy exterior.
- Lemon Juice
- Balances the oil with a hit of acidity.
- Garlic Powder
- Provides deep savoriness without the risk of burning fresh bits.
The Shopping List: 2 cans (142g each) tuna in water, drained well Why this? It's a leaner choice and easier to drain 1 large (50g) egg, beaten Why this? Crucial for the structure 1/2 cup (60g) Panko or plain breadcrumbs Why this? Panko offers a better crunch 1 tbsp (15ml) lemon juice Why this? Brightens the overall profile 1/4 tsp (1.5g) salt Why this? Amplifies the fishy flavor 1/4 tsp (1.2g) black pepper Why this? Adds a touch of warmth 1/2 tsp (2.5g) garlic powder Why this? Distributes flavor evenly 1 tbsp (4g) fresh parsley, finely chopped Why this? Adds a bright, herbal note 2 tbsp (30ml) neutral oil Why this? Stable at high searing temperatures
- Panko → Crushed saltines
- Provides a similar bind with a heartier crunch.
- Lemon juice → Apple cider vinegar
- Offers a similar tang with a fruity twist.
- Parsley → Dried dill
- Creates a more traditional seafood pairing.
Gear You'll Need
Basic kitchen staples are all you need for these Tuna Patties; a mixing bowl and a fork will handle the preparation. For frying, a cast iron or stainless steel pan is ideal for its ability to distribute heat evenly.
Using a fine mesh strainer is crucial for pressing out every bit of moisture from the tuna to ensure the patties aren't soggy. While you could use the lid of the can instead, this method is slower and doesn't remove as much liquid.
The Cooking Steps
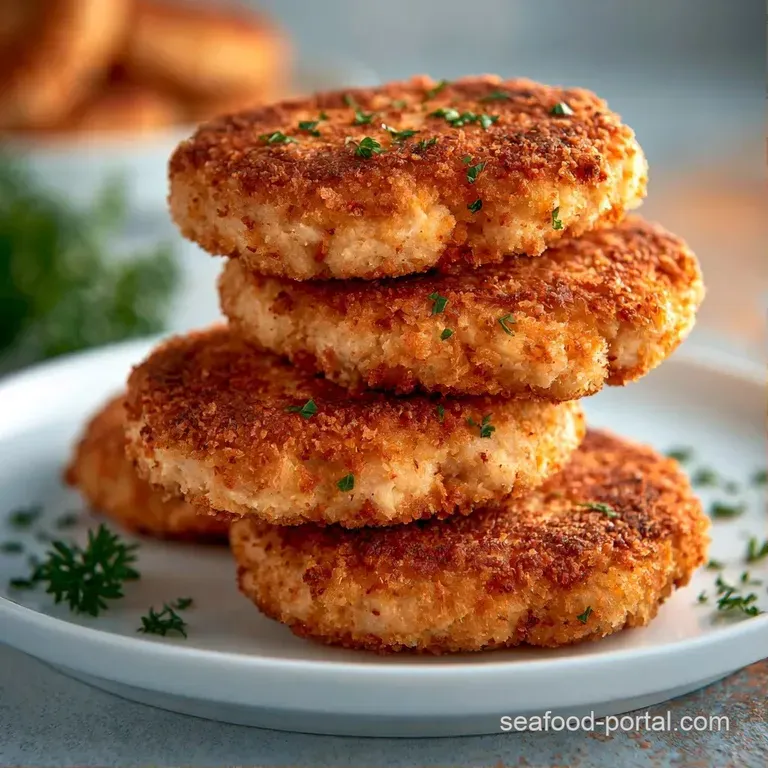
Time to dive into the preparation. It is vital to move quickly once the patties are shaped so they don't become too soggy from the egg.
1. The Texture Prep
Drain the canned tuna through a fine mesh strainer. Use a spoon to push out as much excess moisture as possible. Transfer the tuna to a mixing bowl and break up any large pieces with a fork. Note: The drier the tuna, the crispier the crust.
2. The Binding Process
Fold in the beaten egg, breadcrumbs, lemon juice, and seasonings. Mix with a spatula or fork until the mixture is cohesive and holds its shape. If it feels too wet to form a patty, stir in one additional tablespoon of breadcrumbs.
3. The Precision Sear
Warm the oil in your pan over medium-high heat until it begins to shimmer. Shape the mixture into 4 equal patties, roughly 1 inch thick.
4. The Final Brown
Gently place the Tuna Patties into the pan. Cook undisturbed for 3–4 minutes until a deep golden brown crust forms. Flip once and cook for another 3 minutes.
Chef's Note: Avoid the temptation to nudge or poke the patties. Every time you move them, you break the seal of the crust, which can cause them to fall apart.
How the Crust Forms
The Heat Reaction: High heat from the oil browns the proteins and starches. This creates a sturdy shell that stops the fish from leaking.
Moisture Control: By removing the water from the can, the oil can fry the surface immediately. This prevents the patties from steaming, which is what usually makes them mushy.
Fixing Common Issues
The biggest challenge with Tuna Patties is preventing them from crumbling. This typically stems from issues with temperature or moisture. When the skillet lacks sufficient heat, the patties cling to the pan and break apart during flipping.
Additionally, excess liquid prevents the egg from binding the fish quickly enough.
Preventing Patties From Falling Apart
Make sure your tuna is completely dry before mixing in binders. If the consistency is too loose, stir in extra Panko. Wait until the oil is nearly smoking before adding the patties.
Fixing Mushy Centers
Mushy centers are usually caused by patties that are too thick or insufficient heat. Maintain a thickness of 1 inch and cook over medium-high heat. This allows the exterior to brown while the center reaches a safe internal temperature.
Reducing Strong Fishy Taste
To neutralize the "canned" taste, try adding a splash more lemon juice or a pinch of paprika. Fresh parsley is also great for brightening the flavor profile.
| Problem | Root Cause | Solution |
|---|---|---|
| Falling apart | Excessive moisture | Drain tuna more thoroughly |
| Sticking to pan | Insufficient oil heat | Let oil heat until shimmering |
| Pale color | Temperature too low | Increase to medium high |
Saving Your Leftovers
You can keep these in a glass container in the fridge for about 3 days. When you're ready to eat them, don't use the microwave, as that makes them rubbery. Instead, toss them back in a pan with a teaspoon of oil for 2 minutes per side to bring back the crunch.
If you want to freeze them, shape the Tuna Patties but don't fry them. Place them on a parchment lined tray to freeze individually for an hour, then move them to a freezer bag. They'll stay good for 2 months. You can fry them straight from the freezer, just add 1-2 minutes to the cooking time.
For zero waste, don't throw away the leftover egg wash if you made a big batch. It's great for coating a piece of toast or adding to a morning scramble.
Ways to Twist it
If you're looking for 3 Ingredient Tuna Patties, you can simplify this by using just tuna, egg, and mayo. It's a bit softer and more like a salad cake. For those wanting Easy 3 ingredient tuna patties without bread, you can swap the Panko for almond flour or mashed potato.
Decision Shortcut: Extra tang? → fold in 1 tsp lemon zest. More heat? → add 1/2 tsp cayenne. Extra crunch? → toast panko first.
Low Carb Options
For a keto version, use almond flour or crushed pork rinds instead of breadcrumbs. These Ingredient Tuna Patties stay very firm and have a rich, nutty flavor.
Zesty Mediterranean
Fold in a tablespoon of capers, some chopped kalamata olives, and a bit of dried oregano. If you enjoy bold flavors, you might also like this spicy tuna recipe for a fresh contrast.
Old Fashioned Style
Try using mashed potatoes as the binder instead of Panko. This creates a softer, more comforting texture that reminds me of the cakes my grandmother used to make.
Side Dish Ideas
These Tuna Patties are rich and savory, so they need something bright to balance them out. A simple arugula salad with a lemon vinaigrette or some steamed asparagus works brilliantly.
If you want a dipping sauce, a mix of Greek yogurt, lemon, and dill is the way to go. These pair great with a zesty dip, similar to the one in my tuna cakes with lemon dill sauce guide.
Right then, that's how you get a crisp, reliable result every time. Once you get the hang of the drain and sear method, these will become your go to for a quick protein fix. Enjoy!
Recipe FAQs
How to make tuna patties?
Drain the tuna thoroughly and mix with egg, breadcrumbs, lemon juice, and seasonings. Heat oil over medium-high until it shimmers, form 1-inch thick patties, and sear for 3-4 minutes per side until golden brown.
What holds tuna patties together?
The combination of beaten egg and breadcrumbs acts as the binder. The egg proteins set during frying while the crumbs absorb moisture to ensure the patties keep their shape.
Is it true that tuna patties always fall apart when flipped?
That's a myth. They stay intact as long as you press the tuna dry and leave the patties undisturbed for at least 3-4 minutes to build a structural crust before flipping.
What should I serve with tuna patties?
Fresh greens or a zesty dipping sauce are the best pairings. If you loved the tangy contrast in this recipe, see how we apply a similar flavor balance in our creamy caper sauce.
Tuna Patties in 18 Minutes: Crispy