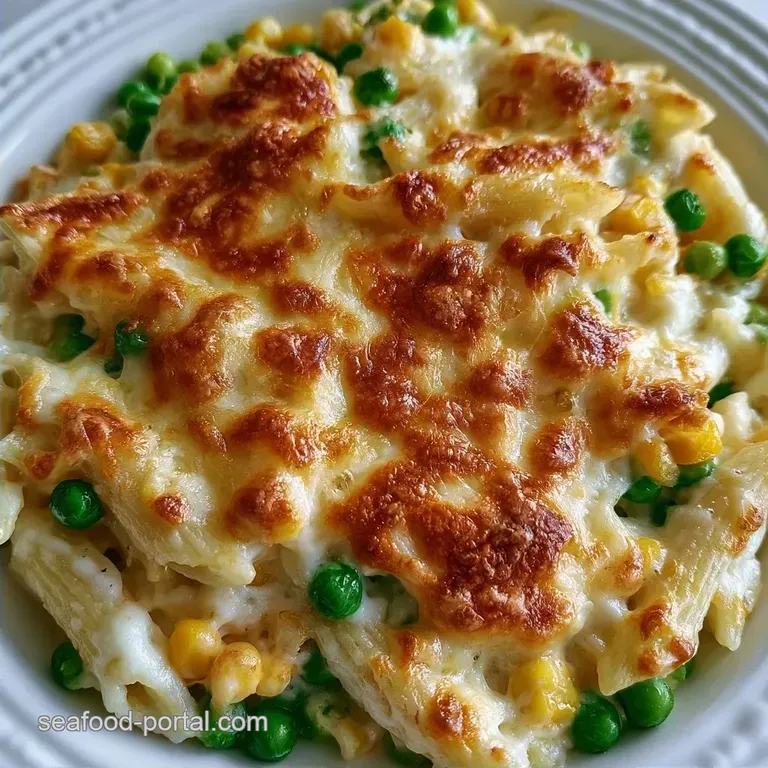
Baked Cheesy Tuna Pasta: Better Than Bistro
- Time: 10 min active + 30 min baking = Total 40 mins
- Flavor/Texture Hook: Shatter crisp Panko topping with a velvety, gooey center
- Perfect for: Easy weeknight dinners or budget-friendly family meal prep
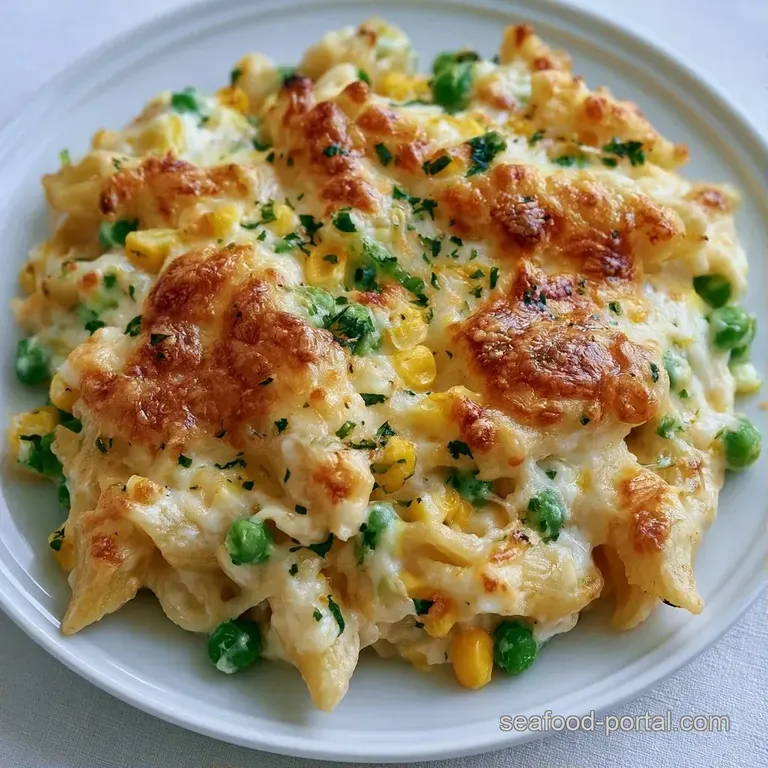
- Baked Cheesy Tuna Pasta
- Secrets behind the texture
- Component Analysis
- Gathering your ingredients
- Essential gear for the job
- Step by step assembly
- Fixing common mishaps
- Troubleshooting Common Issues
- Creative ways to tweak
- Adjusting the serving size
- Debunking common beliefs
- Keeping leftovers fresh
- Best sides for this
- High in Sodium
- Recipe FAQs
- 📝 Recipe Card
That smell of toasted breadcrumbs and bubbling cheese hitting the air is honestly the best part of my Sunday. I remember the first time I tried to make a tuna bake, I just dumped everything in a dish and hoped for the best, only to end up with a dry, clumped mess that tasted like cardboard.
It was a disaster, but it taught me that the secret is all in the sauce.
The real hero here is the chunk light tuna. I've tried using the fancy albacore, but it's often too firm and "steak like" for a bake. Chunk light has a softer texture that integrates into the sauce while still leaving those satisfying little bites of protein. When you pair that with a sharp cheddar and the pull of mozzarella, this Baked Cheesy Tuna Pasta becomes something you actually crave.
You can expect a dish that hits all the right notes, from the saltiness of the cheese to the pop of sweetcorn and peas. It's not just "filler" food, it's a proper meal. We're going for a specific contrast: a crust that actually shatters when you hit it with a fork, and a center that stays silky and rich.
Baked Cheesy Tuna Pasta
The magic of this dish is the balance of textures. If you've had those versions that feel like mush, it's usually because the pasta was overcooked before it even hit the oven. By pulling the noodles out early, they soak up the sauce without losing their structure.
I also learned the hard way that cold milk is the enemy of a smooth sauce. If you pour ice cold milk into a hot butter flour mixture, you get lumps. Warmed milk creates a seamless, glossy emulsion that wraps around every piece of tuna and vegetable.
It's a small step, but it makes a huge difference in how the final result feels in your mouth.
Right then, let's get into the bits that actually make this work. Trust me on the cheese choice, because using a single type of cheese usually leaves the dish either too oily or too stiff. The combo we're using is the sweet spot.
Secrets behind the texture
- Under boiling: Cooking pasta 2 minutes short ensures the noodles finish in the oven, absorbing the sauce instead of becoming soggy.
- The Roux Base: Cooking flour in butter for a minute removes the "raw" taste and creates a stable thickening agent.
- Cheese Layering: Using Cheddar inside the sauce for flavor and Mozzarella on top for the stretch prevents the topping from breaking.
- Breadcrumb Toasting: Mixing Panko with melted butter ensures every crumb browns evenly rather than just burning on the edges.
- Liquid Warmth: Warmed milk prevents the fat in the butter from seizing, which keeps the sauce velvety and smooth.
Since you might be in a rush or wanting something a bit more traditional, I've put together a quick comparison to help you decide which route to take.
| Feature | Fast Method (Tinned Soup) | Classic Method (This Recipe) | Impact |
|---|---|---|---|
| Sauce Texture | Thick and "gel like" | Silky and fluid | Better mouthfeel |
| Flavor Profile | Very salty/metallic | Fresh and buttery | Cleaner taste |
| Prep Time | 5 mins | 15 mins | Slightly more effort |
| Control | Pre set ingredients | Fully customizable | Better quality |
You'll notice the classic method takes a few more minutes, but the payoff is a dish that doesn't taste like it came from a can.
Component Analysis
Before we start, it's helpful to know why these specific ingredients are in the mix. It's not just about flavor, it's about how they behave under heat.
| Ingredient | Science Role | Pro Secret |
|---|---|---|
| All purpose flour | Starch thickener | Cook it until it smells nutty, not burnt |
| Sharp Cheddar | Flavor anchor | Grate it yourself to avoid anti clumping starch |
| Panko Breadcrumbs | Texture contrast | Use these over regular crumbs for a lighter "crunch" |
| Whole Milk | Fat carrier | According to USDA FoodData, the fat in whole milk provides the necessary creaminess |
Having a handle on these roles helps if you ever need to make a last minute change to the recipe.
Gathering your ingredients
For the base, you'll need the bulk of your meal. Make sure your tuna is drained well so the sauce doesn't get watery.
- 1 lb (450g) Penne or Rigatoni pasta Why this? Ridges hold onto the cheese sauce better than smooth pasta
- 2 cans (5 oz/140g each) Chunk light tuna in water, drained Why this? Softer texture that blends with the sauce
- 1 cup (150g) Frozen peas Why this? Adds a bright, fresh pop of color and sweetness
- 1 cup (160g) Canned sweetcorn, drained Why this? Adds a subtle crunch and sweetness
For the creamy sauce, keep your measurements precise to ensure the thickness is just right.
- 3 tbsp (42g) Unsalted butter Why this? Pure fat for a rich, neutral base
- 3 tbsp (25g) All purpose flour Why this? Standard thickener for a stable roux
- 2 cups (480ml) Whole milk, warmed Why this? Prevents lumps and adds richness
- 1 tsp (5g) Garlic powder Why this? Even distribution of flavor throughout the sauce
- ½ tsp (3g) Salt
- ¼ tsp (1g) Black pepper
- 1 cup (115g) Sharp Cheddar cheese, shredded Why this? High flavor punch to cut through the cream
For the golden topping, this is where we get that "shatter" effect.
- 1 cup (115g) Mozzarella cheese, shredded Why this? Superior melting and stretching properties
- ½ cup (60g) Panko breadcrumbs Why this? Larger flakes for a more dramatic crunch
- 1 tbsp (15ml) Melted butter Why this? Helps the crumbs brown evenly in the oven
- 1 tsp (1g) Dried oregano Why this? Earthy aroma that balances the heavy cheese
If you're missing something, don't panic. Most of these can be swapped without ruining the dish.
| Original Ingredient | Substitute | Why It Works |
|---|---|---|
| Penne Pasta | Fusilli or Macaroni | Similar starch content. Note: Macaroni makes it more like a traditional mac and cheese |
| Whole Milk | Heavy Cream (diluted with water) | Similar fat content. Note: Result will be richer and thicker |
| Sharp Cheddar | Gruyere or Pepper Jack | Strong flavor profiles. Note: Pepper Jack adds a spicy kick |
| Panko Breadcrumbs | Crushed Cornflakes | High crunch factor. Note: Adds a slightly sweeter, corn like taste |
Wait a second before you start make sure your oven is preheating. There's nothing worse than having a beautiful sauce ready to go and then realizing the oven is still cold, which lets the sauce start to set.
Essential gear for the job
You don't need a professional kitchen for this, but a few specific tools make it much easier. I highly recommend using a heavy bottomed saucepan for the sauce; thin pans tend to create hot spots that can burn the flour.
A whisk is non negotiable here. Trying to stir a roux with a spoon is a recipe for lumps. You want to be able to break up those flour particles quickly as the milk hits the pan. Also, grab a 9x13 inch baking dish. If you use one that's too large, the pasta will spread too thin and dry out.
If it's too small, you won't get enough of that crispy top layer.
Finally, a colander for the pasta and a cheese grater. Honestly, don't even bother with the pre shredded cheese in bags. Those are coated in potato starch to keep them from sticking, which means they don't melt into a velvety sauce as well as fresh grated cheese does.
Step by step assembly
Let's crack on with the actual cooking. Follow these steps, and you'll have a Baked Cheesy Tuna Pasta that tastes like it took hours, even though it's quite fast.
Phase 1: The Foundation
- Bring a large pot of salted water to a boil. Add the pasta and cook for 2 minutes less than the package instructions for al dente. Drain and set aside without rinsing. Note: Rinsing removes the starch that helps the sauce stick
- In a saucepan, melt 3 tbsp butter over medium heat. Whisk in the flour and cook for 1 minute until it smells slightly nutty and fragrant.
- Slowly pour in the warmed milk, whisking constantly to eliminate lumps. Simmer until the sauce thickens enough to coat the back of a spoon.
Phase 2: The Velvety Assembly
- Stir in garlic powder, salt, pepper, and the shredded Cheddar until the sauce is a smooth, glossy emulsion.
- Fold in the drained tuna, peas, and sweetcorn, stirring gently until the vegetables are evenly distributed but the tuna stays in chunks.
- Pour the cooked pasta into a 9x13 inch baking dish and fold in the creamy sauce until every noodle is enveloped.
Phase 3: The Final Bake
- Preheat oven to 400°F (200°C). Mix Panko breadcrumbs, melted butter, and oregano in a small bowl.
- Layer the Mozzarella over the pasta, then sprinkle the seasoned breadcrumbs on top.
- Bake for 15-20 minutes until the topping is golden brown and the sauce is bubbling.
Chef's Tip: For an even crispier top, I sometimes pop the broiler on for the last 2 minutes. Just watch it like a hawk Panko goes from "golden" to "burnt" in about 30 seconds!
Fixing common mishaps
Even for experienced cooks, things can go sideways. The most common issue with a Baked Cheesy Tuna Pasta is usually related to moisture levels. If you've ever had a bake that turned into a soup or, conversely, a dry brick, here is how to handle it.
Troubleshooting Common Issues
| Issue | Solution |
|---|---|
| Why Your Sauce Is Pasty | If the sauce feels thick and gluey, you likely cooked the flour too long or didn't add enough milk. It can also happen if you use too much flour. |
| Why The Topping Isn't Browning | Usually, this is because the breadcrumbs weren't tossed in butter or the oven temperature is too low. Without that fat, the crumbs just dry out rather than fry. |
| Why The Pasta Is Too Soft | This happens when you follow the pasta box instructions exactly. Remember, the pasta cooks a second time in the oven. Always aim for that "slightly too firm" bite when you drain it. |
- ✓ Use a timer for the pasta, don't guess.
- ✓ Warm your milk in the microwave for 60 seconds.
- ✓ Use a sharp cheddar for a more balanced flavor.
- ✓ Drain the tuna until no liquid remains.
- ✓ Grate your own cheese for better melt.
Creative ways to tweak
Once you've nailed the basic Baked Cheesy Tuna Pasta, you can start playing with the flavors. I love adding a teaspoon of Dijon mustard to the roux; it doesn't make it taste like mustard, but it adds a depth that makes people ask, "What is in this?"
If you want to add more greens, baby spinach is a great choice. Just fold it in at the same time as the peas, and it will wilt perfectly in the oven. For those who like a bit of a kick, a pinch of cayenne pepper or some red chili flakes in the sauce works wonders.
If you're looking for other ways to use tuna in a comforting bake, you might enjoy my Homemade tuna casserole which uses a slightly different approach to the cream base. You can also try adding sautéed mushrooms or diced bell peppers for an extra layer of texture.
Dietary Swaps
- gluten-free: Swap the AP flour for a 1:1 gluten-free blend and use GF penne. Note: The sauce might be slightly thinner.
- low fat: Use skim milk and a reduced fat mozzarella. Note: You'll lose some of that velvety richness.
- Extra Veggie: Double the peas and add diced carrots. Note: Increase bake time by 5 minutes to ensure carrots are tender.
Adjusting the serving size
If you're cooking for just yourself or a huge crowd, you can't just double everything blindly. Baking is all about ratios and heat distribution.
Scaling Down (Half Recipe): Use an 8x8 inch square pan instead of the 9x13. Reduce the baking time by about 20%, as a smaller mass heats through faster. If the recipe calls for an egg (though this one doesn't), beat one and use half.
Scaling Up (Double Recipe): Don't just double the spices and salt, or it'll be overwhelming. Go to 1.5x for the salt and oregano. For the liquids, you can actually reduce the milk by about 10% because larger batches retain more moisture.
Use two separate 9x13 pans rather than one deep pan to ensure the middle cooks through before the edges burn.
| Pan Size | Servings | Temp | Estimated Bake Time |
|---|---|---|---|
| 8x8 inch | 3 | 400°F (200°C) | 20-25 mins |
| 9x13 inch | 6 | 400°F (200°C) | 15-20 mins |
| Two 9x13 inch | 12 | 375°F (190°C) | 25-30 mins |
When doubling the recipe, I recommend lowering the temperature by 25°F (about 15°C) and extending the time. This prevents the outer edges from drying out while the center is still cold.
Debunking common beliefs
There's a lot of noise out there about tuna bakes. One big myth is that you should rinse your pasta after boiling. Please, don't do this! Rinsing removes the surface starch, which is exactly what helps the cheese sauce cling to the noodle. Without it, your sauce will just slide off and pool at the bottom of the dish.
Another common misconception is that canned tuna is essentially tasteless and needs a ton of salt. The truth is that the tuna provides the savory base. If you use a high-quality chunk light tuna and balance it with a sharp cheese, you don't need to over salt the dish. Let the ingredients do the heavy lifting.
Finally, some people think you need to use canned "cream of mushroom" soup to get that classic texture. While that's the old school way, making a roux from scratch is actually easier and tastes far fresher. You avoid the metallic aftertaste of the can and have total control over the salt.
Keeping leftovers fresh
This Baked Cheesy Tuna Pasta stores surprisingly well. Place any leftovers in an airtight container and keep them in the fridge for up to 3 days.
When it comes to reheating, avoid the microwave if you can. Microwaves tend to make the pasta rubbery and the cheese oily. Instead, put a portion in a small oven safe dish, add a tiny splash of milk to loosen the sauce, and bake at 350°F (175°C) for about 10-15 minutes.
This brings back that crispy topping.
For freezing, I'd recommend freezing the dish before it's baked. Assemble everything up to the breadcrumb step, wrap it tightly in foil, and freeze for up to 2 months. To cook, thaw it in the fridge overnight and then bake as directed.
If you freeze it after it's already been baked, the pasta can get a bit mushy upon reheating.
For those who love this style of meal, my Silky tuna casserole is another great option that stores well.
- Tuna Cans
- Don't throw away the cans; they're great for organizing small hardware like nails or paperclips in the garage.
- Cheese Scraps
- If you have odd ends of Cheddar or Mozzarella, freeze them in a bag to use for future bakes or omelets.
- Breadcrumb Bits
- If you have leftover Panko, toast them in a pan with a bit of garlic powder and use them as a topper for steamed broccoli.
Best sides for this
Since the Baked Cheesy Tuna Pasta is quite rich and creamy, you need something bright and acidic to cut through that heaviness. A crisp green salad with a lemon vinaigrette is the gold standard here. The acidity of the lemon cleanses your palate between bites of cheesy pasta.
Roasted asparagus or sautéed kale also work well. The slight bitterness of the greens balances the sweetness of the corn and peas. If you're feeling fancy, some garlic rubbed crostini on the side can add another layer of crunch.
Honestly, keep the sides simple. This dish is the star of the show, so don't overcomplicate the plate. A simple bowl of steamed green beans with a squeeze of lime is all you really need for a complete, balanced meal.
High in Sodium
910 mg 910 mg of sodium per serving (40% 40% of daily value)
The American Heart Association recommends a daily limit of 2,300mg of sodium to reduce the risk of high blood pressure and heart disease.
Tips to Reduce Sodium
-
Omit Added Salt-25%
Completely remove the ½ tsp of salt from the recipe; the cheese and tuna already provide significant sodium for flavor.
-
Rinse Canned Tuna-20%
Thoroughly rinse the canned tuna under cold water before draining to remove excess brine and sodium.
-
Swap for Frozen Corn-20%
Replace canned sweetcorn with frozen corn to avoid the added salt typically found in canning liquids.
-
Use Low-Sodium Cheese-15%
Substitute the sharp cheddar and mozzarella with low-sodium versions or reduce the amount of cheese by a third.
-
Enhance with Aromatics
Increase the dried oregano or add fresh parsley and lemon zest to boost flavor without increasing sodium.
Recipe FAQs
How do you make an easy tuna casserole?
Boil pasta slightly underdone, stir into a cheese sauce with tuna and vegetables, and bake. This straightforward process takes only 40 minutes from start to finish.
How to make a tasty tuna casserole?
Sauté butter and flour for a fragrant roux before adding milk and sharp Cheddar. Finishing the dish with a buttered Panko and oregano crust baked at 400°F provides a professional, savory crunch.
What is the secret to Tuna Casserole?
Undercooking the pasta by two minutes. Since the noodles absorb liquid and cook further in the oven, this step prevents them from becoming mushy.
What is a tuna casserole?
A comforting baked dish consisting of pasta, tuna, and vegetables bound together by a creamy cheese sauce. It is traditionally topped with breadcrumbs and baked until bubbling and golden.
How to make a tuna casserole without mushroom soup?
Whisk flour into melted butter to create a roux, then simmer with warmed milk. If you enjoyed mastering this roux technique here, see how the same principle works in our baked mac and cheese.
Is it possible to make a simple baked cheesy tuna pasta?
Yes, this recipe is designed for efficiency. With just 10 minutes of prep, you can have a complete meal in the oven in under 20 minutes.
Why didn't my breadcrumb topping brown?
You likely skipped tossing the crumbs in melted butter. Without fat, the Panko dries out rather than frying to a golden brown, even at 400°F.
Baked Cheesy Tuna Pasta

