Sea Bass Sous Vide: Herbs and Citrus
- Time: 10 min active + 45 min cooking = Total 55 mins
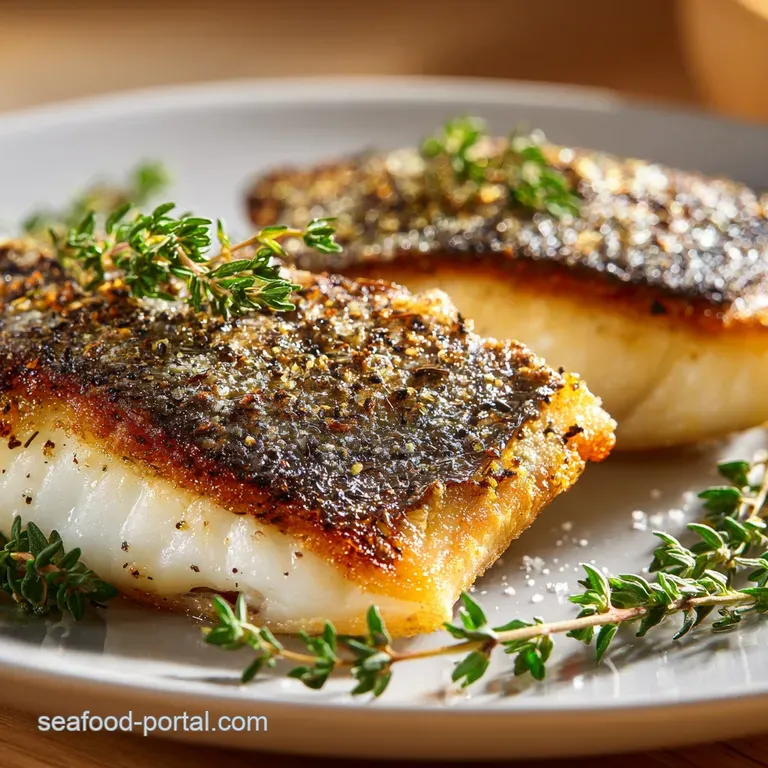
- Flavor/Texture Hook: Shatter crisp skin with a velvety, flakey center
- Perfect for: Impressive date nights or high end dinner parties
- Sea Bass Sous Vide with Herbs and Citrus Recipe
- Nailing the Technique
- Component Analysis
- Gathering Your Essentials
- Essential Gear List
- From Prep to Plate
- Pro Tips & Pitfalls
- Dietary Adaptations
- Troubleshooting the Texture
- Adjusting Batch Sizes
- Debunking Sea Bass Myths
- Preservation Secrets
- Presentation Tips
- High in Sodium
- Recipe FAQs
- 📝 Recipe Card
Sea Bass Sous Vide with Herbs and Citrus Recipe
The first thing you'll notice is that aggressive sizzle the second the skin hits the cast iron. I remember the first time I tried making Chilean sea bass the traditional way, and I completely panicked, flipping it too early and tearing the skin. It was a mess.
But once I switched to the sous vide method, everything changed. The fish stays impossibly juicy, and you only have to worry about that final, golden sear.
Experience a restaurant quality meal at home with this Sea Bass Sous Vide with Herbs and Citrus Recipe. The real hero here is the Chilean sea bass itself. Unlike leaner white fish, this cut has a high fat content that makes it feel more like a steak than a fillet.
If you try to swap this for a lean cod or tilapia, you'll lose that signature buttery melt. The richness of the fish is the perfect canvas for the bright, zingy citrus and the woody scent of fresh rosemary.
What I love most is the contrast. You get this shatter crisp skin that gives way to a center so tender it almost feels like custard. Then, you hit it with that finishing butter, and the citrus notes just wake everything up.
It's a balance of heavy and light, salt and acid, that honestly makes you feel like you've got a professional kitchen in your house.
Nailing the Technique
- Precision Heat: Keeping the water at exactly 131°F prevents the proteins from tightening up too much, which is why the fish stays velvety instead of becoming rubbery.
- Vacuum Infusion: The pressure inside the bag forces the thyme and rosemary oils directly into the flesh, rather than just sitting on the surface.
- Skin Dehydration: Removing every trace of moisture from the skin before the sear is the only way to get that mahogany crust without the fish sticking.
- Fat Emulsion: Using a combination of lemon and orange juice in the final butter creates a bright, stable sauce that clings to the fish.
| Method | Time | Texture | Best For |
|---|---|---|---|
| Sous Vide | 55 mins | Velvety & Consistent | Precision & Guests |
| Traditional Pan Sear | 15 mins | Flaky & Variable | Quick Weeknights |
| oven roasted | 25 mins | Soft & Tender | Large Groups |
Component Analysis
| Ingredient | Science Role | Pro Secret |
|---|---|---|
| Chilean Sea Bass | High fat content | Pat bone dry for better sear |
| Unsalted Butter | Flavor carrier | Use soft butter in the bag for better infusion |
| Citrus Juices | Acid balance | Mix orange and lemon for a complex tang |
| Fresh Rosemary | Aromatic depth | Keep sprigs whole to avoid overpowering the fish |
Gathering Your Essentials
For the fish, you'll need 1.5 lb of Chilean sea bass fillets, skin on. Trust me, don't buy skinless for this. The skin is where all the flavor and texture live. You'll also need 2 tbsp of unsalted butter (patted soft), 1 tbsp of extra virgin olive oil, 1 tsp of kosher salt, and ½ tsp of cracked black pepper.
For the aromatics, grab 2 sprigs of fresh thyme, 2 sprigs of fresh rosemary, and 1 lemon, thinly sliced into rounds.
For the finishing butter, you'll need 4 tbsp of unsalted butter, cubed, along with 1 tbsp of fresh lemon juice, 1 tbsp of fresh orange juice, 1 tsp of lemon zest, and 1 tbsp of chopped fresh parsley.
Substitution Guide
| Original Ingredient | Substitute | Why It Works |
|---|---|---|
| Chilean Sea Bass | Black Cod | Similar fat profile. Note: Slightly more delicate flavor |
| Fresh Rosemary | Fresh Sage | Both are woody herbs. Note: Earthier, less piney profile |
| Orange Juice | Lime Juice | Adds sharp acidity. Note: More aggressive than orange |
| Unsalted Butter | Ghee | Higher smoke point. Note: Lacks the milky sweetness of butter |
Right then, before we move to the gear, just a quick tip on the citrus. Always use fresh lemons and oranges. The bottled stuff has a metallic aftertaste that will kill the freshness of the sea bass. If you're looking for a different way to prep white fish, my baked white fish guide is a great alternative for those days when you don't want to break out the water bath.
Essential Gear List
You'll need a sous vide immersion circulator and a large container or pot to hold the water. A vacuum sealer is the best bet for a tight seal, but you can use the water displacement method with a heavy duty Ziploc bag if you're in a pinch. For the final step, a cast iron skillet is non negotiable.
It holds heat much better than stainless steel or non stick, which is how we get that incredible crust.
I also recommend a digital meat thermometer just to be safe, though the sous vide does most of the heavy lifting. A pair of fish spatulas the thin, flexible kind will help you flip the fillets without breaking that beautiful mahogany skin.
From Prep to Plate
Setting the Stage
Preheat your sous vide water bath to 131°F (55°C). While that's heating up, take your sea bass fillets and pat them bone dry with paper towels. I mean really dry. Any moisture left on the surface will steam the fish instead of searing it.
Season both sides generously with the kosher salt and cracked black pepper.
Bagging the Aromatics
Place the fillets into your vacuum bag. Add the soft butter, the fresh thyme, rosemary, and those thin lemon slices. Make sure the herbs are in direct contact with the fish so the flavors can really penetrate. Seal the bag tightly using your vacuum sealer or the water displacement method.
Executing the Precision Cook
Submerge the bag fully in the 131°F water bath and let it cook for 45 minutes. Once the timer goes off, carefully remove the bag. Lift the fish out with tongs and discard the spent herbs and lemon slices.
They've done their job, and keeping them on during the sear will just cause them to burn and taste bitter.
Achieving the Perfect Crust
Pat the skin of the fish extremely dry once more. This is a critical checkpoint. Heat your cast iron skillet over high heat with the olive oil until it just begins to smoke. Place the fish skin side down and press firmly for 30 seconds using your spatula. This prevents the skin from curling and ensures full contact.
Sear for 1-2 minutes until the skin is mahogany colored and crisp. Flip the fillets over and sear for just 30 seconds on the other side to warm them through. For those who love a quick stovetop sear, you can apply similar logic to my salmon stove recipe to get a similar result.
The Citrus Finish
While the fish is resting for a minute, combine your cubed butter, lemon juice, orange juice, lemon zest, and chopped parsley in a small pan. Melt it over low heat until it's a velvety, golden liquid. Spoon this citrus butter generously over the seared fillets just before serving.
Pro Tips & Pitfalls
If you're new to sous vide, the biggest mistake is overcrowding the bag. If the fillets are overlapping, the heat won't distribute evenly, and you'll end up with cold spots. Give them some breathing room.
Another trick: I like to freeze my butter for about 5 minutes before cubing it for the sauce; it helps the emulsion stay a bit more stable as it melts.
Chef Note: If the skin isn't crisping up, your pan isn't hot enough. The oil should be shimmering and just on the verge of smoking before the fish hits the metal.
Decision Shortcut
- If you want a more intense herb flavor, leave the fish in the bag for an extra 15 minutes (up to 1 hour total).
- If you prefer a lighter finish, swap the finishing butter for a squeeze of fresh lemon and a drizzle of high-quality olive oil.
- If the skin is sticking, wait another 30 seconds. The fish will naturally release from the pan once the crust has fully formed.
Dietary Adaptations
For those avoiding dairy, you can make a killer dairy-free version of this. Instead of butter in the bag, use a tablespoon of avocado oil. For the finishing sauce, use a vegan butter substitute or a refined coconut oil. The citrus and herbs provide so much flavor that you won't even miss the dairy.
If you want to boost the Mediterranean profile, add a few capers and a sliced kalamata olive to the sous vide bag. The brine from the olives cuts through the fat of the sea bass beautifully. You could also swap the rosemary for fresh oregano to give it a more rustic, Greek feel.
| Goal | Adjustment | Result |
|---|---|---|
| dairy-free | Olive Oil/Vegan Butter | Lighter, cleaner taste |
| Extra Zesty | Double Lemon Zest | Brighter, more acidic |
| Earthier | Add Fresh Sage | Deeper, woodier aroma |
When adapting this for different diets, remember that the high fat content of the sea bass is what makes this recipe work. If you're using a leaner fish for health reasons, reduce the sous vide time by 10-15 minutes to avoid a mushy texture.
Troubleshooting the Texture
Why Your Fish Feels Mushy
This usually happens if the temperature is too high or the fish stays in the bath too long. Sea bass is forgiving, but if it hits 140°F, the muscle fibers break down too much. Stick to 131°F for a velvety feel.
Stopping the Skin from Sticking
If your fish is tearing when you flip it, it's usually because the skin was damp or the pan wasn't hot enough. The moisture creates a steam barrier that prevents the proteins from bonding with the pan to create that crust.
Why the Sauce Separates
If your citrus butter looks oily rather than velvety, you likely overheated it. Melt the butter on low and whisk in the juices slowly. If it breaks, just whisk in a teaspoon of warm water to bring it back together.
| Problem | Root Cause | Solution |
|---|---|---|
| Mushy Flesh | Overcooked/Too Hot | Stick to 131°F and 45 mins |
| Skin Tearing | Pan too cold/Wet skin | Pat dry; heat pan until smoking |
| Sauce Oily | Overheated butter | Melt on low heat; whisk constantly |
Common Mistakes Checklist
- ✓ Did I pat the skin bone dry before searing?
- ✓ Is the water bath exactly 131°F?
- ✓ Did I press the fish down for the first 30 seconds?
- ✓ Are the herbs in direct contact with the fillets?
- ✓ Did I discard the spent lemon slices before searing?
Adjusting Batch Sizes
When scaling this recipe up for a party, don't just double the salt and pepper. I follow the "1.5x rule" for seasonings increase the salt and spices by only 50% when doubling the protein. Too much salt in a vacuum bag can actually "cure" the fish and change the texture to something more like sashimi.
If you're cooking for 8 or more, work in batches for the searing process. If you crowd the skillet, the temperature will drop, and you'll end up boiling the fish in its own juices instead of searing it. Keep the fillets in the warm water bath (or a low oven) until the pan is ready for the next round.
For smaller portions, like a single fillet, you can reduce the sous vide time by about 20% if the fillet is particularly thin. However, 45 minutes is generally the sweet spot for most cuts of Chilean sea bass to ensure the center is perfectly tempered.
Debunking Sea Bass Myths
One of the biggest myths in the kitchen is that searing meat or fish "seals in the juices." In reality, moisture loss happens regardless of how you sear it. The crust we're creating here is all about flavor and texture, not about locking in liquid. The sous vide is what actually preserves the moisture.
Another common misconception is that sous vide fish is "raw" or unsafe. As long as you follow seafood safety guidelines and maintain the correct temperature, the fish is pasteurized and perfectly safe to eat. The "raw" look is just a result of the precise temperature not over coagulating the proteins.
Preservation Secrets
If you have leftovers (though that rarely happens with this dish), store them in an airtight container in the fridge for up to 2 days. When reheating, avoid the microwave. Instead, gently warm the fish in a pan with a tiny bit of butter over low heat. This prevents the fish from becoming rubbery.
This dish doesn't freeze well once cooked because the delicate structure of the sea bass can break down. However, you can vacuum seal the raw fish with the herbs and butter and freeze the whole bag.
When you're ready to eat, just drop the frozen bag straight into the 131°F water bath and add about 15-20 minutes to the cooking time.
For zero waste, don't throw away those lemon rinds after zesting. I usually toss them into a jar of vodka or olive oil to make a quick infused condiment. Even the stems of the parsley can be thrown into a veggie stock to add a bit of fresh, green brightness.
Presentation Tips
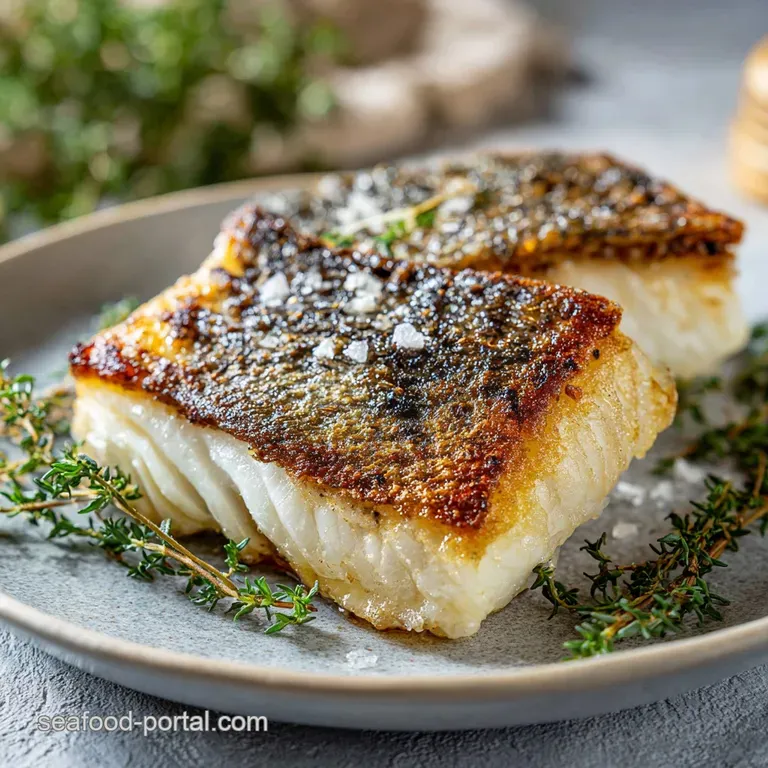
To really make this look like it came from a high end bistro, start with a wide, shallow plate. Place a bed of sautéed spinach or a swipe of parsnip puree in the center. Lay the sea bass fillet skin side up you want that mahogany crust to be the star of the show.
Spoon the citrus butter around the base of the fish rather than dumping it on top. This keeps the skin crisp while allowing the diner to dip the fish into the sauce. Garnish with a fresh sprig of thyme and a very thin, raw slice of lemon on the side for a pop of color.
If you're serving this as part of a larger meal, pair it with something acidic, like a shaved fennel salad or roasted asparagus with a balsamic glaze. The brightness of the vegetables balances the richness of the fish, making the whole experience feel cohesive and light.
High in Sodium
890 mg 890 mg of sodium per serving (39% 39% of daily value)
The American Heart Association recommends a daily limit of 2,300 mg of sodium for most adults to maintain heart health.
Tips to Reduce Sodium
-
Reduce Kosher Salt-25%
Cut the 1 tsp of kosher salt in half or replace it with a potassium based salt substitute for a significant reduction.
-
Use Salt Free Seasoning-15%
Swap the salt and pepper for a salt free lemon pepper blend to maintain the zesty profile without the added sodium.
-
Amplify Citrus Zest-10%
Increase the lemon and orange zest; the bright, acidic flavors trick the palate into needing less salt.
-
Maximize Fresh Herbs
Increase the amount of fresh thyme, rosemary, and parsley to add depth and aroma, reducing the reliance on salt for flavor.
Recipe FAQs
What herbs and spices go well with sea bass?
Fresh thyme, rosemary, and citrus. These aromatics complement the buttery richness of the fish without overpowering its delicate natural flavor.
How long to sous vide sea bass?
Cook for 45 minutes at 131°F (55°C). This precise temperature and timing ensure the fillets remain moist and flaky throughout.
What are some mistakes to avoid when cooking sea bass?
Leaving the skin damp before searing. Any remaining moisture creates steam in the pan, which prevents the skin from becoming mahogany colored and crisp.
What shouldn't you sous vide?
Avoid sous viding raw mushrooms or certain wild greens. These ingredients can be unsafe or develop unappealing textures when cooked at low temperatures over long periods.
Can I substitute Chilean sea bass with another white fish?
Yes, other firm white fish work well. If you prefer a milder flavor, try tilapia, though you should monitor thinner fillets closely to avoid overcooking.
Is it true that sous vide fish always becomes mushy?
No, this is a common misconception. Setting your water bath to 131°F provides a succulent, buttery texture that is far more consistent than traditional poaching.
How to achieve a perfectly crisp skin after the water bath?
Pat the skin extremely dry and sear in a smoking hot cast iron skillet. Press the fillet firmly for 30 seconds to ensure the skin makes full contact with the oil.
Sea Bass Sous Vide

