Sauteed Shrimp: Quick Garlic Butter Dish
- Effortless Elegance: Mastering the Quick Sautéed Shrimp
- The Science of Succulence: Why This Garlic Butter Shrimp Delivers
- Sourcing the Best: Ingredients for Your Quick Shrimp Sauté
- Precision Sautéing: Step-by-Step Guide to Flavor Extraction
- Troubleshooting Your Sauté: Expert Tips for Perfect Results
- Make-Ahead and Storage: Handling Leftover Garlic Butter Shrimp
- What to Serve Alongside Your Speedy Garlic Shrimp
- Recipe FAQs
- 📝 Recipe Card
Effortless Elegance: Mastering the Quick Sautéed Shrimp
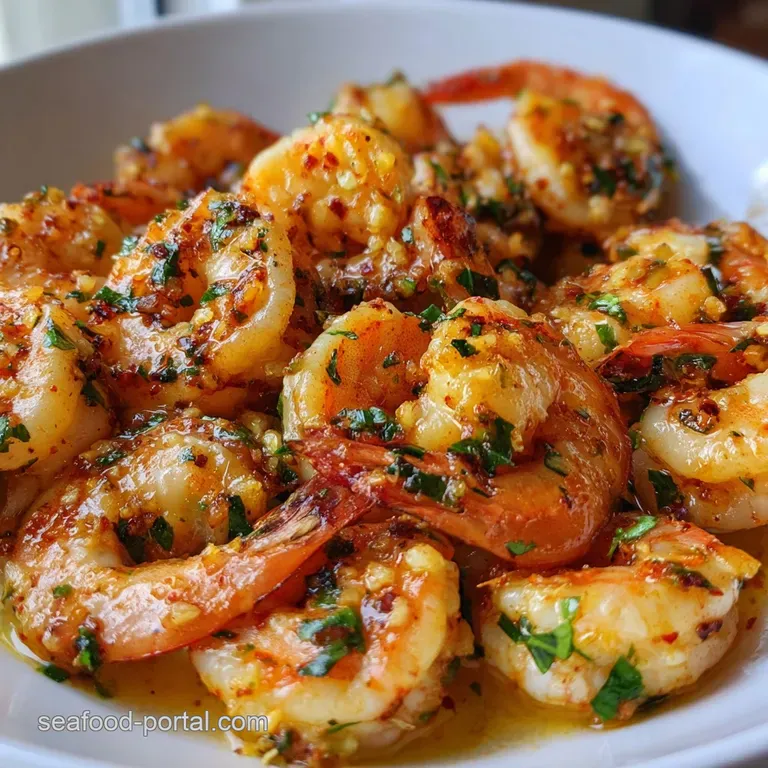
Stop scrolling. Are you smelling that already? That glorious blend of sizzling garlic, melting butter, and a tiny whisper of smoked paprika is exactly what perfect Sauteed Shrimp smells like.
Achieving this gorgeous dish isn't about expensive ingredients; it’s about timing and heat control. Once you master the simple sauté method, you’ll never settle for rubbery prawns again.
Seriously, this isn't just a recipe; it’s a time machine. Forget complicated marinades or fussy steps we’re talking 15 minutes, tops, for a dish that tastes like you spent all afternoon in a seaside trattoria.
It’s cheap, incredibly healthy, and makes you feel like a culinary genius when the doorbell unexpectedly rings. This truly is the best Sauteed Shrimp recipe you will find for speed and flavour.
I’ve made all the mistakes hello, grey, watery shrimp disaster of 2017! so I’m here to guide you through the actual tricks that work every time. Let's make the most delicious, foolproof Sauteed Shrimp you’ve ever had, guaranteed to be plump, succulent, and begging for bread to sop up the sauce.
The Science of Succulence: Why This Garlic Butter Shrimp Delivers
The secret to amazing Sauteed Shrimp is that the shrimp itself is a blank canvas, so the flavour must come from a rapid infusion of fat and aromatics. We are aiming for maximum flavour transfer in minimum time.
This technique works because we hit the pan with two types of fat at varying temperatures, creating a richer, deeper pan sauce than butter or oil alone could manage.
Why This Recipe Is Your 15 Minute Weeknight Hero
We rely on speed because shrimp cook so quickly. If you blink, they’re overcooked; if you use low heat, they steam instead of sear. This method ensures that the pan is ripping hot, giving the shrimp color and texture before the interior has time to toughen up. That means maximum flavour development, fast.
Making Sauteed Shrimp should feel like a lightning quick dance, not a slow waltz.
The Mediterranean Secret: High Heat, Simple Flavor Foundation
Think Spanish tapas or Italian antipasti. They use great olive oil and fresh garlic as their base. We start the pan with olive oil because of its high smoke point, which protects the delicate butter we add later.
High heat is non-negotiable for success here, especially when making Sauteed Shrimp for a crowd.
Overview of Difficulty and Essential Prep Time
This recipe sits squarely in the "easy" category. Your main job is organization. You need all the ingredients measured, chopped, and ready (that's the French term, mise en place ) because the actual cooking time is under five minutes.
If you’ve spent 12 minutes prepping and 6 minutes cooking, you’ve done it right.
Achieving the Perfect Sear: The Maillard Reaction on Shrimp
Ever wonder how restaurants get that beautiful pink crust on their shrimp? It’s the Maillard reaction, plain and simple, and it requires three things: high heat, fat, and zero moisture.
Patting the shrimp aggressively dry with paper towels removes the surface water that would turn the searing heat into steaming heat. This step is the difference between rubbery texture and truly stunning, caramelised Sauteed Shrimp .
Balancing Act: The Role of Smoked Paprika and Lemon Zest
Smoked paprika is magical; it adds a depth of flavour usually only achievable with hours of cooking. It provides warmth and complexity to the garlic butter. The fresh lemon juice, added at the very end, acts as the acid needed to brighten the dish.
It cuts through the richness of the butter and stops the cooking process instantly.
Why Finishing in Butter Creates the Richest Pan Sauce
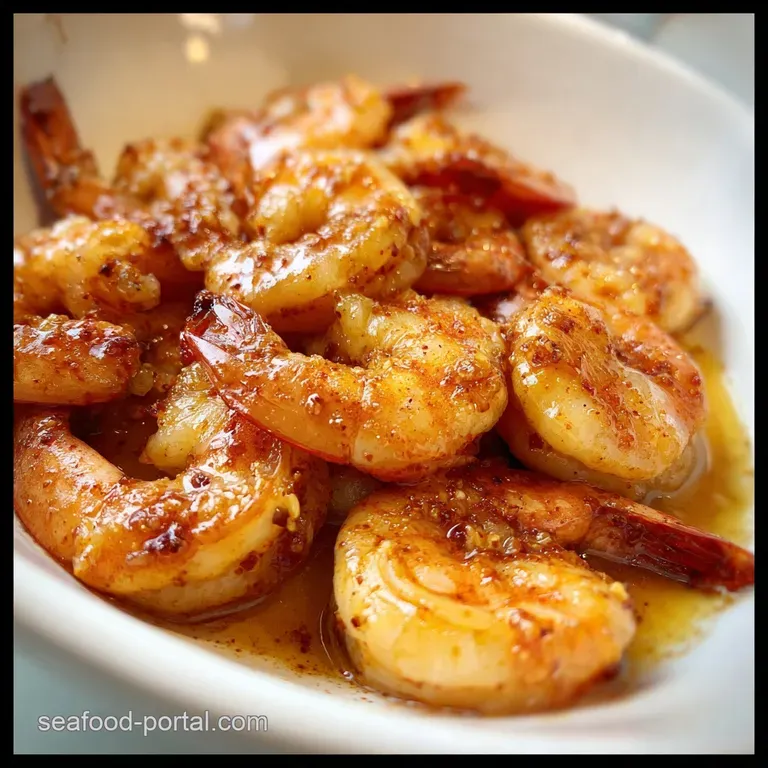
We don't cook the shrimp in butter; we finish them with it. By adding the final piece of cold butter along with the garlic, the fat melts and emulsifies with the residual olive oil and any shrimp juices, creating a thick, glossy, beautiful sauce for your Sauteed Shrimp .
This is how you transform simple ingredients into a restaurant quality meal.
Sourcing the Best: Ingredients for Your Quick Shrimp Sauté
You only need five key items for this simple Sauteed Shrimp dish, so make them count. Quality matters most when the ingredient list is short!
Fresh vs. Frozen Prawns: Selecting the Right Size and Grade
I almost always buy frozen prawns, especially the large or jumbo sizes (21/25 count or larger). Why? Because "fresh" shrimp at the counter was likely frozen and thawed days ago, losing crucial texture. Buy frozen, thaw them yourself overnight in the fridge, and pat them dry. The key to the best Sauteed Shrimp is that dryness. If you want ultra crispy shrimp later, check out my recipe for Air Fryer Fried Shrimp: Ultra Crispy Panko Recipe , but for sautéing, dry is paramount.
The Garlic Conundrum: Mincing vs. Thinly Slicing for Intensity
You have a choice here, but my preference is finely minced garlic. We want maximum garlic flavour saturation in the 30 seconds we give it in the pan. If you thinly slice it, you get fewer intense hits of flavour but a nicer visual texture. A friendly warning: pre-minced jarred garlic burns faster, so use fresh.
Smart Swaps: Alternative Fats and Spices for Flavor Variation
If you need to adjust the recipe, here are some quick swaps that maintain the integrity of the finished Sauteed Shrimp :
| Ingredient | My Recommendation | Viable Substitution |
|---|---|---|
| Olive Oil | Extra Virgin | Avocado Oil or Grapeseed Oil (High smoke point) |
| Unsalted Butter | European Style (high fat) | high-quality vegan butter or Ghee (if dairy-free) |
| Smoked Paprika | Spanish Pimentón | Sweet paprika + a pinch of cayenne or chili powder |
| Lemon Juice | Freshly Squeezed | Lime juice or a splash of white wine vinegar |
Essential Equipment: Choosing the Right Pan for Sautéing
Ditch the non-stick pan for this. Non-stick pans don't retain heat well enough for a proper sear, and they can’t handle the medium high heat required to make perfect Sauteed Shrimp . Use a 10 or 12 inch stainless steel skillet or, even better, a well seasoned cast iron pan.
These heavy bottomed workhorses hold onto that heat and guarantee a golden brown sear.
Precision Sautéing: step-by-step Guide to Flavor Extraction
This is where the magic happens. Remember: fast, hot, and dry.
Preparation Checklist: Deveining and Patting Dry
- Prep: If your shrimp aren’t peeled and deveined, get that sorted now. You can leave the tails on for presentation, but I find tail off easier for eating.
- Dry: This is the step everyone skips! Lay the shrimp on a double layer of paper towels and top with another layer. Press down hard. Toss the dry shrimp with the initial 1 teaspoon of olive oil, salt, and pepper.
- Mise en Place: Have the garlic, paprika, second piece of butter, parsley, and lemon juice ready to go. Sautéing this Sauteed Shrimp takes zero prisoners if you’re unprepared.
Phase 1: Achieving High Heat and Infusing the Oil
- Place your heavy skillet over medium high heat. Add 2 tablespoons of olive oil and one piece of butter (about 1.5 tablespoons).
- Wait for the butter to melt, foam, and then subside slightly. The pan should be seriously hot. If the fat smokes instantly, your pan is too hot reduce the heat slightly.
- Add half the seasoned shrimp to the pan. Crucially, lay them flat in a single layer. Do not touch them for 90 seconds!
Phase 2: The Quick Sear and Butter Integration
- After 90 seconds, flip the shrimp using tongs. They should have a beautiful golden pink sear mark on the underside. Cook the second side for another 60 to 90 seconds.
- Remove the first batch immediately and set them aside on a clean plate.
- Repeat the process with the remaining shrimp. The second batch might cook slightly faster since the pan is now hotter.
Finishing Touches: Incorporating Paprika, Acidity, and Seasoning Check
- When the second batch of shrimp is nearly done, reduce the heat to medium low. Add the remaining butter, the minced garlic, and the smoked paprika to the pan (move the shrimp slightly to the side).
- Stir the garlic and paprika constantly for about 30 45 seconds until fragrant. Never let the garlic brown , or it will become bitter.
- Return the first batch of cooked shrimp to the pan. Toss quickly for about 10 seconds to coat everything in the gorgeous garlic butter.
- Remove the pan from the heat completely. Stir in the fresh lemon juice and the chopped parsley. Taste a prawn and add a tiny extra pinch of flaky salt if needed. Your homemade Sauteed Shrimp is ready!
Chef's Note: The addition of cold butter at the end creates a superior sauce. It melts rapidly into the hot oil, thickening the liquid without needing flour or cornstarch, leaving a shiny, silky coating on the shrimp.
Troubleshooting Your Sauté: Expert Tips for Perfect Results
Sometimes things go awry, and usually, it comes down to timing or temperature. Here’s how to fix the top mistakes people make when cooking shrimp.
The #1 Mistake: Avoiding Rubbery, Overcooked Shrimp
Overcooked shrimp are the bane of my existence. They seize up, shrink, and become chewy a total waste of good seafood. The fix: Watch the shape, not the clock. A raw shrimp is straight ("I" shape). A perfectly cooked shrimp forms a gentle "C" shape.
If it curls into a tight, hard "O," it’s overcooked! Pull it out immediately, regardless of what the timer says.
Maximizing Pan Space: Why Crowding Kills the Sear
If you dump all 1 pound of shrimp into the pan at once, the pan temperature drops instantly, and the shrimp release their internal moisture. You end up boiling them in grey water. The fix: Always sauté in batches (2 or even 3, if necessary).
Setting the cooked shrimp aside doesn't hurt them; the residual heat keeps them warm while you build the sauce later.
Fixing a Watery Sauce: Rapid Reduction Techniques
If you ignored my warning and overcrowded the pan, or if your shrimp weren't dry enough, you might end up with a thin, watery sauce instead of a silky butter coating. The fix: Remove the shrimp from the pan. Increase the heat to high and let the liquid vigorously bubble.
Reduce the liquid by half this only takes 60 seconds. Then, return the shrimp, toss, and serve.
make-ahead and Storage: Handling Leftover Garlic Butter Shrimp
This style of Sauteed Shrimp is absolutely best when served immediately. However, sometimes you have leftovers. Here is the safest and tastiest way to handle them.
Refrigeration Timeline: How Long Do Cooked Prawns Last?
Cooked shrimp, properly stored, will keep in an airtight container in the fridge for up to 3 days. If you’re meal prepping, use a portion for a quick lunch the next day, perhaps tossed cold into a zesty Shrimp Pasta Salad: The Perfect make-ahead Picnic Dish .
Can You Freeze Sautéed Shrimp? (Proceed with Caution)
Yes, you can freeze them, but I advise against it. Freezing cooked shellfish almost always leads to a noticeable textural change when thawed, making them slightly mushy. If you absolutely must, flash freeze the cooled shrimp on a sheet pan first, then transfer them to an airtight bag.
They’ll last for 2 3 months.
Best Practice for Reheating Without Losing Texture
Never microwave Sauteed Shrimp unless you want that rubbery disaster we talked about. The fix: Preheat a small skillet over medium low heat.
Add a tiny splash of water or stock to create steam, then add the shrimp and cover tightly for 60 seconds, just until warmed through. The steam rehydrates the outside without further cooking the interior.
What to Serve Alongside Your Speedy Garlic Shrimp
This gorgeous skillet of Sauteed Shrimp is versatile. You can serve it as a main course or as a sophisticated appetizer.
- Bread is Mandatory: Seriously, you need something to soak up the garlic butter. Crusty baguette or sourdough is perfect.
- Simple Starches: Pair this with creamy polenta, saffron risotto, or my speedy Shrimp with Garlic Sauce: Speedy Restaurant Style Succulent Prawns served over angel hair pasta.
- Green Stuff: A quick arugula salad dressed simply with olive oil and vinegar provides a sharp, peppery contrast to the richness of the butter.
If you are looking for a super light summer party appetizer, you might also consider my recipe for Shrimp Dip Recipe: The Classic Seaside Chilled Appetizer , but for an elegant, warm offering, this Sauteed Shrimp simply cannot be beat. Enjoy!

Recipe FAQs
Why did my sautéed shrimp turn out tough and rubbery?
This is the classic sign of overcooking. Shrimp cook incredibly fast usually within 2 to 4 minutes total on high heat. Watch for the shape change: when they form a tight 'C' curve and turn opaque pink, they are perfectly done; if they curl into an 'O' or closed circle, they have cooked too long.
Do I need to thaw the shrimp completely before cooking them?
Yes, thorough thawing is essential. Cooking shrimp from frozen or partially frozen drops the pan temperature significantly, causing them to steam instead of sauté, which results in a watery sauce and an inferior texture.
Always pat the thawed shrimp completely dry with paper towels before adding them to the hot butter.
Can I scale up this recipe for a larger group, or should I cook in batches?
It is strongly recommended that you cook in batches if you are scaling the recipe. Overcrowding the pan dramatically lowers the heat, preventing proper searing and making the shrimp release too much moisture, leading to a stewed rather than a sautéed result.
I don't have butter. Can I substitute it with only oil?
While you can use olive oil, you will lose the essential richness and luxurious mouthfeel that butter provides to the sauce. For the best flavor, use a mixture of oil and butter, or if avoiding dairy entirely, use a good quality plant based butter alternative alongside a neutral high heat oil.
How should I store leftover shrimp and what is the best way to reheat them?
Store leftovers in an airtight container in the refrigerator for up to three days. Reheating should be done very gently to avoid turning them rubbery; quickly warm them on low heat in a non-stick skillet for just 60 to 90 seconds, or use a very short 20-30 second burst in the microwave.
What type of paprika should I use, and can I make this spicier?
The recipe calls for Spanish smoked paprika (Pimentón de la Vera) for a crucial smoky depth. To add heat, introduce a small pinch of red pepper flakes (chili flakes) to the garlic butter when you are sautéing the garlic, which allows the flavor and heat to properly infuse into the sauce.
What is the benefit of adding the lemon juice at the end?
Adding lemon juice right at the end provides a necessary bright, acidic finish that cuts through the richness of the garlic butter. It prevents the dish from tasting heavy and enhances all the other savory flavors, giving the final sauce a much needed lift and zing.
Quick Garlic Butter Sauteed Shrimp

Ingredients:
Instructions:
Nutrition Facts:
| Calories | 282 kcal |
|---|---|
| Protein | 15.4 g |
| Fat | 18.1 g |
| Carbs | 11.6 g |
