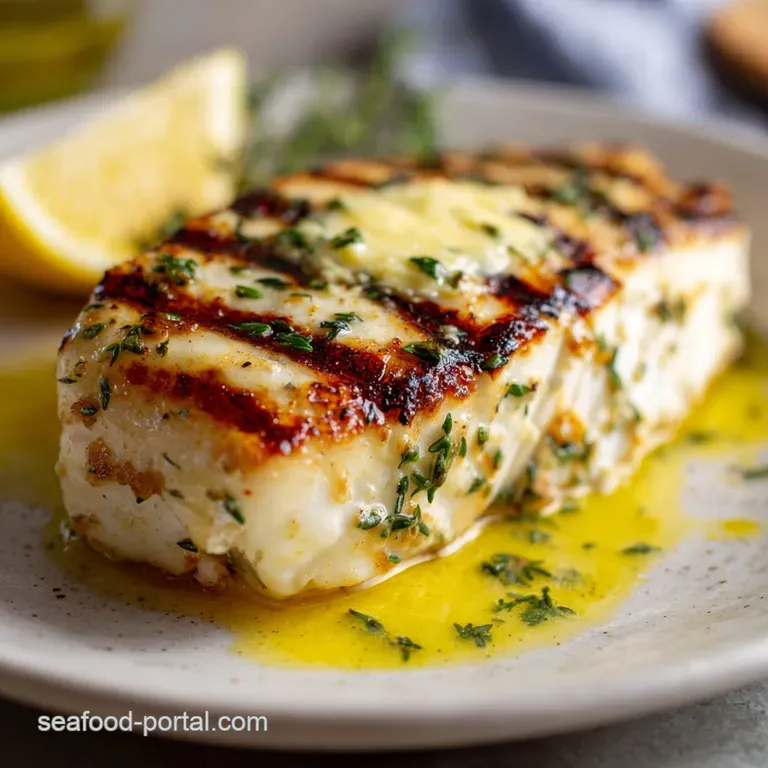
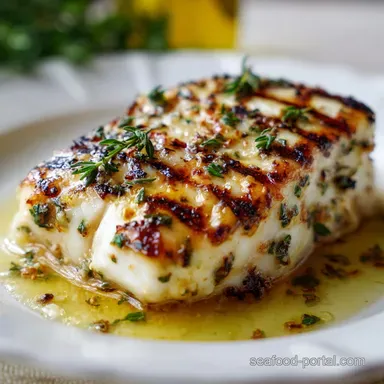
Grilled Halibut with Lemon-Thyme Finishing Butter
- Unlocking the Secret to Flawlessly Grilled Halibut
- The Science of Grilling Halibut: Why This Method Guarantees Success
- Essential Ingredients for Grilled Halibut Perfection
- How to Grill Halibut: A Step-by-Step Guide
- Troubleshooting and Expert Grilling Tips
- Preparing Ahead and Storing Leftovers
- What to Serve Alongside Your Grilled Fish
- Recipe FAQs
- 📝 Recipe Card
Unlocking the Secret to Flawlessly Grilled Halibut
That perfect crust that crackle when you bite into perfectly cooked fish? It’s pure magic. When you manage to nail a piece of Grilled Halibut that’s crispy on the outside and pure flaky silk on the inside, you feel like a culinary god.
The aroma alone charred lemon, salty char, and sweet fish is immediately addictive.
Look, I’ve made dinner hard enough in the past; sometimes the meal needs to be fast, elegant, and stress free. This specific recipe for Grilled Halibut is exactly that.
It takes less than 15 minutes of hands-on time, making it ideal for weeknights or when you have guests who appreciate great seafood but you don't want to spend all evening babysitting the grill.
We're ditching the dry, sad fillets cemented to the grates. We’re mastering the over high heat sear, deploying a brilliant finishing butter, and learning the exact, critical moment to pull the fish off the heat. Ready to make the best Grilled Halibut of your life? Let’s crack on.
The Science of Grilling Halibut: Why This Method Guarantees Success
You know I’ve made every cooking mistake in the book. My first attempt at Grilled Halibut ended up looking more like shredded fish debris than dinner, stuck permanently to the metal.
This method bypasses all those rookie errors by focusing intensely on two things: extremely high heat for a quick sear, and a killer moisture barrier. High heat means the fish releases easily; the subsequent butter ensures that the expensive halibut doesn't turn into a dry hockey puck.
This isn't just throw-it-on-the-barbie cooking; this is precision grilling. We are utilizing the Maillard reaction (the desirable browning) while keeping the internal temperature low and steady. The real secret to perfect Grilled Halibut lies in that rapid, intense sear on the first side.
This sets a foundation, almost like a protective crust, that holds the whole fillet together for the final gentle cook.
Halibut Fillets: Selecting the Right Cut and Thickness
Halibut is naturally firm and wonderfully meaty, which makes it an excellent candidate for the intense heat of the grill. However, you need sufficient volume to withstand that heat. I absolutely insist on pieces that are at least 1 inch thick 1.5 inches is even better.
Thicker cuts have a wider temperature gradient, meaning the outside can get a gorgeous char while the center stays moist and tender, yielding amazing Grilled Halibut Steaks .
The Magic of Finishing Butter: Brightening the Flavor Profile
The Lemon Thyme Finishing Butter isn't just a fancy garnish; it is a necessary part of the process. Halibut is an exceptionally lean fish, meaning it needs external fat to carry flavour and provide much needed richness.
By pouring the warm, emulsified butter over the fish after it rests, we prevent the herbs and dairy from burning on the grill. At the same time, the butter locks in moisture and gives the final Grilled Halibut that glorious, silky mouthfeel we crave.
Effortless Elegance: Why Halibut Excels on the Grill
Unlike overly flaky white fish (like sole or thin cod), halibut holds its shape beautifully under high heat. It boasts a robust, meaty texture that takes char brilliantly and resists falling apart.
Because of this inherent firmness, mastering delicious Grilled Halibut is actually easier than many other delicate seafood options, provided you manage the heat correctly.
Preventing Sticking: The Importance of High Heat and Oil
Sticking is the ultimate nightmare, and it happens when the fish is placed on a cold or lukewarm grill, giving the proteins time to bond fiercely with the metal grates. Our non-stick method requires three critical steps. First, a thoroughly cleaned grate. Second, a screaming hot grill (450°F+).
Third, copious oiling of the hot grate right before the fish goes down. If you do this right, your beautiful Grilled Halibut should release cleanly, every single time.
Maximizing Moisture: The Role of Resting the Fish
Resting is non-negotiable, just like resting a perfectly cooked steak. As the fish cooks, the internal juices rush toward the centre under duress. If you cut into the Grilled Halibut immediately, those juices will run out onto the plate, leaving the fish dry.
A quick 3 5 minute rest allows the muscle fibres to relax and redistribute that precious, flavourful moisture, guaranteeing maximum tenderness.
Flavor Layering: When to Apply Seasoning vs. Finishing Butter
We season the fish lightly before grilling to create initial depth of flavour and to assist with the necessary sear. We only apply the finishing butter after resting. Think of it this way: the marinade penetrates slightly, while the finishing butter coats and brightens .
It is a strategic two-stage process that guarantees every bite of the resulting Grilled Halibut is perfectly balanced and full of flavour.
Essential Ingredients for Grilled Halibut Perfection
We are keeping the ingredient list tight and focused here. Halibut is expensive; we absolutely do not want to drown out its delicate, magnificent flavour with unnecessary noise. This precise recipe for Grilled Halibut needs only a handful of high-quality components.
Selecting Your Halibut: Fresh vs. Frozen Considerations
Always go for fresh if you can, looking for firm, translucent flesh that smells only mildly and pleasantly of the sea. If you must use frozen halibut (which, admittedly, is often flash frozen at sea and quite high-quality), you must ensure it is thawed properly: slowly in the fridge overnight.
Never microwave thaw fish. Thawed fish needs extra effort to pat dry to ensure the best possible crust when creating premium Grilled Halibut Steaks .
Making the Lemon Thyme Finishing Butter
This specific butter is the ultimate game changer for lean fish. It’s incredibly simple: cold butter cubes, fresh lemon juice, thyme sprigs, and a pinch of salt. Melt it gently over very low heat, allowing the thyme to infuse without browning the dairy.
Keep it warm but decidedly not boiling; we want emulsion, not separation. This step is what separates a good fish dish from the absolute best Grilled Halibut you’ve ever had.
Necessary Equipment Checklist (Tools for Safe Flipping)
You absolutely, positively need a thin edged, wide metal spatula. Seriously, forget those thick plastic flippers; they will rip the delicate flesh every time you try to turn it. A thin metal fish spatula slides easily under the forming crust without disturbing the fish.
You also need an instant read thermometer, please this is completely non-negotiable for successfully grilling expensive fish like Grilled Halibut .
Quick Flavor Substitutions (If Thyme or Lemon is Unavailable)
If you’re missing an herb or a citrus fruit, don't panic. There are great alternatives that work beautifully with the delicate flavour of Grilled Halibut Steaks .
| Missing Ingredient | Viable Substitution | Flavor Profile Change |
|---|---|---|
| Thyme | Dill or Parsley | Dill leans Nordic and bright; Parsley is milder. |
| Lemon Zest/Juice | Lime Zest/Juice | More intense and slightly bitter; use slightly less. |
| Olive Oil | Avocado Oil | Higher smoke point, very neutral flavor base. |
| Halibut | Cod Loin or Swordfish | Cod is much flakier, Swordfish is far denser. |
How to Grill Halibut: A step-by-step Guide

Stage 1: Preparation and Marination
- Pat the Fish Dry: Grab those paper towels and treat the four halibut fillets like a precious commodity. Pat them extremely dry on all sides. This one action prevents steaming and guarantees that essential sear for flawless Grilled Halibut .
- Prepare the Marinade: Whisk together the 3 Tbsp olive oil, lemon zest, minced garlic, 1 tsp thyme leaves, salt, and pepper in a small bowl.
- Marinate (Briefly): Brush the marinade evenly over the halibut fillets. Cover and refrigerate for exactly 30 minutes no longer. > Chef’s Note: You only want the oil and flavor adherence here, not a ceviche style cook. Over marinating halibut in acid will destroy the texture before it hits the grill.
- Make the Finishing Butter: Combine the cubed unsalted butter, 3 sprigs of thyme, 2 Tbsp lemon juice, and salt in a small saucepan. Melt over the lowest heat possible and set aside, keeping it warm but liquid.
Stage 2: Grilling Technique
- Preheat the Grill: Heat your gas or charcoal grill to a raging medium high heat, targeting about 450°F (230°C). Clean those grates until they look pristine.
- Oil the Grates (Crucial Step): Dip a folded paper towel in neutral, over high heat oil. Using long tongs, wipe the hot, clean grates generously until they gleam. This oil barrier is the definitive key to preventing the Grilled Halibut from sticking.
- Place the Halibut: Gently place the halibut fillets directly over the hottest part of the grill. If the skin is on, place it skin side down first. The sizzle should be immediate and intense.
- Sear and Wait: Close the lid and cook completely undisturbed for 4– 5 minutes. Seriously, do not attempt to peek or move it! Wait until the fillet develops a crisp, golden crust and naturally releases from the grill.
- Flip the Fish: When it lifts easily (it should require zero effort), slide that thin edged spatula beneath the crust and flip carefully. If it resists, give it another 30 seconds.
- Finish Cooking: Continue grilling for another 3– 5 minutes. If the exterior looks perfectly browned, shift the Grilled Halibut to the cooler, indirect heat zone to finish cooking gently and prevent charring the exterior too much.
- Check Doneness: Insert an instant read thermometer into the absolute thickest part. Remove the fish immediately when it hits 135°F (57° C) . It will coast to the perfect 140°F (60°C) as it rests.
Stage 3: Resting and Serving
- Rest the Fish: Transfer the beautiful Grilled Halibut to a warm plate. Tent loosely with foil and let it rest for a full 3– 5 minutes. This is where the magic happens and the moisture settles into the flesh.
- Serve: Remove the thyme sprigs from the finishing butter before serving. Spoon a generous amount of the warm Lemon Thyme Finishing Butter over each perfectly cooked fillet and serve immediately. This layer of fat transforms the flavour and texture of the simplest Grilled Halibut dish.
Troubleshooting and Expert Grilling Tips
Grilling fish, especially magnificent Grilled Halibut , can feel like a high stakes operation because of the price tag. Here are the things I learned the hard way so you don't have to experience the heartbreak of lost fish.
Prepping the Grill and Fish (The Non-Stick Method)
People usually fail here because they forget the oiling step. They clean the grates, but cleaning is only half the battle. You must oil the hot grates right before placing the halibut down. Cold oil on cold grates will burn off immediately. Hot oil on hot grates forms a temporary, non-stick barrier.
Trust me, oil those hot grates for stress free Grilled Halibut cooking.
Grilling Timetables: Achieving the Perfect Internal Temperature
This is highly dependent on thickness. For 1.5 inch fillets, 4- 5 minutes per side at 450°F is usually perfect. For every half inch thinner, reduce the total cooking time by about 2 minutes.
The thermometer is your only true friend here; aiming for 135°F (57° C) is the secret to flawlessly moist Grilled Halibut .
The Critical Flip: Technique for Keeping Fillets Intact
If the fish sticks when you try to lift it, it’s simply not ready to flip. Wait another 30 seconds, close the lid, and try again. When you do flip, I recommend using two tools: the thin fish spatula beneath the fillet and a pair of tongs holding the top edge gently.
This two-point support prevents the fillet from buckling or tearing as you turn it over, ensuring your Grilled Halibut stays presentation perfect.
Glazing with Finishing Butter and Serving Immediately
The finishing butter should only be applied moments before serving, after the fish has rested. If you try to brush it on while the fish is still grilling, the milk solids in the butter will instantly burn, imparting a bitter, acrid flavour to the fish.
We want bright, fresh flavour to complement our perfect Grilled Halibut , not burnt char.
How to Rescue Flaking Halibut (When It Sticks)
If you try to flip too early and the fillet rips or leaves part of the crust behind, don't panic or try to scrape it up aggressively. Immediately slide your spatula underneath and move the damaged fillet to the indirect, cooler side of the grill.
Close the lid and let it finish cooking gently without flipping the torn side. Serve the fillet torn side down, hiding your kitchen secret! You still end up with delicious, flaky Grilled Halibut .
Determining Doneness Without a Thermometer
If your thermometer battery died (it happens to the best of us!), look for two visual cues instead. First, the exterior should be completely opaque and well browned. Second, insert a sharp knife tip into the thickest part.
If the flesh inside separates easily along the natural muscle lines and just barely starts to flake, it’s done. The very centre should still look slightly translucent; that residual heat will finish the cooking process beautifully as it rests.
Preparing Ahead and Storing Leftovers
Can You Prepare the Finishing Butter in Advance?
Absolutely, yes! The Lemon Thyme Finishing Butter can be made days ahead of time, which is a massive time saver. Prepare it, chill it, and store it in an airtight container in the fridge.
When ready to serve your amazing Grilled Halibut , just gently reheat it on the stovetop over low heat until melted and warm. It's ready in minutes.
Safe Refrigeration and Reheating Methods
Leftover Grilled Halibut should be cooled quickly and stored in an airtight container in the fridge for up to 3 days. Reheating is tricky business because fish dries out easily when exposed to high heat again.
The best method is wrapping the leftover fillet tightly in foil and warming it in a 300°F (150°C) oven for about 10– 12 minutes, or until just warmed through. Avoid the microwave unless you enjoy tough, rubbery fish.
Freezing Cooked Halibut: Recommended vs. Not Recommended
While you can technically freeze cooked halibut, I strongly advise against it if your goal is to recreate that perfect grilled texture. The beautiful, firm texture we achieved on the grill will turn mushy and dry once thawed and reheated.
If you must freeze it, use the leftovers within one month, and plan to flake the thawed fish into a recipe where texture is less critical, like a simple seafood spread or a chowder.
What to Serve Alongside Your Grilled Fish
The richness of the butter and the brightness of the lemon demand something fresh and crisp alongside your perfect Grilled Halibut . Keep the balance in mind.
Ideal Vegetable Pairings (Focusing on Light and Crisp Sides)
I love to keep the sides simple and summery. Think light green vegetables that can handle a bit of char themselves. Grilled asparagus is fantastic, or maybe some blistered green beans with sea salt and a touch of chili flake. If you’re already firing up the grill, why not char some romaine hearts? A little char and a simple vinaigrette contrast beautifully with the richness of the fish. This pairing works beautifully with the robust nature of Grilled Halibut Steaks . If you're looking for other grill ideas, I often rotate this recipe with my guide to making Grilled Salmon: The Best Way to Grill Flaky Fillets .
Wine and Beverage Recommendations for White Fish
Halibut demands a high acid wine to cut through the richness of the butter and refresh the palate. A crisp, unoaked Chardonnay or a Sancerre works beautifully, offering mineral notes and brightness.
If you're a beer fan, a light, citrusy pale ale or a Belgian Saison offers the refreshing lift needed to complement the substantial flavor of your Grilled Halibut .
Complementary Sauces Beyond the Finishing Butter
While the finishing butter is fantastic, sometimes you want a little variety, especially if you are serving simple Grilled Halibut Tacos .
- Chimichurri: A vibrant, herby sauce adds a necessary sharpness and pungent lift.
- Romesco: A Spanish sauce made from roasted red peppers and nuts provides smokiness and depth without overpowering the fish.
- Simple Yogurt Dill Sauce: For a cool, creamy contrast, whisk together Greek yogurt, fresh dill, lemon juice, and salt.
This easy method yields stunning, flavour packed results. Enjoy the perfectly executed brilliance of this simple, succulent Grilled Halibut .

Recipe FAQs
How do I prevent the halibut from sticking to the grill grates?
Proper grill preparation is absolutely critical to avoid sticking. Ensure your grates are meticulously clean, then oil them thoroughly and immediately before placing the fish down.
Only apply the halibut once the grill is screaming hot, and avoid moving the fish for at least 3 to 4 minutes so a protective crust can form.
How can I tell when the halibut is perfectly done and not overcooked?
The best and safest method is to use an instant read thermometer, aiming for an internal temperature of 145°F (63°C) at the thickest point. If you don't have a thermometer, insert a fork at the center; the fish should look completely opaque and flake easily without resistance.
Remember to remove the fish just shy of your target temperature, as carryover cooking will finish the process.
Why did my grilled halibut come out dry and tough?
Halibut is a very lean fish, making it highly susceptible to drying out if it is cooked even a minute too long. To combat this, adhere strictly to the recommended cooking time based on the fillet's thickness and use high heat to ensure a quick cook.
Brushing the fillets with a little olive oil or the finishing butter halfway through grilling will also help retain moisture.
Should I grill the halibut with the skin on or off?
If your fillet has the skin on, it is highly recommended to grill it skin side down first and complete most of the cooking on that side. The skin acts as a natural protective barrier, preventing the delicate flesh from adhering to the grates or falling apart while insulating the meat from the direct heat.
If the skin is off, ensure you use foil or a well oiled grill basket.
I don't have fresh thyme. What can I substitute in the finishing butter?
While fresh thyme offers the best aromatic lift, you can substitute it with dried thyme, using about one-third of the measurement called for in the recipe. Other excellent fresh herb alternatives that pair beautifully with lemon and white fish are tarragon or finely chopped dill.
Ensure the herbs are fully incorporated into the softened butter.
How should I store and reheat leftover grilled halibut?
Store any leftover halibut in an airtight container in the refrigerator for up to three days, but note that the texture will be slightly drier upon reheating. For the best results, reheat gently in a 300°F (150°C) oven until warmed through, or simply flake the cold fish to use in salads, sandwiches, or fish tacos.
Can I still make this recipe if I don't have an outdoor grill?
Absolutely, you can achieve excellent results using a cast iron skillet or by broiling the fish in the oven. For pan-searing, cook the halibut in a little oil over medium high heat for 4 5 minutes per side until a golden crust forms and the interior is opaque.
When broiling, place the fish 4 6 inches from the heat source and watch carefully for doneness.
Perfect Grilled Halibut With Butter
Ingredients:
Instructions:
Nutrition Facts:
| Calories | 392 kcal |
|---|---|
| Protein | 35.3 g |
| Fat | 25.1 g |
| Carbs | 3.4 g |
