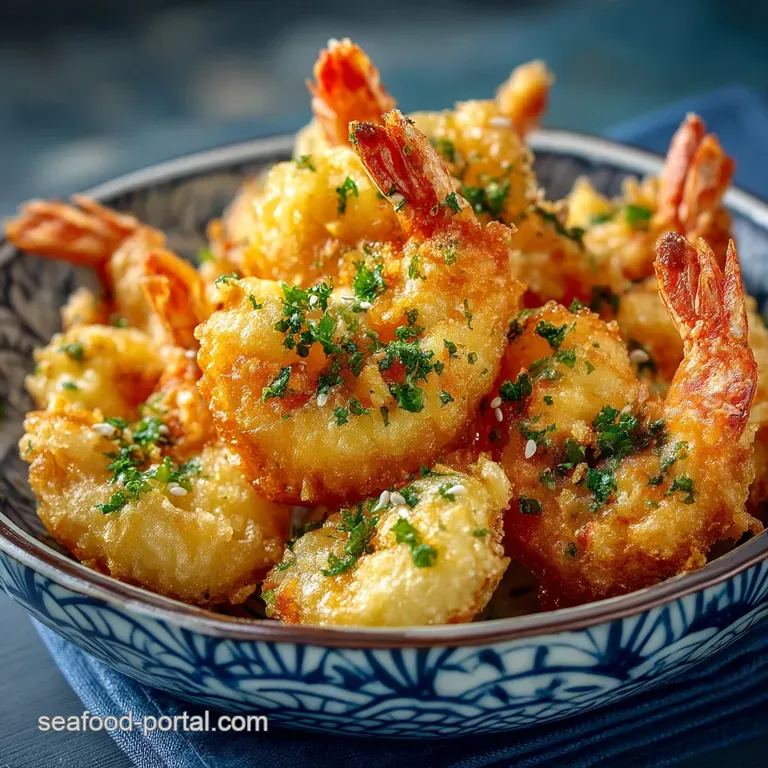
Shrimp Tempura: the Ultimate Light and Lacy Recipe

- Mastering the Art of Japanese Tempura
- The Science of the Perfect Lacy Batter
- Essential Components: Prawns, Pantry Staples, and Preparation
- How to Cook Light and Crispy Prawn Tempura (Step-by-Step)
- Deep Dive: Troubleshooting and Tempura Secrets
- Handling Leftovers: Keeping Tempura Crisp
- Traditional Tentsuyu Dipping Sauce and Accompaniments
- Recipe FAQs
- 📝 Recipe Card
Mastering the Art of Japanese Tempura
That incredible, almost audible crunch followed by the steam rising from succulent protein that’s what perfect Shrimp Tempura is all about. When done right, homemade tempura is light, airy, and somehow completely non-greasy.
It’s a revelation compared to the heavy, doughy version most people have encountered.
People often assume Tempura is one of those highly specialized Japanese skills only perfected by chefs. Seriously, it's not. If you have oil hot and the batter ice-cold, you are genuinely halfway there. Mastering Shrimp Tempura is more about controlling temperatures than complex mixing.
I spent years making sad, heavy tempura before I finally understood the three non-negotiables of the batter. Now I'm sharing every hard won trick so you can skip the struggle and go straight to crispy, flavourful success.
Let’s crack on and make the best, easiest Shrimp Tempura you’ll ever taste. (ST 3)
The Science of the Perfect Lacy Batter
This isn't just deep frying; it’s a delicate, rapid cooking process. The key to achieving authentic Japanese Shrimp Tempura lies in disrupting the gluten structure of the flour. We want the batter to cling lightly, not form a heavy crust.
This approach ensures the delicate flavor of the prawn shines through.
What Defines Authentic Tempura Texture?
Authentic tempura is defined by its lacy, almost brittle texture. It should shatter when you bite into it, leaving behind no heavy residue. This ethereal crust is achieved by the rapid evaporation of water inside the batter when it hits the high heat.
We are essentially building a thin shell of crispy starch around the prawn. When you master this, you master Crispy Shrimp Tempura . (ST 4)
Why Icy Cold Batter is Non-Negotiable
This is the number one secret I learned the hard way. The batter must be kept as close to freezing as possible. Why? Cold ingredients dramatically slow down the hydration of the flour and the formation of gluten. When you drop that icy batter into 350°F oil, the temperature difference creates a huge shock wave.
That rapid thermal shock turns the water into steam instantly, creating those delicate, airy pockets that define amazing Shrimp Tempura . Keep the bowl on ice!
Overview of the Tempura Making Process
The process is simple: Prep the shrimp, chill the ingredients, mix minimally , and fry hot . We rely on the raw prawn being completely dry, dusted lightly, and then enveloped in the lumpy, cold batter.
Timing is everything; once the batter is mixed, it has to be used almost immediately before it warms up. That’s the rhythm of perfect Shrimp Tempura . (ST 5)
The Role of Low-Gluten Flour and Starches
If you use standard bread flour, you're going to end up with a tough crust. We use low-protein plain (all-purpose) flour, but we also include cornstarch or rice flour. Starch, unlike wheat flour, contains zero gluten.
Adding a quarter cup of cornstarch ensures that the texture remains light and brittle, reducing the risk of a heavy crust, which is the death knell for good tempura.
The Power of Carbonation: Achieving Airiness
Want to take your Shrimp Tempura to the next level? Swap out half of the ice-cold water for ice-cold sparkling water or club soda. The carbon dioxide in the bubbly water helps create more tiny air pockets in the batter.
These air bubbles expand and escape rapidly in the hot oil, resulting in a noticeably lighter, more airy crust. It’s a simple trick that yields big rewards. (ST 6)
Preparing Prawns for Maximum Straightness and Snap
Nobody wants a curled-up shrimp! To get those beautiful, long, straight pieces of Ebi Tempura , you have to score them. Lay the peeled shrimp belly side up and make 3 to 4 shallow, diagonal cuts along the underside. Then, gently press down on the back of the shrimp until you hear a tiny pop.
This breaks the muscle fibres and ensures your Shrimp Tempura stays perfectly straight during frying.
Essential Components: Prawns, Pantry Staples, and Preparation
The secret to incredible fried food is starting with quality protein. Tempura requires specific preparation, ensuring the prawns are not just peeled, but completely prepped for optimal texture.
Choosing the Best Prawns (Size and Type)
I strongly recommend using large or jumbo prawns (around 16/20 count). They hold up better to the heat and provide a better meat-to-batter ratio. Always use peeled and deveined prawns, but make sure to leave the tail shells on . The tail acts as a handle both for dipping and for eating.
If you can only get frozen prawns, ensure they are fully thawed in the fridge and then dried meticulously before starting the prep for your Japanese Shrimp Tempura . (ST 7)
Building the Flavor Base: Homemade Tentsuyu Sauce
Tempura requires a dipping sauce; it simply isn't complete without the tangy, savoury, sweet Tentsuyu . While you can buy it bottled, making it fresh is so fast and superior. It’s a simple simmer of dashi (Japanese stock), soy sauce, and mirin.
This sauce should be made ahead of time and served chilled the cold sauce contrasting with the hot, crispy Shrimp Tempura is part of the experience. (ST 8)
Ingredient Swap Guide for Specific Dietary Needs
| Ingredient | Standard Ingredient | Substitution | Reason |
|---|---|---|---|
| Flour | Plain (All-Purpose) Flour | Rice Flour or GF Blend | Ensures a completely gluten-free Shrimp Tempura crust. |
| Dashi | Dashi Stock (Fish/Kelp base) | Vegetable Stock + Mushroom Powder | Excellent umami alternative for vegetarians. |
| Mirin | Mirin (Sweet Rice Wine) | Dry Sherry + 1/2 tsp Sugar | Balances the lost sweetness from the traditional ingredient. |
| Egg Yolk | Large Egg Yolk | 1 Tbsp Icy Water or Vodka | If avoiding egg, the cold liquid serves the same purpose of hydration. |
How to Cook Light and Crispy Prawn Tempura (step-by-step)
Trust me, follow these steps exactly. This is where we move from good to truly great.
Preparing the Prawns and Setting up the Station
Before you even think about mixing the batter, set up your entire station. Dry the scored prawns completely. Lightly dust them with the two tablespoons of plain flour. Get your pot of oil heating up slowly toward the target 350°F temperature.
Crucially, set up a large bowl filled with ice, and place your empty batter bowl on top of it. This creates your constant ice bath.
Mixing the Batter: The Do's and Don'ts of Stirring
Get your cold, dry ingredients (flour, starch) and your cold, wet ingredients (egg yolk, icy water). Whisk the dry ingredients together first. Then add the wet ingredients and stir only 5 to 6 times. You must leave massive lumps of dry flour in the mixture.
Do not, I repeat, do not try to make it smooth. Lumps mean low gluten, and low gluten means crispy Shrimp Tempura . (ST 9)
Chef’s Note: Mix the batter just before the oil hits the frying temperature. You want the least amount of time between mixing and frying possible. Batter warm-up is the enemy of crispy Japanese Shrimp Tempura . (ST 10)
Deep Frying Techniques for Optimal Golden Color
The oil temperature must be maintained between 340°F and 360°F (170°C 180°C). Use a thermometer; there are no shortcuts here. Holding the shrimp by the tail, dip the main body into the batter, letting the excess drip off. Do not overcrowd the pot.
Fry only 3 4 pieces of Shrimp Tempura at a time. Overcrowding dramatically drops the oil temperature, leading to heavy, greasy results. (ST 11)
For that beautiful, lacy appearance, take a fork dipped in batter and flick tiny droplets onto the frying shrimp while they cook. Those droplets will puff up and create delicate, crispy shards on the outside of your Crispy Shrimp Tempura .
(ST 12) Cook for about 2– 3 minutes total, flipping once, until pale golden.
Draining and Resting for Maximum Crispness
When they look perfect, lift the tempura out immediately and let the excess oil drip back into the pot. Transfer the hot pieces directly onto a wire cooling rack set over a tray. Never place them on paper towels.
Paper towels trap steam rising from the bottom, turning the delicious crispy crust instantly soggy. Serving immediately is the only way to enjoy truly perfect Easy Shrimp Tempura . (ST 13)
Deep Dive: Troubleshooting and Tempura Secrets
I learned these secrets through trial and error and a few catastrophic batches that looked more like dough balls than delicate seafood. Pay attention to these common pitfalls.
Temperature Control: The Single Most Important Factor
If your oil is too cool (below 330°F), the Shrimp Tempura will absorb the fat before the batter can fully crisp. You end up with a depressing, oily bite. If the oil is too hot (above 370°F), the outside burns to a deep brown before the shrimp is cooked through.
Constant monitoring with a reliable thermometer is the absolute key to success in making restaurant quality Shrimp Tempura . (ST 14)
Avoiding a Tough or Soggy Crust
Toughness comes from overmixing the batter (gluten development). Soggy crusts come from either oil that is too cool or resting the finished product on a flat surface (trapping steam).
If you follow the cold, lumpy batter rule and use the wire rack, you will avoid 90% of texture disasters when preparing Shrimp Tempura . (ST 15)
Cleaning the Frying Oil (Removing Batter Scraps)
As you fry, small bits of batter (called tenkasu ) will break off and float in the oil. These scraps will burn, eventually creating bitter specks on subsequent batches of Ebi Tempura . Use your spider skimmer to constantly sweep the oil clean between batches.
Clean oil is happy oil, leading to cleaner flavors.
Handling Leftovers: Keeping Tempura Crisp
Does this delicious fried treat freeze well? You bet if you follow the right steps. However, like all great fried foods, Shrimp Tempura is best eaten immediately.
Short Term Storage (Refrigeration)
If you must store leftovers, place cooled Shrimp Tempura in an airtight container lined with a paper towel. Store them for no more than 2 days in the fridge. They will lose much of their initial crispness, which we will address in reheating. For a fantastic use of leftover shrimp, especially if you have other pieces, consider whipping up a batch of Shrimp Egg Foo Young: Fluffy Omelette with Rich Gravy for brunch the next day.
Best Method for Reheating Shrimp Tempura
Do not, under any circumstances, use the microwave. It turns crispy things into sad, chewy rubber. The absolute best way to revive day-old Shrimp Tempura is in an air fryer or a conventional oven.
- Air Fryer: Preheat to 350°F (175°C). Cook for 3– 5 minutes until piping hot and re-crisped.
- Oven: Preheat to 375°F (190°C). Lay the tempura on a wire rack over a baking sheet. Heat for 5– 8 minutes.
This quick burst of dry heat will bring back the crunch, making your leftover Crispy Shrimp Tempura almost as good as fresh. (ST 16)
Can You Freeze Uncooked Batter or Prepared Tempura?
Uncooked Batter: No. The integrity of the cold batter is compromised the moment it starts to warm or is frozen. The texture will be gummy upon thawing. Make the batter fresh every time you want authentic Shrimp Tempura . (ST 17)
Prepared Tempura: Yes, technically. Once completely cooled, flash freeze the Shrimp Tempura on a baking sheet, then transfer to a freezer bag. They can last up to 2 months. Reheat directly from frozen using the oven or air fryer methods mentioned above, adding a few extra minutes to the cooking time. For another delicious fried shrimp recipe that freezes beautifully, check out my tips for making Honey Walnut Shrimp: Best Ultra Crispy Restaurant Style Recipe .
Traditional Tentsuyu Dipping Sauce and Accompaniments
While the crispness of the Shrimp Tempura is critical, the dipping sauce provides the necessary balance.
The chilled Tentsuyu sauce made from dashi, mirin, and soy sauce offers that perfect salty sweet counterpoint. If you want a more substantial meal, serve the Shrimp Tempura over hot rice (Tendon style). It’s amazing!
Alternatively, if you’re hosting a big gathering, serving this alongside a contrasting dish like my Bang Bang Shrimp Recipe: Restaurant Quality Sweet Heat offers guests two different, incredible textures and flavors.
Making amazing Shrimp Tempura at home is entirely doable. It requires respect for temperature and restraint with the whisk, but the reward a plate piled high with delicate, crispy prawns is absolutely worth the effort. Go forth and fry! (ST 18)

Recipe FAQs
Why is my tempura batter heavy and soggy instead of light and crisp?
This is usually due to two main factors: overmixing the batter and warm ingredients. Overmixing develops the gluten in the flour, resulting in a tough, bready texture; always mix minimally until just combined and lumpy.
Ensure your water and egg are icy cold, as the temperature shock during frying is what creates the famous lacy, non-greasy crust.
How do I prepare the shrimp so they fry straight instead of curling up?
To ensure the shrimp remain straight, make 3-4 small, shallow cuts across the belly side of the peeled prawn, spacing them evenly. Gently press the body flat on the cutting board until you feel the segments slightly ‘pop’ and straighten out.
This technique cuts the muscle fibers that cause the characteristic curling motion when heat is applied.
What is the optimal oil temperature for cooking shrimp tempura?
The ideal temperature range is critical, falling between 340°F and 365°F (170°C to 185°C). If the oil is too cold, the tempura absorbs excessive oil and becomes greasy and heavy.
Conversely, if it is too hot, the batter will brown too quickly before the delicate shrimp inside is fully cooked; use a deep fry thermometer to monitor this closely.
Can I use standard all-purpose flour instead of specialized tempura flour?
Yes, you can substitute specialized flour with cold all-purpose flour, though the result may be slightly heavier. For the lightest possible result, use low-protein cake flour, or mix standard AP flour with a tablespoon of cornstarch or rice flour before chilling it thoroughly.
Regardless of the type, keep the flour itself cold before incorporating it into the batter.
Can I freeze cooked shrimp tempura, and how should I reheat it?
While best enjoyed immediately, you can freeze cooked tempura after cooling it completely on a wire rack. To reheat, place the frozen pieces on a lined baking sheet and bake them in a preheated oven at 350°F (175°C) for about 8 10 minutes.
Avoid using a microwave entirely, as the resulting steam will quickly make the tempura soggy.
Can I use this icy batter technique for vegetables?
Absolutely; this light and lacy batter is perfect for various vegetables, including slices of sweet potato, broccoli florets, zucchini, or mushrooms. Ensure the vegetables are completely dry before dipping, as any surface moisture will cause the batter to slip right off the food.
Fry vegetable tempura at a slightly lower temperature (around 330°F) for denser items.
Light And Lacy Shrimp Tempura

Ingredients:
Instructions:
Nutrition Facts:
| Calories | 351 kcal |
|---|---|
| Protein | 30.0 g |
| Fat | 3.0 g |
| Carbs | 41.0 g |
