Baked Salmon Collars Crispy Lemonmiso Glaze the Best Salmon Kama Recipe
- Unlocking the Chef's Secret: Why Salmon Collars (Kama) Are the Ultimate Fish Cut
- Sourcing and Preparing Your Essential Components
- Mastering the Method: How to Make Crispy Baked Salmon Collars
- Achieving Maximum Crispness: Air Fryer Adaptation
- Troubleshooting and Expert Tips for Your Next Batch
- Customizing the Flavor: Alternative Glazes for Baked Salmon Collars
- Recipe FAQs
- 📝 Recipe Card
Unlocking the Chef's Secret: Why Salmon Collars (Kama) Are the Ultimate Fish Cut
Stop scrolling past the discounted cuts at the fish counter. Seriously. This cut is gold. If you’ve been sticking solely to boneless, skinless salmon fillets, you are missing out on the absolute best part of the fish, and you're paying way too much for the privilege.
I swear, the first time I made these baked salmon collars , my husband nearly wept. They are richer, far more forgiving if you slightly overcook them, and they carry flavour like a champ. Plus, they usually cost about half the price of the fillets. It’s brilliant, actually.
Defining the Delicious: Where Exactly Is the Salmon Collar Found?
This isn't some weird, scary part of the fish, I promise. The salmon collar, often known by its Japanese name, kama , is the V-shaped slice of flesh that sits right behind the gills and pectoral fins. Think of it as the shoulder or the brisket of the fish.
Because the salmon uses these muscles constantly for movement, they are marbled with incredible amounts of fat. That fat, my friends, is where the flavour lives. You’re getting a cut loaded with connective tissue and bone, which means when you roast it, it stays incredibly moist and succulent.
It’s hard to believe how juicy such a small piece can be.
The Nutritional Advantage: High Omega-3s in a Budget and Friendly Cut
Listen, we all know salmon is healthy, right? But the collar is especially potent. Because it’s the fattiest part of the fish, it’s absolutely packed with Omega-3 fatty acids. If you’re trying to maximize your intake of those good fats without spending a fortune, this is the way to do it.
You get that rich, buttery flavour that usually comes with expensive belly cuts, but for a fraction of the cost. When you’re looking up how to bake salmon collars , remember that you are cooking a high and fat cut, which means it will release wonderful juices as it roasts.
That’s why we use high heat; we want that fat to render out beautifully.
The Ultimate Texture Test: Achieving Maximum Moistness and Crisp Skin
The challenge with any piece of fish is avoiding that horrible, dry, cottony texture. With a standard fillet, it happens in seconds. With the collar? It’s much harder to mess up. The bones and high fat content keep the internal flesh protected and unbelievably tender.
The secret to the best crispy salmon collars is twofold: high heat and dryness. First, you need to pat the skin dry (I’m serious, use several layers of paper towel). Second, you need that oven cranked up to 200°C (400°F).
That blast of heat ensures the skin tightens and crisps up almost immediately while the fat melts slowly, basting the interior.
Sourcing and Preparing Your Essential Components
Selecting the Right Salmon Collars for Optimal Baking
When you’re at the market, look for collars that still have the skin attached. Sometimes they try to sell you skinless ones, but trust me, the skin is essential for structure and for that glorious crunch. You want collars that look robust thick and fleshy rather than thin and flimsy.
The flesh should be bright pink or orange, not dull or faded. If they offer you enormous king salmon collars, grab them! They are the fattiest and offer the most flaky meat. If you’re lucky enough to find them pre and cut into small pieces (known as portions), that works too, but I prefer the whole salmon collar kama recipe piece because the bones help insulate the meat.
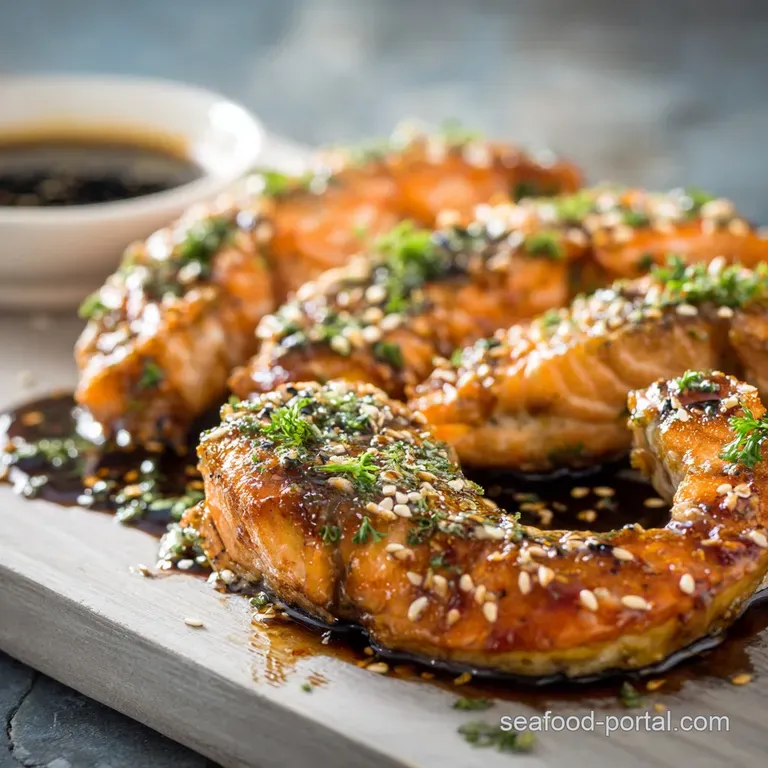
The Bright & Savory Balance: Building the Lemon and Miso Glaze
This miso glaze isn't just sticky sweet, though it has that going for it too. It’s all about balance. The white miso paste (Shiro Miso) provides a deeply savoury, almost nutty umami flavour. This is your foundation. Then we cut through that richness with fresh lemon zest and juice.
That acid is crucial; it brightens everything up and makes the richness feel light. My mistake when I first started was using too much soy sauce and making it too salty. Now, I keep the soy sauce minimal and rely on the rice vinegar for that slight tang, using a bit of honey to ensure the glaze caramelizes nicely under the heat.
Quick Kitchen Tools Required for Perfect Baking
Honestly, this recipe is mercifully low on equipment requirements. All you really need is a good, heavy sheet pan (because thin ones tend to warp under high heat, leading to uneven cooking) and a sheet of parchment paper.
The parchment paper isn't just for easy cleanup, though it certainly helps; it also provides a nonstick surface, which means you won't lose your precious crispy skin when you lift the fish off the tray. A small pastry brush for applying the glaze is helpful, too.
Mastering the Method: How to Make Crispy Baked Salmon Collars
Right then, let’s crack on. This method for oven baked salmon collars is straightforward, relying heavily on the pre and marination and the high heat of the oven.
CRUCIAL NOTE: Do not skip the 15 minute resting time. Even 15 minutes at room temperature allows the salt and the miso to start pulling flavour into the fish.
If you throw cold, straight and from the and fridge fish into a hot oven, it messes up the cooking time and often results in a tougher texture.
Related Recipes Worth Trying
- Garlic Crusted Cod Fish UltraCrispy Easy Baked White Fish Recipe — Make the perfect Garlic Crusted Cod Fish tonight This easy baked cod recipe yields a flaky moist fish with an unbelievably crispy buttery garlic crust Its a...
- Oven baked branzino fillets Quick Moist Mediterranean Recipe — Oven baked branzino fillets are guaranteed moistness using the en papillote method This fast oven-roasted branzino fillets recipe takes just 30 minutes and...
- Garlic Butter Lobster Tails Ultimate OvenBaked Recipe in 30 Mins — Master restaurantquality Garlic Butter Lobster Tails at home This simple Baked Lobster Tail Oven recipe uses the classic butterflying method for maximum...
Achieving Maximum Crispness: Air Fryer Adaptation
Step One: Preparing the Umami Glaze Mixture
Just dump all those glaze ingredients miso, soy, ginger, garlic, honey, lemon into a bowl and whisk vigorously until it's smooth. I like to use a microplane for the ginger and garlic; you get a finer pulp that blends right into the paste without any chunky bits.
Remember to reserve two tablespoons of this mixture! You’ll need that untouched glaze for basting later, so we don’t contaminate the whole batch with raw fish juices.
Step Two: Coating and Marinating for Maximum Flavour Penetration
Pat the collars dry first! Then, get in there with your brush (or your hands, I don’t judge) and really coat those collars. Get the glaze into all the little crevices around the bone. We are aiming for maximum flavour penetration here.
Since we are using lemon juice, keep that marinating time limited to under an hour at room temp. If you need to prep this ahead of time, marinate in the fridge for up to four hours, but pull them out 30 minutes before baking.
Step Three: over High heat Roasting for a Flaky Interior
This is where the magic starts. Slide those glazed collars onto the sheet pan, making sure they are spaced apart. Set that oven to 200°C (400°F). The initial 10 minute bake is to get the interior cooking quickly and to start rendering that wonderful fat. The high heat seals in the moisture almost instantly.
This is how you ensure the flesh is tender and flaky inside.
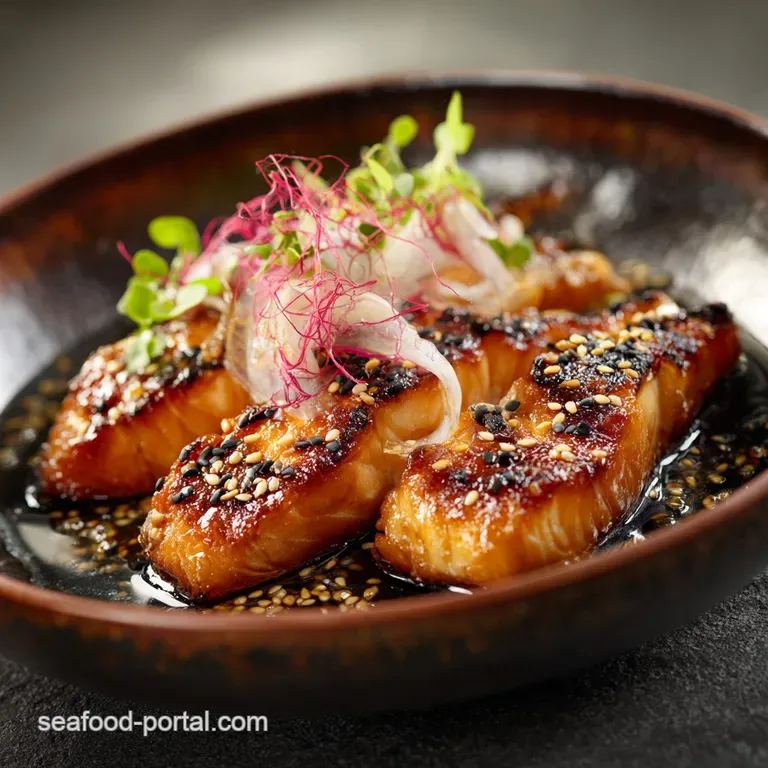
Step Four: Achieving the Final Crisp Under the Broiler
After the first 10 minutes, take them out. Now grab that reserved glaze and brush the collars again. Return them to the oven for another 5– 10 minutes.
If, and only if, the collars are cooked through (they should be flaky and opaque) but the skin hasn't reached that dark, bubbly caramelization you want, turn on your broiler (grill). Slide the pan onto the top rack and watch it like a hawk.
Seriously, the miso and honey will go from perfect to charcoal in about 45 seconds. A minute or two is usually all you need for that glorious, caramelized crust.
Setting Up the Air Fryer for Fatty Fish
If you have an air fryer, you absolutely must try this. It produces the best, most consistent crispness I have ever achieved on fish. Line the basket with parchment paper designed for air fryers (or just foil with holes poked in it) to catch the fat, which can smoke a bit, especially when cooking fatty fish like this.
If your collars are very large, you might need to cook them in batches so you don't crowd the basket.
The Ideal Temperature and Time for Air and Fried Salmon Collars
I set my air fryer to 190°C (375°F). Place the glazed collars in the basket, skin side up if possible. Cook for 8 minutes, then remove, baste with the reserved glaze, and flip them over briefly if you want that bottom side crisp too (about 2 minutes).
Total cooking time for average and sized collars is usually only 10– 12 minutes. Check for flakiness at the thickest part. It’s faster, arguably crispier, and just as satisfying as the oven method.
Troubleshooting and Expert Tips for Your Next Batch
Why Do My Salmon Collars Taste Dry? (Preventing Overcooking)
If you followed the instructions for how long to bake salmon collar and they still came out dry, it's almost always one of two things: either your oven runs hot, or you used collars that were too thin. Thin collars simply can't hold up to 20 minutes of high heat.
Next time, cook for less time initially (maybe 8 minutes), then check for doneness using a fork. The sweet spot is when the flesh separates easily but still looks moist.
If you're nervous, pull them out when they hit 60°C (140°F); residual heat will bring them to the perfect 63°C (145°F).
Storage and Reheating Advice for Leftovers
If you have leftovers (a rare occurrence in my house), they store well in an airtight container for up to three days. Do not try to microwave them unless you enjoy rubbery fish and a smelly kitchen.
The best way to reheat is to place them back in the air fryer at 160°C (325°F) for about 5– 7 minutes, or pop them back on a sheet pan in the oven at the same temperature until heated through.
The goal is to bring the temperature up slowly so the skin re and crisps without drying out the flesh.
Serving Suggestions: Best Pairing Sides for the Glazed Fish
The rich, umami flavour of this glaze needs something simple and fresh to cut through it.
- For Texture: A quick cucumber or cabbage slaw dressed in rice vinegar and sesame oil.
- For Substance: Steamed white rice is classic. If I'm feeling fancy, I'll make a batch of garlic and fried brown rice.
- For Colour/Greens: Blistered shishito peppers or quick and braised bok choy.
Customizing the Flavor: Alternative Glazes for Baked Salmon Collars
The Broiled Approach: Achieving a Caramelized Crust Without the Oven
If you don't want to turn on the whole oven, you can actually cook these primarily under the broiler (grill). The technique is slightly different, and requires even more vigilance! You must place the collars on a rack set over a tray (so the heat can reach them from all sides).
Broil on medium and high for about 6– 8 minutes per side, turning once and basting with the glaze when you flip it. This gives a super smoky, intense crust very quickly, which is perfect for maximizing that fatty salmon collar flavour.
Making It Spicy: Adding Chili Paste and Sambal Oelek
If you need a kick, ditch the fresh ginger and swap it for a teaspoon of Gochujang (Korean chili paste) or about half a teaspoon of Sambal Oelek (Indonesian chili paste). Since these are already salted, you might want to dial back the soy sauce just a hair.
The spice plays beautifully against the sweet miso and the lemon. It turns it into a totally different, but equally delicious, dish.
Dietary Swaps: Making the Glaze Soy and Free or Gluten and Free
This is easy to adapt! If you need gluten and free, simply swap the standard soy sauce for Tamari or Coconut Aminos. Tamari is my preference because it has a stronger, richer flavour profile. If you need it soy and free entirely (to avoid miso and soy sauce), use a strong alternative.
A paste made from tahini, blended with rice vinegar, sesame oil, and a little salt, can mimic the creamy thickness of the miso. It’s not exactly the same, but it does the job brilliantly.

Recipe FAQs
What exactly are salmon collars? Are they really worth the fuss, or just the chef’s secret leftover bit?
They are the rich, fatty, bone-in cuts located right behind the gills, and they are absolutely worth the fuss! Due to their high fat content, collars stay incredibly moist and tender when baked, offering superior flavour and value compared to standard fillets.
What’s the secret to getting super crispy skin when making these Baked salmon collars? I hate a soggy bottom!
The key is moisture control: thoroughly pat the collars dry before applying any glaze and ensure your oven is preheated to that high 200°C (400°F) temperature to quickly render the fat.
If needed, give them a blast under the broiler (grill) for the last minute, watching them like a hawk so the miso glaze doesn't burn.
This miso glaze sounds lovely, but if I’m missing Shiro Miso, what is a decent swap?
If you’ve run out of white miso, you can use tahini mixed with a touch of extra soy sauce for that desirable deep umami flavour. Alternatively, use a smaller amount of darker (red) miso, but remember to reduce the soy sauce slightly as red miso is much saltier.
Are salmon collars tricky to eat because they are bone-in? Should I be worried about little bones?
Not at all; the bones are large and structural, similar to those you’d find in a chicken wing, and the moist meat flakes away easily from the bone structure. It’s a very satisfying, hands-on eating experience, much easier than picking through tiny pin bones in a standard fillet.
How should I handle leftovers, and can I reheat the baked collars without drying them out?
Leftovers store beautifully in the fridge for 2 3 days and are best reheated quickly in a hot oven (or air fryer) to maintain the texture; they are also fantastic served cold and flaked over a fresh salad or rice bowl.
Lemon Miso Baked Salmon Collars
Ingredients:
Instructions:
Nutrition Facts:
| Calories | 179 kcal |
|---|---|
| Protein | 22.0 g |
| Fat | 9.0 g |
| Carbs | 0.0 g |
