Dynamite Shrimp: the Classic Crispy and Irresistibly Creamy Appetizer
- The Ultimate Guide to Restaurant-Style Dynamite Shrimp at Home
- The Science Behind the Crunch: Why This Dynamite Shrimp Recipe Never Fails
- Essential Ingredients for Dynamite Shrimp and Key Substitutions
- Master the Method: Step-by-Step Dynamite Shrimp Instructions
- Expert Tips and Troubleshooting for Flawless Results
- Storage, Reheating, and Making Dynamite Shrimp Ahead of Time
- Elevating Your Plate: What to Serve Alongside Dynamite Shrimp
- Recipe FAQs
- 📝 Recipe Card
The Ultimate Guide to Restaurant Style Dynamite Shrimp at Home
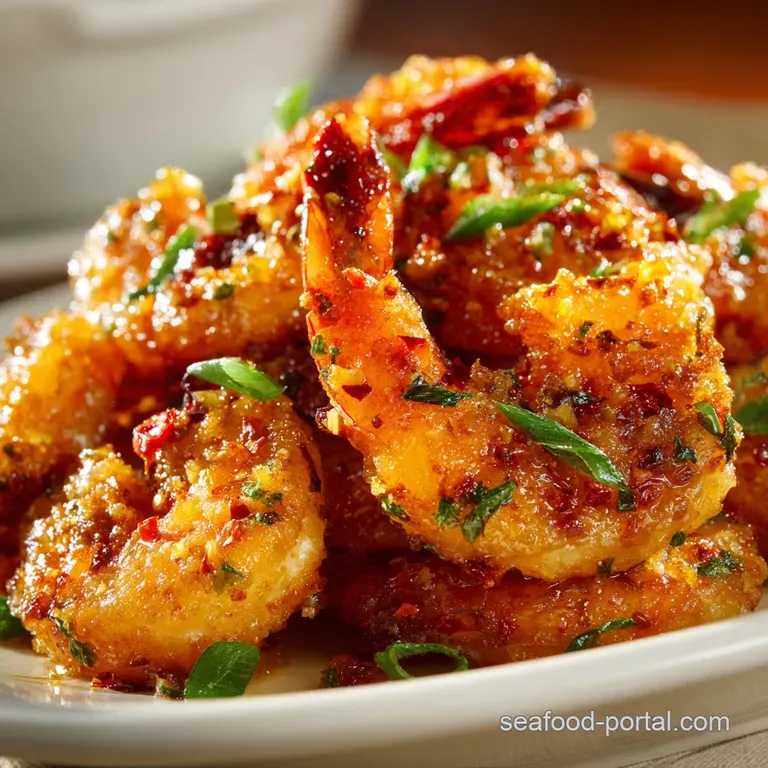
That sound. That glorious, shattering crunch followed by the immediate hit of creamy, spicy sweetness hitting your tongue. It’s what makes Dynamite Shrimp such a wildly addictive appetizer.
Seriously, the aroma alone, a tantalizing mix of toasted sesame and chili heat, tells you you're about to eat something spectacular.
For years, I believed this dish was strictly reserved for those fancy Asian fusion menus with the ridiculous price tags. Turns out, making genuinely excellent, crispy Dynamite Shrimp Recipe at home is startlingly straightforward.
It’s fast, incredibly satisfying, and frankly, a cheap way to feel like you’re having a high end night in.
Trust me, forget those sad, soggy attempts you’ve seen floating around the internet. We’re going to achieve next level crispness and nail that perfect sweet spicy ratio every single time.
Grab your apron and let's crack on this is how you make the ultimate Crispy Dynamite Shrimp Appetizer .
The Science Behind the Crunch: Why This Dynamite Shrimp Recipe Never Fails
You don't need a culinary degree to understand the magic here; you just need to respect the oil temperature. The goal is to maximize surface area crispness while keeping the shrimp inside juicy and perfectly cooked. This recipe focuses on three non-negotiable techniques that guarantee success.
What Defines the Classic Dynamite Flavor Profile
The flavor profile is a magnificent push pull dynamic. You need that rich, creamy vehicle, usually high-quality Japanese mayonnaise, cut sharply with acidity from rice vinegar. Then comes the heat, powered by Sriracha, followed immediately by the soothing sweetness of honey.
This complex balance is what elevates this from simply spicy shrimp sauce to true dynamite status. If your sauce tastes flat, it’s missing either acid or sweetness go fix it!
How Long Does Dynamite Shrimp Take to Prepare?
This is a fast food masterpiece, honestly. While the active cooking time is quick (about 15 minutes of frying in batches), the total time is about 50 minutes.
Most of that time is dedicated to prepping the shrimp and letting the glorious Dynamite Shrimp Sauce Recipe chill out in the fridge. That chilling step is non-negotiable for a perfect finish.
Achieving Maximum Crispness: The Corn Starch Batter Secret
If you use only flour, you end up with heavy, bready, slightly chewy fried shrimp. Blegh. The secret is using a 50/50 mixture of all-purpose flour and corn starch (cornflour). Corn starch inhibits gluten formation, creating an incredibly light, airy, and shatteringly crisp exterior.
This is the foundation of the best Dynamite Shrimp Batter Recipe you will ever make, period.
The Importance of the Double Dry Technique
This is my biggest takeaway from years of frying failures. You must pat the peeled, raw shrimp bone dry before you even think about the batter. Water is the enemy of crispy frying! I use two layers of paper towels and literally press them dry.
Then, after dipping them in the wet egg and rolling them in the dry mixture, let them sit for 5 minutes. This creates a tacky surface, meaning the batter won't flake off when it hits the hot oil.
Essential Ingredients for Dynamite Shrimp and Key Substitutions
You don't need a massive list of obscure items, just high-quality basics. I always suggest using Kewpie mayo if you can find it it’s the authentic, secret base for the best flavor.
Choosing the Best Shrimp Size and Preparation
Go for large or jumbo shrimp (21/25 count or larger). They hold up beautifully to the intense frying and make a much better presentation. We leave the tail segment on purely for looks and ease of handling it acts like a little handle. Always use peeled and deveined raw shrimp.
Frozen is fine, just make sure they are fully thawed in cold water and, crucially, patted completely dry.
The Two-Part Sauce Breakdown: Mayonnaise Base and Spice Elements
The mayonnaise base provides the necessary richness. Kewpie is richer and slightly sweeter than regular American mayo due to the use of egg yolks only. Sriracha gives us the heat, but don't stop there. Adding a tiny dash of rice vinegar balances the overall fat and sugar, making the sauce pop on the palate.
| Ingredient | My Recommendation | Quick Substitution |
|---|---|---|
| Shrimp | Large/Jumbo (tail on) | Cod or other firm white fish chunks (cut small) |
| Kewpie Mayonnaise | Essential for depth | Standard full fat mayo + a pinch of sugar |
| Sriracha | Mandatory | Gochujang (less heat, deeper color) or Cayenne paste |
| Honey | Simple sweetness | Agave nectar or brown sugar syrup |
| Corn Starch | Non-negotiable | Potato starch or Tapioca flour (texture may vary slightly) |
Flour Alternatives for gluten-free Batter
If you need a gluten-free Dynamite Shrimp Batter Recipe , simply substitute the all-purpose flour for a good quality rice flour blend. Keep the corn starch ratio the same. Rice flour tends to fry exceptionally well, yielding a light, crisp texture that rivals wheat flour.
Quick Shopping List: Pantry Staples vs. Fresh Items
Most of the sauce components are pantry staples, which is why this is such a great last minute dinner or appetizer. You really only need to purchase the fresh shrimp and maybe the chives/scallions for garnish.
Chef’s Note: My rookie mistake? Thinking low-fat mayo was acceptable. It is not. It separates under the heat of the fried shrimp and leaves you with a watery mess. Use full fat, high-quality mayo. You deserve it.
Master the Method: step-by-step Dynamite Shrimp Instructions
This process is broken down into three crucial stages: prepping the flavor, creating the crunch, and combining them perfectly. Remember, speed is your friend once the shrimp is fried.
Perfecting the Batter Coating and Consistency
Once your shrimp is dry, it’s time to coat it. Set up your two bowls: one wet (the egg) and one dry (the seasoned flour/starch mix). Dip quickly in the egg, ensuring the whole shrimp is coated. Then move immediately to the dry mixture and press the powder onto the shrimp.
We want a thick, heavy coating that will inflate nicely during frying.
Frying to Golden Perfection (Temperature Control)
Heat at least 2 inches of neutral oil (canola, peanut, or vegetable) to 350°F (175° C). Use a thermometer! I once guessed the temperature and ended up with oil-logged shrimp that tasted like deep fried sadness. It wasn't my finest moment.
Combining the Dynamite Sauce and Toss Technique
Fry your shrimp in small batches (6 8 pieces at a time) for about 2– 3 minutes until they are a light golden color. They cook fast! Retrieve them and drain immediately on a wire rack (not paper towels, which steam the bottom).
Once all batches are done, transfer them to a large mixing bowl. Take your cold, thick Dynamite Shrimp Sauce from the fridge and pour about three quarters of it over the hot shrimp. Toss gently but quickly until they are glossy and evenly coated.
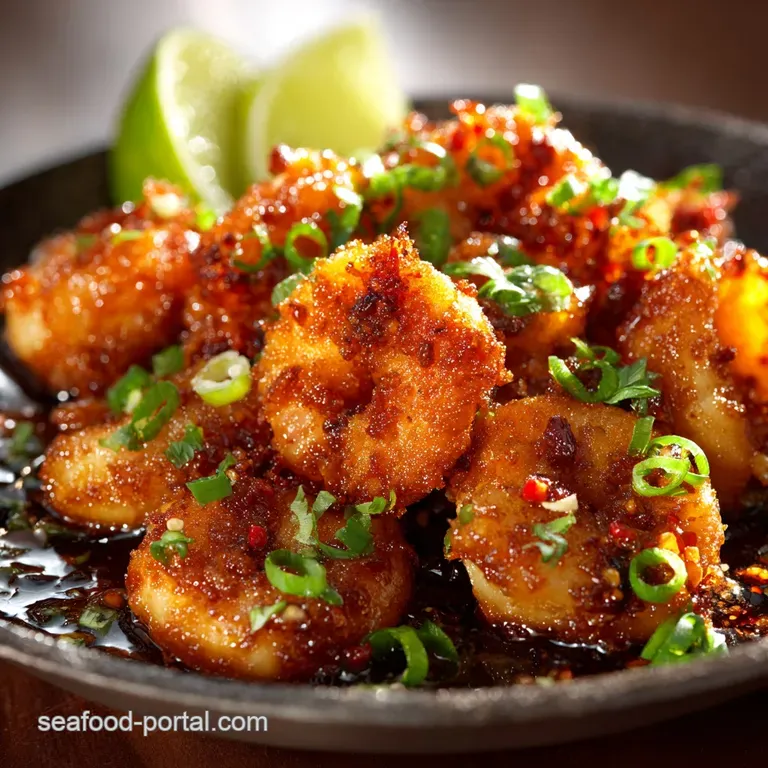
Finishing Touches: Garnish and Immediate Serving
Transfer the tossed shrimp to your serving dish. I like to drizzle the remaining sauce right over the top, just for visual appeal. A sprinkle of toasted sesame seeds adds a lovely nutty counterpoint, and fresh green chives or thinly sliced scallions provide that essential freshness and pop of color.
Serve this baby immediately!
Expert Tips and Troubleshooting for Flawless Results
You've got the recipe; now here are the professional habits that ensure success.
The Crucial Mistake of Overcrowding the Fryer
I cannot stress this enough: Never overload your fryer. When you drop too many shrimp into the hot oil, the temperature plunges instantly. This causes the shrimp to cook slowly, absorb far too much oil, and emerge greasy and soft instead of crispy Dynamite Shrimp .
Stick to small batches, even if it feels tedious.
Prepping Shrimp for Optimal Batter Adhesion
Make sure the shrimp is not only dry but also cold before battering. I usually toss my dry shrimp in the fridge for 10 minutes while the oil heats up. Cold shrimp, hot oil, strong contrast. This is fundamental to avoiding the dreadful batter separation during the cook.
Adjusting the Spice Level for Personalized Heat
If you want more heat, simply add more Sriracha obvious, right? But if you want a deeper, more robust heat without just burning your face off, try blending a pinch of Gochugaru (Korean chili flakes) into the dry batter mix.
If you need to dial the heat down , mix in a little more honey and perhaps a tiny squeeze of lime juice into the finished sauce.
Storage, Reheating, and Making Dynamite Shrimp Ahead of Time
The sad reality: Dynamite Shrimp is best eaten straight away. However, life happens, and sometimes we need to plan ahead.
Best Practices for Refrigerating Leftovers
Store any remaining Dynamite Shrimp in an airtight container in the refrigerator. They will last safely for up to 2 days. Be warned: the sauce will soften the coating, so they will lose their signature crispness the longer they sit.
Reheating Instructions for Retaining Crispness
Forget the microwave; it turns them into sad, rubbery blobs. The best way to regain some crunch is using dry heat. Place the leftover shrimp on a baking sheet lined with parchment paper.
Reheat in a preheated oven at 350°F (175° C) or in an air fryer at 375°F (190° C) for 5– 8 minutes. They won't be as perfect as fresh, but they will still be delicious and firm.
Can You Freeze Dynamite Shrimp? (And Should You?)
You can absolutely freeze raw, battered shrimp! If you plan ahead, coat the shrimp as instructed, lay them flat on a baking sheet, and freeze until solid. Once frozen, transfer them to a freezer bag.
When you want to cook them, you can fry them directly from frozen just add 1– 2 minutes to the total cook time. Freezing the cooked dish is generally not recommended, as the delicate texture is ruined upon thawing.
Elevating Your Plate: What to Serve Alongside Dynamite Shrimp
While it shines as an appetizer, Dynamite Shrimp makes an excellent main dish served over simple accompaniments.
If I'm having a big Asian inspired feast, I might serve these alongside a big, flavor packed meal like my Thai Shrimp Curry: Creamy Red Coconut Recipe Ready in 35 Mins for a spicy contrast. However, if this is the star of the show, keep the sides minimal and refreshing.
We often turn it into a main course by serving it over a bed of warm steamed rice and a quick pickled cucumber salad. The acidity from the pickles cuts through the richness of the fried shrimp sauce perfectly. For a faster weeknight option, you could easily pair this with a quick vegetable dish like my Shrimp Chop Suey: The Best 30 Minute Stir Fry Recipe to round out the meal without heavy lifting.

Recipe FAQs
Why is my coating falling off, and how do I ensure maximum crispiness?
The main causes are overcrowded frying baskets or insufficient preparation of the shrimp. Always ensure your oil is between 350°F and 375°F, and fry in small batches to maintain a steady temperature.
For the best adhesion, pat your raw shrimp completely dry and consider chilling the battered shrimp for 15 minutes before frying.
Can I use an air fryer or oven instead of deep frying the shrimp?
Yes, both methods work well, though deep frying yields the crispiest result. For air frying, preheat to 400°F (200°C), generously spray the battered shrimp with oil, and cook for 8 10 minutes, flipping halfway.
If using an oven, bake at 425°F (220°C) on a lightly oiled rack for about 12 minutes, making sure the shrimp is not touching the baking sheet directly.
What is the best way to adjust the heat level of the Dynamite Sauce?
The heat level is fully customizable by adjusting the ratio of Sriracha to the base ingredients. To make it milder, reduce the Sriracha by half and replace the volume with sweet chili sauce or extra honey.
If you desire significantly more heat, a small addition of Gochujang (Korean chili paste) or a tiny pinch of cayenne pepper will intensify the spice.
How long can I store leftover Dynamite Shrimp, and how should I reheat it?
Leftover cooked and sauced shrimp should be stored in an airtight container in the refrigerator for up to three days. To restore the texture, avoid microwaving entirely, as this will make the shrimp rubbery.
Reheat them in a conventional oven or air fryer at 350°F (175°C) until heated through, which helps crisp the coating slightly.
My sauce turned out too thin and watery. How can I fix this?
This often happens when shrimp retain too much oil or when too much liquid (like lime juice) is added to the mayonnaise base. To quickly thicken the sauce, whisk in a small cornstarch slurry (1/2 tsp cornstarch mixed with 1 tsp cold water) and gently warm it on the stove until it coats the back of a spoon.
Always ensure your fried shrimp are thoroughly drained on a wire rack before tossing.
What is a good substitute for mayonnaise if I need a lighter or dairy-free sauce base?
For a lighter alternative, you can successfully replace the mayonnaise with plain Greek yogurt or sour cream, though you may need to add a touch more sweetener to balance the tang. For a completely vegan or dairy-free version, use a high-quality vegan mayonnaise; the flavor profile will remain nearly identical.
Can I prepare the shrimp in advance before serving?
You can prepare the shrimp up to the frying stage by battering and refrigerating them for a few hours. However, the dish should only be sauced immediately before serving to prevent the crispy coating from becoming soggy.
If preparing for a party, fry the shrimp first, keep them warm in a low oven, and toss in the freshly made sauce right before guests arrive.
Crispy Dynamite Shrimp Appetizer Recipe

Ingredients:
Instructions:
Nutrition Facts:
| Calories | 271 kcal |
|---|---|
| Protein | 6.0 g |
| Fat | 18.0 g |
| Carbs | 21.0 g |
