Baked Fish and Rice: Healthy One-Pan Meal
- Time: 15 min active + 40 min baking = Total 55 mins
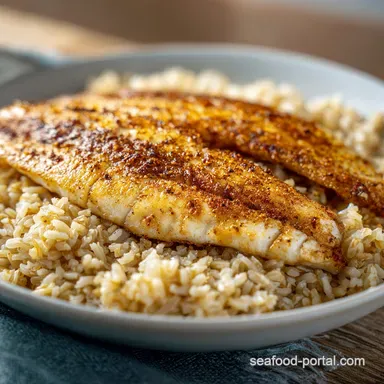
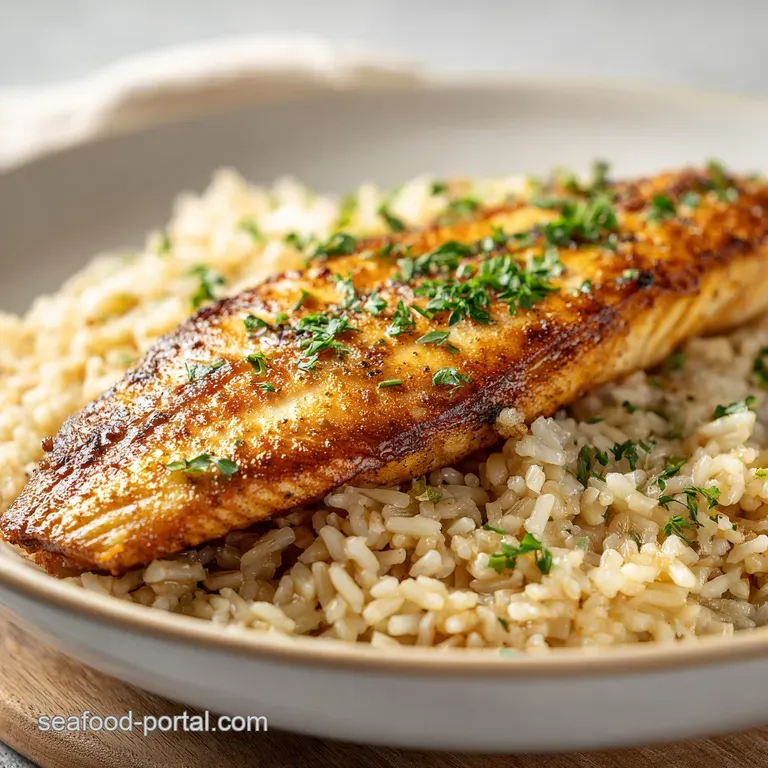
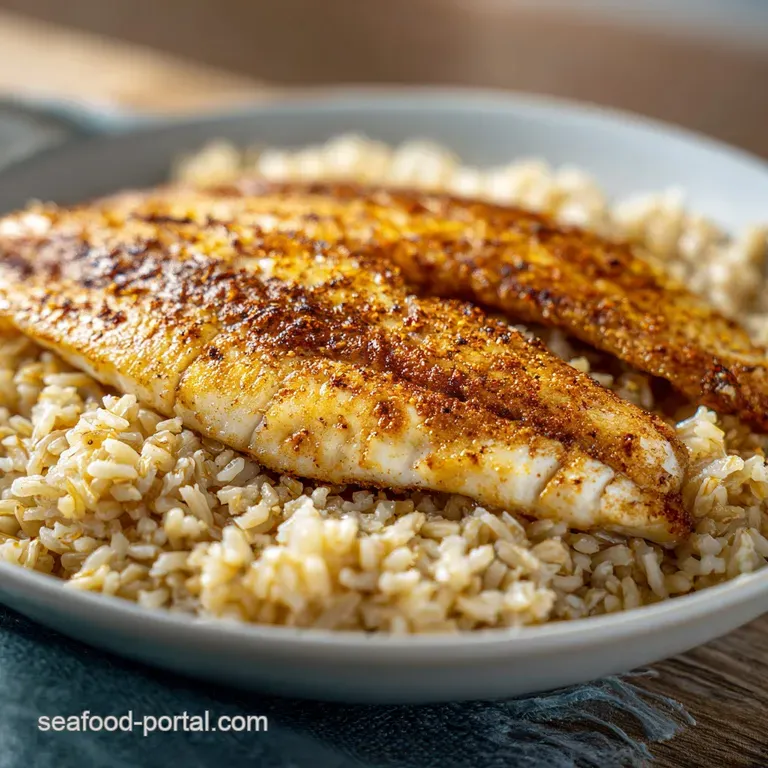
- Flavor/Texture Hook: Flaky, butter basted cod over nutty, savory rice with pops of sweet peas
- Perfect for: A healthy weeknight dinner that only uses one pan
- The Best Easy Baked Fish and Rice Recipe
- Why This Method Actually Works
- Component Analysis
- What You'll Need
- Essential Gear for This Bake
- The Step-by-Step Process
- Fixing Common Cooking Errors
- Troubleshooting Common Issues
- Tasty Ways to Swap Ingredients
- Adjusting the Portion Size
- Debunking Common Kitchen Myths
- Storage and Zero Waste Tips
- Best Sides for Your Meal
- Recipe FAQs
- 📝 Recipe Card
The Best Easy Baked Fish and Rice Recipe
That sharp, bright scent of lemon hitting hot butter, mixed with the earthy aroma of paprika, is exactly what hits you the second you pull this tray out of the oven. It's the kind of smell that makes everyone in the house wander into the kitchen asking "what's for dinner?" before you've even turned off the heat.
For a long time, I struggled with one pan seafood meals. I'd either end up with rice that felt like pebbles or fish that had the consistency of a pencil eraser because I tried to cook them both at the same time.
It's a frustrating cycle, especially when you're trying to keep things healthy but don't want to spend an hour scrubbing three different pots.
The fix was surprisingly simple: stop treating the rice and fish as a single unit. By giving the grains a head start, you get a velvety, fully cooked bed of rice that then acts as a protective cushion for the fish.
This baked fish and rice recipe is the result of that "aha!" moment, balancing the rich, savory butter on top with the light, clean taste of the cod.
Why This Method Actually Works
I used to think any one pan meal was just a gamble, but there's actually a bit of logic to why this specific timing works. Here is the breakdown of the mechanics:
- The Steam Trap: Covering the rice with foil creates a sealed environment. This forces the vegetable broth to stay in the pan, steaming the brown rice from all sides so it doesn't dry out on the edges.
- Staggered Heat: Cod is a lean fish that overcooks in minutes. By adding it only for the final 12-15 minutes, we avoid the "rubber effect" while the rice gets the full 40 minutes it needs to soften.
- Fat Based Insulation: Brushing the fish with melted butter and spices doesn't just add flavor, it creates a barrier. This prevents the dry oven air from sucking the moisture out of the fillets.
- Bottom Up Flavor: The rice absorbs the garlic and salt from the broth, while the fish juices drip down into the grains during the final stage, creating a cohesive flavor profile.
Before we get into the gear, let's look at how this compares to other ways of making this meal. Most people debate between the stovetop and the oven, but they offer completely different results.
| Feature | Stovetop Method | Oven Baked Method | Best For |
|---|---|---|---|
| Texture | Softer, more porridge like rice | Distinct, nutty grains | Oven (for structure) |
| Effort | Constant stirring/monitoring | Set it and forget it | Oven (for convenience) |
| Fish Finish | Pan seared crust | Tender, steamed flakes | Stovetop (for crust) |
| Clean Up | Multiple pans/pots | One single baking dish | Oven (for easy cleanup) |
Depending on your goals, you might choose one over the other, but for a weeknight, the oven wins every time because you aren't glued to the stove.
Component Analysis
Not every ingredient here is just for taste; they all have a job to do in the pan. If you change one, you might change the whole vibe of the dish.
| Ingredient | Science Role | Pro Secret |
|---|---|---|
| Brown Rice | Complex starch base | Rinse it well to remove excess surface starch for separate grains |
| Vegetable Broth | Hydration & flavor | Use low sodium so you can control the salt level yourself |
| Melted Butter | Moisture barrier | Mix spices into the butter first for an even coat |
| Lemon Slices | Acidic brightness | The oils in the rind add a deeper citrus note than just juice |
What You'll Need
I've listed everything here exactly as I use it. For the fish, I prefer cod because it's sturdy and doesn't fall apart, but you can be flexible here.
For the Rice Base: 1 cup (190g) long grain brown rice, rinsed Why this? Holds its shape better than short grain 2 cups (480ml) low sodium vegetable broth Why this? Adds depth that water lacks 1 tbsp (14g) extra virgin olive oil
Why this? Prevents rice from clumping 1 tsp (5g) garlic powder Why this? Distributes flavor evenly through the grains 1/2 tsp (3g) sea salt 1/4 tsp (1g) cracked black pepper 1 cup (150g) frozen peas Why this? Adds a pop of sweetness
And color
For the Fish Topping: 1.5 lbs (680g) cod fillets Why this? Mild flavor and thick cut 2 tbsp (28g) melted unsalted butter Why this? Adds richness to lean fish 1 lemon, thinly sliced into rounds 1 tbsp (15g) fresh parsley, chopped 1 tsp (5g)
Paprika Why this? Gives a beautiful golden color 1/2 tsp (3g) onion powder
Ingredient Swaps:
| Original Ingredient | Substitute | Why It Works |
|---|---|---|
| Cod Fillets | Halibut or Tilapia | Similar lean profile. Note: Tilapia is thinner and needs 3-5 mins less cook time |
| Brown Rice | White Jasmine Rice | Faster cook time. Note: Reduce first bake to 15-20 mins or it will be mushy |
| Vegetable Broth | Chicken Broth | More savory flavor. Note: Changes dish from vegetarian base to meat base |
| Frozen Peas | Diced Carrots | Similar texture. Note: Add carrots at the start as they take longer to soften |
Right then, before we start, make sure your fish is at room temperature for about 10 minutes. If you put ice cold fish on hot rice, it can drop the temperature of the dish and lead to uneven cooking.
Essential Gear for This Bake
You don't need a professional kitchen for this, but a few specific tools make it a lot easier.
- 9x13 inch Baking Dish: Glass or ceramic is best. Metal can sometimes create "hot spots" that brown the rice too quickly on the edges.
- Tight Fitting Aluminum Foil: This is the most important part. If the steam escapes, the rice stays hard.
- Pastry Brush: Great for getting that butter paprika mix into every nook and cranny of the cod.
- Instant Read Thermometer: The only way to be 100% sure the fish is done without overcooking it.
Chef's Note: If you don't have a pastry brush, just use a spoon to dollop the butter on and spread it with the back of the spoon. It works just as well, you just might have a few "extra buttery" spots.
The step-by-step Process
Follow these steps exactly, and you'll avoid the common pitfalls of one pot seafood.
- Preheat your oven to 375°F (190°C). Make sure the rack is in the center position for even heat.
- Combine the rice foundation. In your 9x13 inch baking dish, stir together the rinsed brown rice, broth, olive oil, garlic powder, salt, and pepper. Note: Stirring ensures the garlic powder doesn't clump in one spot.
- Add the greens. Gently fold in the frozen peas. Don't overmix; you just want them distributed.
- Seal and steam. Cover the dish tightly with aluminum foil. Bake for 30 minutes until the broth is mostly absorbed and the rice is tender.
- Dry the protein. While the rice is par baking, pat the cod fillets completely dry with a paper towel. Note: Wet fish steams rather than roasting, which ruins the texture.
- Prepare the glaze. In a small bowl, mix the melted butter, paprika, and onion powder. Brush this mixture generously over the top of each fillet.
- Merge the layers. Remove the foil from the rice. Place the seasoned fish fillets directly on top of the rice bed.
- Add finishing touches. Top each fillet with a lemon slice and a sprinkle of fresh parsley.
- The final bake. Return the dish to the oven, uncovered, for 12–15 minutes until the fish reaches an internal temperature of 145°F (63°C) and flakes easily with a fork.
- Rice Check
- At 30 minutes, the rice should be "al dente" (nearly done but with a slight bite).
- Fish Temp
- Pull the fish out at 140°F (60°C); carryover cooking will bring it to the safe 145°F (63°C) mark.
- Visual Cue
- The butter glaze should be bubbling and the lemon slices should look slightly softened.
Fixing Common Cooking Errors
Even with a guide, things happen. The trick is knowing how to pivot.
Troubleshooting Common Issues
| Issue | Solution |
|---|---|
| Why Your Rice is Crunchy | This usually happens because of a "leak" in your foil seal. If the steam escapes, the liquid evaporates before the grain can absorb it. You can fix this by adding 2-3 tablespoons of water or broth and |
| Why Your Fish is Rubbery | Overcooking is the enemy here. If the fish is tough, it's likely because it stayed in the oven too long or the fillets were uneven in thickness. According to [USDA Food Safety guidelines](https://fdc. |
| Why the Dish is Too Salty | If you use a broth that is already heavily salted, the added sea salt can push it over the edge. A squeeze of fresh lemon juice over the final dish helps balance the saltiness with acidity. |
Mistakes Checklist:
- ✓ Did you rinse the brown rice? (Prevents gumminess)
- ✓ Is the foil sealed tight? (Prevents crunchy rice)
- ✓ Did you pat the fish dry? (Ensures better glaze adhesion)
- ✓ Is the oven actually at 375°F? (Prevents uneven cooking)
- ✓ Did you check the internal temp of the fish? (Prevents rubbery texture)
Tasty Ways to Swap Ingredients
This baked fish and rice recipe is a great canvas. Once you've nailed the basic method, you can start playing with the flavors.
For a Mediterranean Twist Swap the paprika for dried oregano and add a handful of kalamata olives and halved cherry tomatoes to the rice base. Instead of just butter, use a mix of olive oil and lemon zest. This makes the dish feel lighter and more summery.
For a Creamy Garlic Profile If you want something richer, stir 2 tablespoons of heavy cream or cream cheese into the rice once it comes out of the first bake. This creates a creamy fish and rice recipe that feels more like a restaurant meal. If you love creamy seafood, you might also enjoy my Marry Me Salmon for a different take on a rich sauce.
For a Low Carb Swap While the rice is the star here, you can substitute it with cauliflower rice. Note: Cauliflower rice doesn't need 30 minutes of steaming.
Only bake the cauliflower base for 10 minutes before adding the fish, or it will turn into mush.
For a Richer Protein If you find cod too mild, try salmon or sea bass. These have higher fat contents, meaning they are more forgiving if you leave them in the oven for an extra minute or two.
Decision Shortcut:If you want more crunch → Top the fish with Panko breadcrumbs mixed with the butter. If you want more veg → Add diced bell peppers and zucchini to the rice.
If you want a kick → Add 1/2 tsp of cayenne pepper to the butter glaze.
Adjusting the Portion Size
Scaling a one pan meal is a bit different than scaling a soup. You have to consider the surface area of your pan.
Cutting it in Half If you're cooking for two, use an 8x8 inch square pan. Reduce the rice and broth by half. Because the layer of rice is thinner, check the rice 5-7 minutes earlier than the 30 minute mark. The fish will likely cook in about 10-12 minutes.
Doubling the Batch For a crowd, use two 9x13 pans rather than one giant deep pot. If the rice is too deep, the bottom will be mushy while the top is dry. Keep the seasonings for the rice as is, but increase the butter glaze for the fish by only 1.5x.
Too much butter in a large batch can make the dish feel greasy.
Baking Adjustments If you're using a convection oven (with a fan), lower the temperature to 350°F (175°C). The fan circulates heat more efficiently, and 375°F might brown the butter on the fish too quickly before the inside is cooked.
Debunking Common Kitchen Myths
I've heard a lot of "rules" about fish that just aren't true. Let's clear a few up.
Myth: You must sear fish first to "seal in the juices." This is probably the biggest lie in cooking. Searing adds flavor and color, but it doesn't create a waterproof seal.
In this recipe, the butter glaze and the steam from the rice do a much better job of keeping the cod moist than a quick sear would.
Myth: Brown rice takes forever to cook in the oven. While it takes longer than white rice, the oven is actually more consistent than the stove. Because the heat surrounds the pan, you don't get that burnt bottom layer that often happens in a pot.
Myth: Frozen peas ruin the texture of the rice. Actually, adding them frozen is the secret. If you thaw them first, they release too much water, which can make the rice soggy. Frozen peas steam perfectly alongside the grains.
Storage and Zero Waste Tips
Don't let the leftovers go to waste. This dish actually holds up quite well if you treat it right.
Storage Guidelines Store leftovers in an airtight container in the fridge for up to 3 days. To reheat, add a tablespoon of water or broth to the container and cover it with a lid. Microwave on medium power in 1 minute bursts.
This creates a mini steam chamber that prevents the fish from turning into rubber during reheating.
Freezing the Bake I don't recommend freezing the finished dish. The texture of the cooked rice can become grainy, and the fish can get a bit mushy. However, you can freeze the "rice base" (rice, broth, spices) in a freezer bag and thaw it before baking.
- Lemon Scraps
- Don't throw away the remaining lemon ends. Squeeze the juice into your salad dressing or freeze the zest for future baking.
- Broth Leftovers
- If you have a bit of broth left in the carton, use it to deglaze the pan if you're making a side dish, or freeze it in ice cube trays for future flavor boosts.
- Parsley Stems
- Chop the parsley stems finely and stir them into the rice at the beginning. They have a more intense flavor than the leaves and add great nutrition.
Best Sides for Your Meal
Since this baked fish and rice recipe is already a complete meal (protein, grain, and veg), you only need something to add a bit of contrast.
Fresh Contrasts A simple arugula salad with a lemon olive oil vinaigrette works perfectly. The peppery bite of the arugula cuts through the richness of the butter basted cod.
Hearty Additions If you're serving this to hungry teenagers or athletes, add a side of roasted asparagus or sautéed spinach. These greens complement the mild flavor of the cod without overpowering it.
The Final Touch For an extra layer of flavor, serve this with a side of garlic aioli or a zesty tartar sauce. If you're looking for more ways to dress up your seafood, check out these Salmon Sauces which also work surprisingly well with cod.
Right then, you've got the method, the science, and the shortcuts. This baked fish and rice recipe is all about patience and timing. Just remember to seal that foil tight and trust your thermometer, and you'll have a dinner that's as easy as it is flavorful. Let's get cooking!
Recipe FAQs
Is it better to bake fish at 350 or 400?
Neither, use 375°F. This temperature is the sweet spot for cooking cod without drying it out while the rice finishes steaming.
Are rice and fish good together?
Yes, they are a classic pairing. The rice absorbs the savory juices from the fish and butter, making the whole dish feel cohesive.
How to cook fish to lower cholesterol?
Bake the fish instead of frying it. This significantly reduces added saturated fats, especially when using a lean protein like cod.
Should I bake fish in the oven, covered or uncovered?
Bake the rice covered and the fish uncovered. You need the foil to steam the rice, but the fish needs open air to let the paprika butter glaze set.
Why is my rice still crunchy after baking?
A leak in the foil seal likely allowed steam to escape. This prevents the grains from absorbing enough liquid. Add a splash of vegetable broth and re-seal tightly.
Can I freeze the finished dish?
No, avoid freezing the finished meal. The rice becomes grainy and the fish loses its flaky texture upon thawing.
How to prevent the fish from becoming rubbery?
Monitor the internal temperature with a meat thermometer. Pull the fish out exactly at 145°F to prevent toughness. If you've mastered this temperature precision here, see how it applies to our crispy cod.
Baked Fish And Rice