Creative Sandwich Art: Edible Design
- Time: Active 10 minutes, Passive 0 minutes, Total 10 minutes
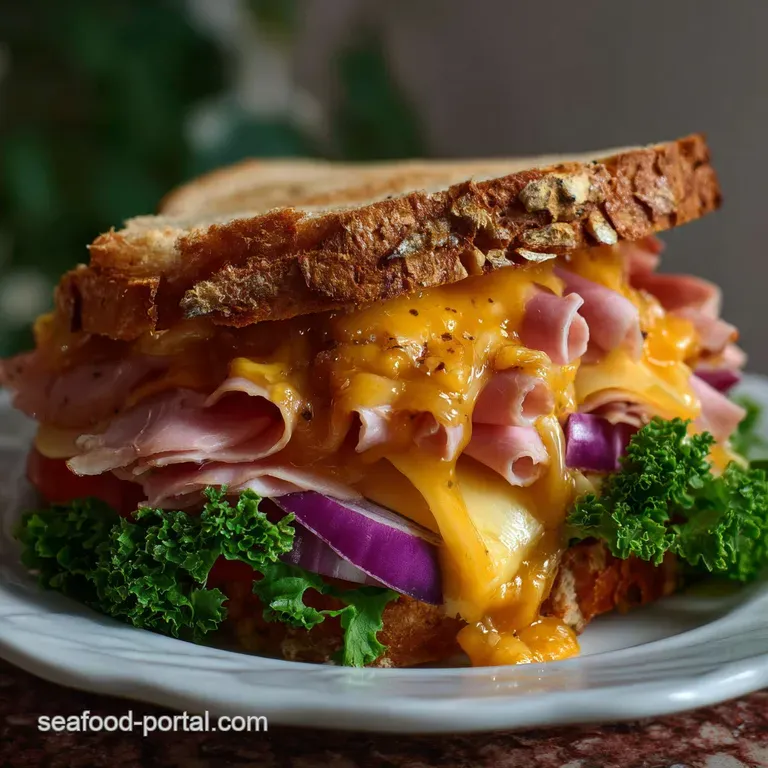
- Flavor/Texture Hook: Silky honey ham paired with the crisp snap of fresh garden vegetables.
- Perfect for: A whimsical weekend lunch or a surprising addition to a child's bento box.
- Simple Homemade Idea for Creative Sandwich Art
- The Science Behind Successful Food Art
- Recipe Specs and Nutritious Numbers
- Essential Elements for Your Edible Masterpiece
- Basic Kitchen Tools for Easy Shaping
- Step by Step Assembly Instructions
- Fixing Slips and Structural Issues
- Budget Friendly Swaps and Flavor Twists
- Keep Your Sandwich Fresh and Crisp
- Perfect Pairings for a Fun Lunch
- Why This Outshines Basic Sandwiches
- Common Sandwich Art Design Solutions
- Recipe FAQs
- 📝 Recipe Card
Simple Homemade Idea for Creative Sandwich Art
Ever looked at a plain ham and cheese and felt it lacked a bit of soul? We've all been there, staring at a beige lunch that tastes fine but looks, well, boring. Get ready to craft a whimsical ham and cheese creation with this simple sandwich art recipe!
It is much easier than it looks, and honestly, playing with your food is therapeutic. I remember the first time I tried this for my nephew, I ended up making a whole zoo out of deli meats and spent more time laughing than actually eating.
This specific method is all about the Art: A Fun & Simple Homemade Idea with Ham and Cheese. We aren't just slapping ingredients between two slices of bread. We are using the textures and colors of 3 oz honey glazed ham and vibrant vegetables to build something special.
It's a "Simple Homemade Idea with Ham and Cheese" that turns a 10 minute task into a memorable moment. Plus, it’s a great way to use up those odd ends of carrots or cucumbers sitting in the crisper drawer.
You don't need a culinary degree or fancy carving tools to make this happen. With just a standard kitchen knife and a little imagination, we can turn a basic meal into "Sandwich Art: A Fun & Simple Homemade Idea with Ham and Cheese".
Trust me on this, once you see the look on someone's face when you hand them a sandwich that looks like a flower or a lion, you'll never go back to "plain" again. Let's crack on and see how a few slices of Boar's Head ham can become a canvas.
The Science Behind Successful Food Art
Structural Adhesion: The lipids in the 1 tbsp salted butter or cream cheese create a hydrophobic barrier that prevents the bread from absorbing moisture while acting as a "glue" for the heavier ham slices.
Turgor Pressure: By using fresh baby spinach and crisp carrots, we rely on the water pressure within the plant cells to maintain the 3D shape of our decorations without them wilting or sagging.
Protein Pliability: Thinly sliced honey glazed ham contains enough moisture and fat to be folded or rolled without tearing, allowing for complex shapes that hold their form through surface tension.
The Science of Why it Works: This works because the viscosity of the condiments creates a mechanical bond between layers. Meanwhile, the firm crumb of the Pullman loaf provides a stable foundation that resists compression during the "sculpting" phase.
Recipe Specs and Nutritious Numbers
| Component | Detail | Pro Secret |
|---|---|---|
| Bread Base | 2 slices Pullman loaf | Use slightly chilled bread for cleaner, sharper cuts. |
| Protein | 3 oz honey glazed ham | Fold into "waves" to add height and shadows to the art. |
| Adhesive | 1 tbsp Salted Butter | Room temperature is vital to avoid tearing the bread fibers. |
| Garnish | Fresh Carrot/Cucumber | Use a peeler to create "ribbons" for hair or grass. |
Essential Elements for Your Edible Masterpiece
To get the best results for your Creative Sandwich Art, you need ingredients that can hold a shape. We aren't looking for crumbly or overly soft items here.
- 2 slices firm sandwich bread (Sourdough or Pullman loaf): Why this? A dense crumb supports the weight of the decorative toppings without folding.
- 1 tbsp salted butter or cream cheese, room temperature: Why this? Acts as the essential edible "paste" to keep components in place.
- 3 oz honey glazed ham, thinly sliced: Why this? The sweetness balances the sharp cheese and it's highly flexible for shaping.
- 2 slices sharp cheddar or provolone cheese: Why this? Provides a high contrast color background for your vegetable art.
- 1 slice white American cheese or Swiss cheese: Why this? Perfect for cutting out small circles (eyes) or clouds.
- 1 small carrot or cucumber: Why this? Offers the "snap" and bright pigments needed for facial features.
- 1 tsp mustard or mayonnaise: Why this? Use as a secondary adhesive for tiny, detailed pieces.
- 1 handful baby spinach: Why this? Provides a velvety green forest or grass like bed for the sandwich.
Basic Kitchen Tools for Easy Shaping
While you can go wild with specialty cutters, a basic set of tools from your kitchen drawer is usually enough. I personally love using my Lodge Cast Iron Skillet to lightly toast the bread if I want a sturdier "canvas," though this recipe works beautifully cold too.
- Small Paring Knife: Essential for fussy cuts and shaping the ham or cheese into specific figures.
- Kitchen Scissors: Honestly, it's a secret weapon for cutting "fur" textures into the edges of the 3 oz honey glazed ham.
- Vegetable Peeler: Use this to make long, thin strips of carrot that can be curled into spirals.
- Metal Straw or Piping Tip: These are perfect for punching out tiny, exact circles from the American cheese.
- Cutting Board: A flat, stable surface is a non negotiable.
step-by-step Assembly Instructions
Phase 1: Preparing the Canvas
- Lay out 2 slices of firm Pullman loaf bread. If you want a more gourmet feel, you can look at the technique used in an Everything Bagel with recipe for layering, though here we stick to flat slices.
- Spread 1 tbsp salted butter evenly.Note: Ensure it reaches the very edges to act as a seal against veggie moisture.
Phase 2: Layering the Protein
- Place 3 oz honey glazed ham on the bottom slice. Instead of laying it flat, ruffle the slices like a ribbon. until it looks voluminous and textured.
- Layer 2 slices of sharp cheddar on top of the ham.Note: The orange color provides a beautiful "sunset" backdrop for the next steps.
Phase 3: Creating the Edible Art
- Cut shapes from the 1 slice of white American cheese. Use your paring knife to create clouds or a small "moon" shape.
- Slice the 1 small carrot into thin rounds.until you have bright orange discs for eyes or flower petals.
- Dab 1 tsp mustard on the back of the shapes.Note: This ensures your "art" doesn't slide off when you pick up the sandwich.
- Arrange a handful of baby spinach at the base. This creates a "ground" or "bush" effect at the bottom of the sandwich.
- Press the top slice of bread on (optional). If you are making "open face" Sandwich Art, leave the top slice off and serve it on the side!
- Add final tiny details with the cucumber. Tiny slivers can become eyelashes or whiskers.
Fixing Slips and Structural Issues
Even the best "Simple Homemade Idea with Ham and Cheese" can run into trouble if the ingredients are too slick or the bread is too dry.
Why Your Art Slides Off
If your carrot "eyes" or ham "flowers" are migrating, it’s usually a moisture issue. Excess water on the surface of the veggies acts as a lubricant.
| Problem | Cause | Fix | Pro Tip |
|---|---|---|---|
| Sliding Toppings | Excess surface moisture | Pat veggies dry with a paper towel. | Use a tiny dot of cream cheese as "heavy duty" glue. |
| Tearing Bread | Cold, hard butter | Use room temp butter only. | Microwave butter for exactly 5 seconds if it's too firm. |
| Wilting Spinach | Heat or age | Keep spinach in ice water until use. | Use the stems as "stems" for cheese flowers! |
Budget Friendly Swaps and Flavor Twists
You don't need expensive ingredients to make Creative Sandwich Art. This "Simple Homemade Idea with Ham and Cheese" is meant to be flexible.
| Original Ingredient | Substitute | Why It Works |
|---|---|---|
| Honey Glazed Ham (3 oz) | Bologna or Turkey | Flexible and easy to cut with scissors. Note: Bologna is very budget friendly but saltier. |
| Sharp Cheddar | Mozzarella Slices | Provides a stark white canvas for colorful veggies. |
| Pullman Loaf | Whole Wheat Bread | Denser texture is great for heavy toppings. Note: Darker color changes the "aesthetic." |
| Salted Butter | Mashed Avocado | Great fat content for "gluing" layers. |
If you are looking for a different vibe altogether, you might enjoy the textures in a How to Make recipe, which uses creamy elements that can also be piped onto the bread for 3D effects.
Keep Your Sandwich Fresh and Crisp
Storage: This Creative Sandwich Art is best enjoyed immediately. If you must store it, place it in a hard sided airtight container (like Tupperware) to prevent the "art" from being crushed.
It will stay fresh in the fridge for about 4 hours, but the bread may begin to soften after that.
Freezing: Do not freeze. The fresh carrots, cucumber, and spinach will lose their cellular structure (turgor pressure) and turn into mush upon thawing.
Zero Waste: Don't throw away the scraps from your cheese and ham cutouts! Chop them up and toss them into an omelet the next morning. Carrot peels can be saved in a bag in the freezer to make a quick vegetable stock later.
Perfect Pairings for a Fun Lunch
Since this is such a visual dish, keep the sides simple but high-quality. A side of kettle cooked potato chips adds a "shatter" texture that contrasts with the soft bread.
- Fruit Kabobs: Use leftover carrot/cucumber cutters to shape melons or pineapple.
- Greek Yogurt Dip: A small bowl of yogurt with honey makes a great dipping sauce for any leftover carrot sticks.
- Soup: A classic tomato bisque is the ultimate partner for any ham and cheese creation.
Why This Outshines Basic Sandwiches
Most people think of sandwiches as utilitarian. This Simple Homemade Idea with Ham and Cheese changes that perspective. By using the 3 oz honey glazed ham as a sculptural element rather than just a filling, you increase the surface area of the meat, which actually changes how the flavor hits your tongue.
Decision Shortcut:If you want a more stable structure, use cream cheese instead of butter as it has a higher "tack" or stickiness. If you want vibrant colors, use bell peppers (red/yellow) in addition to the carrot and cucumber.
If you want a warm meal, toast the base bread first, then add the cold art on top for a "hot and cold" sensory experience.
Common Sandwich Art Design Solutions
Myth: You need expensive bento tools for this. Truth: Absolutely not. A standard paring knife and a clean pair of office scissors work perfectly. The "Simple Homemade Idea with Ham and Cheese" is about creativity, not equipment.
Myth: The bread will get soggy immediately. Truth: If you apply a thin, even layer of 1 tbsp salted butter from edge to edge, you create a waterproof barrier that protects the bread for hours.
Scaling for a Crowd:Down (1/2 serving): Just use 1 slice of bread for an open faced version. Up (Party size): Prep all your veggie shapes in advance and keep them between damp paper towels.
Lay out the "canvases" (bread with butter) and assembly becomes a 2 minute task per sandwich.
- 1. Ham Weight
- Exactly 3 oz ensures the sandwich isn't too heavy to hold its shape.
- 2. Bread Thickness
- Use slices at least 0.5 inches thick for the best "canvas" stability.
- 3. Prep Time
- Limit your "sculpting" to 10 minutes to ensure the bread doesn't dry out.
Stovetop vs. Oven (Toasting the Canvas)
| Feature | Stovetop (Skillet) | Oven (Broiler) |
|---|---|---|
| Texture | Crunchy exterior, soft middle | Uniformly crisp and dry |
| Speed | 2-3 minutes | 1-2 minutes (watch closely!) |
| Flavor | Buttery and rich | Toasty and clean |
Making Creative Sandwich Art is really just about giving yourself permission to have fun in the kitchen. Whether you're making a "Simple Homemade Idea with Ham and Cheese" for yourself or someone else, the effort shows. It turns a routine 12:00 PM meal into something that makes people stop and smile.
Now, grab those 3 oz of honey glazed ham and start creating!

Recipe FAQs
Can I prepare the vegetable cutouts a day ahead of time for my sandwich art?
Yes, but with caution. You can prep shapes up to 24 hours in advance, but they must be stored airtight between slightly damp paper towels in the refrigerator to maintain turgor pressure.
Is it better to use room temperature or cold butter as the adhesive layer?
Definitely room temperature. Cold butter is too hard and will tear the delicate fibers of the Pullman loaf when spreading; room temperature butter spreads smoothly, creating the necessary uniform moisture barrier.
What is the best technique for making the honey ham look dimensional?
Ruffle or fold the slices lightly before placing them. This simple layering technique builds height and shadow, making the protein look more sculptural than flat.
If I want a sturdier, toastier base, what is the fastest way to prepare the bread?
Use the stovetop skillet method for rapid crisping. It takes only 2-3 minutes to achieve a buttery, crunchy exterior that holds up well to heavier decorations.
My carrots keep sliding off the cheese layer; is there a stronger "glue" I can use?
Yes, switch your secondary adhesive to cream cheese or a thick mayonnaise. While mustard works, the higher fat content in cream cheese provides a superior mechanical bond to hold the shapes in place.
Are there any savory fillings that use similar structural adhesion principles?
Yes, many cold preparations rely on fat as an adhesive binder. If you enjoyed mastering the layering technique here, see how the same principle applies to creating a stable emulsion in our Shrimp Crab Pasta with Creamy Cajun Dream Sauce (for the sauce base).
Can I substitute the ham with leftover seafood for a fun twist?
You can, but you must treat the protein first. If using flaked fish or crab, mix it with a binder like mayo or softened cream cheese so you can sculpt it, similar to how you might handle the filling in a Gourmet Grilled Cheese Recipe.
Artful Ham And Cheese Layers
Ingredients:
Instructions:
Nutrition Facts:
| Calories | 685 calories |
|---|---|
| Protein | 39g |
| Fat | 42g |
| Carbs | 36g |
| Fiber | 3g |
| Sugar | 7g |
| Sodium | 1680mg |
