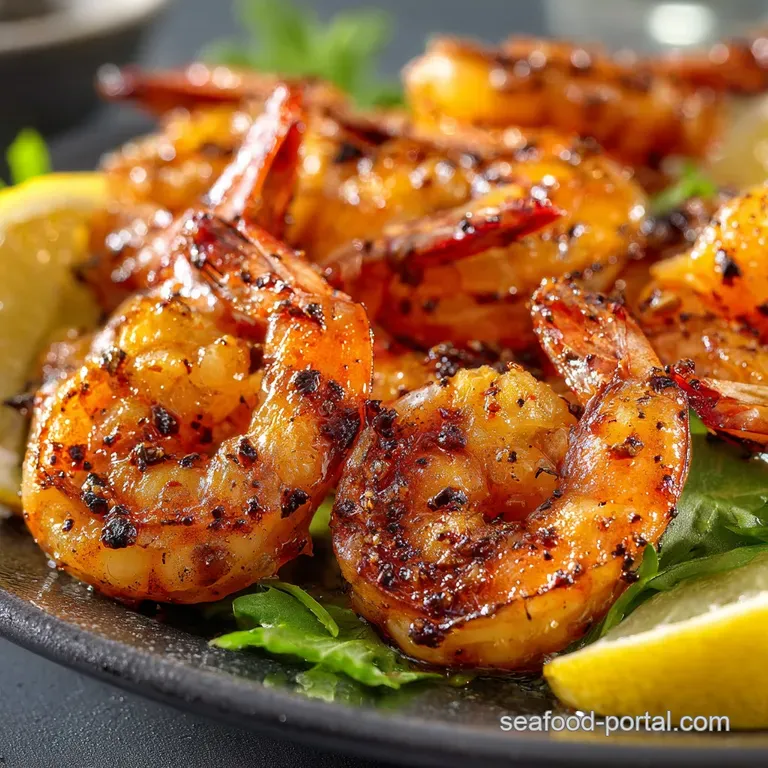
Broiled Shrimp the Zesty Garliclemon 5Minute Prawn Cocktail Starter
- The Art of the 5 Minute Gourmet Meal: Instant Elegance
- Mastering the Perfect Texture for Broiled Shrimp
- Setting Up Your Mise en Place for Lightning and Fast Cooking
- Non and Negotiable Tools for Maximum Broiler Efficiency
- Preparing the Shrimp for the Heatwave
- The Crucial Two Minutes: Achieving the Ideal Broiled Shrimp
- Elevating Your Plate: Serving Suggestions and Wine Pairings
- Troubleshooting and Flavor Swaps for Broiled Shrimp Success
- Recipe FAQs
- 📝 Recipe Card
The Art of the 5 Minute Gourmet Meal: Instant Elegance
Okay, listen up. I know you’re busy. We all are, spinning ten plates at once most evenings. But that does not mean dinner has to be sad and beige. Broiled shrimp is the culinary cheat code I swear by. It’s brilliant. Truly.
I’m talking tender, juicy, slightly charred perfection in less time than it takes to unpack the groceries. Use good ingredients, use that fierce heat, and suddenly you look like a kitchen genius.
This isn’t scampi, which often involves too much simmering and sauciness. This is turbo and charged, high and intensity flavor delivery designed to get you the best texture possible. It’s a weeknight wonder that works brilliantly as a starter, a quick lunch, or a foundation for a sophisticated main course.
Honestly, it’s almost unfair how simple this quick shrimp recipe is.
Mastering the Perfect Texture for Broiled Shrimp
If you’ve ever had rubbery shrimp, you know the heartbreak. It’s the worst. The key to nailing the texture here isn't magic; it’s geometry and high velocity cooking. We need serious heat to guarantee that lovely, springy snap we all crave.
Why High Heat Equals Unbeatable Tenderness and Snap
People often worry that high heat will dry the shrimp out. No! The opposite is often true, especially with Broiled Shrimp. Shrimp proteins seize up quickly. If you cook them low and slow (like in a sauté pan or a simmering sauce), they spend too much time in the heat, resulting in that chewy, miserable rubber band texture we all hate.
Broiling is a blast of pure fire, essentially searing the exterior while cooking the core fast enough to maintain tenderness. A quick four to six minutes is all it takes.
Unlocking the Zing: The Zesty Garlic and Lemon Compound
The butter mixture here is non and negotiable. Forget delicate drizzles of oil. We want a paste a vibrant, pungent shield of flavour that melts and caramelizes under the broiler element. The combination of melted butter, fresh lemon zest (key!), minced garlic, and smoked paprika creates this incredible glaze.
That initial zing of fresh lemon oil cuts through the richness, keeping everything tasting bright and balanced.
Ditching the Grill: The Superior Speed of Broiling
I love grilling. You know I do. But when I need a truly instant meal, broiling is simply superior. Grilling requires weather cooperation, propane monitoring, and patience. Broiling? Just hit 'High' on the oven, let it preheat, and you’re ready to roll.
It’s faster, the heat is more consistent, and cleanup is often simpler, especially if you opt to broil shrimp in oven foil lining the pan.
Is Defrosting Really Necessary? The Case for Flash Frozen Prawns
Okay, this is an opinionated stance: Yes, you must defrost them. Trying to cook shrimp frozen under the broiler results in wildly uneven cooking icy inside, burnt outside. Defrost them gently in a bowl of cold water (change the water once) and then, critically, pat them bone dry.
Good quality flash and frozen shrimp (peeled and deveined, ideally) is usually superior to the previously and frozen then and thawed stuff sitting behind the counter. Just thaw, pat, and proceed.
Setting Up Your Mise en Place for Lightning and Fast Cooking
We’re dealing with a 5 minute cook time, remember? That means zero hesitation once the shrimp are in. Everything needs to be ready before the shrimp even touch the seasoning. Get your pan lined, your garlic minced, your broiler preheated. This recipe doesn’t allow for mid and toss chopping.
It’s a kitchen sprint, not a marathon, so get your ingredients laid out!
Non and Negotiable Tools for Maximum Broiler Efficiency
Selecting the Best Prawns: Size, Grade, and Shell and On Debate
Go large. Look for 16/20 count (that means 16 to 20 shrimp per pound). Small shrimp dry out far too fast under the broiler’s intense heat. For the shell and on debate, I’m team tail and on for presentation and shell and off for easy eating.
If you want maximum moisture and don't mind peeling at the table, keep the shell on. It truly acts like a little steam jacket, protecting the meat.
Essential Pantry Items for the Punchiest Glaze
The smoked paprika is my secret handshake for this broiled shrimp recipe. It adds depth and a gorgeous reddish colour that makes the char look even better. You can use regular paprika, but the smoky flavor really lifts the whole thing. And do not skip the fresh lemon zest, even if you are using lemon juice.
That’s where the powerful citrus oil resides.
The Importance of a Rack and Foil Liner for Cleanup
We use the rack. Always. Why? Airflow. It separates the shrimp from the pooling butter and lemon drippings. If the shrimp sit in the liquid, they steam. If they steam, they become rubbery. Simple as that. Plus, the foil liner makes cleanup a 10 second job, which is a big win on a Tuesday.
CRUCIAL WARNING: Using a wire rack placed over foil in your sheet pan is the single biggest difference between mushy shrimp and perfectly snapped, broiled shrimp. The rack allows 360 degree heat, ensuring the bottoms are cooked, not steamed.
Prepping Your Broiler Pan for Non and Stick Results
Even with the rack, things stick a little because of the sugar in the paprika and the high heat. To prevent this, after lining the pan with foil, lightly brush your wire rack with a over high heat oil (like grapeseed or even just a tiny bit of olive oil). Just a thin coat.
It makes flipping them halfway through a breeze and keeps your broiled shrimp from clinging stubbornly.
Related Recipes Worth Trying
- Shrimp Newburg The Decadent Velvety Cream Sauce Recipe — Shrimp Newburg is an impressive classic seafood dinner recipe featuring tender shrimp and a rich buttery sherryinfused Shrimp Newburg sauce Master the...
- Yucatan Shrimp Recipe 25Minute Zesty Butter Sauce Classic — This vibrant Yucatan Shrimp dish is ready in 25 minutes Get the authentic Yucatan Shrimp Sauce Recipea sublime balance of zesty lime silky butter and chili...
- 25Minute Shrimp Scampi Without Wine Buttery Lemon Garlic Sauce — Our zesty weeknightfriendly Shrimp Scampi Without Wine is ready in 25 minutes Learn how to make shrimp scampi without wine using a deeply flavourful stock...
Preparing the Shrimp for the Heatwave
Pat. Them. Dry. I know I mentioned this, but it bears repeating. Get out the paper towels, spread the shrimp out, and press down firmly. We need to remove all surface moisture. If you skip this, the water evaporates first, cooling the surface, and preventing that glorious sear and caramelization.
Once they are dry, toss them gently in our prepared garlic and lemon compound. Use your hands to make sure that paste is everywhere! We aren't marinating for hours; we are glazing them for immediate cooking.
The Crucial Two Minutes: Achieving the Ideal Broiled Shrimp
The Optimal Tossing Technique for Even Coating
Again, use a bowl, not a zip and top bag, for the tossing. Use your hands, gently, to make sure the paste is everywhere. This rich seasoning mixture protects the shrimp surface under that brutal heat. Once coated, move immediately to the rack.
Single Layer Deployment: Preventing Steaming, Encouraging Char
Spread them out on the rack like they are sunbathing. No touching. No overlap. If they are piled up, they steam each other, guaranteeing that chewy texture. We want fierce, direct heat exposure on every single side.
This is essential for getting those little brown, slightly charred spots that give the Broiled Shrimp and Scallops Recipe or just your basic broil shrimp such fantastic character.
Positioning Your Rack: Where Should the Pan Sit Under the Heat?
High. Higher than you think. Aim for 4 to 6 inches away from the heating element. This ensures the heat is intense and direct, allowing for the quick and cook we need. Too far away, and you risk baking them slowly instead of broiling them quickly, and that defeats the entire purpose of this method.
The Visual Cues: Knowing Exactly When to Pull Them Out
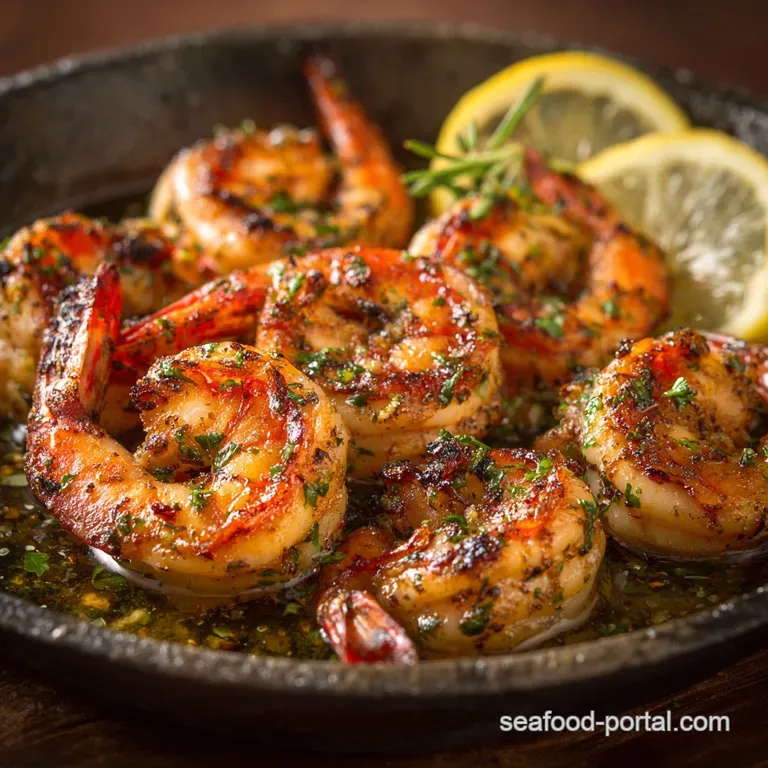
Do not trust the timer alone. You must watch the oven. After 2 to 3 minutes, they should be bright pink on the edges and starting to curl into a loose 'C' shape. If they form a tight 'O' shape, you’ve gone too far (that means they are rubbery).
Pull the pan out (oven mitts, please!), flip them fast, return them for 2 to 3 more minutes, and pull them out as soon as the underside turns opaque and you see those beautiful little caramelized edges forming. Stop cooking immediately!
Elevating Your Plate: Serving Suggestions and Wine Pairings
These garlic and lemon Broiled Shrimp are so rich and punchy, they demand a side that’s light and absorbent. I usually serve them over a quick saffron rice pilaf or alongside a massive green salad tossed in a vinaigrette that cuts through the butter.
A chilled glass of crisp white wine (Sauvignon Blanc or Pinot Grigio) is the only pairing you need. Simple elegance, remember?
Troubleshooting and Flavor Swaps for Broiled Shrimp Success
What to Serve Alongside Effortless Garlic and Lemon Prawns
- Creamy polenta or grits (best for soaking up the residual juices mandatory!).
- Crusty French bread for dipping in the pan drippings (Seriously, don't waste that butter. It’s glorious.)
- Asparagus spears, tossed lightly in olive oil, broiled alongside the shrimp during the second half of the cook time (watch closely, they finish fast!).
How to Prep the Marinade Ahead of Time
You can absolutely mix the butter, garlic, herbs, and seasonings up to 2 days ahead of time and store the paste in the fridge. When you’re ready to cook, just melt it gently in the microwave, toss the dry shrimp, and broil.
Do not toss the raw shrimp in the paste until immediately before they go in the oven, or the salt in the paste will start pulling moisture out, making them harder to dry and sear.
Refrigerating Leftovers: Keeping Broiled Prawns Fresh
If you somehow have leftovers (unlikely, honestly), store them in an airtight container for up to two days. Reheating can be tricky; they seize up fast and turn tough. I almost always prefer to eat them cold the next day chopped up into a quick pasta salad or served over greens for an instant high and protein lunch.
Turning Up the Heat: Spicy Cajun or Herby Mediterranean Swaps
If the classic garlic and lemon isn't doing it for you, there are easy ways to change the vibe for your Broiled Shrimp.
| Flavor Profile | Key Swap | Notes |
|---|---|---|
| Spicy Cajun | Use 1 Tbsp store and bought Cajun seasoning (adjust salt accordingly!) | Add a dash of hot sauce to the butter mixture for extra punch. |
| Herby Med | Replace paprika/oregano with dried thyme, rosemary, and fennel seed. | Add a squeeze of orange juice instead of lemon juice for a different kind of brightness. |

Recipe FAQs
Why did my prawns turn out a bit rubbery and tough?
Rubbery texture is almost always down to overcooking; shrimp only need 4 6 minutes under the high heat of the broiler, so pull them out the second they turn fully opaque and curl into a loose 'C' shape.
What’s the secret to getting a proper caramelised crust on this Broiled Shrimp?
Achieving that cracking char requires two things: ensuring the shrimp are patted bone dry before seasoning to prevent steaming, and using a wire rack to allow 360-degree heat circulation from the fierce broiler element.
How do I know exactly when the shrimp are perfectly cooked?
They are done when they are uniformly pink, opaque, and the flesh turns white in the thickest part; if they start to tighten into a tight 'O' shape, like a forgotten biscuit in the oven, you've gone too far!
I've got a batch of leftovers how long will they keep, and can I freeze them?
Store cooked shrimp in the fridge for up to 2 3 days in an airtight container, but freezing is generally discouraged as it can drastically change the texture, often making them spongy when thawed and reheated.
Can I swap the butter for oil if I'm trying to cut back on saturated fat?
Certainly; you can easily substitute the butter with a neutral, high heat oil like grapeseed or a good quality extra virgin olive oil for a beautiful finish, though the overall calorie count will remain broadly similar.
Zesty Garlic Broiled Shrimp Recipe
Ingredients:
Instructions:
Nutrition Facts:
| Calories | 250 kcal |
|---|---|
| Fat | 15 g |
| Fiber | 1 g |
