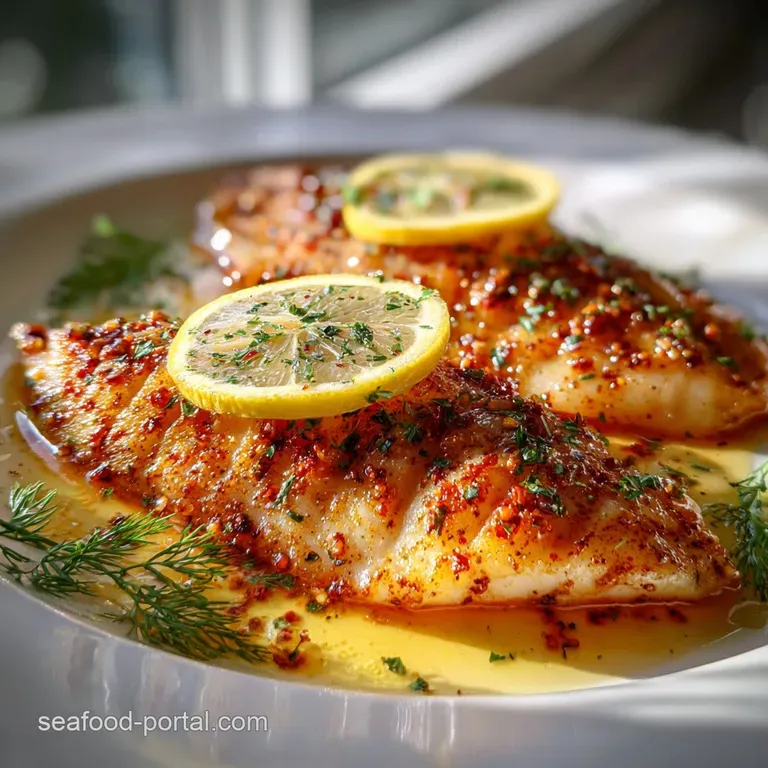
Red Snapper Fillet Recipe with Lemon: Crispy Skin
- Time: Active 10 minutes, Passive 10 minutes, Total 20 minutes
- Flavor/Texture Hook: A shattering, crispy skin paired with a velvety, bright lemon garlic emulsion
- Perfect for: A quick weeknight luxury or an impressive but easy date night dinner
- The Logic Behind This Snapper Dish
- Essential Specifications for Success
- Ingredients Necessary for the Snapper Dish
- Tools for a Flawless Sear
- Precise Phases of the Cooking Process
- Avoiding Common Flubs with Seafood Searing
- Creative Variations for Flavor Expansion
- Preserving Freshness for Snapper Leftovers
- Styling Your Seafood for Restaurant Quality
- Kitchen Truths and Myths
- Recipe FAQs
- 📝 Recipe Card
The Logic Behind This Snapper Dish
Understanding the "how" behind the heat is what separates a soggy fillet from a masterpiece. When we cook fish, we are essentially managing protein denaturation and moisture loss. Red snapper is a lean protein, which means it doesn't have much fat to insulate it from the heat.
That's why we use the skin as a protective barrier and the butter as a finishing glaze to reintroduce richness.
- Protein Coagulation: Rapid heat on the skin side causes proteins to tighten, creating a rigid structure that prevents the delicate flesh from falling apart.
- Maillard Reaction: By patting the skin bone dry, we allow the 2 tbsp extra virgin olive oil to reach temperatures above 300°F, triggering the browning that creates savory flavor.
- Emulsification Stability: Adding the 2 tbsp unsalted butter at the very end, off the heat, allows the lemon juice and fats to bind into a creamy sauce rather than a broken, greasy mess.
- Aromatic Infusion: Slivering the 4 cloves garlic instead of mincing them allows them to brown slowly without burning, providing a nutty sweetness rather than a bitter bite.
Achieving a Shattering Crust
The secret to that elusive crunch is moisture management. Even a tiny drop of water on the skin will turn into steam, and steam is the enemy of the sear. I always spend an extra minute with paper towels, pressing down on the skin until it feels almost tacky.
Temperature Regulation Techniques
You want the pan hot enough to sizzle but not so hot the oil smokes. If you see wisps of blue smoke, your oil is breaking down and will taste metallic. Aim for the "shimmer" stage, where the oil moves across the pan like water.
| Thickness | Internal Temp | Rest Time | Visual Cue |
|---|---|---|---|
| 0.5 inch | 145°F | 2 minutes | Flesh is opaque throughout |
| 1 inch | 145°F | 3 minutes | Flakes easily with a fork |
| 1.5 inch | 145°F | 4 minutes | Center is no longer translucent |
Checking the internal temperature with a digital thermometer is the only way to be 100% sure. I used to guess by poking the fish, but that usually just resulted in me breaking the fillet before it hit the plate. Let it rest!
This allows the juices to redistribute so they don't leak out the moment you take your first bite.
Essential Specifications for Success
When we look at this Fillet Recipe with Lemon and Garlic, the efficiency is what makes it a staple in my house. You're looking at a 20 minutes total commitment, which is faster than ordering takeout. This method works because it prioritizes high impact moves over complicated processes.
For the best results, I recommend using a heavy bottomed stainless steel pan or a well seasoned cast iron skillet. These materials hold heat much better than non stick pans, which are often too thin to maintain the temperature needed for a proper sear.
If you’re wondering about the difference between this quick method and traditional poaching, the table below breaks down why we’re sticking to the pan today.
| Method | Prep Time | Result | Best For |
|---|---|---|---|
| Pan Sear (This) | 20 minutes | Crispy skin, juicy meat | Quick luxury meals |
| Oven Roasting | 35 minutes | Even cook, no crunch | Large batches |
| Traditional Poach | 25 minutes | Soft, delicate texture | Health focused diets |
The pan sear provides that contrast between the "snap" of the skin and the "melt" of the meat that roasting simply can't achieve. It’s that textural variety that makes your brain think you’re eating at a five star bistro.
Ingredients Necessary for the Snapper Dish
The beauty of this Snapper Fillet Recipe with Lemon and Garlic lies in the quality of the components. Since there are so few ingredients, each one has to pull its weight. I always reach for Kosher salt because the larger grains make it harder to over salt and easier to see exactly where you've seasoned.
- 4 Red Snapper fillets: Skin on is non negotiable for the texture we want. Why this? The skin protects the flesh and provides a savory, crispy contrast.
- 1 tsp Kosher salt: Draws out moisture and seasons the deep layers of the fish.
- 0.5 tsp freshly cracked black pepper: Provides a floral heat that cuts through the butter.
- 2 tbsp extra virgin olive oil: High smoke point for the initial sear.
- 1 large lemon, sliced into rounds: These caramelize in the pan, adding a concentrated sweetness.
- 1 large lemon, juiced: This provides the acidity needed to balance the fat.
- 4 cloves garlic, thinly slivered: Slivering prevents burning and creates "garlic chips."
- 2 tbsp unsalted butter: This is the "glue" that creates the velvety sauce finish.
- 0.25 cup fresh Italian parsley: Adds a hit of grassy freshness at the very end.
- 1 tsp dried oregano: Adds a Mediterranean earthiness that pairs perfectly with snapper.
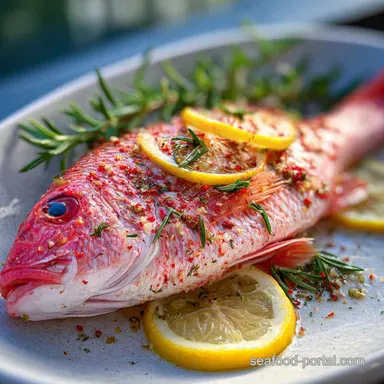
Choosing the Best Snapper
Look for fillets that are firm to the touch with a vibrant pinkish red hue. If the fish looks grey or has a strong "fishy" odor, skip it. It should smell like the sea fresh and slightly salty. If you can't find snapper, a Zesty Lemon Fish recipe using sea bass or grouper is a fantastic alternative.
| Original Ingredient | Substitute | Why It Works |
|---|---|---|
| Red Snapper Fillets | Grouper or Sea Bass | Similar firm texture and mild flavor profile. |
| Unsalted Butter | Ghee or Olive Oil | Ghee adds nuttiness; Olive oil keeps it dairy-free. |
| Fresh Parsley | Fresh Cilantro | Changes the profile to a more bright, citrusy note. |
While I love the traditional parsley, don't be afraid to experiment with what you have in the garden. Just remember that dried herbs should be added earlier in the process, while fresh herbs are almost always a finishing touch to preserve their volatile oils.
Tools for a Flawless Sear
You don't need a kitchen full of gadgets, but two things are essential: a fish spatula and a heavy pan. A fish spatula is thinner and more flexible than a standard pancake turner, allowing you to get under the delicate skin without tearing it. If you use a thick plastic spatula, you risk mangling the fillet.
For the pan, a 12 inch skillet is ideal for 4 fillets. If the pan is too small, the fillets will be crowded, which lowers the temperature of the oil and causes the fish to steam instead of sear.
I’ve made that mistake more times than I care to admit, and trust me, "steamed" snapper skin is not something you want to eat.
Components Deep Dive
| Ingredient | Science Role | Pro Secret |
|---|---|---|
| Kosher Salt | Moisture Extractor | Season the skin 15 mins early for maximum crunch. |
| Lemon Juice | Protein Relaxer | Use fresh juice; bottled has a bitter preservative aftertaste. |
| Slivered Garlic | Flavor Infuser | Don't add until the fish is flipped to prevent burning. |
The oregano adds a subtle depth that many people miss. It’s that "what is that flavor?" ingredient that makes this Fillet Recipe with Lemon and Garlic stand out from a basic lemon butter dish.
Precise Phases of the Cooking Process

Let’s get into the nitty gritty. This process moves fast once the fish hits the pan, so have all your ingredients measured and ready (mise en place is your best friend here).
- Dry the fish. Use paper towels to pat the 4 Red Snapper fillets completely dry on both sides. Note: This is the most important step for crispy skin.
- Season thoroughly. Sprinkle 1 tsp Kosher salt and 0.5 tsp black pepper over both sides of the fillets.
- Heat the oil. Add 2 tbsp extra virgin olive oil to your skillet over medium high heat until the oil shimmers and barely wisps smoke.
- The initial sear. Place fillets skin side down in the pan. Press gently with a spatula for 10 seconds to ensure even contact.
- Wait for release. Cook for 4 to 5 minutes until the skin is golden and the fish releases easily from the pan.
- Flip and flavor. Turn the fillets over carefully. Add the 4 slivered cloves of garlic and 1 large lemon, sliced into rounds, to the empty spaces in the pan.
- Baste with butter. Add 2 tbsp unsalted butter and 1 tsp dried oregano. As the butter melts, spoon it over the fish for 2 to 3 minutes until the garlic is fragrant and light brown.
- Brighten the sauce. Pour in the juice of 1 lemon and sprinkle 0.25 cup fresh Italian parsley over everything.
- The final check. Cook for another 1 minute until the internal temperature hits 145°F and the meat is opaque.
- Rest and serve. Transfer to plates and spoon the pan sauce and lemon rounds over the top immediately.
The Basting Phase
When you add that butter, it’s going to foam up. This is the milk solids toasting. That "nutty" aroma is a signal that you're building a massive amount of flavor. Spoon that liquid gold over the flesh side of the fish; it acts as a gentle poaching liquid that keeps the top of the fillet moist while the bottom finishes searing.
Avoiding Common Flubs with Seafood Searing
The most common heartache in seafood cooking is the "stick." You go to flip the fish, and half of it stays behind. Usually, this happens because the pan wasn't hot enough or you tried to flip it too early.
Fish has a natural "release" point when the proteins have seared sufficiently, they will naturally detach from the metal.
Why Your Snapper Skin is Soggy
If your skin isn't crunching, it's likely due to steam. This happens if the fillets were still damp or if you crowded the pan. When you put too much cold fish into a pan at once, the temperature drops instantly, and the moisture escaping the fish can't evaporate fast enough.
Why Your Garlic Tastes Bitter
Garlic contains sugars that burn very quickly. If you add your slivered garlic at the beginning with the oil, it will be charcoal by the time the fish is done. Adding it after the flip ensures it only gets those few minutes of heat needed to turn sweet and golden.
| Problem | Root Cause | Solution |
|---|---|---|
| Fish sticks to pan | Pan was too cold or flipped too early | Wait for the fish to "release" naturally; use more oil next time. |
| Meat is dry/rubbery | Overcooked beyond 145°F | Pull the fish at 140°F; carryover heat will finish the job. |
| Sauce is too greasy | Butter melted too fast or split | Add a splash of water or more lemon juice and whisk vigorously. |
Common Mistakes Checklist
- ✓ Did you pat the skin dry? (I mean really dry, like parchment paper).
- ✓ Did you wait for the oil to shimmer? (Cold oil leads to sticking).
- ✓ Did you avoid the urge to move the fish? (Let it sit for at least 3 minutes undisturbed).
- ✓ Is your garlic slivered instead of minced? (Thicker pieces are more heat resistant).
- ✓ Did you use a fish spatula? (Standard spatulas are too thick and will break the fillet).
Creative Variations for Flavor Expansion
Once you've mastered the basic with Lemon and Garlic method, you can start playing with the profile. This dish is a canvas. If you want something with more of a kick, try adding a pinch of red pepper flakes when you add the garlic.
It creates a "Fra Diavolo" lite feel that is incredible with the sweetness of the snapper.
For a Mediterranean Twist
Add a tablespoon of drained capers and some halved cherry tomatoes during the butter basting phase. The tomatoes will blister and release their juices, creating a more robust, chunky sauce. This variation is a direct nod to my PanSeared Flounder Recipe which uses a similar citrus caper base.
For a Low Carb/Keto Variation
This recipe is already naturally low carb! To make it even richer, you can double the butter and add a splash of heavy cream at the very end. Serve it over a bed of sautéed spinach or zoodles instead of rice or potatoes to keep the carbohydrate count at a minimum.
Decision Shortcut: If you want X, do Y - If you want a deeper umami flavor, add a teaspoon of white miso to the butter. - If you want a brighter, more herbal finish, swap the oregano for fresh dill and chives.
- If you want a crunchy topping, toasted panko breadcrumbs with lemon zest can be sprinkled over at the very end.
Preserving Freshness for Snapper Leftovers
Seafood is always best eaten immediately, but if you have leftovers, you can keep them in the fridge for up to 2 days. The key is how you reheat it. Never, and I mean never, use the microwave for fish. It will turn your beautiful snapper into a piece of scented rubber.
- Storage: Place fillets in an airtight container with a piece of parchment paper between layers to prevent sticking.
- Reheating: Place the fish in a cold pan with a teaspoon of water and cover with a lid. Heat over medium low for 3 to 4 minutes. This creates a gentle steam that warms the fish without drying it out.
- Zero Waste: Don't throw away those caramelized lemon rounds! Chop them up and stir them into a pasta salad the next day. Also, any leftover sauce can be used as a base for a vinaigrette just whisk in a little more olive oil and a touch of Dijon mustard.
Styling Your Seafood for Restaurant Quality
We eat with our eyes first, right? To make this look like a $40 entree, focus on the height and the color contrast. Start with a base of something soft creamy polenta or a simple cauliflower purée works wonders. Lean the snapper fillet against the mound of starch so it’s sitting at an angle.
For a Pop of Color
Don't just dump the parsley on top. Sprinkle it from high up to get an even distribution. Place one of the caramelized lemon rounds on top of the fillet and drizzle the remaining butter sauce around the edges of the plate rather than just on top of the fish.
This keeps the skin crispy while still giving you all that flavor.
Flavor Map
- Sweet: The natural sugars in the snapper meat and caramelized garlic.
- Sour: The sharp, clean hit of fresh lemon juice.
- Salty: The Kosher salt crust and the richness of the butter.
- Herbal: The earthy oregano and the bright, grassy parsley.
The contrast between the warm, buttery sauce and the sharp citrus is what makes this Red Snapper Fillet Recipe with Lemon so addictive. It’s a balanced profile that hits every part of your palate.
Kitchen Truths and Myths
I used to believe that you had to let fish come to room temperature before cooking it, just like a steak. That’s a myth that can actually hurt your results. Because fish fillets are so thin, if they are room temp when they hit the pan, the inside will overcook before the skin has a chance to get crispy.
I actually prefer my fillets slightly chilled when they go in it gives the skin more time in the heat to achieve that "shatter" texture without turning the meat into sawdust.
Another common misconception is that you shouldn't use butter with fish because it has a low smoke point. While true for the initial sear, using butter as a finishing element is the secret to that velvety mouthfeel. We use the olive oil for the heavy lifting and the butter for the flavor.
It’s the best of both worlds.
Finally,, don't fear the skin! I've had friends tell me they always remove the skin because it's "slimy." That's only true if it's undercooked. When done correctly, the skin is the most flavorful part of the dish, acting as a salty, crunchy cracker that perfectly complements the tender meat.
Give it a chance you might find it's your favorite part.

Recipe FAQs
What is the best method to cook red snapper?
Pan-searing is recommended. High heat on the skin creates a shatteringly crisp exterior that protects the delicate flesh underneath.
What is the best sauce for red snapper?
A bright lemon butter sauce is ideal. The acidity of the lemon cuts through the richness of the butter and complements the mild flavor of the snapper.
What do you soak red snapper in before cooking?
You do not need to soak the fillet. Instead, pat the skin aggressively dry with paper towels to ensure maximum crispness upon searing.
What pairs well with red snapper?
Asparagus, roasted root vegetables, or simple rice pilaf pair well. The lean protein stands up well to slightly earthy or starchy sides that absorb the pan sauce.
How do I prevent the red snapper fillet from sticking to the pan?
Heat the pan until the oil shimmers before adding the fish. The fillet must naturally release from the pan surface after a few minutes of good searing contact.
Is it true that I must avoid butter when cooking fish?
No, this is a common misconception. Butter should be added after the initial high heat sear, off the heat, to emulsify with the lemon juice for flavor, not for the initial searing phase.
How do I ensure the fish is cooked through without drying it out?
Use an instant read thermometer to pull the fish at 140°F internally. This allows for carryover cooking to reach the safe temperature of 145°F while preserving moisture.
Red Snapper Lemon Garlic
Ingredients:
Instructions:
Nutrition Facts:
| Calories | 291 calories |
|---|---|
| Protein | 35.4g |
| Fat | 14.8g |
| Carbs | 2.9g |
| Fiber | 0.7g |
| Sugar | 0.5g |
| Sodium | 715mg |
