Pan Fried Shrimp: Crispy & Succulent
- Time: Active 10 minutes, Passive 6 minutes, Total 16 minutes
- Flavor/Texture Hook: Shatter crisp edges with a buttery, garlicky finish
- Perfect for: Busy weeknight dinners, taco nights, or a protein packed appetizer
- Master the Ultimate Golden Brown Pan Fried Shrimp at Home
- Why This High Heat Searing Technique Actually Works
- A Deep Dive into the Starch and Spice Components
- What You Need and How to Swap It
- Essential Gear for Achieving That Restaurant Quality Crust
- Step by Step Guide to the Ultimate Sizzle
- How to Avoid Sogginess and Common Texture Issues
- Scaling the Recipe for Parties or Solo Dinners
- Flavor Variations and Healthy Ingredient Substitutions
- Storing Your Leftovers and Reducing Kitchen Waste
- The Best Ways to Platter and Serve Shrimp
- Pan Fried Shrimp FAQs
- 📝 Recipe Card
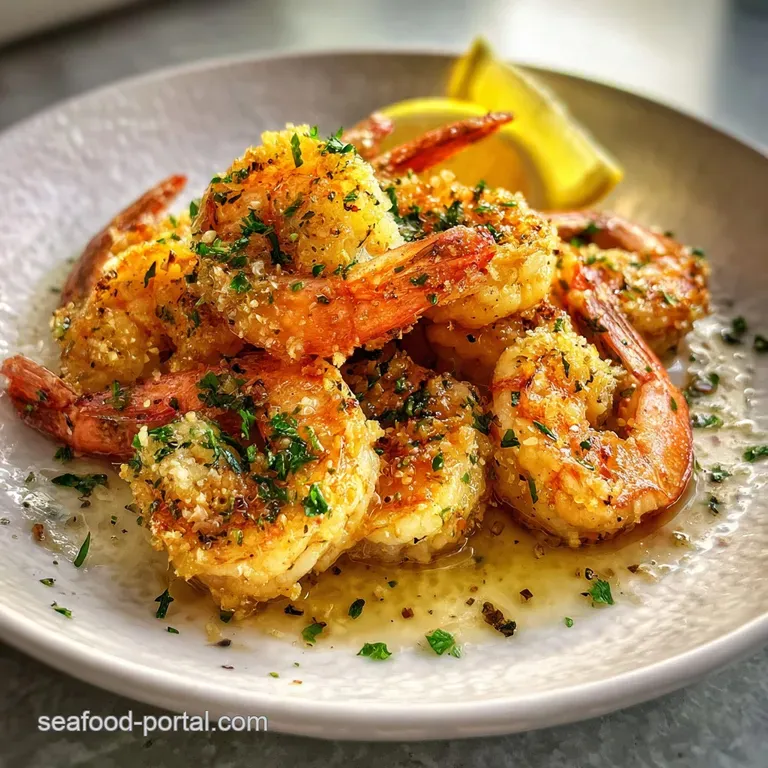
Master the Ultimate Golden Brown pan-fried Shrimp at Home
That high pitched sizzle when the first jumbo shrimp hits the cast iron is basically my favorite song. I still remember the first time I tried making these years ago; I was so worried about overcooking them that I used low heat. The result? Grey, rubbery, sad looking seafood swimming in a puddle of its own juices.
It was a total disaster, but it taught me the most important lesson in the kitchen: don't be afraid of the heat.
Now, I’ve got this down to a literal science. We aren't going for a thick, greasy batter here. Instead, we’re using a thin "dusting" technique that creates a crust so crisp it practically cracks when you bite into it.
The kitchen smells like toasted garlic and smoky paprika within seconds, and the best part is that it’s actually faster than ordering takeout.
We’re going to focus on getting that perfect contrast between the hot, seasoned exterior and the tender, sweet meat inside. Trust me, once you see those edges turn golden and opaque, you’ll never go back to boiling or poaching shrimp for your salads or tacos again.
Let’s get that pan screaming hot and crack on.
Why This High Heat Searing Technique Actually Works
- Surface Dehydration: Cornstarch acts as a moisture magnet, drying out the shrimp's surface so the oil can fry the exterior instead of steaming it.
- Maillard Acceleration: The small amount of natural sugars in the shrimp, combined with the dry heat and fats, creates complex savory compounds rapidly.
- Thermal Buffering: Adding butter at the very end provides a fat soluble flavor boost without the milk solids burning during the initial over high heat sear.
| Method | Time | Texture | Best For |
|---|---|---|---|
| Flash Pan Fry | 5-6 mins | Shatter crisp | Tacos, salads, quick meals |
| Classic Batter | 10-12 mins | Thick and bready | Po' boys, fish & chips style |
| Poaching | 3-4 mins | Soft and tender | Shrimp cocktail, cold rolls |
Choosing the right approach depends on your end goal, but for sheer speed and flavor intensity, the flash fry wins every time. This technique is much lighter than the heavy coating you'd find in The Homemade Fried recipe but offers more crunch than a standard sauté.
A Deep Dive into the Starch and Spice Components
| Ingredient | Science Role | Pro Secret |
|---|---|---|
| 16/20 Shrimp | Protein Structure | Larger shrimp resist overcooking better than small ones |
| Cornstarch | Moisture Absorber | Create an ultra thin "skin" that crisps instantly in oil |
| Avocado Oil | Heat Carrier | High smoke point prevents the oil from breaking down |
| Sea Salt | Protein Denaturation | Draws out surface moisture to help the starch stick |
One of the biggest mistakes I see is using a low smoke point oil like extra virgin olive oil for this. It’ll smoke up your kitchen before the shrimp even stand a chance. Stick to avocado oil or grapeseed oil to keep things clean and crisp.
What You Need and How to Swap It
To get started, you'll need the following quantities exactly as listed. I've found that these ratios provide the best coverage without making the seasoning feel "clumpy" or overbearing.
- 1 lb jumbo shrimp (16/20 count): Peeled and deveined, but leave the tails on for a "handle." Why this? Larger shrimp provide a better surface area to meat ratio for searing.
- 2 tbsp cornstarch: This is our secret weapon for the crunch.
- 1 tsp smoked paprika: Adds a deep, woodsy color and flavor.
- 1 tsp garlic powder: Essential for that classic savory profile.
- 0.5 tsp onion powder: Rounds out the garlic with a bit of sweetness.
- 0.5 tsp sea salt: To make all the other flavors pop.
- 0.25 tsp cayenne pepper: Just a hint of heat (totally optional).
- 2 tbsp avocado oil: For the over high heat searing.
- 1 tbsp unsalted butter: For that velvety, rich finish.
| Original Ingredient | Substitute | Why It Works |
|---|---|---|
| Cornstarch | Arrowroot Powder | Similar starch profile. Note: Results in a slightly more delicate crunch. |
| Smoked Paprika | Chipotle Powder | Adds heat and smokiness. Note: Significantly increases the spice level. |
| Avocado Oil | Grapeseed Oil | Both have high smoke points. Note: Neutral flavor that won't distract. |
If you’re looking for a completely different flavor profile, you might enjoy the delicate balance of a Classic Shrimp Shumai recipe instead, which focuses on steaming rather than frying. But for today, we are all about that golden crust.
Essential Gear for Achieving That Restaurant Quality Crust
You don't need a professional kitchen, but a heavy bottomed pan is non negotiable. I personally swear by a 12 inch cast iron skillet because it holds heat like a champion. When you drop cold shrimp into a thin, cheap pan, the temperature plummets, and you end up steaming the meat rather than frying it.
A set of long kitchen tongs is also your best friend here. You need to be able to flip the shrimp individually and quickly. If you try to use a spatula, you'll knock off that delicate starch coating we worked so hard to apply.
Finally, keep a bunch of paper towels handy drying the shrimp is the most important prep step you'll take.
1. The Cast Iron Advantage
A heavy pan acts as a heat reservoir. This ensures that the second and third batches of shrimp cook just as beautifully as the first one.
2. High Heat Tongs
Precision matters. You want to flip each shrimp the moment the tail turns bright pink and the underside looks bronzed.
step-by-step Guide to the Ultimate Sizzle

- Dry the shrimp. Use paper towels to pat the 1 lb of shrimp until they are bone dry to the touch. Note: Surface moisture is the enemy of a good sear.
- Mix the coating. In a large bowl, whisk together the 2 tbsp cornstarch, 1 tsp smoked paprika, 1 tsp garlic powder, 0.5 tsp onion powder, 0.5 tsp sea salt, and 0.25 tsp cayenne.
- Toss and coat. Add the shrimp to the bowl and toss vigorously until every crevice is lightly dusted in pinkish powder.
- Heat the pan. Place your skillet over medium high heat and add the 2 tbsp avocado oil.
- Test the oil. Wait about 2-3 minutes until the oil shimmers and a tiny pinch of starch sizzles instantly.
- Arrange the shrimp. Place the shrimp in the pan in a single layer, leaving space between each one. Note: Work in two batches if your pan is smaller than 12 inches.
- Sear the first side. Cook for 2 to 3 minutes without moving them until the edges turn opaque and golden.
- Flip and finish. Turn the shrimp over and cook for another 2 minutes.
- The butter baste. Drop the 1 tbsp unsalted butter into the center of the pan until it foams and smells nutty.
- Toss and serve. Swirl the shrimp in the melted butter for 30 seconds, then remove them from the heat immediately.
How to Avoid Sogginess and Common Texture Issues
Why Your Shrimp Is Rubbery
If your shrimp feels like a tire, you've likely overcooked it. Shrimp continues to cook for a minute even after you take it off the heat (carryover cooking). You want to pull them when they form a "C" shape; if they tightly curl into an "O," they’re overdone.
Why the Coating Falls Off
This usually happens because the pan wasn't hot enough or the shrimp were too wet when you tossed them in the starch. The starch needs to bond with the surface proteins instantly. If the pan is lukewarm, the starch turns into a paste instead of a crust.
| Problem | Root Cause | Solution |
|---|---|---|
| Soggy exterior | Overcrowded pan | Cook in batches to maintain high oil temp. |
| Burnt spices | Heat too high / no oil | Reduce heat slightly or add more oil to buffer. |
| Gray color | Steaming in liquid | Pat shrimp dry and don't cover the pan. |
Common Mistakes Checklist:
- ✓ Triple check that your shrimp are dry before adding the starch.
- ✓ Don't skip the cornstarch; flour won't give you the same "snap."
- ✓ Avoid moving the shrimp for at least 2 minutes after they hit the pan.
- ✓ Use a high smoke point oil butter alone will burn at these temps.
- ✓ Pull the shrimp the moment they hit 145°F internally.
Scaling the Recipe for Parties or Solo Dinners
If you're cooking for a crowd, don't just dump 2 lbs of shrimp into the pan at once. You'll drop the temperature so fast the shrimp will boil. Instead, double the ingredients but stick to the batch cooking method.
You can keep the first batch warm in a 200°F oven on a wire rack while you finish the rest.
For a solo dinner, halving the recipe is easy. Use about 0.5 lb of shrimp and just a tablespoon of starch. When scaling down, remember that the oil will heat up much faster in a large pan, so keep a close eye on it to prevent scorching.
| Comparison | Classic Sauté | Flash Pan Fry (This Recipe) |
|---|---|---|
| Fat Used | Mostly Butter | Oil + Butter Finish |
| Coating | None | Light Cornstarch Dusting |
| Crunch Factor | Low | High |
Flavor Variations and Healthy Ingredient Substitutions
If you want a different vibe, you can easily swap the spices. For a Mediterranean twist, replace the paprika and cayenne with dried oregano and lemon zest. If you're looking for a "Taco Night" version, add a half teaspoon of cumin and some lime juice right at the very end.
For those watching their salt intake, you can omit the sea salt in the starch mix and instead finish the dish with a squeeze of fresh lime or a splash of coconut aminos. The acidity will brighten the flavors without the need for extra sodium.
Chef's Tip: Freeze your butter for 10 minutes before adding it to the pan. Cold butter takes longer to melt, allowing the milk solids to toast slowly and create a deeper flavor without burning.
Storing Your Leftovers and Reducing Kitchen Waste
- Fridge: Store in an airtight container for up to 2 days. The crust will soften, but the flavor remains great.
- Freezer: I don't recommend freezing these after they're cooked, as the texture becomes quite mealy.
- Reheating: Avoid the microwave! It turns shrimp into rubber. Instead, toss them back into a hot, dry skillet for 1-2 minutes until they're heated through and the edges crisp up again.
Zero Waste Tip: Don't throw away those shrimp shells! If you peel them yourself, toss the shells into a bag in the freezer. When you have a few handfuls, simmer them with water, celery, and onion to make a quick seafood stock for risotto or chowder.
The Best Ways to Platter and Serve Shrimp
These are best served immediately while that crust is still "shattering" crisp. I love piling them high on a platter with a few lemon wedges and a side of garlicky aioli. They also make an incredible topper for a cold Caesar salad the contrast between the hot, spicy shrimp and the cold, crisp romaine is a total winner.
If you’re doing a taco spread, serve these in charred corn tortillas with a crunchy cabbage slaw and plenty of cilantro. The starch coating helps the salsa cling to the shrimp rather than sliding right off.
- Sweet
- Jumbo shrimp meat
- Savory
- Garlic and onion powder
- Smoky
- Smoked paprika
- Rich
- Foaming butter finish
- Acid
- Fresh lemon squeeze (essential!)
Precision Checkpoints
- Shrimp Size: Use 16/20 count for the best texture.
- Internal Temp: Pull at 145°F (63°C) for maximum succulence.
- Oil Temp: Oil should reach 375°F before the first shrimp is added.
Decision Shortcut: If you want Maximum Crunch, use 3 tbsp of cornstarch instead of 2. If you want Low Carb, replace cornstarch with almond flour (though it will be less crispy).
If you want Spicy, double the cayenne pepper or add a teaspoon of red chili flakes to the butter at the end.
Searing shrimp might seem intimidating because it happens so fast, but once you get the rhythm down, it’s the most rewarding 15 minutes you’ll spend in the kitchen. Just remember: dry the shrimp, heat the pan, and don't walk away! Enjoy that crunch!

pan-fried Shrimp FAQs
How to fry shrimp in a pan?
Dry the shrimp thoroughly, toss them in a seasoned cornstarch mixture, and sear in a hot, oiled pan for 2-3 minutes per side until golden brown and cooked through.
Is it better to fry shrimp in butter or oil?
Use oil for searing, finish with butter. High smoke point oils like avocado or grapeseed oil are best for the initial high heat sear, while a touch of butter at the end adds richness and flavor.
What's the secret to perfect pan-seared shrimp?
High heat and a dry surface are key. Ensure your shrimp are completely dry, use a very hot pan with oil, and don't overcrowd it to achieve a crispy exterior without steaming.
How long do raw shrimp take to pan fry?
About 4-6 minutes total. Jumbo shrimp typically cook quickly, needing 2-3 minutes per side until they turn opaque and curl slightly.
Can I use flour instead of cornstarch for coating?
No, stick with cornstarch for the best crisp. While flour can be used, cornstarch creates a lighter, shatteringly crisp crust that's ideal for pan-fried shrimp, similar to the technique in our Fried Shrimp Po Boys recipe.
How do I prevent my shrimp from becoming rubbery?
Avoid overcooking and ensure high heat. Shrimp cook in minutes; pull them off the heat as soon as they turn opaque and form a "C" shape, and never use low heat as it steams them.
Can I add other seasonings to the shrimp coating?
Absolutely! Experiment with spices. Beyond salt and pepper, consider paprika for color and smokiness, garlic powder, onion powder, or a pinch of cayenne for heat, much like the flavor profiles in dishes like Shrimp Etouffee.
pan-fried Shrimp
Ingredients:
Instructions:
Nutrition Facts:
| Calories | 218 kcal |
|---|---|
| Protein | 23.8 g |
| Fat | 10.2 g |
| Carbs | 4.6 g |
| Fiber | 0.4 g |
| Sugar | 0.2 g |
| Sodium | 312 mg |
