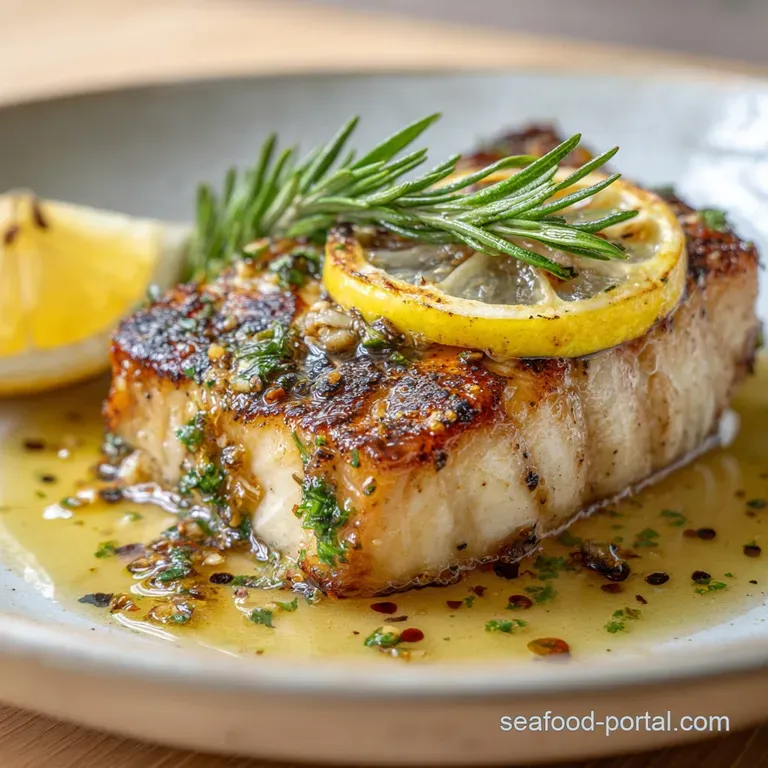
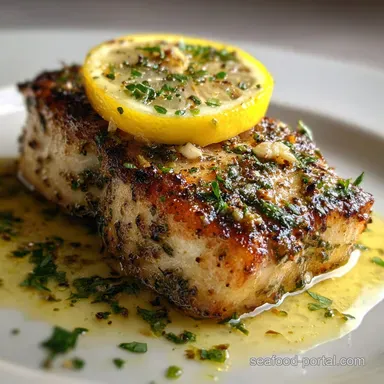
Mahi Mahi Fish Recipe with Lemon and Garlic
- Time: Active 5 minutes, Passive 10 minutes, Total 15 minutes
- Flavor/Texture Hook: Flaky, golden crusted fillets with a zesty, buttery garlic glaze
- Perfect for: Weeknight dinners, quick protein rich meals, or beginner seafood cooks
- Mahi Mahi Fish Recipe with Lemon and Garlic
- The Thermal Logic of Flaky Fish
- Vital Statistics for This Dish
- Elements of the Flavor Profile
- Necessary Tools for Success
- A Methodical Guide to Searing
- Troubleshooting the Pan Sear
- Creative Variations and Adjustments
- The Truth About Frozen Fish
- Preservation and Reheating Strategies
- Inspired Accompaniments and Pairings
- Recipe FAQs
- 📝 Recipe Card
Mahi Mahi Fish Recipe with Lemon and Garlic
The moment that cold mahi mahi hits a hot, oiled pan, you get that glorious, sharp sizzle that tells you dinner is going to be good. I remember the first time I tried cooking this; I was so worried about the fish sticking that I kept poking it with a spatula. Big mistake. I ended up with a shredded mess.
Now, I know the secret is patience and a really good sear that lets the fish release naturally.
This Mahi Mahi Fish Recipe with Lemon and Garlic delivers a truly unforgettable dinner. It is the kind of meal that looks incredibly fancy on the plate but actually only takes about fifteen minutes from start to finish.
We are talking about meaty, white fish that holds its shape, coated in a sauce that makes you want to lick the plate clean. It’s light enough for a summer evening but satisfying enough for a busy Tuesday.
What I love most about this dish is how the lemon cuts right through the richness of the butter. If you've been looking for a way to make "fish night" more exciting without spending an hour in the kitchen, you’ve found it.
We are going to build layers of flavor, starting with a smoky rub and ending with a bright, wine infused garlic sauce that ties everything together.
The Thermal Logic of Flaky Fish
Maillard Reaction: High heat transforms the protein and natural sugars on the surface into a golden brown crust, creating a savory depth that raw poaching cannot achieve.
Emulsification Stability: Adding cold butter to the warm lemon and wine reduction creates a silky, thickened sauce that clings to the fish rather than running off the plate.
Carryover Cooking: Removing the fish just before it hits its final temperature allows the residual heat to finish the center, preventing a dry or rubbery texture.
| Thickness | Internal Temp | Rest Time | Visual Cue |
|---|---|---|---|
| 1.25 cm | 63°C | 2 mins | Opaque and easily flakes |
| 2.5 cm | 63°C | 3 mins | Center loses translucent look |
| 3.75 cm | 63°C | 4 mins | Firm to the light touch |
Setting the stage for a flawless sear requires understanding your ingredients before they ever touch the heat. When you choose your fillets, look for ones that are uniform in thickness so they finish at the same time. If you find yourself needing more seafood inspiration, you can always browse other Fish Recipes to see how different textures respond to various heat sources.
Vital Statistics for This Dish
| Component | Science Role | Pro Secret |
|---|---|---|
| Mahi Mahi | Lean Protein | Pat bone dry to prevent steaming |
| Avocado Oil | High Smoke Point | Allows for over high heat searing without burning |
| Lemon Juice | Denatures Protein | Brightens the heavy fats in the butter |
| Unsalted Butter | Fat & Mouthfeel | Use cold cubes for a creamier sauce |
Choosing the right fat is crucial for this specific method. While extra virgin olive oil is great for salads, its lower smoke point makes it a risky choice for the initial sear. Avocado oil handles the heat beautifully, ensuring that your kitchen doesn't fill with smoke while you're trying to get that golden crust.
Elements of the Flavor Profile
- 4 (6 oz) Mahi Mahi fillets: Thawed and patted dry. Why this? A firm, mild fish that won't fall apart in the pan.
- Substitute: Halibut or Cod (slightly more fragile).
- 1 tbsp avocado oil: For the over high heat sear. Why this? High smoke point prevents acrid flavors at searing temps.
- Substitute: Grapeseed oil or refined coconut oil.
- 1 tsp kosher salt: Enhances all other flavors.
- Substitute: Sea salt (use slightly less if fine grain).
- 0.5 tsp cracked black pepper: Provides a subtle floral heat.
- 0.5 tsp smoked paprika: Adds color and a hint of earthiness. Why this? Provides a beautiful orange gold hue to the sear.
- Substitute: Sweet paprika or a pinch of cayenne.
- 3 tbsp unsalted butter, divided: Creates the velvety sauce base.
- Substitute: Ghee for a nuttier, dairy-free alternative.
- 4 cloves garlic, minced: The aromatic heart of the dish.
- 3 tbsp fresh lemon juice: Provides necessary acidity.
- Substitute: Lime juice or white wine vinegar.
- 1 tbsp dry white wine or chicken broth: Deglazes the pan. Why this? Lifts the browned bits (fond) into the sauce.
- 2 tbsp fresh parsley, finely chopped: Adds a grassy, fresh finish.
- 1 lemon, sliced into rounds: For a beautiful presentation.
Necessary Tools for Success
You don't need a professional kitchen, but a heavy bottomed pan is non negotiable here. A cast iron skillet or a high-quality stainless steel pan (like an All Clad) distributes heat evenly, which means you won't have "hot spots" that burn one side of your fish while the other stays raw.
Chef Tip: If using stainless steel, wait for the "Leidenfrost effect" where a drop of water dances on the pan surface before adding your oil. This creates a naturally non stick environment.
A thin, flexible fish spatula is also a massive help. It allows you to get under the fillet without breaking that delicate crust you've worked so hard to build. If you're a fan of gentler methods, you might also enjoy a Poached Mahi Mahi recipe which uses a different set of tools but yields equally tender results.
A Methodical Guide to Searing

1. The over High heat Prep
Pat the 4 (6 oz) Mahi Mahi fillets completely dry with paper towels. Note: Surface moisture creates steam, which prevents the formation of a golden crust.
2. The Seasoning Layer
Season both sides of the fillets with 1 tsp kosher salt, 0.5 tsp black pepper, and 0.5 tsp smoked paprika.
3. The Initial Sear
Heat 1 tbsp avocado oil in a large skillet over medium high heat until the oil shimmers and barely smokes.
4. The First Side
Place fillets in the pan, skin side or bottom side down first. Cook 3-4 minutes until the bottom is deeply golden and releases easily from the pan.
5. The Gentle Flip
Carefully flip the fish using a thin spatula. Note: If the fish resists, give it another 30 seconds; it will "tell" you when it’s ready to turn.
6. The Second Side
Cook for another 2-3 minutes until the fish is opaque throughout and reaches an internal temperature of 63°C. Transfer fillets to a warm plate.
7. The Aromatic Base
Reduce heat to medium and add 1 tbsp of the unsalted butter and 4 cloves minced garlic. Sauté 30 seconds until fragrant and golden.
8. The Pan Deglaze
Pour in 3 tbsp lemon juice and 1 tbsp dry white wine or chicken broth. Scrape the bottom of the pan to release browned bits.
9. The Velvety Finish
Whisk in the remaining 2 tbsp of cold butter and 2 tbsp parsley until the sauce thickens into a glossy glaze.
10. The Final Assembly
Return the fish to the pan briefly to coat in the sauce and garnish with lemon rounds.
Troubleshooting the Pan Sear
Preventing Pan Sticking
If your fish feels glued to the pan, the most common reason is that the pan wasn't hot enough when the fish was added, or you're trying to flip it too early. The proteins need time to undergo the Maillard reaction, which naturally detaches the flesh from the metal surface.
Avoiding Burnt Garlic Bitter Notes
Garlic has a high sugar content and a very low water content, meaning it can go from aromatic to charcoal in seconds. If your pan is too hot after searing the fish, remove it from the heat for a minute before adding the garlic, or use the "Cold Butter Finish" to immediately drop the pan's temperature.
| Problem | Root Cause | Solution |
|---|---|---|
| Fish is tough/chewy | Overcooked past 65°C | Pull fish at 60°C and let it rest |
| Sauce is broken/oily | Butter added to boiling liquid | Remove from heat before whisking in butter |
| No golden crust | Pan was too cold or fish was wet | Pat dry and wait for oil to shimmer |
Common Mistakes Checklist
- ✓ Skipping the paper towel step (moisture is the enemy of the sear)
- ✓ Crowding the pan (this lowers the temperature and causes steaming)
- ✓ Using "light" butter or margarine (they have too much water for a silky sauce)
- ✓ Fiddling with the fish before it develops a crust
- ✓ Using bottled lemon juice (the flavor is flat and lacks the bright zest of fresh)
Creative Variations and Adjustments
If you need to scale this recipe down for two people, it's quite simple. Use 2 fillets and cut the oil and seasonings in half. However, keep the sauce measurements almost the same you'll want that extra glaze for your sides. If scaling up for a crowd, work in batches.
Overcrowding the pan will drop the temperature, and you'll end up with grey, boiled looking fish instead of that beautiful sear.
| Method | Time | Texture | Best For |
|---|---|---|---|
| Stovetop | 10 mins | Crispy, caramelized crust | Quick weeknight flavor |
| Oven Baked | 12-15 mins | Evenly cooked, very moist | Large groups, hands off |
| Air Fryer | 8 mins | Extra firm exterior | Low oil, maximum crunch |
If you want a different flavor profile, consider swapping the paprika for a little chili powder or even some cumin for a southwestern vibe. For those following a dairy-free diet, coconut oil or a high-quality vegan butter substitute works well, though you won't get the same "milky" thickness in the sauce that real butter provides.
The Truth About Frozen Fish
Many people believe that fresh fish is always superior to frozen. In reality, most fish labeled "fresh" at the grocery store was previously frozen and thawed in the display case. high-quality mahi mahi is often flash frozen on the boat, locking in the cell structure and flavor.
As long as you thaw it slowly in the fridge overnight, the texture will be indistinguishable from a fresh catch.
Another myth is that you must rinse fish before cooking. Please, don't do this. Rinsing fish under the tap spreads bacteria around your sink and makes the surface wet, which ruins your sear. A simple pat down with a paper towel is all the "cleaning" a fillet needs.
Preservation and Reheating Strategies
- Storage
- You can keep cooked mahi mahi in an airtight container in the fridge for up to 3 days. It makes a fantastic addition to a cold salad the next day.
- Freezing
- While you can freeze cooked fish, the texture often becomes a bit grainy upon thawing. It’s best to eat this fresh.
- Reheating
- Avoid the microwave! It will turn your fish into rubber. Instead, place the fillets in a pan with a splash of water or broth, cover with a lid, and warm over low heat for 3-4 minutes.
- Zero Waste
- Don't throw away those parsley stems or the lemon rinds. Throw them into a freezer bag to use the next time you make a seafood stock or a quick veggie broth.
Inspired Accompaniments and Pairings
This Mahi Mahi Fish Recipe with Lemon and Garlic cries out for something to soak up that extra sauce. A bed of jasmine rice or some garlic rubbed toasted baguette is the classic move.
If you want to keep things on the lighter side, a simple arugula salad with a balsamic vinaigrette or some roasted asparagus works beautifully.
If you're feeling a bit more adventurous, this fish pairs surprisingly well with a nutty, brown butter sauce. You can see a similar flavor profile in this Almondine Fish recipe, which uses toasted nuts to add a crunch that contrasts the flaky mahi mahi perfectly. Whatever you choose, make sure it has enough structural integrity to handle that glorious lemon garlic glaze.

Recipe FAQs
Should I use fresh or frozen Mahi Mahi for this sear?
Yes, quality frozen is often comparable to fresh. Most "fresh" fish has been previously frozen; high-quality flash frozen fillets retain superior texture if thawed correctly in the refrigerator overnight.
How to ensure the Mahi Mahi fillets release easily from the hot pan?
Ensure the pan is hot enough and wait patiently for the crust to form. The fish must achieve a deep golden sear before you attempt to turn it; otherwise, the proteins will stick.
What oil is best for achieving the high heat sear needed for this recipe?
Use avocado oil or grapeseed oil. These oils have a high smoke point, which allows you to safely reach the searing temperature without the fat breaking down and burning before the fish crusts.
Is it true that I must rinse the fish before seasoning to clean it?
No, rinsing fish under tap water is discouraged. Rinsing spreads bacteria around the sink area and adds surface moisture, which actively prevents a proper sear.
How to prevent the garlic butter sauce from breaking or becoming oily?
Remove the pan from the heat before whisking in the cold butter cubes. If you add cold butter while the liquid is boiling, the emulsion will separate, unlike when you use a gentle incorporation method like in our Garlic Butter Cream recipe.
What is the secret to getting a restaurant quality flaky texture?
Pull the fish from the heat just before it reaches 65°C. Apply the carryover cooking principle: remove it from the pan when the center is opaque but still slightly translucent, letting residual heat finish the cook for perfect flakiness.
What can I serve with the Lemon Garlic Mahi Mahi for a complete meal?
Serve over rice or with light, starchy vegetables. This recipe pairs wonderfully with a side that can absorb the bright sauce, such as roasted asparagus or, for a richer experience, try a side of Crawfish Julie Sauce recipe served lightly under the fillet.
Mahi Mahi Lemon Garlic Recipe
Ingredients:
Instructions:
Nutrition Facts:
| Calories | 264 kcal |
|---|---|
| Protein | 31.6 g |
| Fat | 13.2 g |
| Carbs | 1.8 g |
| Fiber | 0.3 g |
| Sugar | 0.5 g |
| Sodium | 512 mg |
