Baked Tilapia Recipe with Lemon: Garlic Butter Crust
- Time: Active 10 minutes, Passive 12 minutes, Total 22 minutes
- Flavor/Texture Hook: Flaky, citrus bright fillets with a velvety garlic butter finish
- Perfect for: Busy weeknights when you need a high protein, low carb meal in under 25 minutes
- Perfect Baked Tilapia Recipe with Lemon
- Why This Simple Method Works
- Essential Ingredient Science Analysis
- Fresh Shopping List Components
- Required Kitchen Tool Inventory
- Detailed Step By Step Guide
- Pro Troubleshooting and Common Pitfalls
- Scaling Your Serving Sizes
- Flavorful Recipe Variations
- Debunking Common Kitchen Myths
- Storage and Leftover Management
- Perfect Side Dish Pairings
- Recipe FAQs
- 📝 Recipe Card
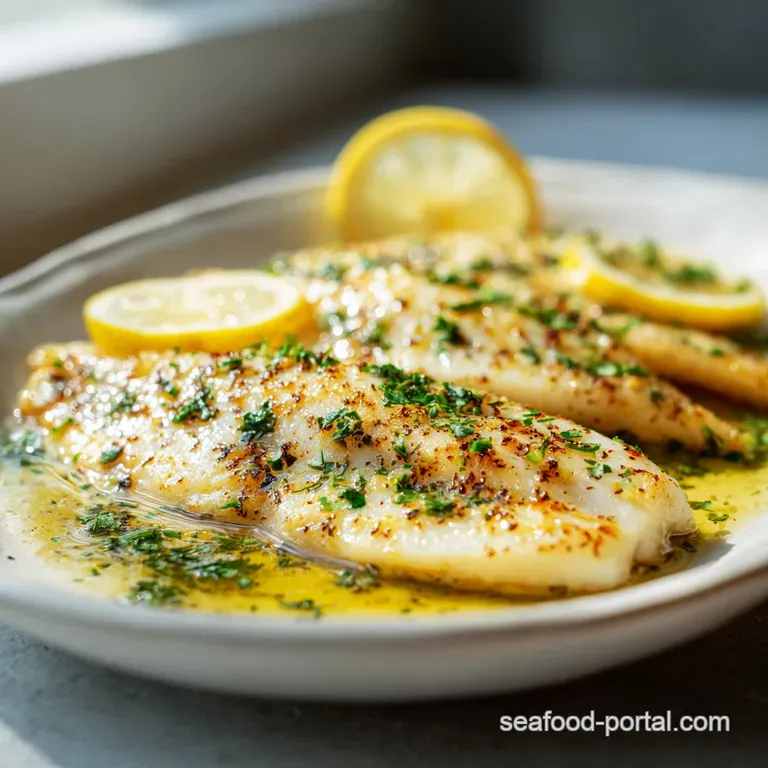
Perfect Baked Tilapia Recipe with Lemon
The moment you pull that baking sheet from the oven, your kitchen fills with a sharp, bright citrus spray and the warm, earthy scent of blooming garlic. You might have heard people say tilapia is a "junk fish" or completely flavorless, but I am here to tell you that is a total myth.
Tilapia is actually the ultimate culinary blank canvas. Because it is so lean and mild, it absorbs every single drop of that garlic butter emulsion we are going to drizzle over it. Forget the soggy, bland fish you have had in the past. We are going to treat these fillets with the respect they deserve.
Discover our incredible Baked Tilapia Recipe with Lemon and Garlic for a simple yet unforgettable meal. The first time I made this, I made the mistake of not drying the fish properly, and it basically steamed in its own juices. It was a watery mess.
Since then, I have learned the secret is all in the moisture control and the over high heat blast. We are talking 200°C of pure heat that creates golden edges while keeping the center tender and flaky. It is the kind of meal that feels fancy but takes less time than ordering a pizza.
When you slide the fillets into the oven, listen for that very faint, initial sizzle as the butter hits the parchment. About six minutes in, the aroma shifts from raw garlic to a sweet, toasted scent that lets you know the magic is happening. This isn't just a quick dinner.
It is a lesson in how three or four basic ingredients, when handled correctly, can create something truly special. You'll see exactly what I mean once you take that first bite of the citrus soaked, flaky goodness.
Why This Simple Method Works
Most people treat fish like chicken, cooking it low and slow, but that is exactly how you end up with rubbery seafood. Tilapia has very little connective tissue, so it needs a fast, aggressive heat to cook through before the moisture has a chance to evaporate.
By using a 200°C oven, we are ensuring the exterior proteins set quickly, which traps the internal juices. This is how you get that "shatter on-the fork" texture rather than a mushy one.
- Emulsification Stability: Mixing melted butter with lemon juice and zest creates a thick sauce that clings to the fish rather than sliding off onto the pan.
- Thermal Velocity: The high 200°C temperature forces heat into the center of the 6 oz fillets rapidly, finishing the cook in exactly 12 minutes.
- Acidic Denaturation: The lemon juice begins breaking down the surface proteins before the heat even hits, ensuring a silky mouthfeel.
- Surface Tension: Patting the fish dry allows the fats to bond directly with the flesh, preventing a layer of steam from forming between the fish and the sauce.
If you are looking for a different approach to this fish, you might enjoy my lemon caper sauce recipe which uses a stovetop technique. However, for sheer ease and consistent results, this oven baked method is the gold standard for home cooks.
| Thickness | Internal Temp | Rest Time | Visual Cue |
|---|---|---|---|
| 1.5 cm | 63°C (145°F) | 2 minutes | Opaque and flakes easily |
| 2 cm | 63°C (145°F) | 3 minutes | Center loses translucency |
| 2.5 cm | 63°C (145°F) | 3 minutes | Edges start to curl golden |
The transition from translucent to opaque is your primary visual signal. In a 200°C oven, this happens remarkably fast, so keep an eye on the clock starting at the 10 minute mark.
Essential Ingredient Science Analysis
Understanding what each component does helps you become a more intuitive cook. We aren't just throwing things in a bowl. We are building a flavor profile that balances fat, acid, and aromatics.
Each ingredient in this Baked Tilapia Recipe with Lemon serves a specific structural or flavor based purpose that ensures the fish doesn't just taste good, but feels right on the tongue.
| Ingredient | Science Role | Pro Secret |
|---|---|---|
| Tilapia Fillets | Lean Protein | Use 6 oz fillets for even cooking across the tray. |
| Unsalted Butter | Fat Carrier | Melt it just until liquid; too hot and it breaks the emulsion. |
| Fresh Lemon | Acid/Brightener | Zest before juicing to release essential oils for aroma. |
| Minced Garlic | Aromatic Base | Mince finely so it melts into the butter sauce. |
The butter provides the "velvety" texture we are after. Without it, the fish would feel dry and astringent from the lemon. The fat coats the tongue, allowing the garlic and paprika flavors to linger longer. This is why we don't use low-fat substitutes here.
You need that fat to carry the fat soluble compounds in the garlic and red pepper flakes.
Fresh Shopping List Components
When you are at the store, look for fillets that are uniform in thickness. This is the biggest trick to making sure the whole tray is done at the same time. If you have one thin fillet and one thick one, the thin one will be overcooked by the time the thick one is safe to eat. Go for the 6 oz portions if possible.
- 4 Tilapia fillets (6 oz each): Look for firm, pinkish white flesh. Why this? They are the perfect size for a 12 minute bake.
- 1 tbsp Extra virgin olive oil: Use a high-quality oil for the base layer. Why this? Prevents sticking and adds a peppery undertone.
- 0.5 tsp Sea salt: Flaky sea salt provides a better "crunch" than table salt.
- 0.25 tsp Cracked black pepper: Freshly cracked provides a much stronger floral aroma.
- 3 tbsp Unsalted butter: This allows you to control the salt level perfectly.
- 3 cloves Garlic: Use fresh cloves, not the jarred stuff which can taste metallic.
- 1 large Lemon: You need both the zest and the juice for full impact.
- 0.5 tsp Paprika: Provides a smoky depth and that beautiful golden color.
- 0.25 tsp Red pepper flakes: Adds a tiny hum of heat without being spicy.
- 2 tbsp Fresh parsley: Finely chopped for a grassy, fresh finish.
- 1 Lemon (extra): Sliced into rounds for a stunning presentation.
| Original Ingredient | Substitute | Why It Works |
|---|---|---|
| Unsalted Butter | Ghee | Higher smoke point and adds a nutty, toasted flavor. |
| Tilapia Fillets | Cod or Haddock | Similar white fish texture. Note: May require 2-3 extra minutes. |
| Sea Salt | Kosher Salt | Similar clean taste. Use 1.5x the volume if using Diamond Crystal. |
I always recommend sticking with fresh lemon if you can. The bottled juice lacks the volatile oils found in the skin, which is where that incredible "fresh from the kitchen" smell actually comes from. If you're out of lemons, a lime can work in a pinch, but the flavor profile will shift toward a more tropical vibe.
Required Kitchen Tool Inventory
You don't need a professional kitchen to pull this off, but having a few specific items will make your life much easier. The goal is to maximize the surface area for the fish so it roasts rather than steams.
- Rimmed Baking Sheet: A large one allows for the 2 inch spacing required between fillets.
- Parchment Paper: This is non negotiable for easy cleanup and preventing the delicate skin from sticking.
- Small Microwave Safe Bowl: For whisking together your butter emulsion.
- Microplane or Zester: To get that fine, aromatic lemon zest without the bitter white pith.
- Digital Meat Thermometer: The only way to truly know when you have hit that 63°C (145°F) sweet spot.
| Method | Time | Texture | Best For |
|---|---|---|---|
| Oven Bake | 12 mins | Flaky and tender | Hands off meal prep |
| Stovetop | 8 mins | Crispy exterior | Small batches (1-2 fillets) |
| Air Fryer | 10 mins | Very firm/crispy | Maximum crunch |
While the stovetop method is great for getting a sear, the oven bake is superior for feeding a family because you can cook all four fillets at once without crowding a pan. Crowding is the enemy of texture.
Detailed step-by-step Guide
Right then, let's crack on. This process moves fast once the fish is in the oven, so make sure your "mise en place" (everything in its place) is ready before you start.
- Preheat the oven. Set it to 200°C (400°F) and line your rimmed baking sheet with parchment paper. Note: Preheating is vital for that immediate hit of heat.
- Dry the tilapia. Pat each 6 oz fillet thoroughly dry on both sides with paper towels. Do this until the paper towel comes away dry.
- Position the fish. Place the fillets on the tray, leaving at least 2 inches of space between them. Note: Space allows hot air to circulate and prevents steaming.
- Create the emulsion. In a small bowl, whisk together the 3 tbsp melted butter, 3 minced garlic cloves, lemon juice, lemon zest, paprika, and red pepper flakes. Whisk until it looks slightly thickened and opaque.
- Season the base. Sprinkle 0.5 tsp sea salt and 0.25 tsp black pepper evenly over the fillets.
- Apply the sauce. Spoon the garlic butter mixture generously over each fillet, coating the entire surface.
- Add the citrus. Place one thin lemon slice on top of each fillet. Note: This protects the center of the fish and adds extra moisture.
- Bake the fish. Place the tray on the center rack and bake for 10 to 12 minutes. Bake until the fish is opaque and the edges look golden.
- Check for doneness. Use a thermometer to ensure the thickest part reaches 63°C (145°F).
- Finish and garnish. Remove from the oven and immediately sprinkle with the fresh parsley. Wait 2 minutes before serving to let the juices settle.
When you pull the tray out, you should see the butter bubbling around the edges of the fish. That "sizzle" is a sign that the fats have properly rendered and the garlic has softened into a sweet paste. The parsley should be added last so its bright green color doesn't dull in the heat of the oven.
Pro Troubleshooting and Common Pitfalls
Even simple recipes have their traps. I have seen perfectly good fish ruined because of a few small oversights. The most common issue is "weeping" fish, where a puddle of water forms on the tray.
This is almost always due to not drying the fillets enough or using frozen fish that hasn't been properly thawed and drained.
Why Your Fish Is Mushy
If your tilapia feels soft and breaks apart into a paste rather than clean flakes, it is likely overcooked or was cooked in too much moisture. When fish stays in the oven too long, the protein fibers contract so tightly they squeeze out all their internal liquid, leaving the meat mushy.
Stick to the 12 minute rule at 200°C for a 6 oz fillet.
Why Your Garlic Tastes Bitter
Garlic turns bitter if it burns. If you notice your garlic bits are dark brown or black, your oven might be running hot, or you minced the garlic too finely into a pulp. Aim for a "mince" rather than a "paste." The butter coating should protect the garlic from the direct heat of the oven.
| Problem | Root Cause | Solution |
|---|---|---|
| Watery tray | Inadequate drying | Pat fish with paper towels 3 times before seasoning. |
| Bland flavor | Lack of salt | Season both sides of the fillet, not just the top. |
| Tough texture | Overcooking | Pull the fish at 60°C; carryover heat will hit 63°C. |
Cooking fish is all about timing. If you feel like you are struggling with the texture, check out these preventive steps.
- ✓ Always thaw frozen fish completely in the fridge overnight before cooking.
- ✓ Never skip the lemon zest; it provides 80% of the citrus flavor.
- ✓ Ensure the oven is fully preheated for at least 15 minutes before the fish goes in.
- ✓ Use a rimmed baking sheet to catch any escaping butter or juices.
- ✓ Don't use "light" butter or margarine; they contain too much water for this recipe.
Scaling Your Serving Sizes
If you are cooking for a crowd or just for yourself, adjusting this recipe is straightforward as long as you follow a few basic rules about pan space and seasoning ratios.
For a single serving, you can use a small toaster oven or a quarter sized baking sheet. Reduce the cook time by about 2 minutes since a smaller oven often has more intense heat circulation.
You can also beat one egg and use half if you were doing a breaded version, but for this butter based sauce, just divide the ingredients by four.
When doubling the recipe to feed 8 people, you must use two separate baking sheets. Do not try to cram 8 fillets onto one tray. If they are touching, they will steam, and you'll lose that beautiful golden edge. Rotate the trays halfway through the 12 minute cook time to ensure both levels cook evenly.
For spices, you don't need to double the red pepper flakes stay at 1.5x the amount to avoid overwhelming the delicate fish.
Chef's Tip: If you're scaling up, melt the butter in a larger batch on the stovetop rather than the microwave. It gives you better control over the temperature and ensures the garlic doesn't "pop" and splatter.
Flavorful Recipe Variations
Once you have mastered the basic Baked Tilapia Recipe with Lemon, you can start playing with the aromatics. This recipe is incredibly forgiving and serves as a fantastic base for different global flavors.
- Mediterranean Twist: Add 1 tbsp of drained capers and 5 chopped Kalamata olives to the butter mixture. The saltiness of the olives pairs beautifully with the lemon.
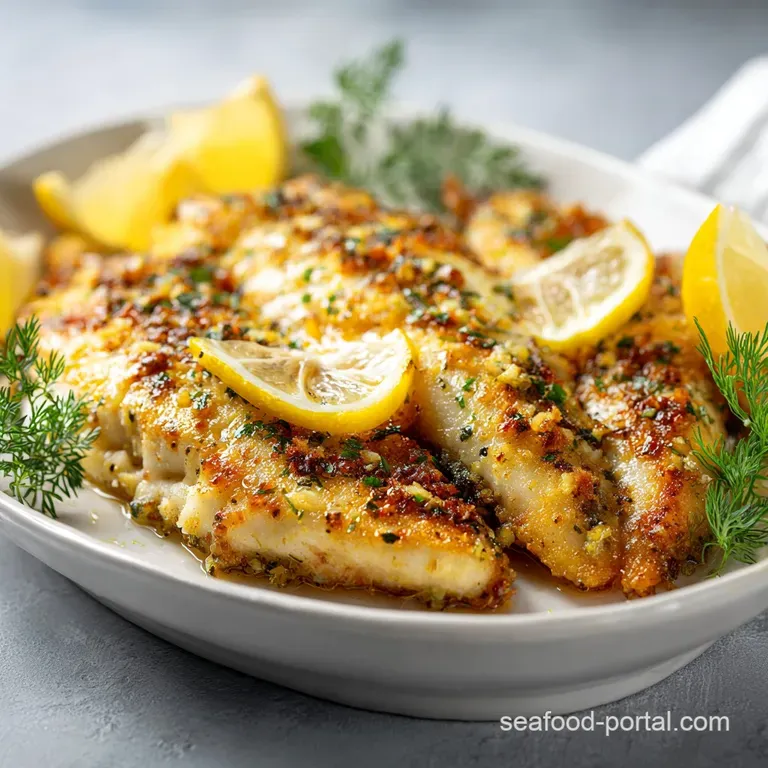
- Smoky Heat: Swap the paprika for Smoked Paprika (Pimentón) and add a pinch of cumin. This gives the fish a deeper, more "grilled" flavor profile.
- Herb Garden: Use fresh dill or tarragon instead of parsley. Dill and lemon are a classic pairing that makes the dish feel very light and spring like.
- dairy-free: Replace the 3 tbsp of butter with a high-quality vegan butter or simply use more olive oil. The texture will be slightly less velvety but still very delicious.
If you are a fan of bold, creamy sauces, you should definitely try my tilapia with everything bagel cream sauce. It takes the basic idea of white fish and turns it into a decadent, savory meal that kids usually love because it masks the "fishiness."
| Variation | Added Ingredient | Impact on Flavor |
|---|---|---|
| Spicy | Cayenne Pepper | Adds a sharp, lingering heat to the back of the throat. |
| Asian Inspired | Ginger & Soy | Replaces the butter richness with a salty, zingy punch. |
| Herbaceous | Fresh Dill | Provides a bright, anise like finish that cuts through fat. |
Debunking Common Kitchen Myths
There is so much misinformation about cooking fish that it's no wonder people are intimidated by it. Let's clear up a few things so you can cook with confidence.
First, "Searing meat or fish seals in the juices." This is scientifically untrue. Moisture loss is a function of temperature and time. Searing creates flavor through a chemical reaction on the surface, but it doesn't create an impermeable barrier.
Our butter emulsion does more to "lock in" moisture by providing a fatty coating than a sear ever would.
Second, "Fish must be cooked until it is bone dry to be safe." The USDA recommends 63°C (145°F), which is still very moist and tender. If you wait until the fish is curling and hard, you have gone too far.
Modern farm raised tilapia is very safe and doesn't require "over killing" it in the oven.
Finally,, "Fresh fish is always better than frozen." In many cases, "fresh" fish at the counter has been sitting there for days. high-quality frozen tilapia is flash frozen on the boat or at the facility, which preserves the cell structure better than a fillet that has been slowly oxidizing in a display case.
Don't be afraid of the freezer aisle!
Storage and Leftover Management
Leftover fish can be tricky, but it doesn't have to go to waste. If you have extra fillets, store them in an airtight glass container in the fridge for up to 2 days. I don't recommend freezing cooked tilapia, as the delicate texture will become grainy and unpleasant upon thawing.
To reheat, avoid the microwave at all costs! It will turn your fish into a rubber eraser. Instead, place the fillet in a cold frying pan with a teaspoon of water and a lid. Heat it over medium low for about 4 minutes. The steam will gently warm the fish without drying it out further.
For a zero waste approach, flaked leftover tilapia is incredible in fish tacos the next day. Just break it up, toss it with some lime juice and cabbage slaw, and you have a whole second meal. You can also stir the flakes into a cold pasta salad with plenty of herbs and a vinaigrette.
The lemon and garlic flavors only deepen overnight, making it a great "cold" lunch option.
Perfect Side Dish Pairings
Because this Baked Tilapia Recipe with Lemon is so light and bright, you want sides that either complement the acidity or provide a hearty contrast. I usually go for a mix of both.
A bed of fluffy jasmine rice or quinoa is the perfect sponge for that extra garlic butter sauce from the tray. If you want to keep things low carb, cauliflower rice or a big pile of sautéed zoodles (zucchini noodles) works wonders. The key is to have something on the plate that can catch the citrus juices.
For vegetables, roasted asparagus or steamed broccoli are my go to choices. You can actually toss the asparagus on the same baking sheet as the fish if you trim them thin enough they'll cook in the same 12 minutes!
A crisp green salad with a simple vinaigrette also helps cut through the richness of the butter sauce. Whatever you choose, keep it simple so the fish remains the star of the show. Trust me, once you master this 22 minute meal, it will become a permanent resident in your weekly rotation.
It's brilliant, it's fast, and it works every single time.

Recipe FAQs
What temperature should I preheat my oven to?
Preheat your oven to 400°F (200°C). Always ensure the oven reaches this temperature fully before putting your baking sheet inside to guarantee even cooking.
Is it true I should skip patting the fish dry to keep it moist?
No, this is a common misconception. Patting each fillet thoroughly dry on both sides is essential for achieving a firm, desirable texture rather than a mushy one.
How to know when the tilapia is fully cooked?
Check that the fish is opaque throughout and reaches an internal temperature of 145°F. The edges will also look slightly golden once the fish is finished baking.
How to store leftovers so they stay edible?
Place the fish in an airtight glass container and refrigerate for up to 2 days. If you enjoyed the velvety finish of our butter based emulsion, you will appreciate how this storage method maintains the moisture of the fish.
How to reheat leftovers without ruining the texture?
Place the fillet in a cold frying pan with a teaspoon of water and a lid. Heat it over medium low for about 4 minutes to warm it gently without turning the fish rubbery.
How to prevent the fish from sticking to the baking sheet?
Line a large rimmed baking sheet with parchment paper or a silicone mat. This creates a reliable non-stick surface that makes cleanup much faster after baking.
How to prepare the garlic butter mixture correctly?
Whisk the melted butter, minced garlic, lemon juice, lemon zest, paprika, and red pepper flakes in a small microwave safe bowl. Continue whisking until the mixture thickens slightly before spooning it over your fillets.
Lemon Garlic Baked Tilapia

Ingredients:
Instructions:
Nutrition Facts:
| Calories | 281 kcal |
|---|---|
| Protein | 34.2 g |
| Fat | 14.8 g |
| Carbs | 3.1 g |
| Fiber | 0.6 g |
| Sugar | 0.8 g |
| Sodium | 315 mg |
