How to Cook Scallops Perfectly
- Time: Active 15 minutes, Passive 5 minutes, Total 20 minutes
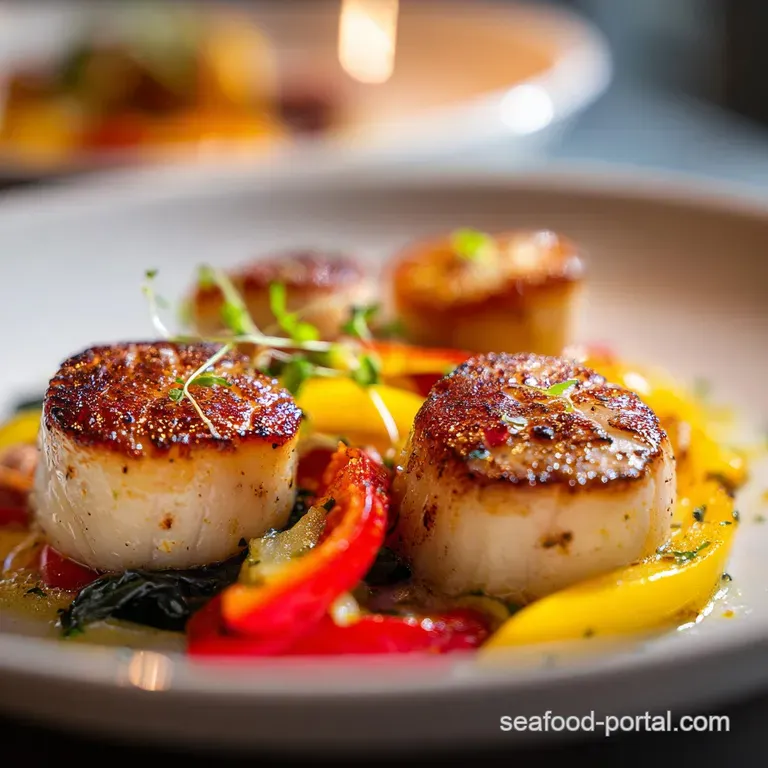
- Flavor/Texture Hook: A shatter crisp golden exterior with a velvety, melt in-your mouth interior
- Perfect for: Date nights, impressive dinner parties, or a high protein weeknight treat
- Essential Timing and Temperature Specs for the Best Scallops
- A Curated Shopping List for Your Next Seafood Dinner
- The Professional Kitchen Tools You Actually Need at Home
- Step by Step Guide to Seared Perfection Every Time
- How to Fix Common Scallop Mistakes and Save Dinner
- Creative Flavor Variations for Every Type of Seafood Lover
- Best Methods to Store and Reheat Your Leftover Scallops
- Gorgeous Presentation Ideas to Impress Your Dinner Guests
- Recipe FAQs
- 📝 Recipe Card
The first time I tried to tackle this dish, I made a mess of it. I bought the wrong kind of scallops, the pan wasn't hot enough, and I ended up with what looked like boiled rubber erasers. I remember standing over the stove, watching this weird white liquid pool in the pan, wondering why they wouldn't brown.
It was frustrating, but it led me down a rabbit hole of kitchen science that changed everything.
Now, that sizzle when the scallop hits the oil is music to my ears. There’s something so satisfying about flipping one over to reveal a deep, mahogany crust that contrasts against the pearly white meat. It’s all about the balance of sweet seafood and savory, nutty butter.
We’re going to get that specific contrast of textures the "shatter" of the sear and the "silk" of the center without any of the stress.
You don't need a culinary degree to pull this off, just a few specific tricks that most recipes gloss over. We’re moving past the "boiled" stage and into the land of restaurant quality results.
I’ve made all the mistakes so you don't have to, and trust me, once you nail this, you’ll never want to order them out again. It's about confidence, high heat, and a very dry towel.
The Physics of the Crust
Surface moisture is the enemy of the sear because it creates a layer of steam that lifts the protein away from the heat. By removing every drop of water, we allow the Maillard reaction to occur immediately, turning natural sugars into a savory, brown crust.
Chef Tip: For the most intense crust, place your scallops on a paper towel lined plate in the fridge, uncovered, for 1 hour before cooking. This "air dries" the surface perfectly.
Essential Timing and Temperature Specs for the Best Scallops
Getting the timing right is the difference between a tender morsel and a piece of tire tread. Scallops are mostly protein and water, which means they tighten up the second they're overcooked.
We want to aim for a specific window where the internal temperature reaches that sweet spot while the outside is still beautifully browned.
| Method | Cook Time | Internal Temp | Texture Goal |
|---|---|---|---|
| Classic Sear | 2 mins per side | 120°F / 50°C | Golden crust, opaque center |
| Butter Baste | 1.5 mins + 1 min baste | 125°F / 52°C | Richer flavor, softer edges |
| Quick Sear (High Heat) | 90 secs per side | 115°F / 46°C | Rare center, extreme crunch |
If you are just starting out, the classic sear is your best bet. It gives you enough time to manage the pan without feeling like everything is moving too fast. Remember that the scallops will continue to cook slightly once you pull them off the heat, so pulling them at 120°F (50°C) is the gold standard.
Choosing the right approach depends on how much "funk" you want in your dish. The butter baste adds a layer of complexity with garlic and herbs, while the quick sear is all about the pure, clean flavor of the sea. I usually go for the butter baste when I'm serving them with a simple pasta, like my favorite How to Make recipe.
A Curated Shopping List for Your Next Seafood Dinner
The quality of your ingredients is 90% of the battle here. If you start with "wet" scallops (those treated with STPP, a preservative that makes them soak up water), you've already lost the battle for a good crust. Always look for "dry packed" sea scallops.
They should look creamy or slightly pinkish, not stark white and sitting in a puddle of milky liquid.
- 1 lb dry packed sea scallops (U-10 or U-12 size): These are large enough to get a good sear without overcooking the middle. Why this? Larger scallops provide the best texture contrast.
- 2 tbsp grapeseed or avocado oil: You need a high smoke point so the oil doesn't burn before the scallop browns. Why this? Prevents bitter, burnt flavors at high heat.
- 2 tbsp unsalted butter: This is for the "finish" and provides the nutty, toasted flavor. Why this? Unsalted allows you to control the seasoning.
- 3 cloves garlic, smashed: These perfume the butter during the basting phase.
- 1 sprig fresh thyme or rosemary: Adds a woodsy aroma that cuts through the richness.
- 1/2 lemon: A bright squeeze of acid at the end brings everything to life.
- 0.5 tsp kosher salt: Essential for drawing out flavor.
- 0.25 tsp fresh cracked black pepper: Adds a subtle floral heat.
| Component | Science Role | Pro Secret |
|---|---|---|
| Scallops | Protein structure | Use "dry pack" only to avoid the dreaded white foam. |
| Grapeseed Oil | Heat conductor | Its high smoke point allows for a "screaming hot" pan. |
| Unsalted Butter | Flavor emulsifier | Add it only at the end to prevent the milk solids from burning. |
When you're at the fish counter, don't be afraid to ask to smell them. They should smell like the ocean fresh and salty not fishy. If the person behind the counter tells you they don't have dry scallops, honestly, it's better to change your dinner plans and make something else.
The "wet" ones just won't give you the results you're looking for.
The Professional Kitchen Tools You Actually Need at Home
You don't need a cupboard full of gadgets to cook scallops, but a couple of items are non negotiable. The most important is your pan. A heavy bottomed stainless steel or cast iron skillet is your best friend.
These materials hold onto heat, so when the cold scallops hit the surface, the temperature doesn't drop significantly. Non stick pans are generally a bad idea here because they can't safely handle the high heat needed for a true sear.
- Cast iron or stainless steel skillet: Essential for heat retention and crust development.
- Fish spatula: Thin and flexible, it slides under the delicate crust without tearing it.
- Paper towels: Lots of them. You’ll use more than you think to get the scallops bone dry.
- Digital thermometer: To hit that 120°F (50°C) mark precisely.
Chef Tip: Freeze your butter for 10 minutes before you start cooking. When you drop cold butter into a hot pan at the end, it foams up more aggressively, creating a better emulsion for basting.
step-by-step Guide to Seared Perfection Every Time

- Prep the protein. Remove the small, tough side muscle from each scallop (it just peels off) and pat them dry with paper towels on all sides. Note: That little muscle gets very chewy when cooked.
- Seasoning. Sprinkle the kosher salt and black pepper onto the scallops only right before they go into the pan. Wait for the sizzle.
- Heat the pan. Add the 2 tbsp oil to your skillet and heat over medium high until the oil is shimmering and just starting to smoke.
- The drop. Carefully place the scallops in the pan, starting from the outside and moving in. Hear the aggressive sizzle.
- Don't touch. Leave them alone for 2 full minutes. If you try to move them and they stick, they aren't ready to flip yet. Wait for a golden ring at the base.
- The flip. Turn each scallop over with your fish spatula. The crust should be a deep, even brown.
- The butter bath. Add the 2 tbsp butter, smashed garlic, and thyme to the pan. Listen for the butter foaming.
- Baste. Tilt the pan slightly and use a large spoon to pour the foaming butter over the scallops for 1 minute.
- The finish. Remove the pan from the heat and squeeze the lemon juice over the top.
- Rest. Transfer the scallops to a warm plate and let them sit for 2 minutes before serving.
The "don't touch" phase is where most people fail. It’s tempting to peek, but every time you lift them, you lose heat and interrupt the crust formation. Trust the process. If you want to see a slightly different technique for a party setting, our Guide recipe is a great alternative for bacon wrapped versions.
How to Fix Common Scallop Mistakes and Save Dinner
Even with the best intentions, things can go sideways. The most common issue is the "milky puddle," which happens when there's too much moisture in the pan. If you see liquid pooling, your pan wasn't hot enough or the scallops were "wet" packed.
Why Your Scallops Are Rubbery
If your scallops feel like bouncy balls, they’ve gone past the 130°F (54°C) mark. Scallops are mostly muscle fiber, and at high temperatures, those fibers contract and squeeze out all the juice.
This usually happens if the pan is too crowded, causing the temperature to drop and the scallops to steam instead of sear.
Why Your Scallops Stuck
Sticking is usually a sign of impatience. A properly seared protein will "release" itself from the pan once the crust has formed. If you use a stainless steel pan, this is especially true. If you force it, you'll leave that beautiful brown crust stuck to the bottom of the skillet.
| Problem | Root Cause | Solution |
|---|---|---|
| Pale and soggy | Pan temperature too low | Heat oil until it wisps smoke before adding seafood. |
| Burnt outside, raw inside | Heat too high or scallops too cold | Temper scallops at room temp for 15 mins before cooking. |
| Tough and chewy | Overcooking past 130°F | Use a thermometer and pull at 120°F for carryover. |
Common Mistakes Checklist
- ✓ Didn't remove the side muscle (it stays tough even when cooked).
- ✓ Using a non stick pan (prevents the deep Maillard crust).
- ✓ Crowding the pan (this lowers the temp and causes steaming).
- ✓ Seasoning too early (salt draws out moisture, making them wet again).
- ✓ Moving them around too much (let the crust build undisturbed).
Creative Flavor Variations for Every Type of Seafood Lover
Once you have the basic technique down, you can start playing with the flavor profile. While garlic and thyme are classic, scallops are like a blank canvas that loves bold, bright, or even spicy companions.
Frozen Scallops Recipe Hack
If you can't find fresh, frozen scallops can work if you thaw them properly. Place them in the fridge for 24 hours in a colander over a bowl. This allows the melting ice to drain away so they don't sit in liquid.
You’ll need to be extra diligent with the paper towels, but you can still get a respectable sear.
Miso Maple Glaze
For a savory sweet contrast, whisk together 1 tbsp white miso and 1 tsp maple syrup. Brush this onto the scallops only in the last 30 seconds of cooking. The sugars will caramelize quickly, so watch them like a hawk to prevent burning. This variation pairs beautifully with a Pan Seared Scallops recipe setup.
Chili Lime Kick
Instead of thyme and lemon, use a pinch of red chili flakes in the butter and finish with a heavy squeeze of lime zest and juice. It transforms the dish into something bright and zingy that's great for summer.
- If you want a crunchier crust: Dust one side of the scallop in a tiny bit of flour or cornstarch before searing.
- If you want it lighter: Skip the butter basting and use a high-quality extra virgin olive oil to finish after the pan is off the heat.
- If you want a smoky vibe: Use a tiny pinch of smoked paprika in your salt and pepper mix.
Best Methods to Store and Reheat Your Leftover Scallops
I’ll be honest with you: scallops are best eaten within minutes of leaving the pan. However, if you have leftovers, you can keep them in an airtight container in the fridge for up to 2 days. Don't expect that crust to stay crispy, though; the moisture in the meat will eventually soften it.
To reheat, avoid the microwave at all costs it will turn them into rubber instantly. Instead, heat a skillet over medium heat with a tiny bit of butter. Toss the scallops in just long enough to warm through, about 1 minute per side.
They won't be as good as the first time, but they’ll still be better than most things!
Zero Waste Tip: If your scallops came with the "roe" or "coral" (that orange crescent shaped part), don't throw it away! While some people find the texture odd on its own, it’s packed with concentrated scallop flavor.
Sauté it and blend it into a seafood butter or add it to a stock for a massive flavor boost.
Gorgeous Presentation Ideas to Impress Your Dinner Guests
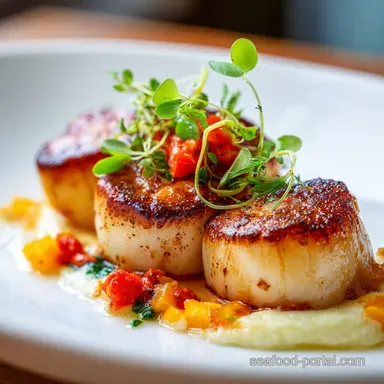
Presentation is key with a luxury ingredient like this. Since we worked so hard on that crust, we want it to be the star of the plate. I like to serve them on a light colored sauce like a parsnip puree or a lemon butter sauce so the dark golden brown really pops.
- The "Offset" Look: Place 3 scallops in a gentle curve rather than a straight line.
- Microgreens: A few sprigs of micro cilantro or pea shoots add height and a fresh green contrast.
- Lemon Zest: Grate fresh zest over the top right before serving for a hit of aromatic oils.
- Flaky Salt: A final sprinkle of Maldon salt adds a crunch that echoes the sear.
Right then, you're ready. Just remember: high heat, dry scallops, and don't touch them! You've got this. If you’re looking for a full meal idea, these scallops are incredible when served over a bed of creamy risotto or alongside our Seared Scallops with Lemon Butter recipe. Go grab your skillet and let's get that perfect sear.

Recipe FAQs
What is the best method of cooking scallops?
Pan-searing in a hot skillet is the best method. This technique delivers the necessary high heat to achieve a deep, golden brown crust while keeping the interior tender and sweet.
What not to do when cooking scallops?
Do not crowd the pan or move them before they naturally release. Crowding causes steaming instead of searing, and moving them interrupts the Maillard reaction necessary for crust development.
Is it better to saute scallops in butter or oil?
Start with a high smoke point oil, then finish with butter. Use oil like grapeseed initially for a searing temperature, then add butter at the end to baste for flavor without burning the milk solids.
How to ensure my scallops are perfectly cooked through without being rubbery?
Pull the scallops from the heat when the internal temperature hits 120°F (50°C). Because they continue cooking off the heat, pulling them slightly under ensures the residual warmth brings them to the ideal texture.
Are scallops good for diabetics?
Yes, scallops are generally a good, lean protein choice for diabetics. They are low in carbohydrates and offer essential nutrients, but be mindful of sugary glazes; stick to the lemon, salt, and pepper finish.
Why do my scallops leak white liquid and won't brown?
This happens because the scallops are wet or the pan temperature is too low. You must pat the scallops completely dry; the moisture creates steam, preventing the surface from reaching the necessary heat for a sear.
How to get the maximum flavor contrast between the crust and the center?
Achieve a screaming hot pan and apply high contrast finishing agents. The extreme heat builds the crust quickly, and finishing with acid (like lemon) balances the rich, nutty flavor from the browned butter you used for basting. If you enjoyed mastering this temperature control, apply the same precision to our How To Cook Trout recipe.
How To Cook Scallops
Ingredients:
Instructions:
Nutrition Facts:
| Calories | 211 kcal |
|---|---|
| Protein | 19.9 g |
| Fat | 13.3 g |
| Carbs | 2.7 g |
| Fiber | 0.1 g |
| Sugar | 0.4 g |
| Sodium | 475 mg |
