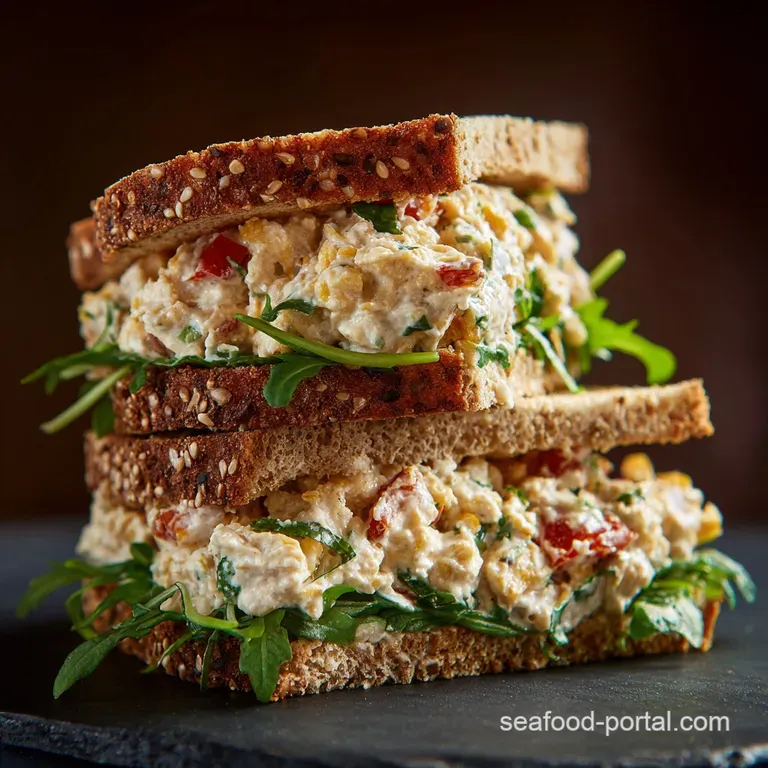
Chickpea Tuna Salad the Best Vegan Sandwich Filler Ready in 15 Minutes
Unlocking the Classic Flavor: Why This Chickpea Tuna Salad Works So Well
Let's be real. When you crave a big, satisfying sandwich, you want that salty, creamy, crunchy texture combo that only a proper ‘salad’ filler provides. Right? But if you’re trying to cut back on seafood, or you just realized you ran out of cans in the pantry (that was me last Tuesday), you need a flawless substitution.
This Easy Chickpea Tuna Salad is that substitution. It’s brilliant.
It’s not just mashed chickpeas mixed with mayo; it's a calculated assault on your memory of the classic deli sandwich. The key is in the texture creating a mash that's chunky enough to bite into but smooth enough to bind perfectly.
We use garbanzo beans because they break down beautifully, mimicking that flaky density of fish. It's the ultimate plant and based tuna salad, ready before your toast is cool.
The Secret Ingredient for That Signature Sea Flavor
Okay, listen up. If you want this vegan tuna salad to really taste like the ocean, you need a touch of umami depth that mayo alone cannot deliver. My biggest tip? Kelp powder.
A tiny half teaspoon of kelp powder or finely crushed, dried nori sheets (the kind you use for sushi) is the game changer. This provides that essential, iodine and rich, slightly savory "sea" background note. You won't taste seaweed, promise. You'll just taste deeply savoury, complete seasoning.
I know it sounds crazy, but this is the difference between a nice chickpea mash and a truly convincing vegetarian tuna lunch. If you skip this, it's still good, but if you include it? You’ve cracked it.
The Magic of Mashing: Achieving the Perfect Texture
We’re aiming for structural integrity, not soup. When making any kind of sandwich salad (egg, chicken, or this Chickpea Tuna Salad), texture is non and negotiable.
Here’s where I went wrong the first time: I threw the whole can of chickpeas into the food processor. Big mistake. Huge. I ended up with a slightly gritty hummus, not a flaky salad. The trick is intentional inconsistency. Use a potato masher, or even just a sturdy fork, and only mash about 75% of the beans.
That remaining 25% should be left whole or just coarsely broken. This variety ensures that when you take a bite, you get the creamy binding from the mashed paste and the satisfying chew from the chunkier bits. That’s how you nail the mouthfeel.
From Pantry to Plate: Ready in 10 Minutes Flat
This recipe is the definition of minimal effort, maximum reward. There is zero cooking required. Provided you have your cans in the pantry and your veggies pre and chopped (or you’re just a fast chopper), you can absolutely pull this together in 10 minutes.
It’s faster than ordering takeout, healthier than grabbing a pre and made supermarket sandwich, and honestly, cheaper than both. This makes it my go and to healthy low and fat salad for days when I’m running on five minutes and a caffeine crash.
Essential Components for Your Plant and Based Salad Masterpiece

Pantry Staples: Everything You Need to Start
The foundation of any great salad is simple, high and quality basics. For this Chickpea Tuna Salad Recipe, start with a good can of chickpeas. I know people love rinsing, but you need to go one step further and pat them aggressively dry with a tea towel. Moisture is the enemy of creamy salad texture.
You also need good quality vegan mayonnaise (or regular mayo, your choice). I swear by a specific brand, but honestly, just use one you truly love the taste of. If your mayo is too sweet or too thin, it will ruin the whole vibe.
Then we layer in the classic tuna flavour boosters: Dijon mustard for pungency and acidity, and a solid dose of salt and pepper.
Tools of the Trade: Minimal Equipment Required
You don't need a stand mixer or immersion blender here. The beauty of this recipe is its simplicity. All you really need is:
- A big bowl (one large enough that you can mash without splashing beans everywhere).
- A potato masher (or a fork, seriously).
- A cutting board and sharp knife for the crunch elements.
That’s it. If you can handle a fork, you’ve got the necessary equipment.
Elevating the Mix: Fresh Add and ins for Crunch and Zest
We talked about texture earlier, and celery is the hero here. It doesn’t just provide crunch; it holds up beautifully in the fridge without wilting too quickly.
- Celery: Finely dice it. We want tiny flecks of crunch evenly distributed.
- Red Onion: You need something sharp to cut through the richness of the mayo. Mince the red onion finely so you get the flavour without giant chunks of raw onion. (If red onion is too much, swap it for milder spring onion.)
- Pickles: Dill pickle relish is my secret weapon. It distributes that briny, vinegary punch better than simple chopped pickles, and the liquid helps wake up the dried spices in the mix.
Related Recipes Worth Trying
- Seared Tuna Sesame Crusted Ahi Steaks with Quick SoyGinger Glaze — Master restaurantquality Seared Tuna in under 30 minutes Our Sesame Crusted Ahi recipe ensures a crispy exterior and silky rare center Learn how to cook...
- Tuna Salad MayonnaiseFree Zesty 15Minute Mediterranean Recipe — Tuna Salad MayonnaiseFree is the vibrant healthy lunch you need This Tuna Salad No Mayo Recipe uses a lemonherb vinaigrette for a fresh balanced and quick...
- Tuna Tataki Easy FlashSeared Tuna Recipe with Homemade Ponzu — Tuna Tataki is an elegant fast appetizer Master this fresh tuna recipe achieving the perfect flashseared crust and buttery raw interior Complete with a...
The Assembly Process: Crafting Your Creamy 'Tuna' Mix
Prepping the Base: Rinsing, Draining, and Initial Mashing
Let's crack on with the hands and on part.
- Drying is Non and Negotiable: First step: drain, rinse, and then take five minutes to truly dry your chickpeas. Lay them on a towel and give them a good rub. Get rid of that starchy water.
- Mash Session: Put the dried chickpeas into your bowl. Use the potato masher until you have a mixture that looks like chunky cottage cheese creamy paste interspersed with whole beans. Don't go overboard, or you'll lose the structure.
- Add the Crunch: Stir in your diced celery, minced red onion, and dill relish.
CRITICAL WARNING: Resist the urge to add the mayo yet. We want those veggies coated and mixed evenly with the mash before we introduce the binder.
Folding in the Flavors: Mixing Wet and Dry Components
Now for the flavor bomb. In a separate small dish, whisk together the vegan mayo (or regular), Dijon, and lemon juice. Add your seasonings: the garlic powder, the salt, pepper, smoked paprika, and crucially, the kelp powder.
Pour that wet, savoury mixture over the dry chickpea base. Use a rubber spatula and gently fold everything together. The goal isn't vigorous stirring; it's coating every component evenly. Once the colour is uniform and everything is bound, stop. Over and mixing leads to mush.
Taste Test and Final Adjustments: Hitting the Perfect Balance
Right then. This is where you, the chef, step in. Take a small spoonful. Does it need more salt? Often, yes. Is it bright enough? A squeeze more lemon juice can really make the flavours sing.
If it feels a little too stiff, use a splash of pickle brine instead of mayo to thin it out slightly without adding more fat.
After you’ve achieved that perfect savoury, salty, creamy, acidic balance, cover it and refrigerate for 30 minutes. I know, waiting is torture, but the chill time allows the kelp powder to hydrate and the red onion to mellow. It’s significantly better chilled. Trust me on this.
Serving Suggestions and Creative Uses Beyond the Sandwich
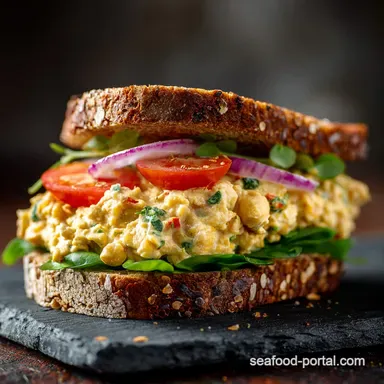
Three Ways to Serve Your Speedy Chickpea Tuna Salad
This vegetarian tuna lunch is far too versatile to be limited to just bread.
- On sturdy, seed and based crackers for a quick high and protein snack.
- Piled high onto half an avocado, drizzled with olive oil and extra black pepper.
- Stuffed into large lettuce cups (like butter lettuce or endive) for a crisp, low and carb appetizer.
Building the Ultimate Lunch Box Filler
If you’re meal prepping for the week, this is your friend. Because we dried the chickpeas so thoroughly, this salad holds up beautifully for 3 4 days.
For a perfect desk lunch, I pack the Chickpea Tuna Salad separately in a small container and pack my bread or crackers on the side. This prevents the bread from going soggy by 10 AM. It tastes fantastic straight from the fridge no reheating necessary.
Make and Ahead Tips and How Long It Keeps Fresh
As I mentioned, this salad is actually better on day two. The spices have fully bloomed, and the celery is still beautifully crisp. Store it in an airtight container in the fridge. It will stay fresh and flavourful for up to 4 days. I wouldn't push it past that, as the celery starts to lose its vibrant crunch.
It does not freeze well, so don't try it.
Addressing Common Texture Issues (Too Dry/Too Wet)
The two most common complaints are that the mixture is either gluey and dry or watery and runny.
- If it’s Too Dry: This usually means you need more binder or acid. Add another tablespoon of mayo and a tiny bit of pickle brine or water. Mix well, starting with liquids one teaspoon at a time.
- If it’s Too Wet: This means you didn’t dry the beans enough, or you used a watery relish. To fix this, stir in a tablespoon of nutritional yeast (it’s great at absorbing moisture without changing the flavour much) or a tablespoon of ground flaxseed meal. Let it sit for 5 minutes, and it should firm up.
Adapting the Recipe for Paleo and Gluten and Free Diets
Good news: this recipe is naturally Gluten and Free , provided you check the ingredients on your specific brand of mayonnaise and Dijon mustard (though most are GF).
For those needing a Low and Fat or High and Protein adjustment, simply swap out the standard full and fat mayonnaise for a low and fat version, or use an equivalent amount of plain, thick Greek yogurt.
Note that yogurt adds an even sharper tang, so you might need to reduce the lemon juice slightly. Paleo requires eliminating beans, so while this specific recipe won't work, you can achieve a similar creamy salad structure by using steamed, cooled cauliflower rice as the base instead of the chickpeas.

Recipe FAQs
I'm looking for a proper savoury flavour. What’s the secret to making this Chickpea Tuna Salad taste like the real deal?
The magic ingredient for that essential marine flavour is kelp powder or crushed nori (seaweed), which provides a salty umami punch that mimics classic seafood notes. Don’t forget the fresh lemon juice and Dijon mustard; they are vital for that signature tangy brightness.
Can I make this a day or two in advance for my lunchtime meal prep, and how long will it keep in the fridge?
Absolutely, prepping ahead is highly encouraged! Store the salad in an airtight container in the fridge, where it will keep brilliantly for 3 to 4 days, with the spices and seasoning often melding even better overnight.
My salad ended up a bit too runny or mushy. What did I do wrong, and how do I fix it?
Runniness usually occurs if the chickpeas weren't thoroughly patted dry after rinsing, as excess moisture dilutes the binder; ensure you only use a masher or fork, never a food processor, to maintain crucial texture.
For a quick remedy, stir in a spoonful of nutritional yeast or even a few fine breadcrumbs to absorb the excess liquid.
I’m trying to cut back on fats can I swap out the mayonnaise for something lighter or entirely vegan?
Certainly! You can easily swap traditional mayo for a high-quality vegan mayonnaise, Greek yogurt, or even a blend of tahini and olive oil for a different depth of flavour, provided your substitute is thick enough to bind the chunky ingredients.
Besides a simple sarnie, what are some creative ways to serve this crunchy Chickpea Salad?
This filling is incredibly versatile; try loading a generous portion onto a warm, fluffy jacket potato (a classic comfort meal), stuffing it into large lettuce cups for a low-carb alternative, or serving it as a dip with crisp cucumber and carrot sticks.
Easy Vegan Chickpea Tuna Salad
Ingredients:
Instructions:
Nutrition Facts:
| Calories | 325 kcal |
|---|---|
| Fat | 22.5 g |
| Fiber | 7 g |
