Easy Shrimp Recipe with Garlic and Butter
- Time: Active 5 mins, Passive 5 mins, Total 10 mins
- Flavor/Texture Hook: Zesty, garlicky, and snappy crisp
- Perfect for: Busy weeknights or an impressive date night
- Easy Shrimp Recipe with Garlic and Butter
- Why This Specific Method Works
- Critical Cooking Temps and Times
- Pantry Staples and Ingredient Swaps
- Kitchen Tools for Better Searing
- Simple Instructions for Sizzling Shrimp
- Solving Sogginess and Bitter Garlic
- Variations for Pasta and Cream
- The Myth of High Heat Searing
- Storing Leftovers and Using Scraps
- Perfect Pairings for Your Meal
- Recipe FAQs
- 📝 Recipe Card
Easy Shrimp Recipe with Garlic and Butter
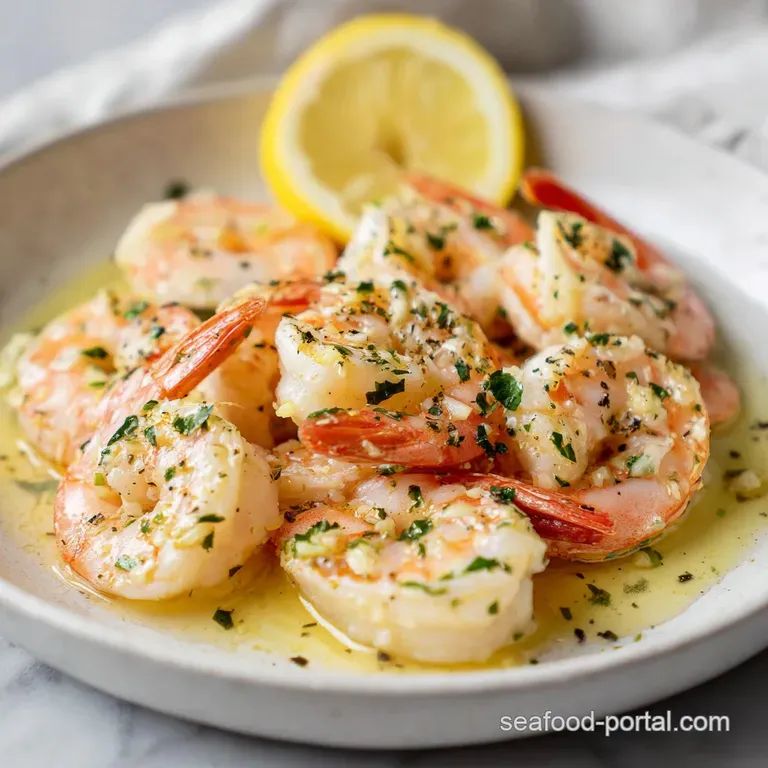
Picture this: it is 7:00 PM on a Tuesday, you are exhausted, and the fridge looks depressing. Then you remember that bag of shrimp in the freezer. Within ten minutes, your kitchen smells like a high end coastal bistro, with that unmistakable sizzle of seafood hitting a hot pan and the heady, intoxicating aroma of garlic swirling in golden butter.
This easy shrimp recipe with garlic and butter is a guaranteed weeknight winner because it turns basic staples into something that feels like a total indulgence.
I used to struggle with shrimp coming out either rubbery or sitting in a pool of grey liquid. It was frustrating. I wanted that "pop" when you bite into them and a sauce that actually clings to the meat instead of sliding off.
After a lot of trial and error in my own kitchen, I realized the secret isn't fancy equipment it is all about how you treat the protein before it even touches the heat.
We are going for big flavors here: sharp garlic, a hint of chili heat, and a bright splash of lemon to cut through the richness. You'll get those slightly charred, caramelized edges while the inside stays juicy.
It’s the kind of meal you eat straight out of the pan with a piece of crusty bread because waiting for a plate feels like far too much effort.
Why This Specific Method Works
Achieving the right texture in seafood is more about chemistry than just heat. Most people think "quick" means "rushed," but these specific science backed steps ensure your simple garlic shrimp recipe actually succeeds every single time.
- The Alkaline Shift: Adding a tiny pinch of baking soda raises the pH level of the shrimp, which helps the exterior brown faster while keeping the inside plump and moisture rich.
- Carryover Heat Management: Shrimp continue to cook for nearly a minute after leaving the pan, so pulling them when they look "just" done prevents that dreaded rubbery texture.
- Emulsification Stability: Using a splash of wine and finishing with cold butter creates a glossy sauce that won't break into a greasy mess.
| Thickness | Internal Temp | Rest Time | Visual Cue |
|---|---|---|---|
| 1.5 cm (Large) | 63°C (145°F) | 2 mins | Opaque and "C" shaped |
| 2 cm (Jumbo) | 63°C (145°F) | 3 mins | Firm to touch, no translucency |
| 1 cm (Medium) | 63°C (145°F) | 1 min | Pink exterior, white center |
The key to that restaurant style finish is knowing exactly when to stop. If your shrimp curl into a tight "O" shape, they are overcooked. You want a gentle "C" shape think "C" for cooked and "O" for over cooked. It’s a small detail that makes a massive difference in how the dish feels in your mouth.
The Chemistry of the Shrimp Snap
The secret to these Easy Shrimp Recipe with Garlic and Butter is the dry brine. By tossing the shrimp with salt and baking soda for just a few minutes, you alter the protein structure, allowing the muscle fibers to retain more water during the searing process.
Critical Cooking Temps and Times
To get this quick and easy garlic butter shrimp recipe right, you need to be precise with your heat. Shrimp are unforgiving; thirty seconds too long and they turn into pencil erasers.
I always tell my friends to have everything prepped and standing by the stove because once you start, you can't walk away to find a spatula.
| Ingredient | Science Role | Pro Secret |
|---|---|---|
| Baking Soda | pH Modifier | Encourages the Maillard reaction for better browning in less time. |
| Unsalted Butter | Fat & Flavor | Using unsalted lets you control the seasoning perfectly without hidden saltiness. |
| Dry White Wine | Solvent | Deglazes the pan and dissolves the tasty browned bits into the sauce. |
| Garlic | Aromatics | Slicing or mincing fresh (never jarred) provides the most pungent flavor profile. |
Using fresh garlic is non negotiable here. That pre minced stuff in the jar has a weird, metallic aftertaste that gets amplified when it hits the butter. If you're short on time, use a garlic press, but whatever you do, keep it fresh.
The oils in freshly crushed garlic are what create that velvety, aromatic base we're after.
Pantry Staples and Ingredient Swaps
You probably have most of these ingredients in your kitchen right now. This recipe is designed to be accessible, but using high-quality fats makes a noticeable difference. I usually reach for a high fat European style butter if I’m feeling fancy, as it creates a much richer sauce.
- 1.5 lbs Large Shrimp (16/20 count): Peeled and deveined, but leave the tails on for better presentation and flavor. Why this? Larger shrimp are harder to overcook and stay much juicier than smaller varieties.
- 1/4 tsp Baking soda: This is the secret weapon for texture. Why this? It changes the surface pH to ensure a crisp, snappy exterior every time.
- 1/2 tsp Kosher salt: For seasoning and drawing out just enough moisture for the brine.
- 1 tbsp Extra virgin olive oil: A high-quality oil like Lucini helps prevent the butter from burning too quickly.
- 4 tbsp Unsalted butter: Divided into two portions for different stages of cooking.
- 6 cloves Fresh garlic: Minced finely so it distributes evenly through the sauce.
- 1/2 tsp Crushed red pepper flakes: Adds a gentle background warmth without being "spicy."
- 2 tbsp Dry white wine: A Sauvignon Blanc or Pinot Grigio works best for acidity.
- 1 tbsp Fresh lemon juice: To brighten the heavy fats and wake up the palate.
- 2 tbsp Fresh Italian parsley: Finely chopped for a hit of color and herbal freshness.
| Original Ingredient | Substitute | Why It Works |
|---|---|---|
| Dry White Wine | Chicken Stock + Lemon | Provides acidity and depth without the alcohol content. |
| Unsalted Butter | Ghee (Clarified Butter) | Higher smoke point but keeps the nutty, rich dairy flavor. |
| Kosher Salt | Sea Salt | Similar clean saltiness. Note: Use slightly less if using fine table salt. |
If you happen to have leftovers, they actually work surprisingly well cold over a salad the next day. But if you're planning a bigger meal, this shrimp pairs beautifully with the flavors in a Seafood Boil with recipe, especially if you're hosting a crowd and want a variety of textures.
Kitchen Tools for Better Searing
You don't need a professional kitchen, but the right pan changes the game. I personally swear by a large stainless steel or cast iron skillet. Non stick pans are great for eggs, but they struggle to get that deep, golden brown sear on proteins because they don't allow the same kind of heat contact.
- Large Skillet (12 inch): This prevents overcrowding. If the shrimp are too close, they'll steam in their own juices instead of searing.
- Fine Mesh Sieve: Essential for patting the shrimp dry after rinsing.
- Garlic Press or Microplane: To get that garlic as fine as possible for maximum infusion.
Simple Instructions for Sizzling Shrimp
Ready to get cooking? Remember, the whole process takes less than five minutes at the stove. Have your wine measured out and your lemon cut before the heat goes on.
- Dry and Season. Pat the 1.5 lbs of shrimp completely dry with paper towels. Note: Moisture is the enemy of a good sear.
- Brine the Protein. Toss the shrimp with the 1/4 tsp baking soda and 1/2 tsp salt; let them sit for 5 minutes.
- Heat the Pan. Add 1 tbsp olive oil and 1 tbsp butter to the skillet over medium high heat. Cook until the butter foam subsides and starts to shimmer.
- The First Sear. Place shrimp in a single layer. Sizzle for 2 minutes without moving them until the bottoms are pink and slightly browned.
- The Flip. Turn each shrimp over. Cook for 1 minute then immediately remove them to a clean plate. Note: They will not be fully cooked yet.
- Infuse the Fat. Lower heat to medium and add the remaining 3 tbsp butter, 6 cloves of garlic, and 1/2 tsp red pepper flakes.
- Bloom the Aromatics. Stir constantly for about 1 minute until the garlic is fragrant and pale gold.
- Deglaze. Pour in the 2 tbsp white wine and 1 tbsp lemon juice. Simmer until the liquid reduces by half.
- The Final Toss. Return the shrimp and any juices to the pan along with the parsley.
- Emulsify. Toss for 30 seconds until the sauce is glossy and the shrimp are opaque.
If you find yourself loving this garlic forward profile, you might want to try a Classic Shrimp Scampi recipe for your next pasta night. It uses a very similar technique but scales up the sauce to coat every strand of linguine perfectly.
Solving Sogginess and Bitter Garlic
Even the simplest dishes have their quirks. The most common mistake I see is people panicking when the garlic starts to color. Garlic goes from perfect to bitter in a heartbeat, so you have to be ready to add your liquid the moment it smells amazing.
Why Your Shrimp Is Soggy
If your shrimp are sitting in a pool of liquid instead of searing, you likely overcrowded the pan. When too many cold shrimp hit the pan at once, the temperature drops and they release their internal moisture. If you don't have a 12 inch skillet, work in two batches.
It takes an extra three minutes, but the texture difference is massive.
| Problem | Root Cause | Solution |
|---|---|---|
| Rubbery Texture | Overcooking | Pull shrimp when they form a "C" shape, not a tight "O". |
| Bitter Aftertaste | Burnt Garlic | Add wine/liquid immediately once garlic turns pale gold. |
| Greasy Sauce | Broken Emulsion | Whisk in the final cold butter off the heat for a creamy finish. |
Common Mistakes Checklist
- ✓ Skipping the paper towel step (shrimp must be bone dry to sear)
- ✓ Using "salad shrimp" or tiny pre cooked versions (they will turn to mush)
- ✓ Adding the garlic at the very beginning (it will burn before the shrimp are done)
- ✓ Forgetting to devein (no one wants that gritty texture in their dinner)
- ✓ Walking away from the stove (this dish requires 100% of your attention)
Variations for Pasta and Cream
While this easy shrimp recipe garlic butter is stunning on its own, it’s also a fantastic base for more complex meals. You can easily pivot based on what’s in your pantry.
- Make it Creamy: Stir in 1/4 cup of heavy cream at the very end for a creamy garlic butter shrimp recipe that feels like pure luxury.
- Make it a Meal: Toss the finished shrimp with 250g of cooked spaghetti and an extra splash of pasta water to create a garlic butter shrimp pasta.
- Add Greens: Throw in a handful of baby spinach during the final toss; the residual heat will wilt it perfectly without losing the vibrant green color.
Scaling the Recipe
When cooking for one or two, simply halve everything. Use a smaller 8 inch skillet to ensure the sauce doesn't evaporate too quickly. If you're doubling the recipe for a dinner party, do not double the salt or red pepper flakes initially start with 1.5x and adjust to taste at the end.
Always sear the shrimp in batches to maintain that over high heat crust.
The Myth of High Heat Searing
A common misconception is that you need the pan smoking hot to sear seafood. While you want it hot, screaming high heat will burn the butter and the delicate shrimp sugars before the inside is cooked. Medium high is your "sweet spot." It allows for a steady sizzle that develops flavor without carbonizing the fat.
Another myth is that you must use fresh, never frozen shrimp. In reality, unless you live right on the coast, "fresh" shrimp at the counter are usually just frozen shrimp that the grocer thawed for you.
Buying high-quality frozen shrimp (IQF - Individually Quick Frozen) is often better because you can thaw them yourself right before cooking, ensuring they are as fresh as possible when they hit the pan.
Storing Leftovers and Using Scraps
Seafood is always best eaten fresh, but you can definitely make this work for meal prep if you're careful.
- Storage: Keep in an airtight container in the fridge for up to 2 days.
- Reheating: Do not use the microwave! It will turn the shrimp into rubber. Instead, warm them in a pan over low heat with a tiny splash of water or extra butter just until warmed through.
- Zero Waste: If you bought shrimp with the shells on, don't throw those shells away. Simmer them with some water, onion scraps, and a bay leaf for 20 minutes to make a quick seafood stock for your next risotto.
Perfect Pairings for Your Meal
Deciding what to serve with garlic butter shrimp is all about balance. Since the dish is rich and fatty, you want something to soak up that sauce and something else to provide a crisp contrast.
My go to is always a thick slice of sourdough bread toasted with a little olive oil to mop up every last drop of that garlic butter. If you want something heartier, serve the shrimp over a bed of creamy polenta or jasmine rice.
For a lighter option, a simple arugula salad with a sharp lemon vinaigrette provides the perfect acidic counterpoint to the buttery shrimp. Right then, let's crack on and get that pan heating!
Frequently Asked Questions
Can I use frozen shrimp directly in the pan? No, you really shouldn't. Cooking shrimp from frozen will release too much water, causing them to steam rather than sear. Thaw them in a bowl of cold water for 15-20 minutes, then pat them extremely dry before starting.
Is it okay to leave the tails on? Absolutely. Not only does it make the dish look more "chef y," but the shells actually hold a lot of flavor that infuses into the butter sauce as they cook. Just make sure to provide a small discard bowl for your guests!
What kind of wine is best for the sauce? Go for something dry and crisp. A Sauvignon Blanc, Pinot Grigio, or even a dry Sherry works beautifully. Avoid anything sweet like Riesling, as it will clash with the garlic and lemon.
Why did my garlic turn brown and bitter? This usually happens if the heat is too high or if you let it sit too long before adding the liquid. Garlic cooks very fast.
As soon as you see it turning a light golden color and it smells fragrant, hit it with the wine or lemon juice to stop the browning process immediately.
Can I make this recipe dairy-free? Yes, you can substitute the butter with a high-quality vegan butter or just use more olive oil. However, you'll lose that specific "velvety" mouthfeel that dairy butter provides. If using oil only, add a little extra lemon zest to compensate for the flavor.

Recipe FAQs
How do I ensure the shrimp gets a good sear instead of steaming?
Do not overcrowd the pan. Use a very large skillet and cook the shrimp in a single layer; if necessary, work in two batches to maintain high heat contact.
Is it true that I must use a high smoke point oil when cooking this, or will butter burn?
No, you need both oil and butter. Start by heating the oil until shimmering, then add the first half of the butter; this raises the overall smoke point while retaining the necessary rich flavor.
Why is my finished sauce watery instead of glossy and clinging to the shrimp?
You failed to reduce the deglazing liquid sufficiently. After adding the wine, simmer until the liquid has reduced by at least half to concentrate the flavor and thicken the consistency.
How do I prevent the garlic from turning bitter during the quick cook time?
Remove the pan from the heat temporarily when adding the wine. Add the minced garlic only after the initial shrimp sear, cooking it just until fragrant, then immediately deglaze to halt the cooking process.
What is the secret technique for achieving a snappy texture in the shrimp?
Use a tiny amount of baking soda during the initial seasoning. If you enjoyed mastering the texture control in this recipe, apply that same principle of surface modification when preparing something like our Posh Baked Colossal recipe.
Can I use dry spices instead of fresh garlic for this easy recipe?
No, fresh garlic is essential for the flavor base. Dried minced garlic lacks the volatile oils present in fresh garlic, which are necessary to properly infuse the butter without burning or tasting metallic.
What is the best side dish to serve to absorb all the leftover garlic butter sauce?
Serve over quality cooked pasta or crusty bread. The starch absorbs the fat and liquid perfectly, much like the rich roux base required for a successful Shrimp Etouffee recipe.
Easy Garlic Butter Shrimp
Ingredients:
Instructions:
Nutrition Facts:
| Calories | 289 kcal |
|---|---|
| Protein | 31.2 g |
| Fat | 16.8 g |
| Carbs | 2.4 g |
| Fiber | 0.3 g |
| Sugar | 0.5 g |
| Sodium | 485 mg |
