The Ultimate Double Fudge Chocolate Poke Cake Recipe
- Why This Is the Best Chocolate Poke Cake Recipe Ever
- Gathering Your Arsenal: Essential Ingredients for Fudge Drenching
- Necessary Equipment and Pro Ingredient Substitutions
- Phase One: Baking the Foundation of Your Decadent Cake
- Phase Two: The Critical Technique of Poking and Drenching
- Phase Three: The Whipped Cream Finish and Decoration
- Make and Ahead Strategies and Storing Your Chocolate Poke Cake
- Troubleshooting and Expert Baking Tips
- Recipe FAQs
- 📝 Recipe Card
Why This Is the Best Chocolate Poke Cake Recipe Ever
Listen, if I have to read one more recipe that tells me to dump a box of instant chocolate pudding mix and a tub of Cool Whip on a cake mix, I might scream. Look, I get it. Those are easy desserts chocolate recipes, and they definitely save time. But you know what? That’s not baking. That’s assembling.
If you’re here, you want a real Chocolate Poke Cake experience. One where the chocolate flavor is deep, rich, and intensely fudgy, not just chemically sweet.
This version is the one I developed after several, shall we say, failures trying to get that perfect, deep soak without turning the bottom into a sad, rubbery mess. We are making a homemade, rich condensed milk fudge sauce.
This sauce is thicker, tastes a million times better than instant pudding, and when done right, it melts into the sponge like liquid gold. Trust me, once you make this Double Chocolate Fudge Poke Cake, you will never look back.
It’s absolutely worth the extra 15 minutes of stirring on the stove.
Mastering the Triple and Layered Indulgence: Cake, Fudge, and Cream
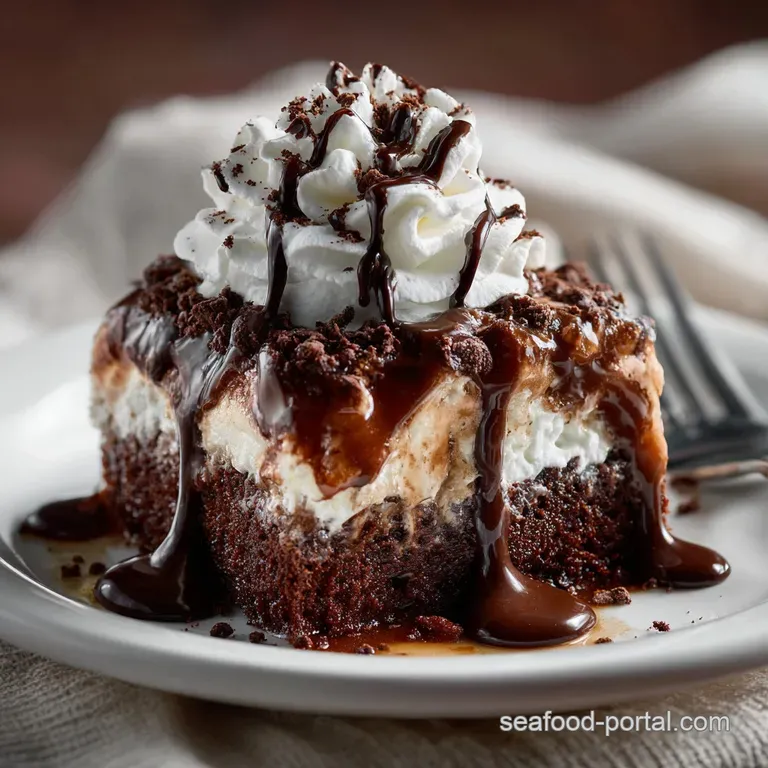
The magic of the chocolate poke cake recipe comes down to balance. You have three distinct textures, and they all have to work together perfectly. First, the incredibly moist chocolate cake base. Second, the heavy, almost molten layer of fudge that sinks into those lovely holes we create.
This fudge layer needs to be intense enough to carry the flavor, but liquid enough to penetrate. Finally, we finish it with a light, stabilized whipped cream cloud. It’s not just a topping, it’s a necessary contrast to the richness below. If your topping is too heavy, the whole thing feels like a brick.
If it's too light, it melts immediately.
The Secret to an Ultra and Moist Chocolate Cake Base
Moisture, moisture, moisture. That is the name of the game here. We use two specific, slightly counter and intuitive ingredients for maximum tenderness. The first is buttermilk. The acid in the buttermilk reacts beautifully with the baking soda and cocoa, giving us a tender crumb and a gorgeous rise.
The second secret, the one I will shout about until the cows come home, is using hot, strong and brewed coffee instead of hot water. Don't worry, the cake won't taste like coffee. The coffee simply deepens the flavour of the cocoa powder (a process known as blooming) and ensures the batter stays wonderfully thin and ready to absorb all that fudge later.
If you skip this, your cake will be fine, but if you do it, your cake will be spectacular.
Decoding the Prep Time: When to Start Baking This Showstopper
Look at the total time estimate. See the two hours of chilling? That is where most people get tripped up. This isn't a cake you can whip up and serve an hour later. If you rush the chilling time, you’re going to end up with liquid fudge spilling onto your plate, and a cake that just doesn't hold its shape.
You need that two and hour minimum for the fudge to set inside the cake structure. Are you hosting a dinner party Saturday night? Start this Chocolate Cake And Pudding Dessert Friday evening. That overnight chill is the ultimate goal.
Gathering Your Arsenal: Essential Ingredients for Fudge Drenching
I know the ingredient list looks long, but we’re using simple, high and quality staples here. We are leaning heavily into dark cocoa and semi and sweet chocolate chips for that fudge sauce because we want a grown and up richness, not a toothache.
The contrast between the sweetness of the condensed milk and the bitterness of the cocoa is what makes this so intensely craveable. Don't cheap out on the cocoa powder here. Seriously. It’s 50% of the cake’s flavour profile.
Necessary Equipment and Pro Ingredient Substitutions
If you are serious about baking, you need the right tools. And sometimes, you need a plan B for ingredients.
Pantry Staples for a Rich Dark Chocolate Cake
My only real non and negotiable here is using full and fat buttermilk. The whole point of the poke cake is richness and moisture, so pulling back on the fat content here is just sad. We use standard all and purpose flour, but remember the rule: measure your dry ingredients correctly!
Don't scoop the flour directly from the bag; spoon it into your measuring cup, then level it off. That avoids adding too much, which leads to a dense cake.
Creating the Homemade Condensed Milk Fudge Sauce
The secret weapon in the fudge is evaporated milk. It might seem strange, but it helps loosen the condensed milk base slightly, giving the sauce a much better viscosity for soaking into the cake holes, rather than just sitting on top like a thick frosting.
You can try a chocolate poke cake with caramel, but for true depth, stick with this intense fudge.
Stabilizing the Whipped Cream: Keys to a Perfect Cloud
If you’ve ever had whipped cream melt before you could finish dessert, you know why stabilization is necessary. I used to use gelatin, but I found that a little bit of softened cream cheese works just as well and is much easier to manage.
Don’t use cold cream cheese! You must soften the cream cheese slightly so it fully incorporates with the heavy cream without leaving lumps. It gives the cream topping structure, turning it into a beautiful, sturdy cloud that won’t deflate.
Baking Pan Requirements and Essential Kitchen Tools
A standard 9x13 inch pan is the backbone of this recipe. It’s what gives you the perfect cake and to-fudge ratio. But the most important tool? The poker. I learned the hard way that toothpicks are useless. They don't create a wide enough channel for the sauce.
A chopstick or a sturdy metal skewer is decent, but the blunt end of a wooden spoon is the absolute best. It creates wide, shallow and ish wells that allow the fudge to pool and penetrate, resulting in those beautiful sauce and filled tunnels.
Dairy and Free Alternatives for a Richer Chocolate Poke Cake
If you need a dairy and free version, this is totally doable. Swap the buttermilk for a high and fat plant and based milk (like cashew or oat milk) mixed with vinegar. For the fudge sauce, use full and fat canned coconut milk (the solid cream part) instead of evaporated milk, and look for quality dairy and free sweetened condensed milk.
Use a plant and based butter stick for the fudge base. The result is still incredibly rich.
Phase One: Baking the Foundation of Your Decadent Cake
This stage is straightforward, but don't rush the liquid step. We combine all the dry ingredients, then mix in the wet (eggs, buttermilk, oil). The batter looks thick and promising at this point. Then comes the magic.
Preparing the Batter for Maximum Rise and Fudginess
The final step in the cake batter is adding that cup of hot coffee (or water). Your beautiful, thick batter suddenly turns into a thin, watery liquid. Do not panic. This is correct. This thinness helps ensure a level bake and a texture that is porous enough to suck up the fudge sauce later.
Pour it right into the prepared pan.
Determining Doneness: Avoiding the Dreaded Dry Cake
Since the batter is so liquid, you might be tempted to overbake it. Doneness usually hits right around 30 to 35 minutes at 350°F (175°C). You’re looking for a skewer inserted into the center to come out with moist, slightly fudgy crumbs attached.
If it comes out clean, you've gone too far. Pull it out and place it on the cooling rack immediately.
Related Recipes Worth Trying
- Death By Chocolate Poke Cake: Easy Homemade Fudge Filling — The ultimate Death By Chocolate Poke Cake is dense, moist, and ridiculously easy. Saturated with warm, homemade hot fudge, this dark chocolate poke cake is...
- Marshmallow Chocolate Poke Cake: The Ultimate Gooey, Sticky Fingered Dessert — Marshmallow Chocolate Poke Cake is the ultimate sticky fingered comfort food. This easy marshmallow chocolate poke cake recipe is flooded with fudge, topped...
- Better Than Sex Cake: The Ultimate Chocolate Caramel Poke Cake Recipe — Master the world famous Better Than Sex Cake with this easy recipe! This decadent, creamy chocolate caramel poke cake requires zero fuss and is crowned with...
- Baked Crab Cakes Golden Crispy Panko Recipe Ready in 1 Hour — These classic Baked Crab Cakes are lighter and healthier boasting a perfect golden panko crust Use this easy crab cake recipe to master the ideal temp and...
- Proper Ahi Tuna Poke Recipe The 15Minute Hawaiian Classic — Master the perfect buttery classic Tuna Poke Bowl This foolproof 15minute Ahi Tuna Poke recipe focuses on clean cuts a vibrant marinade and pristine texture...
- The Real Deal Authentic Southern Style Crab Cakes Less Filler — These authentic Southern Style Crab Cakes skip the filler for maximum jumbo lump flavour Panseared to a golden crust they are the Best Crab Cakes youll ever...
Phase Two: The Critical Technique of Poking and Drenching
This is the make and or-break section of the chocolate poke cake experience. Get this right, and you win.
Whisking Up the Liquid Gold: Perfecting the Fudge Soak Consistency
While the cake is baking, get that fudge sauce ready. The consistency needs to be thick but pourable. If it's too thin, it runs right out the side and sits sadly in the bottom of the pan. If it’s too thick, it just sits on top like a layer of tar.
Heating the condensed milk, evaporated milk, and chocolate chips together slowly creates that perfect, velvety consistency. Remember to remove it from the heat before adding the chocolate chips (residual heat will melt them).
The Right Tool for the Job: Achieving Optimal Poke Hole Depth
Remember how I mentioned the wooden spoon handle? Use it! Press the handle straight down, nearly to the bottom of the pan, about an inch apart across the entire cake surface. I usually make three rows lengthwise and five rows crosswise.
| Tool Type | Result | Comment |
|---|---|---|
| Toothpick | Insufficient | Holes too small; sauce barely penetrates. |
| Wooden Spoon Handle | Excellent | Creates wide wells; perfect absorption. |
| Metal Skewer | Good | Better than toothpick, but holes can be too narrow. |
Pouring and Resting: Maximizing Sauce Absorption Time
Here is the second critical temperature rule: Cake warm, sauce warm. The cake needs to have cooled for just 5 minutes it should still be warm to the touch. The sauce also needs to be warm, ensuring it’s still highly liquid.
Slowly pour the fudge over the entire surface, taking your time, letting it pool over the holes. Use a rubber spatula to gently move any excess sauce toward dry spots. Then, cover it and walk away. That two and hour rest is not a suggestion. It’s science.
Phase Three: The Whipped Cream Finish and Decoration
We’re almost there. But don’t just slap some cream on top. We want it to look beautiful and hold its shape.
Whipping Cream to Stiff Peaks: Stabilizing for Structure
Start with the cream cheese. Beat it until it's completely smooth before you add the cold heavy cream. Adding cold cream to the bowl is vital; it whips better. Gradually increase the speed, adding the confectioners' sugar once the cream starts to thicken.
We’re going for stiff peaks here the kind that hold their shape when you pull the whisk out. This stabilization is what turns this from an "easy desserts chocolate" entry into a magnificent presentation piece.
Make and Ahead Strategies and Storing Your Chocolate Poke Cake
One of the great things about any chocolate poke cake is that it actually gets better as it sits. The moisture continues to distribute, and the fudge solidifies even more.
Can I Bake the Cake Layer in Advance? Prep Timelines Explained
Yes, please! This is my favorite make and ahead strategy. Bake the cake one or two days in advance. Let it cool completely, cover it tightly, and keep it at room temperature. When you're ready to make the poke cake, warm the cake base slightly (just 10 minutes in a 300°F oven) or, if you don't mind a slightly cooler soak, just use it at room temperature, ensuring your fudge sauce is extra hot.
Then, proceed with the poking and drenching stages.
Optimal Refrigeration: Keeping the Cake Moist and Fresh
Because of the dairy content in the fudge and the topping, this cake must be refrigerated. I find it tastes best within 2 3 days of making it. To keep it fresh, store the cake in the 9x13 pan, covered tightly with plastic wrap.
If you’re storing for more than 4 days (unlikely, let’s be honest), you might want to use a whipped cream stabilizer that contains gelatin, as the cream cheese method is best for shorter holds.
Troubleshooting and Expert Baking Tips
Every baker hits snags. Here are the issues I ran into when perfecting this chocolate poke cake recipe.
My Soak Didn't Penetrate the Cake: Common Mistakes and Fixes
Nine times out of ten, this happens because of one of two things:
- Mistake 1: You let the cake cool too much, or you let the fudge sauce cool too much. Remember: warm cake + warm sauce = deep penetration.
- Mistake 2: You didn't poke wide enough or deep enough. If the holes are too shallow, the sauce just sits on the surface. Next time, use the wooden spoon handle and be a little more aggressive.
Elevating the Flavor: Optional Additions and Zesty Twists
If you want to move beyond a simple chocolate cake and pudding dessert (which this already is), consider these additions:
- Add a teaspoon of finely ground instant espresso powder to the cake batter to amplify the chocolate.
- Fold toasted coconut flakes into the fudge sauce before pouring.
- Drizzle a little raspberry jam into the holes before pouring the fudge for a fruity burst (a lovely variation of the chocolate poke cake with vanilla pudding concept, just with fruit).
Best Pairings: What to Serve Alongside Decadent Fudge Cake
This cake is heavy. It needs a strong partner.
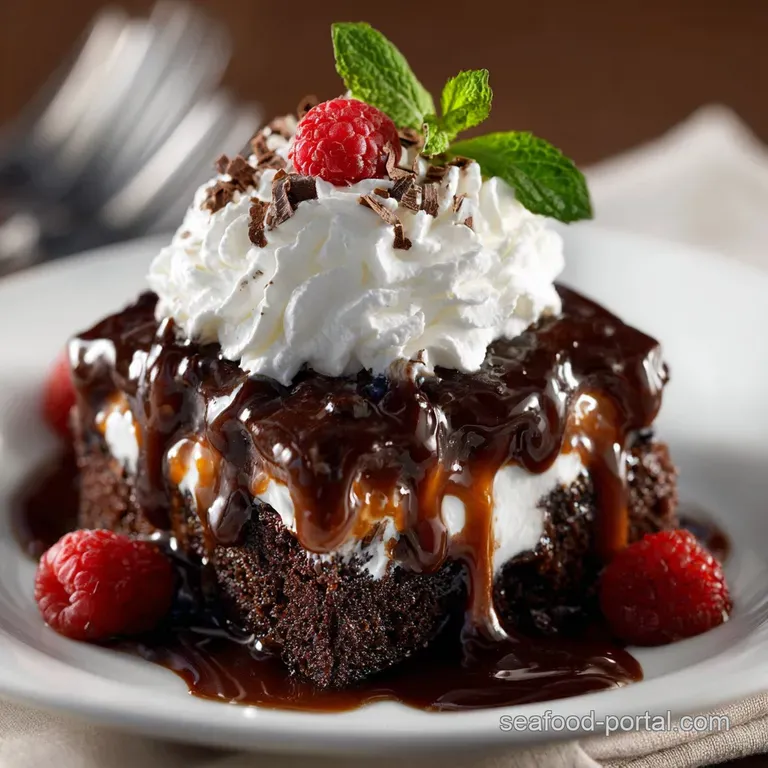
- A sharp, citrusy cocktail, like a Whiskey Sour or a simple Gin and Tonic , cuts through the fat beautifully.
- If serving for dessert, skip the ice cream. Instead, serve alongside a dollop of fresh raspberries or strawberries , or maybe a light glass of cold, bubbly Prosecco. The acidity is key.
Understanding the Macros: Calories and Serving Size Breakdown
Look, this is not diet food. We are talking rich, double chocolate fudge. The estimated 480 520 calories per serving assumes 14 generous slices from a 9x13 inch pan. If you’re worried, slice smaller! But truthfully, this is the kind of treat you enjoy completely, savoring every single fudgy, creamy bite.
You earned it.
 : PIN FOR LATER")
Recipe FAQs
When is the absolute best time to poke my Chocolate Poke Cake?
Poke the cake while it’s still warm (about 5 minutes out of the oven) using a blunt dowel. That warmth is crucial for the fudgy sauce to draw deeply into the sponge.
How long will this fudgy cake last in the fridge?
Because it’s dairy rich, store it tightly covered in the fridge for up to 4 days. In fact, many find the texture improves beautifully overnight as the fudge fully sets.
My whipped cream always goes watery; any tips for this recipe?
We use a stabilized whipped cream! Ensure your heavy cream is fridge cold and incorporate the small amount of softened cream cheese to stop the topping from "weeping." Job’s a good ‘un.
Can I swap the buttermilk for something else in the cake batter?
Absolutely! If you’re short on buttermilk, use 1 cup of whole milk mixed with 1 tablespoon of vinegar or lemon juice. Let it sit for 5 minutes before adding to the batter.
This cake looks incredibly rich can I cut down on the calories?
It is a proper treat! You can use low-fat milk in the fudge sauce, but for true indulgence, we suggest enjoying smaller slices alongside a strong, bitter espresso or builder's brew.
Decadent Fudge Chocolate Poke Cake

Ingredients:
Instructions:
Nutrition Facts:
| Calories | 674 kcal |
|---|---|
| Protein | 6.0 g |
| Fat | 44.0 g |
| Carbs | 69.0 g |
