Crispy Pan Fried Salmon with Brown Butter Glaze and Flawless Skin
- The Secret to Achieving Seriously Crispy Pan Fried Salmon Skin
- Quick Overview: What Makes This Recipe Different?
- Essential Ingredients and How to Select the Best Salmon Fillets
- The Science of the Shatter: Unlocking Maximum Crispness
- Step-by-Step: Mastering the Crispy Pan Fried Salmon Technique
- Perfect Pairings: Side Dishes That Complement Lemon Brown Butter Salmon
- Handling Leftovers: Reheating and Storing Crispy Pan Fried Salmon Safely
- Recipe FAQs
- 📝 Recipe Card
The Secret to Achieving Seriously Crispy pan-fried Salmon Skin
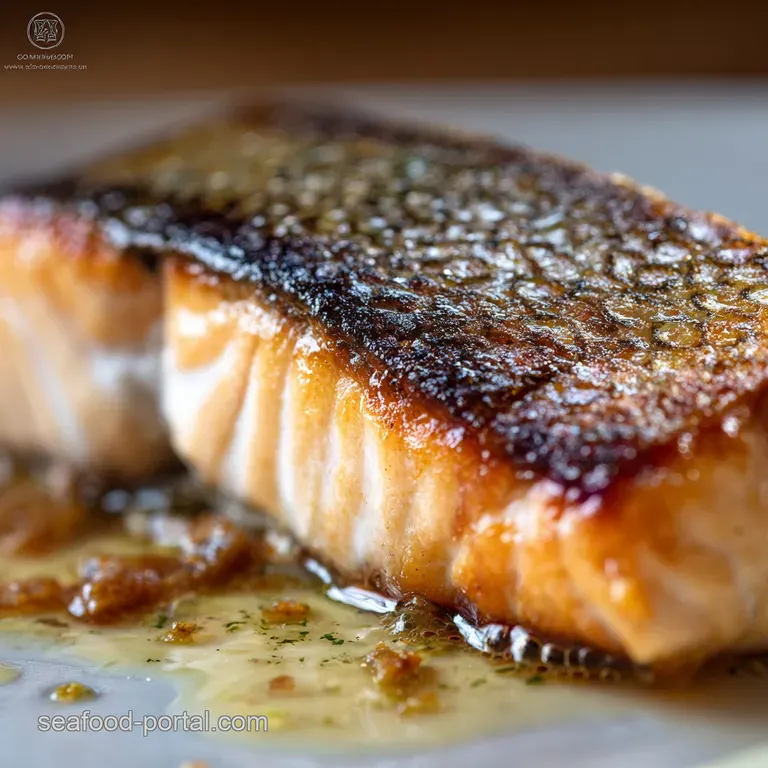
Forget everything you thought you knew about cooking fish at home. We're talking about that incredible moment when you slide your fork toward the fillet and the skin actually shatters . The glorious aroma of nutty brown butter and fresh thyme is absolutely intoxicating when it fills your whole kitchen.
Seriously, this Crispy pan-fried Salmon recipe is a total weeknight lifesaver. It takes less than 10 minutes of active cooking time and makes you feel like a magnificent, high end chef.
Plus, it’s infinitely cheaper than ordering it out when you nail that perfect crispy pan seared salmon skin yourself.
I made every mistake possible when learning How To Pan Fry Salmon, trust me, from sticky skin to dry flesh. Now I’m sharing the secret, ridiculously simple techniques that guarantee perfection every single time you cook. Let's get that restaurant quality, flaky finish right now.
Quick Overview: What Makes This Recipe Different?
This recipe achieves maximum crispness by focusing 90% of the cook time on the skin side, essentially using the skin as a shield. The pan is your most important tool, not the oven. By rendering the fat slowly and deliberately, we ensure the skin is dry and shatteringly crisp while the interior remains perfectly moist.
Why We Use Brown Butter (And How to Make It)
Brown butter is absolutely liquid gold, seriously. Melting the butter gently transforms the milk solids into tiny, nutty, caramel like explosions of flavour. This is what truly elevates the simple lemon glaze. Don't worry, it only takes a minute, and it completely transforms the basic flavour profile.
The Fastest Route to Restaurant Quality Fish
Why complicate things when the simplest method is genuinely the best? We use high heat for the initial sear, followed by a strategic reduction to medium low heat. This technique gives you speed and absolute control. It ensures a stunningly crispy pan-fried salmon without drying out the delicate flesh inside.
Equipment Checklist: What You Need for Success
You absolutely need a heavy pan for this process. Cast iron or heavy stainless steel holds heat evenly, which is crucial for stopping the pan temperature from plummeting when the cold fish hits the surface. A thin, angled metal fish spatula is also non-negotiable for easy, damage free flipping.
Essential Ingredients and How to Select the Best Salmon Fillets
For truly spectacular results, start with the best ingredients you can find. I always recommend seeking out centre cut, skin-on salmon fillets that are about 1.5 inches thick. Thickness matters because it gives you a bigger window to crisp the skin before the centre overcooks.
The Science of the Shatter: Unlocking Maximum Crispness
The secret to incredible skin isn't magic; it's physics. We are eliminating all moisture before the fish ever touches the pan, ensuring the fat renders instead of steaming the skin. Trust me, the extra 20 minutes of drying time changes everything.
Choosing King vs. Sockeye: Which Salmon Works Best?
King salmon is higher in fat and tastes incredibly rich and luxurious, handling the required high heat beautifully. Sockeye is leaner and tastes stronger, so it requires a slightly shorter cook time overall. Either way, always choose thick fillets for the best cooking experience.
Detailed Breakdown of the Lemon Glaze Ingredients
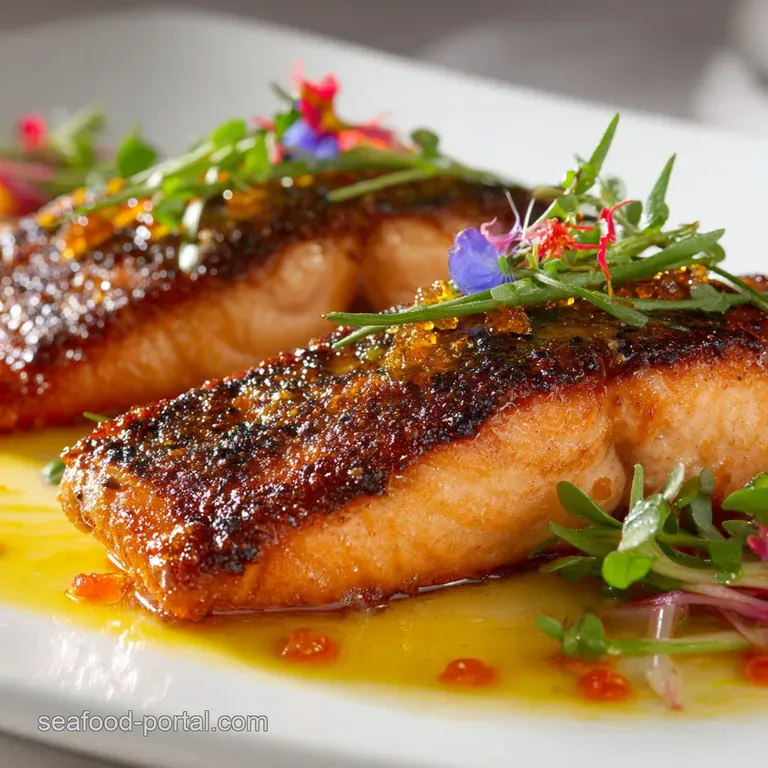
The lemon brown butter glaze is ridiculously simple: fat, acid, and strong aromatics. Using smashed garlic and whole herb sprigs prevents the aromatics from burning while still infusing the basting liquid with incredible depth.
We finish with a fresh lemon squeeze off the heat to keep the acid bright and fresh.
Smart Substitutions for Dairy and Herbs
Don't let one missing ingredient stop you from making this amazing dish. There are plenty of fantastic alternatives if you need them. If you are trying to avoid fat entirely, however, pan-searing is not your friend; you might want to try my method for Poached Salmon: The Secret to Silky, Healthy Fish in 25 Minutes instead.
| If you don't have... | You can use... |
|---|---|
| Salmon Fillets | Arctic Char or Steelhead Trout (same method, shorter cook time). |
| Olive Oil | Grapeseed or Avocado Oil (must be high smoke point). |
| Fresh Thyme/Rosemary | 1/2 teaspoon dried Herbs de Provence, added during the butter foaming stage. |
The Importance of the Moisture Barrier (Pat, Pat, Pat)
This is the biggest failure point for 99% of home cooks! Water boils, but oil fries, and we absolutely need to eliminate the surface water. Pat the skin until it feels almost tacky , then chill it uncovered.
That chilling time allows the air to completely dry out the skin, guaranteeing maximum crispness when it hits the pan.
Why We Cook Primarily on the Skin Side
Cooking 90% of the way on the skin side is the foundational rule for flaky, moist fish. The skin acts as a protective layer, shielding the delicate proteins from direct, high heat. The resulting crispy pan seared salmon skin is honestly the star of the show.
step-by-step: Mastering the Crispy pan-fried Salmon Technique
This is where the magic happens; follow these steps precisely for perfect Pan Fry Salmon every time.
Preparation: Drying, Oiling, and Aggressively Seasoning the Fillets
Aggressively pat the fillets dry on all sides, especially the skin. Then season both the flesh and skin generously with sea salt and black pepper don't be shy here! Place the fillets, skin side up, on a plate lined with paper towels and chill them uncovered for 20 minutes while you get your sides ready.
Phase 1: The Initial Press and over High heat Sear
Set your pan over medium high heat and add the oil until it shimmers. Carefully place the salmon fillets skin side down into the hot pan you must hear a sharp, immediate sizzle.
Immediately press down gently but firmly on each fillet with your spatula for the first 30 seconds to prevent the skin from curling up.
Phase 2: Finishing the Cook and Creating the Glaze
Reduce the heat to medium low and allow the salmon to cook entirely on the skin side (about 4– 6 minutes). You will see the colour change migrate up the fillet; stop cooking when only the top quarter remains translucent.
Now, add the butter cubes, garlic, and herb sprigs to the pan alongside the fish.
Phase 3: The Baste
Tilt the pan slightly and use a spoon to scoop the foaming brown butter mixture over the exposed, pink flesh of the salmon repeatedly. Baste for about one minute to build incredible flavour. If you feel compelled to flip, do it only for a quick 30 second kiss of heat on the flesh side just to set the glaze.
Crucial Step: Resting the Fish Before Serving
Immediately remove the salmon from the hot pan. Squeeze the lemon wedge directly over the fish while it rests on the plate. Transfer to a plate skin side up and allow it to rest for 3 minutes before you even think about serving it.
How to Prevent the Skin From Sticking to the Pan
If the skin sticks, it means your pan wasn't hot enough initially, or you tried to move the fish too soon. The fish will naturally release from the pan when the skin is fully rendered and genuinely crispy.
If you try to move it and it resists, leave it alone for another minute I promise it will let go when it's ready.
Recognizing Internal Doneness Without Cutting the Fish
You can judge the internal doneness visually by watching the side of the fillet. The fish moves from translucent pink to opaque white as it cooks. Once about 80% to 90% of the fillet has turned opaque, it is done, retaining that perfect flaky texture inside.
Perfect Pairings: Side Dishes That Complement Lemon Brown Butter Salmon
This crispy pan-fried salmon with its rich brown butter glaze needs sides that offer either creaminess or brightness to balance the richness. I often pair it with something simple because the fish itself is so dramatic. If you are looking for another incredible crispy classic, you have to try my recipe for Southern Fried Catfish: The Ultimate Buttermilk Soaked Comfort Classic .
Simple Starchy Sides (Risotto, Polenta, or Roasted Potatoes)
Creamy saffron risotto or garlic mashed potatoes provide a comforting, luxurious contrast to the fish's crisp texture. If I am feeling slightly ambitious, I might make a big pot of creamy polenta. Or, if it's colder out, perhaps my comforting Shrimp Stew: The Saffron Kissed Spanish Recipe with Chorizo and Cream alongside a small fillet.
Bright Green Vegetables and Salads (Asparagus, Green Beans)
Keep the vegetables light and snappy. Quick sautéed asparagus or blistered green beans, tossed simply with flaky salt and pepper, work brilliantly. A simple arugula salad with a bright vinaigrette also cuts through the fat beautifully.
Recommended Wine and Beverage Pairings
A crisp, dry Sauvignon Blanc is the absolute classic choice here; its acidity is perfect. For beer lovers, go with a light, crisp pale ale or a slightly fruity Saison.
Handling Leftovers: Reheating and Storing Crispy pan-fried Salmon Safely
But does it store well? Yes, absolutely. Can you get the skin crispy again? That takes a little trickery, but it's totally possible.
Best Practices for Refrigeration
Cooked salmon lasts reliably for 3 4 days in an airtight container stored in the refrigerator. Just be aware that the skin will definitely soften and lose its original crispness overnight, so manage your expectations. Always store the fish away from strong smelling foods like kimchi or onion.
Can You Freeze pan-fried Salmon?
You can freeze pan-fried salmon, but I only recommend it if you plan to use it later in a flaked capacity, like in a dip or salad. Freezing and thawing changes the delicate texture of the salmon, making it slightly drier and mushier upon reheating.
If you must freeze, wrap it tightly in foil, then place it in a freezer bag for up to two months.
The Secret to Re-Crisping the Skin (Oven vs. Air Fryer)
Do not microwave your beautiful salmon; that's just a tragic mistake. The air fryer is, hands down, your secret weapon for restoring the crunch. Place the salmon skin side up in a 390°F (200°C) air fryer for about 3 minutes.
Alternatively, preheat your oven to 400°F (200°C) and reheat the salmon skin side up for 5– 7 minutes, until the skin crackles again. It's worth the extra effort!

Recipe FAQs
Why is my salmon skin not getting crispy, or why did it stick to the pan?
The two main causes are insufficient heat or moisture. Ensure you have properly dried the skin with paper towels and that your oil/butter is shimmering just before the salmon hits the pan. Also, be patient; the salmon will naturally release from the pan only when the skin is fully crisped and golden.
Should I always start the salmon skin side down, and how long should I cook it on that side?
Yes, always start skin side down. The thick skin acts as a protective layer, shielding the delicate flesh from the intense heat and allowing it to cook gradually. For medium fillets (about 6 oz), cook 90% of the time (around 4 6 minutes) on the skin side, then briefly flip it to finish the top edge.
How do I know when the salmon is perfectly cooked without an internal thermometer?
The easiest method is the flaking test. Gently press a fork into the thickest part of the fillet; if it separates easily along the white muscle lines but is still slightly translucent in the center, it is medium.
If you prefer precision, the internal temperature should read 145°F (63°C) when checked at the thickest part.
Can I use skinless salmon fillets for this recipe, and does the cooking time change?
You can certainly use skinless fillets, but you will lose the signature crispness and the protective fat layer. Start cooking these fillets on the side that faced the skin, and reduce the overall cooking time by about 1 2 minutes, as they tend to cook faster.
Be careful not to press down on them, which can cause them to break apart.
The recipe calls for brown butter, but mine burned quickly. What went wrong?
Brown butter (beurre noisette) requires medium heat and constant agitation. If it burns, your heat was likely too high or you stopped stirring after the milk solids began to toast.
Remove the butter from the heat immediately once the solids turn a light amber color, as residual heat will continue the cooking process and can quickly push it past browning and into burning.
How should I store leftover cooked salmon, and can I freeze it?
Store leftover cooked salmon in an airtight container in the refrigerator for up to 3 days; it is excellent cold flaked over a salad. While you can technically freeze cooked salmon, we advise against it as the reheating process severely compromises the delicate texture and crispness.
If you must freeze, consume within two months for best quality.
What types of fats or oils work best for achieving the crispiest skin?
The best fats have a high smoke point, such as grapeseed oil, avocado oil, or refined canola oil, which can withstand the high heat required for crisping. If you prefer using olive oil, use a light or refined variety, not extra virgin, as its lower smoke point may cause it to burn before the skin is fully cooked.
Crispy pan-fried Salmon Quick Recipe

Ingredients:
Instructions:
Nutrition Facts:
| Calories | 450 kcal |
|---|---|
| Fat | 30 g |
| Fiber | < 1 g |
