Fried Oysters: Coastal Crispy Perfection
- Coastal Perfection: Crispy, Briny Fried Oysters with Lemon-Dill Tartare
- The Pursuit of the Perfect Golden Oyster: Our Coastal Recipe Philosophy
- Selecting Your Shellfish and Building the Ultimate Dredge
- Mastering the Technique: From Prep Bowl to Golden Basket
- Troubleshooting the Fry: Expert Tips for Crispy Fried Oysters
- Storage Solutions: Keeping Your Oysters Fresh and Crispy
- Pairing Perfection: Sauces, Sides, and Drinks for the Seaside Snack
- Recipe FAQs
- 📝 Recipe Card
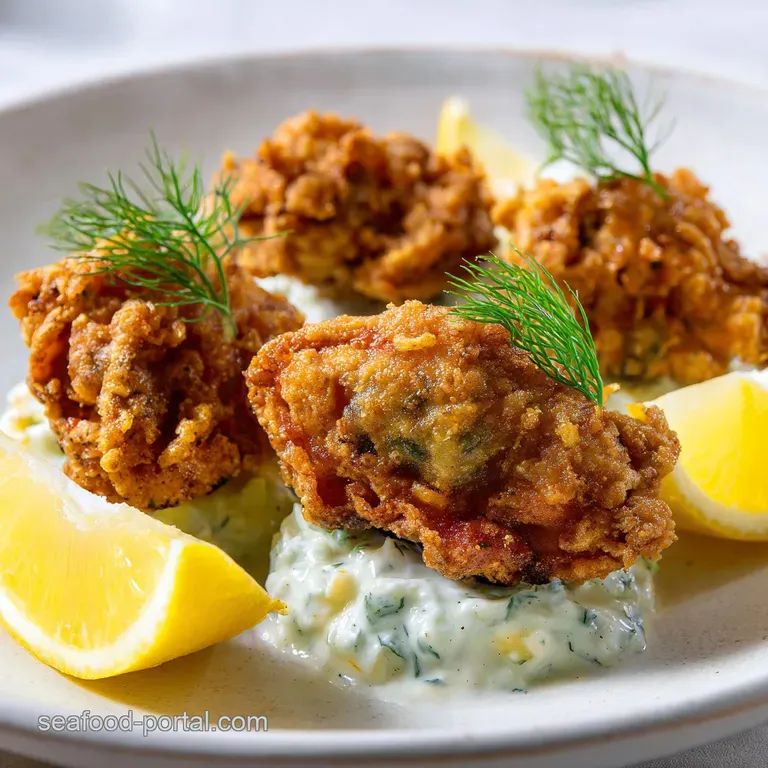
Coastal Perfection: Crispy, Briny Fried Oysters with Lemon Dill Tartare
Hear that crunch? It’s the sound of culinary victory, the precise moment when the shell of golden, seasoned cornmeal shatters to reveal a plump, briny heart. Nothing, and I mean nothing, beats perfectly made Fried Oysters .
This isn't just a snack; it's a coastal experience you can reproduce in your own kitchen, effortlessly.
For years, I thought making restaurant quality Fried Oysters was complicated, reserved for fancy seafood shacks with grizzled fry cooks. Total lie! Making incredible Fried Oysters at home is shockingly fast, totally affordable, and much easier than you think.
You get maximum flavour payoff for minimal effort, which is my kind of recipe philosophy.
We’re bypassing the thin, sad coatings you often see and going straight for robust flavor and maximum texture. This recipe ensures the oyster stays tender and juicy inside while the crust achieves that satisfying, shatteringly crisp bite we crave.
Ready to ditch your fear of frying and achieve the ultimate Classic Fried Oysters ? Let’s crack on.
The Pursuit of the Perfect Golden Oyster: Our Coastal Recipe Philosophy
If you want the best texture, you must understand how we build this coating. I’ve tested batters, heavy flour mixes, and even straight Panko, but none deliver the unique structural integrity required for truly crispy Fried Oysters quite like the cornmeal Panko blend.
What Makes a Truly Great Fried Oyster?
It boils down to three things: Brine, Barrier, and Blast. You need the oyster to be slightly plumped (the buttermilk brine helps with this). You need a sturdy, highly seasoned coating to act as a barrier to the hot oil.
Finally, you need a high temperature blast of heat to crisp the exterior instantly without cooking the oyster into a rubbery mistake.
This recipe uses buttermilk, which has a slight acidity that tenderizes the delicate meat slightly, ensuring the finished Fried Oysters are soft and yielding. Plus, buttermilk’s thickness acts like the perfect glue for the subsequent flour coating.
Why We Choose a Cornmeal Panko Dredge for Superior Crunch
The secret weapon here is the marriage of Panko breadcrumbs and fine yellow cornmeal. Panko, being Japanese style breadcrumbs, is jagged, light, and airy, providing incredible structure and surface area for crispness.
Cornmeal, on the other hand, gives us that classic Southern seafood texture, lending a gorgeous, rustic golden colour and a slightly sandy, satisfying mouthfeel.
Using both means you get the best of both worlds: robust texture and an amazing golden colour. This combination is far superior to a simple flour dredge, which often goes limp too quickly.
This specific dredge is why these Fried Oysters taste exactly like the ones you dream about eating down at the coast.
The Essential Role of Freshness and Brine
Never try to skip the short soak in buttermilk. The brine is crucial for flavour transmission. The oyster naturally holds a lot of salty water, but the buttermilk, seasoned simply with salt and pepper, adds depth and creamy richness.
Chef’s Note: If you’re sourcing shucked oysters from a jar, make sure you drain them for a full 10 minutes. Excess liquid is the enemy of crispy Fried Oysters , causing the oil to sputter and the coating to fall right off during cooking.
Selecting Your Shellfish and Building the Ultimate Dredge
The quality of your raw oyster matters immensely. Don’t splurge on the fancy, deep cupped, small varieties usually reserved for raw shucking. We want something meaty yet manageable for making the perfect batch of crispy Fried Oysters .
Choosing the Right Oysters for Frying (Size and Type)
I recommend using medium sized oysters (about 1 to 1.5 inches in diameter). Larger ones can be great, but they take longer to cook through, risking a burned crust before the center warms up. Smaller oysters can vanish entirely inside the coating.
Look for varieties like Atlantic Oysters or Pacific Oysters that hold their shape well.
If you are using frozen shucked oysters, thaw them overnight in the refrigerator, then rinse them really well and press them between layers of paper towels to wick away every last drop of moisture.
Remember, dry oyster surfaces equal better adherence for the flour, which is the foundation of our awesome Fried Oysters .
Seasoning the Flour: Why Salt Isn't Enough
The breading station is where all the flavour lives, so don't be shy with the seasoning! We start with flour seasoned with basic salt and pepper, but the magic happens in the final, crunchy bowl.
We rely heavily on Old Bay or a similar Cajun style seasoning here. It’s non-negotiable for that authentic coastal depth. The paprika adds smoky undertones and a beautiful richness to the golden crust.
You want this crust to stand up and shout, "I'm delicious!" because the oyster itself is delicate and needs the support. You’ll find the final texture of these Fried Oysters is far superior because we heavily season the dredge.
Essential Components for the Lemon Dill Tartare
What good are incredible Fried Oysters without an equally fantastic dipping sauce? The tartare sauce is necessary to cut through the richness of the frying process. Forget store-bought.
My simple method involves mixing good quality mayonnaise with finely chopped capers, minced gherkins (or sweet pickles, depending on your preference), and plenty of fresh dill and lemon juice.
The fresh dill is the star, bringing a bright, herbaceous note that elevates the entire dish, making these Easy Fried Oysters pop.
Quick Substitutions for Cornmeal and Panko
Sometimes you just don't have exactly what the recipe calls for, and that's fine! We adapt, we survive. Here are my favorite quick fixes for the dredging station when making Fried Oysters :
| Ingredient Needed | Viable Substitution | Texture/Flavor Change |
|---|---|---|
| Buttermilk | Milk + 1 tsp vinegar/lemon juice | Slightly thinner, but works as an effective glue. |
| Panko | Crushed cornflakes or standard breadcrumbs | Cornflakes give great shatter; standard crumbs are slightly softer. |
| Cornmeal | Fine semolina or extra flour/Panko | Semolina provides a subtle crunch; more Panko maintains lightness. |
| Old Bay | Cajun seasoning mix or paprika + celery salt | Cajun adds more heat, while the latter mimics the classic flavor profile. |
Mastering the Technique: From Prep Bowl to Golden Basket
Frying is all about organization and temperature control. If you master the assembly line and trust your thermometer, you will succeed. This process makes the best Fried Oysters you’ve ever had.
Setting Up the Assembly Line (Wet and Dry Stations)
The key to keeping the coating intact and your kitchen clean is the three station approach: Wet, Wet, Dry.
- Station 1 (Wet): The buttermilk brine, where the oyster plumps and gets its initial sticky coat.
- Station 2 (Wet/Dry Hybrid): The seasoned flour. This acts as a protective shield, locking in moisture and preventing the egg wash from becoming gooey.
- Station 3 (Wet/Dry Hybrid): The egg wash mixed with a splash of hot sauce. The egg is the final glue.
- Station 4 (Dry): The Panko and cornmeal blend. Press firmly here!
I learned this the hard way: if you try to take the oyster straight from buttermilk to Panko, it will instantly turn into mud. You need the flour layer in between, and that’s how we ensure these Fried Oysters achieve maximum crunch.
The Art of the Deep Fry: Timing and Batching
You absolutely must monitor your oil temperature. I made the mistake once of assuming the oil was hot enough when it wasn't, resulting in 24 oil-soaked, sad, soft oysters. Never skip the thermometer.
The sweet spot for frying these delicious Coastal Fried Oysters is 185°C (365°F). Anything lower, and your coating absorbs oil and goes limp. Anything higher, and the coating burns before the oyster has warmed through.
We are cooking these for only 60 90 seconds, just enough time for the exterior to achieve a deep golden colour.
Do not overcrowd the pot. If you dump too many cold, coated oysters into the oil at once, the temperature plummets instantly. This is the fastest way to ruin a batch. Stick to 5 or 6 oysters at a time, allowing the oil to recover its heat between batches.
Draining and Immediate Post Fry Seasoning
Once those oysters hit that perfect golden brown they cook fast! pull them out immediately using a spider strainer or slotted spoon. Place them directly onto a wire cooling rack set over a baking sheet.
Why a wire rack? Because putting them on paper towels means the steam gets trapped underneath, turning the bottom crust soggy almost instantly. The rack allows air circulation, maintaining crispness all the way around. While they are still dripping wet and searing hot, hit them with a tiny extra sprinkle of fine salt.
That little bit of finishing salt adheres perfectly and maximizes the flavor of your homemade Fried Oysters .
Troubleshooting the Fry: Expert Tips for Crispy Fried Oysters
Even the most meticulous home cooks sometimes run into issues when frying. Here are the top three ways people mess up their deep fried seafood, and how to fix them for perfect Fried Oysters every time.
Preventing a Soggy Coating (The Key Error)
Sogginess usually comes from two places: moisture on the oyster or incorrect draining. The Fix: Pat your shucked oysters dry before putting them in the buttermilk. And for the love of all that is crispy, do not skip the 15 minute chill time after coating. That chilling step locks the breading to the oyster meat, forming a durable shell ready for the heat. If you need a similar process for other proteins, check out my tips on making Air Fryer Fried Shrimp: Ultra Crispy Panko Recipe .
The Danger of Overcrowding the Fryer
I know you want to be done, but patience is your friend here. Overcrowding dramatically reduces oil temperature, leading to heavy, oily Fried Oysters instead of light, airy ones.
The Fix: Use a thermometer and maintain the oil between 185°C and 190°C (365°F 375°F). Fry small batches (about six at a time). Wait 60 seconds after removing one batch before dropping in the next.
This ensures the oil has time to recover its heat, guaranteeing uniformly crispy Fried Oysters .
How to Tell When the Oyster is Perfectly Cooked
Unlike larger cuts of meat, the visual cue comes entirely from the crust. Since the oyster is so small and delicate, 90 seconds in 185°C oil is generally enough to heat the oyster through completely without overcooking it.
The Fix: Aim for that deep, rich golden brown colour. If you wait for the coating to be dark brown, you’ve gone too far. The oyster inside should still be tender and slightly creamy not rubbery.
This quick cooking time is why Fried Oysters are such a favorite appetizer.
Storage Solutions: Keeping Your Oysters Fresh and Crispy
Ideally, Fried Oysters should be eaten immediately. They are a dish designed for instant gratification. But sometimes, life happens, and you have leftovers.
Short Term Refrigeration of Cooked Oysters
Once fully cooled (on the wire rack, naturally), transfer the remaining Fried Oysters to an airtight container layered with paper towels. They will keep safely in the refrigerator for up to 3 days.
Be warned: They will lose their initial crispness quickly, usually within an hour of cooling down. However, don't despair! We have a fantastic reheating technique that brings back most of that coastal crunch.
Reheating for Maximum Crispness
Do NOT use the microwave. I repeat, do not microwave your leftover Fried Oysters unless you like sadness and rubbery seafood.
The only way to reheat Fried Oysters effectively is with dry heat. Preheat your oven or, better yet, your air fryer to 175°C (350°F). Place the oysters on a bare baking sheet or directly into the air fryer basket.
Cook for 5– 8 minutes until they are piping hot and the crust feels dry and crunchy again. They won't be quite as juicy as fresh fried, but they'll be darn close to perfect Simple Fried Oysters .
Can You Freeze Fried Oysters?
Yes, technically, you can freeze them, but I strongly advise against it unless absolutely necessary. Freezing and thawing introduce moisture deep into the coating, making it much harder to regain that original crispness, even with air frying.
If you must freeze them: flash freeze the cooked, cooled Fried Oysters on a baking sheet, then transfer them to a freezer bag. They keep for up to 2 months.
To reheat, skip the thaw and place them straight into a 200°C (400°F) oven for about 12– 15 minutes until crispy and heated through.
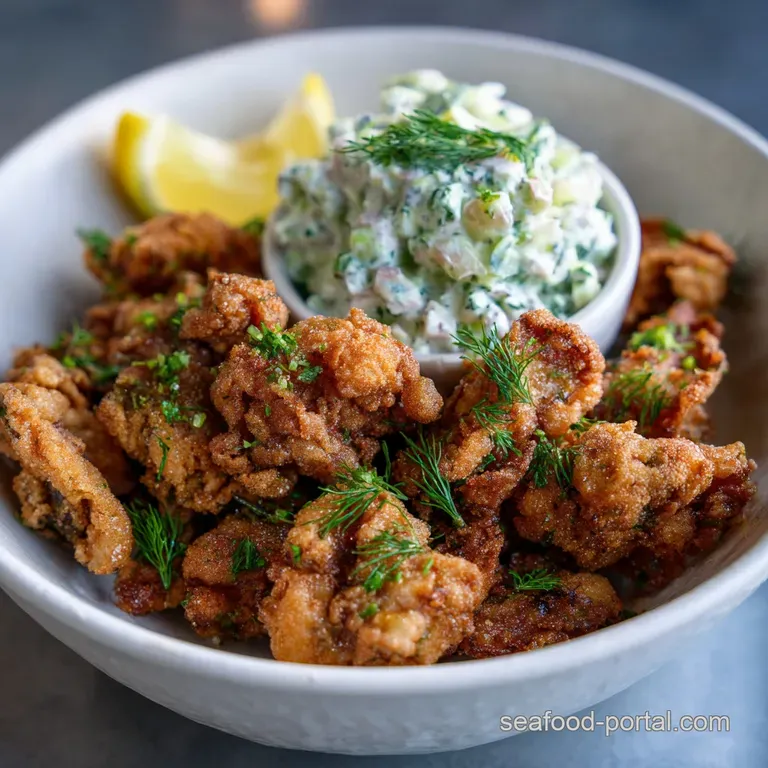
Pairing Perfection: Sauces, Sides, and Drinks for the Seaside Snack
When you present these beautiful Crispy Fried Oysters , you want the sides and drinks to complement the briny, rich flavour, not overpower it. This is how you build a whole Fried Oysters Dinner .
Building the Perfect Plate
Since the oyster is rich and the coating is substantial, you need something bright and acidic to balance the palate.
- Sauce: That homemade Lemon Dill Tartare is a must, but don’t forget a simple Mignonette (finely diced shallots and cracked black pepper mixed into red wine vinegar) for those who prefer pure brine and acid.
- Side Salads: A sharp, crunchy side salad, like a classic vinegar based coleslaw or a simple arugula salad dressed with lemon and Parmesan, provides an essential acidic contrast to the richness. These sides make the Fried Oysters feel like a meal. If you love fried seafood, you might also be looking for the perfect accompaniment to the classic Fried Fish: The Secret to Pub-Style Crispy Batter .
Beverage Pairings for Coastal Fried Oysters
A cold beer is the classic choice, full stop. You want something dry and crisp that cleanses the palate. A crisp, dry lager, a Belgian Saison, or a light American Pale Ale works wonderfully.
If you prefer wine, skip the heavy reds and go straight for something high in acidity. A bone dry Muscadet, a Sancerre, or even a sparkling Cava cuts through the richness beautifully, making the next bite of Fried Oysters taste just as fresh as the first.
This Fried Oysters recipe is perfect for serving at your next dinner party.

Recipe FAQs
Why is my crispy coating falling off the oysters?
The coating often falls off because the oysters were too wet when dredged. It is crucial to pat the shucked oysters thoroughly dry with paper towels right before dipping them in the egg wash, creating a tacky surface for the dry mixture to adhere to. Also, handle the dredged oysters gently before they hit the hot oil.
My fried oysters turned out tough and chewy. What went wrong?
Chewy oysters are a sign of overcooking. Oysters are very delicate and only require 90 seconds to 2 minutes in oil heated to 350°F (175°C). Ensure you maintain the oil temperature and fry the oysters in small batches to prevent the temperature from dropping, which would cause them to steam rather than fry.
Can I prepare the dredged oysters ahead of time?
It is not recommended to dredge the oysters more than 15-20 minutes before frying. The moisture from the raw oyster will begin to leach into the cornmeal and Panko mixture, resulting in a soggy, compromised coating. If prepping ahead, only prepare the dry dredge mix and store it separately.
Can I use an air fryer instead of deep frying?
Yes, you can air fry, but the texture will be slightly different less saturated and crisp. To achieve the best results, spray the dredged oysters liberally with cooking oil and cook at 400°F (200°C) for 6 8 minutes, flipping halfway through.
Note that the signature coastal "shatter" of deep frying will be absent.
What is the best way to store leftovers and reheat them?
Fried oysters are always best consumed immediately, but leftovers can be stored airtight in the refrigerator for up to two days. To reheat and restore crispness, place them on a rack in an oven or air fryer set to 375°F (190°C) for about 5 minutes. Avoid microwaving, as it will make them rubbery.
How do I ensure the coating itself is adequately seasoned?
The seasoning needs to be built into the dredge, as only sprinkling salt on afterward will not penetrate the coating effectively. Use a generous hand when seasoning the cornmeal and Panko mixture with salt, pepper, and any other spices, ensuring the dry mix tastes slightly aggressive before the oysters are coated.
The salty exterior balances the brine of the oyster.
What type of oil should I use for frying, and why?
You should use a neutral oil with a high smoke point, such as peanut, canola, or vegetable oil. These oils prevent the coating from developing off-flavors or burning before the oysters are cooked through. Maintain the oil temperature precisely at 350°F (175°C) for the ultimate crisp texture.
Crispy Fried Oysters Recipe
Ingredients:
Instructions:
Nutrition Facts:
| Calories | 380 calories |
|---|---|
| Fat | 28 g |
| Fiber | 1 g |
