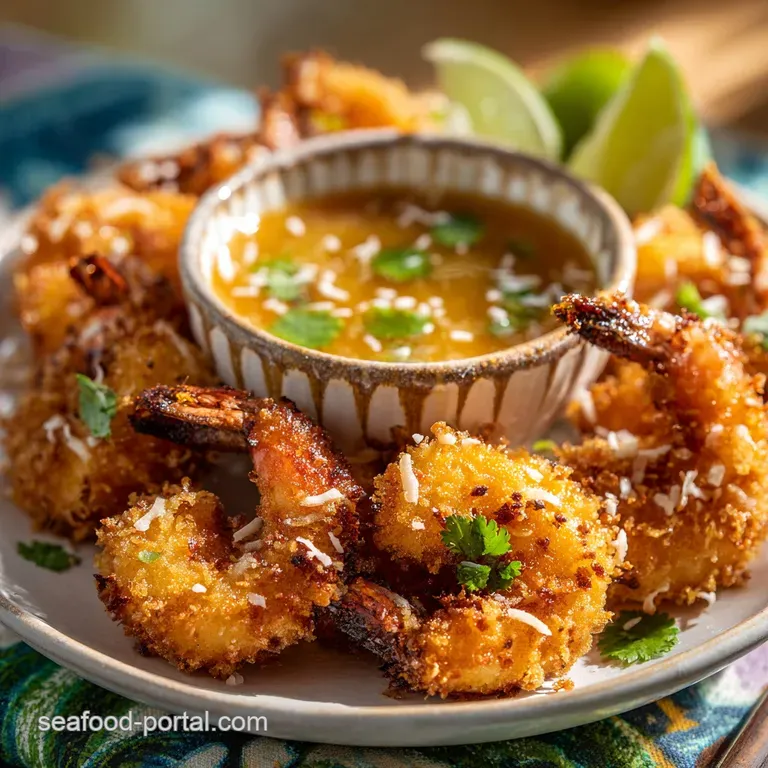
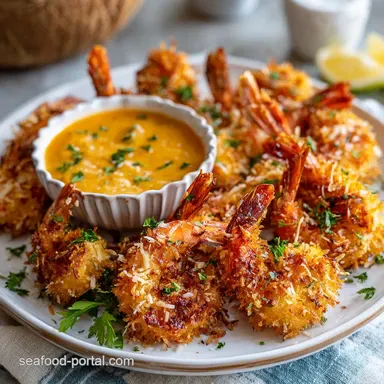
Crispy Coconut Shrimp with Spicy Apricot Dip
- Time: Active 25 minutes, Passive 10 minutes, Total 35 minutes
- Flavor/Texture Hook: A shatter crisp coconut crust giving way to tender, buttery shrimp
- Perfect for: Summer backyard parties, festive holiday appetizers, or a tropical themed date night
- Discovering Crispy Coconut Shrimp with Spicy Apricot Dip
- Why Most Homemade Seafood Recipes Fall Short
- Essential Measurements for Your Shrimp Feast
- Gathering Elements for the Ultimate Flavor Layering
- Essential Tools for a Successful Fry Session
- Mastering the Golden Shatter Frying Technique
- Fixing Common Cooking Hurdles and Mistakes
- Adapting This Recipe for Every Single Guest
- Reheating Tips to Keep That Signature Crunch
- Designing the Best Tropical Dinner Party Menu
- Debunking Popular Shrimp Frying Beliefs
- High in Sodium
- Recipe FAQs
- 📝 Recipe Card
Discovering Crispy Coconut Shrimp with Spicy Apricot Dip
Imagine the sound of a perfect crunch not a dull thud, but a genuine, high pitched shatter that echoes when you take that first bite. That is exactly what we are chasing today.
I remember the first time I tried making this for a weekend get together; the kitchen smelled like a tropical vacation, and the sizzle of the shrimp hitting the oil was the best soundtrack for the evening. Discover your new favorite appetizer with our amazing Crispy Coconut Shrimp served with a zesty Spicy Apricot Dip.
It is the kind of dish that disappears from the platter before you even have a chance to set out the napkins.
We are looking for that specific balance where the sweetness of the shredded coconut meets the savory, garlicky undertones of the breading. It is easy to get wrong nobody wants a soggy coating or shrimp that tastes like a rubber band but when it clicks, it is pure magic.
I’ve spent many evenings figuring out why the coconut sometimes burns before the shrimp is cooked or why the breading occasionally slides off like a silk robe. Today, I am sharing the fixes that actually work so you can skip the frustration and go straight to the "oh wow" moment.
This recipe is all about layering. We aren't just tossing shrimp in flour; we are building a foundation of flavor from the inside out. From the cayenne kick in the starch to the sharp bite of horseradish in the dip, every single element has a job to do.
You can expect a result that is better than anything you'd find at a beachside shack because you are in control of the quality. Let's get into the details of how to make this tropical classic truly stand out on your table.
Why Most Homemade Seafood Recipes Fall Short
The biggest hurdle with any breaded seafood is the dreaded "soggy bottom" or a coating that detaches the moment you take a bite. Most people skip the crucial step of drying their protein properly, which creates a layer of steam between the shrimp and the crust.
That steam acts like a lubricant, causing your hard work to slide right off. We also often see issues with temperature control; if the oil is too cold, the breading drinks it up like a sponge, leaving you with a greasy mess instead of a crisp finish.
Surface Tension: Cornstarch creates a microscopic rough surface that helps the egg whites grip the shrimp like glue.
Protein Aeration: Whisking egg whites until frothy introduces tiny air bubbles that expand during frying, creating a lighter, more delicate crunch.
Moisture Management: Panko breadcrumbs act as a physical buffer, absorbing less oil than traditional breadcrumbs while providing a structural skeleton for the coconut.
Sugar Caramelization: The sweetened coconut contains natural sugars that brown quickly, providing that deep mahogany color and a hint of candy like sweetness.
| Method | Time | Texture | Best For |
|---|---|---|---|
| Deep Fry | 2-3 minutes | Maximum shatter crisp | Authentic party appetizers |
| Air Fry | 8-10 minutes | Light and dry crunch | Everyday healthy snacking |
| Oven Bake | 12-15 minutes | Firm and golden | Large batches for crowds |
Using the right method depends on your equipment, but for that true restaurant style finish, the deep fry is undefeated. It provides the most even heat distribution, ensuring every single strand of coconut is toasted to perfection.
If you're looking for something lighter, the air fryer is a solid runner up, though you lose a bit of that velvety mouthfeel that only neutral oil can provide.
Essential Measurements for Your Shrimp Feast
To get the balance of flavors just right, we need to be precise with our components. If the ratio of panko to coconut is off, the texture will either be too chewy or too crumbly. The apricot dip also relies on a specific balance of acidity from the vinegar and heat from the red pepper flakes to cut through the richness of the fried shrimp.
| Component | Science Role | Pro Secret |
|---|---|---|
| Egg Whites | Binding Agent | Whisk until very frothy to prevent "clumping" during the dredge. |
| Cornstarch | Moisture Absorber | It creates a drier surface than flour, leading to a crispier crust. |
| Panko | Structural Support | Use unseasoned panko to control the salt level and prevent burning. |
The cornstarch is the unsung hero here. While flour is traditional for many fried foods, cornstarch is pure starch with no protein (gluten), which means it won't get tough or bread like. It stays thin and crisp, allowing the flavor of the shrimp and the texture of the coconut to remain the stars of the show.
Gathering Elements for the Ultimate Flavor Layering
Before we start the sizzle, let's look at what is going into our bowls. You want large shrimp for this 16/20 count is the sweet spot. Anything smaller will overcook before the coconut gets golden, and anything larger can be awkward to eat as a finger food.
Keep the tails on; they act as a natural handle for dipping and frying.
- 1 lb large shrimp (16/20 count): Peeled and deveined, tails left on. Why this? Tails provide a handle and prevent the shrimp from curling too much.
- Substitute: Extra large shrimp (21/25) will also work, just reduce cook time by 30 seconds.
- 0.5 cup cornstarch: For the initial dredge. Why this? Creates the driest, most adhesive base for the egg whites.
- Substitute: Potato starch or arrowroot powder for a similar grain free crunch.
- 3 large egg whites: Whisked until frothy. Why this? Provides a light, airy "glue" that doesn't feel heavy like whole eggs.
- Substitute: Aquafaba (chickpea liquid) for an egg free binding option.
- 1 cup sweetened shredded coconut: The star of the show. Why this? Adds the classic tropical flavor and helps with browning.
- Substitute: Unsweetened coconut if you prefer a more savory, less "dessert like" finish.
- 1 cup panko breadcrumbs: For structural crunch. Why this? Panko stays crisp longer than traditional breadcrumbs.
- Substitute: Crushed saltine crackers or gluten-free panko.
- 0.75 cup apricot preserves: The base of our dip. Why this? Provides a thick, sweet foundation that clings to the shrimp.
- Substitute: Orange marmalade or peach preserves for a different fruity profile.
- 1 tsp prepared horseradish: For that hidden "zing." Why this? Cuts through the sweetness of the apricot and coconut.
- Substitute: A half teaspoon of dry mustard powder mixed with water.
If you find yourself running low on the specific dip components, you can always look at a Coconut shrimp sauce recipe to see how other fruit based glazes are constructed. The key is finding that perfect marriage of sweet, sour, and spicy that makes your taste buds wake up.
Essential Tools for a Successful Fry Session
You don't need a professional kitchen, but a few specific tools will make this process much smoother and keep your kitchen from looking like a coconut bomb went off. A heavy bottomed skillet, such as a cast iron pan or a Dutch oven, is non negotiable for frying.
These pans hold heat much better than thin aluminum ones, meaning the oil temperature won't drop drastically when you add the cold shrimp.
A wire cooling rack set over a baking sheet is another secret to success. If you put hot, fried shrimp onto paper towels, the steam gets trapped underneath, turning your crispy crust into a soggy one within minutes.
The wire rack allows air to circulate around the entire shrimp, keeping that bottom side just as shatter crisp as the top.
Finally, a clip on candy or fry thermometer is a massive help. Guessing the oil temperature is a recipe for either burnt coconut or greasy, undercooked shrimp. We are aiming for exactly 350°F (175°C).
Once you hit that mark, you’ll see the "magic sizzle" that indicates the moisture in the shrimp is evaporating at the perfect rate to cook the inside without incinerating the outside.
Mastering the Golden Shatter Frying Technique

Now for the hands on part. Setting up a proper station is the difference between a relaxing cook and a stressful mess. Organize your three bowls from left to right: cornstarch mixture, egg whites, and the coconut panko blend.
Keep one hand "dry" for the starch and coconut, and one hand "wet" for the egg whites to avoid "club hand" where your fingers get breaded along with the shrimp.
- Whisk the dip. Combine 0.75 cup apricot preserves, 1 tbsp rice vinegar, 1 tsp red pepper flakes, 1 tsp horseradish, 1 tsp grated ginger, and 1 minced garlic clove. Note: Letting this sit while you prep the shrimp allows the garlic and ginger to infuse the preserves.
- Season the starch. Mix 0.5 cup cornstarch with 1 tsp salt, 0.5 tsp garlic powder, and 0.25 tsp cayenne.
- Froth the whites. Whisk 3 egg whites in a bowl until they are bubbly and no longer "gloopy."
- Prep the coconut mix. Combine 1 cup sweetened coconut and 1 cup panko in your third bowl.
- Dry the shrimp. Pat your 1 lb of shrimp with paper towels until they feel completely dry to the touch.
- The first dredge. Hold a shrimp by the tail, coat it in cornstarch, and shake off every bit of excess. Note: You only want a thin, invisible layer of starch.
- The egg bath. Dip the starched shrimp into the egg whites, ensuring total coverage.
- The final press. Lay the shrimp into the coconut panko mix and press firmly with your dry hand to embed the coconut into the egg white.
- Heat the oil. Bring 2 cups of neutral oil to 350°F (175°C) in a heavy pan.
- Fry in batches. Cook for 2-3 minutes until golden brown and mahogany flecked, turning once halfway through.
Once the shrimp are out of the oil, give them a tiny sprinkle of flaky salt while they are still hot. This helps the salt adhere and enhances the sweetness of the coconut. Let them rest on that wire rack for at least 2 minutes before serving.
This allows the internal heat to finish cooking the center of the shrimp to a perfect, tender snap without it becoming rubbery.
Fixing Common Cooking Hurdles and Mistakes
Even the best cooks run into issues with breaded seafood. If your coconut is turning dark brown before 2 minutes are up, your oil is likely too hot. On the flip side, if the shrimp looks pale and feels heavy after 3 minutes, your oil is too cold.
Always check your thermometer between batches, as the oil temperature naturally drops every time you add food.
Why Your Breading Falls Off
This usually happens because the shrimp was still damp when it hit the cornstarch. Any moisture trapped under the starch will turn to steam in the fryer, pushing the crust away from the meat. Another cause is not pressing the coconut firmly enough into the shrimp.
Think of it like "stucco" it needs a little pressure to really bond with that egg white "mortar."
Avoiding Rubbery, Tough Shrimp
Shrimp cook incredibly fast. Once they turn opaque and form a "C" shape, they are done. If they curl into a tight "O," they are overcooked. Because we are frying at a high heat, the carryover cooking is real.
Pull them out when the crust looks perfect, even if you're worried about the inside; that 2 minute rest on the rack will finish the job gently.
| Problem | Root Cause | Solution |
|---|---|---|
| Coating is greasy | Oil temperature too low | Wait for oil to return to 350°F before adding the next batch. |
| Coconut is burnt | Oil temperature too high | Lower heat immediately and add a splash of room temp oil to cool it. |
| Breading is patchy | Improper dredging | Ensure full coverage in egg whites; "bald spots" won't hold coconut. |
Common Mistakes Checklist
- ✓ Pat shrimp bone dry before starting (prevents the "slip off" effect).
- ✓ Use a thermometer to maintain exactly 350°F (helps prevent greasiness).
- ✓ Don't overcrowd the pan; fry only 4-5 shrimp at a time to keep heat stable.
- ✓ Use sweetened coconut for that iconic restaurant style browning.
- ✓ Whisk egg whites until frothy to ensure a light, airy bond.
Adapting This Recipe for Every Single Guest
One of the best things about this dish is how easily it can be tweaked for different needs. If you're hosting someone who avoids gluten, it's a very simple transition. If you want a bit more heat, you can easily adjust the dipping sauce to be a "firecracker" version.
- gluten-free Variation: Swap the panko for gluten-free breadcrumbs or use more coconut. Cornstarch is already naturally gluten-free, so you're halfway there.
- Low Sugar Option: Use unsweetened coconut flakes and replace the apricot preserves with a sugar-free apricot jam or a spicy vinegar based dipping sauce.
- Extra Spicy: Double the red pepper flakes in the sauce and add a dash of sriracha or hot sauce directly into the egg whites.
If you are looking for more seafood ideas that fit into a broader menu, something like an Eggplant and Shrimp stir fry offers a completely different texture and flavor profile while using similar base ingredients. It’s a great way to use up leftover shrimp if you bought a larger bag than needed.
Reheating Tips to Keep That Signature Crunch
Let's be honest: fried food is best the second it leaves the pan. However, life happens, and sometimes you have leftovers. Do not, under any circumstances, use the microwave. It will turn your beautiful shatter crisp shrimp into a rubbery, sad mess.
To store them, place the cooled shrimp in a single layer in an airtight container lined with a paper towel. They will stay fresh in the fridge for up to 2 days. For the dip, it actually gets better as it sits, so feel free to keep that in a jar for up to a week; it's also great on grilled chicken or as a glaze for salmon.
How to Reheat Like a Pro: The best way to bring these back to life is in the oven or air fryer. For the oven, preheat to 375°F (190°C) and place the shrimp on a wire rack over a baking sheet.
Bake for 5-7 minutes until you hear them sizzling again. If using an air fryer, 3-4 minutes at 350°F (175°C) will do the trick perfectly.
This evaporates any moisture that the crust absorbed in the fridge, restoring that "shatter" we love so much.
Zero Waste Tip: If you have leftover coconut panko mixture that hasn't been touched by raw shrimp, don't throw it away! Toast it in a dry pan until golden and use it as a crunchy topping for yogurt, oatmeal, or even a tropical fruit salad.
If you have extra apricot dip, it makes a fantastic base for a salad dressing when whisked with a little more rice vinegar and some olive oil.
Designing the Best Tropical Dinner Party Menu
When you serve these, you want sides that complement the sweetness and the crunch without overwhelming the palate. Think about bright, acidic, and fresh flavors. A simple slaw with lime juice and cilantro is the perfect companion.
The acidity cuts through the fried richness, making every bite of shrimp feel as fresh as the first.
| Servings | Shrimp Amount | Coconut/Panko | Pan Size |
|---|---|---|---|
| 2 People | 0.5 lb | 0.5 cup each | 8 inch skillet |
| 4 People | 1 lb | 1 cup each | 10 inch skillet |
| 8 People | 2 lb | 2 cups each | 12 inch or 2 pans |
For a full tropical feast, consider serving these alongside a Tropical vegetable medley. The coconut notes in both dishes will tie the whole meal together beautifully. You could even serve the shrimp over a bed of coconut rice for a more substantial main course.
Debunking Popular Shrimp Frying Beliefs
There's a common belief that you should only use fresh, never frozen shrimp for frying. In reality, most "fresh" shrimp at the grocery store was previously frozen anyway. high-quality frozen shrimp (IQF - Individually Quick Frozen) are often fresher than the ones sitting in the display case for days.
Just make sure to thaw them slowly in the fridge and I cannot stress this enough pat them bone dry before cooking.
Another myth is that you need a deep fryer to get professional results. A simple cast iron skillet with 2 inches of oil is actually superior for home cooks because it’s easier to clean and provides better access for flipping the shrimp.
As long as you have a thermometer to monitor the heat, the vessel matters much less than the technique. Finally, don't believe the lie that you must use unsweetened coconut for "authentic" flavor.
Most restaurants use sweetened coconut because the sugar helps achieve that beautiful golden brown color that makes the dish so visually appealing.
This recipe is your ticket to a tropical escape right in your own kitchen. By focusing on the drying, the temperature, and the pressing technique, you'll create an appetizer that people will be talking about for weeks.
It’s approachable, impressive, and most importantly, it’s exactly the kind of food that brings people together around the table. Trust the process, watch your temperatures, and enjoy that incredible crunch!

High in Sodium
812 mg 812 mg of sodium per serving (35% 35% of daily value)
The American Heart Association recommends limiting sodium intake to about 2,300mg per day.
Tips to Reduce Sodium
-
Reduce Added Salt-25%
Significantly reduce or eliminate the 1 tsp kosher salt used in the shrimp coating. This is often the largest source of added sodium.
-
Swap Prepared Horseradish-10%
Replace the 1 tsp prepared horseradish with fresh horseradish if available, or omit it entirely. Prepared horseradish often contains added sodium.
-
Low-Sodium Preserves & Vinegar-10%
Opt for low-sodium or no-salt added apricot preserves and use a low-sodium rice vinegar. These can contribute a surprising amount of sodium.
-
Boost Flavor with Herbs & Spices
Enhance the flavor of your shrimp and sauce by using a generous amount of fresh herbs like cilantro or parsley, and additional spices like cumin or smoked paprika. This helps compensate for the reduced salt.
-
Fresh Aromatics for Sauce-5%
Instead of relying on prepared horseradish, emphasize the flavor from freshly grated ginger and minced garlic in the sauce. You could also add a small amount of finely minced onion or shallot.
Recipe FAQs
How to get the coconut crust to stay on the shrimp during frying?
Pat the shrimp completely dry before starting your dredging line. Moisture on the surface prevents the cornstarch from adhering, which causes the breading to slide off once it hits the hot oil.
Is it possible to bake this shrimp instead of frying?
No, this recipe is specifically engineered for deep frying. The high heat oil at 350°F is required to achieve the necessary shatter crisp texture; baking will result in a dry, chewy crust rather than the signature mahogany flecked crunch.
How to prevent the coconut from burning before the shrimp is cooked?
Fry in small batches to maintain a steady oil temperature of 350°F. If you crowd the pan, the oil temperature drops, forcing you to cook them longer, which inevitably leads to dark, burnt coconut before the shrimp reaches its tender, opaque state.
How to keep the shrimp crispy after removing them from the oil?
Drain the fried shrimp on a wire rack rather than paper towels. Placing them on a flat surface traps steam beneath the crust, causing the bottom to turn soggy; a rack allows air to circulate on all sides to keep the coating crisp.
Can I make the dipping sauce ahead of time?
Yes, the spicy apricot dip actually improves with time. Preparing it up to 3 days in advance allows the ginger, garlic, and red pepper flakes to fully infuse the preserves, much like the Cajun dream sauce relies on time for the flavors to harmonize.
How to tell when the shrimp is perfectly cooked inside?
Look for an opaque, pearly appearance and a firm, C-shaped curl. Pull them from the 350°F oil as soon as they reach this state, as 2-3 minutes is the absolute limit for retaining a buttery, tender texture inside the crust.
How to ensure the egg white wash is effective?
Whisk the egg whites until they are completely frothy before dipping. A properly aerated wash acts as a strong adhesive, ensuring the coconut panko mixture creates an even, thick coating that won't flake off during the 2-3 minute frying window.
Crispy Coconut Shrimp 4
Ingredients:
Instructions:
Nutrition Facts:
| Calories | 607 kcal |
|---|---|
| Protein | 28.5 g |
| Fat | 19.4 g |
| Carbs | 75.5 g |
| Fiber | 4.2 g |
| Sugar | 46.1 g |
| Sodium | 812 mg |
