Baked Crispy Cod Zesty Lemon Panko Fillets the Healthy Takeaway
- Achieving Deep and Fried Crispness Without the Oil Bath
- The Secret to Truly Delicious Baked Crispy Cod
- Essential Components for Your Zesty Panko Crust
- Prep Time, Cook Time, and Required Kitchen Arsenal
- Mastering the Three and Step Panko Coating Technique
- Troubleshooting Common Issues with Baked Crispy Cod
- Customizing Your Meal: Side Dish Pairings and Crust Variations
- Recipe FAQs
- 📝 Recipe Card
Achieving Deep and Fried Crispness Without the Oil Bath
Frying fish? Ugh. The smell. The splattering oil that finds its way onto every vertical surface in your kitchen. The cleanup is simply not worth it for a Tuesday night. But what about that crunch? That shatteringly crisp exterior we all crave?
We want that perfect, beautiful texture you get from the chippy, but without the hassle, the grease, or, frankly, the guilt.
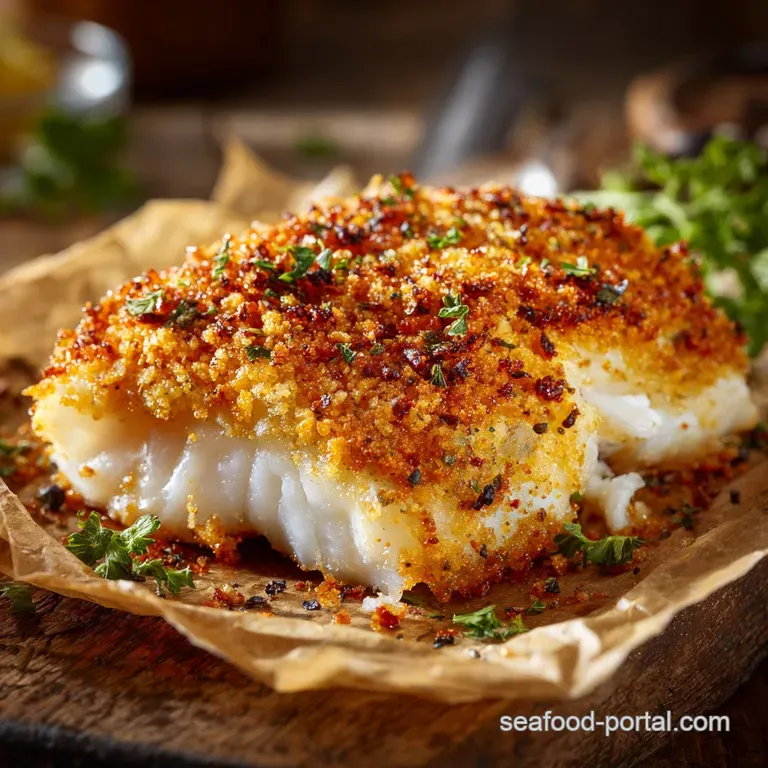
For years, I struggled to achieve true crispiness when making Baked Crispy Cod . It always came out... fine. Edible. But soft on the bottom. Sound familiar? I finally cracked the code, and it boils down to two non and negotiable elements: the right breadcrumb, and a savage oven temperature.
This recipe delivers exactly what the title promises: a healthier, oven and baked crispy cod that tastes like takeaway but is ridiculously easy. It’s a proper game and changer.
The Secret to Truly Delicious Baked Crispy Cod
If you skip these two core secrets, you might as well just wrap your fish in foil and steam it. (No judgment, but we are here for crunch!) We’re aiming for a crust that holds up on the plate. We want that satisfying bite. This is how we get there.
Why Panko is the Only Choice for Shattering Texture
Look, regular breadcrumbs are fine for meatloaf. They’re mushy. They absorb moisture fast, and when you bake them, they end up dense and soft. They simply cannot give you that amazing texture.
Panko is different. Panko, which are Japanese breadcrumbs, are made from crustless white bread and dried into large, airy, flaky shards. Because of their shape, they absorb less oil (or, in this case, less moisture from the fish).
Crucially, they stick up and out from the fish, maximizing the surface area exposed to the hot, dry air of the oven. This is how we achieve that deep and fry level of crunch in our Oven Baked Crispy Cod . Trust me on this. Do not substitute.
over High heat Strategy: Setting the Oven for Success
We are running a sprint, not a marathon, here. To achieve a perfectly flaky interior while ensuring the crust browns quickly, we need high heat 425°F (220°C).
Why so hot? Two reasons. First, high heat quickly evaporates any surface moisture left on the fish, which helps the crust crisp faster. Second, cod fillets are relatively thin. We want them to cook through in 12 to 15 minutes, maximum.
This brief, intense blast guarantees the fish stays tender and flaky inside, rather than drying out, while the outside achieves a gorgeous, deep golden color. This strategy is essential for any Panko Baked Cod Recipe .
Nutritional Scorecard: Comparing Baked vs. Fried Fish
People always ask if this is really that much healthier. Yes, it is. When you ditch the vat of oil, the calorie count drops dramatically. It makes this Healthy Baked Crispy Cod a genuine weeknight option.
| Component | Baked Crispy Cod (Estimate) | Deep and Fried Cod (Estimate) |
|---|---|---|
| Total Fat | ~12g | ~30 40g |
| Saturated Fat | ~3g | ~6 8g |
| Calories | ~340 kcal | ~500 650 kcal |
Essential Components for Your Zesty Panko Crust
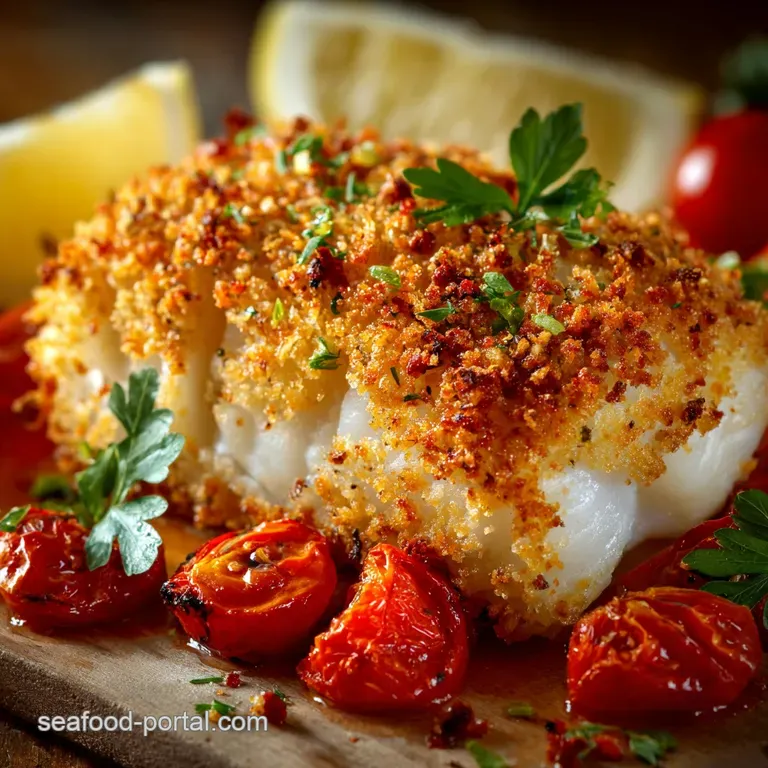
This isn't just about crunch; it’s about flavor. The crust is where we load up all the zesty, salty, savory goodness that makes this meal feel special. My key move? Adding finely grated Parmesan and fresh lemon zest directly into the dry Panko mix.
The Parmesan lends saltiness and helps the crust brown beautifully, and the lemon zest releases those volatile oils when baked, giving you an amazing aroma.
The addition of a tablespoon of Dijon mustard to the egg wash? That’s pure chef’s choice. It helps the Panko adhere even better and adds a subtle background tang that is just brilliant with fish.
Related Recipes Worth Trying
- Baked Catfish Nuggets UltraCrispy Oven Recipe — These Baked Catfish Nuggets deliver satisfying crunch without the fryer fuss This healthy baked catfish nuggets recipe uses Panko for an incredible...
- Baked Teriyaki Salmon Recipe Sticky Glaze Flaky Perfection — This easy Baked Teriyaki Salmon recipe guarantees a perfect sticky glaze and moist fish Learn how to make the best oven baked salmon and broccoli dish in...
- Baked salmon collars Crispy MisoGlazed Kama Ready in 40 Minutes — Baked salmon collars are the ultimate weeknight fish This simple recipe yields incredibly moist fatty salmon collar with irresistibly crispy skin Learn how...
Prep Time, Cook Time, and Required Kitchen Arsenal
Right then, let's look at the logistics. This recipe is designed to be on the table in under 30 minutes, start to finish. Prep is 15 minutes, cook time is 12 to 15. Easy.
Selecting the Freshest Cod Fillets and Portioning Tips
Aim for cod fillets that are about 1 inch thick (170g or 6oz each). Uniformity is key here so they finish cooking at the same time. If your fillets are wildly different sizes, cut the thickest ones into smaller, more even portions.
The single most important step in preparing the fish is to pat it dry. I mean aggressively dry. Take paper towels, press firmly, and suck out every bit of excess moisture. That moisture is the enemy of the crispy crust. Seriously, don't skip this.
The Herb and Parmesan Blend: Building Flavour Depth
Don’t use that shaker can of dusty powdered Parmesan for this. Please. You need proper, finely grated Parmigiano Reggiano (or a good quality pre and grated variety) to mix with the Panko.
For herbs, I usually lean toward fresh parsley because it’s bright and clean, but dill works wonderfully too. If you’re feeling bold, a tiny bit of thyme adds a lovely earthy note. And the paprika? That’s purely for color. It makes the final crust look rich and golden brown, not pale and anaemic.
Essential Prep Checklist: From Thawing to Dredging Stations
Get organized before you start dipping. It saves a lot of mess and confusion.
- Pat cod dry and season with salt/pepper.
- Preheat oven to 425°F (220°C).
- Set up the wire rack on the baking sheet.
- Prepare your three dredging dishes (Flour, Egg, Panko mix).
Standard Kitchen Tools for a Chef and Grade Finish
You mostly need standard stuff, but there is one non and negotiable item that separates this recipe from the soggy disaster pile: the wire rack.
You must bake this cod on an oven and safe wire rack set over a rimmed baking sheet. This lifts the fish off the hot surface of the pan, allowing air to circulate completely around the fillet. No steaming. Just pure, dry heat. That is the secret to a crunchy bottom crust.
Mastering the Three and Step Panko Coating Technique
We are doing the classic standard breading procedure, often called dredging. It’s a three and step dance that ensures the coating adheres perfectly, creating that beautiful barrier between the wet fish and the dry Panko.
Preparing the Wet and Dry Stations for Maximum Adhesion
Your first station is the flour (Dish 1). The flour gives the wet egg wash something to grab onto. Your second station is the wet mix (Dish 2): eggs, lightly beaten, with that dash of Dijon mustard if you're using it. This acts as the glue.
Your third station (Dish 3) is where the Panko magic happens. Make sure you’ve mixed the Panko, Parmesan, zest, and oil thoroughly here. The olive oil is important; it toasts the crumbs while baking, deepening the flavor and improving the golden color of the Easy Baked Cod Dinner .
Crucial Step: Ensuring Even Breadcrumb Coverage
When you take the fillet out of the egg wash, let the excess drip off for a moment. Then, immediately place it in the Panko bowl. Do not be gentle. Press the fillet firmly down into the crumbs. Flip it, press it again. Use your hands to scoop extra crumbs onto the sides and ends, molding a thick, even crust all around.
A thick coating means a crispier finish.
Chef’s Note: The Internal Temperature Check for Flaky Doneness
I always recommend using a meat thermometer for fish. It guarantees perfection. You’re aiming for an internal temperature of 145°F (63°C) right in the thickest part of the fillet. If you don't have a thermometer, look for the flesh to be opaque and flake easily when gently probed with a fork.
Overcooked cod is rubbery, so check early (around the 12 minute mark) if your fillets are thin.
Post and Bake Protocol: The Short Rest Before Serving
Once it's out of the oven, do not move it immediately. Let the cod rest on the wire rack for two minutes. This allows the internal moisture to redistribute slightly and, crucially, gives the crust a final chance to set up and become truly rigid.
Then, hit it with a final squeeze of fresh lemon juice and serve immediately.
Troubleshooting Common Issues with Baked Crispy Cod
My friends often text me saying their fish was crispy on top but soggy underneath. Nine times out of ten, they skipped the rack.
- Issue: Crust is pale or not fully crisp: Did you use Panko? Did you preheat your oven adequately to 425°F? Try giving it a one and minute blast under the broiler (watch it like a hawk!) just before serving to add color.
- Issue: The crust falls off: This happened to me constantly when I started! You likely didn't pat the fish dry enough, or you skimped on the flour layer (the first binding agent). Make sure the flour coating is thin and even.
- Issue: Dry fish: Your oven was too low, or you baked it too long. Stick to the 12 15 minute window and use the temperature check. We want Crispy Baked Cod Without Deep Frying , not cod jerky.
Customizing Your Meal: Side Dish Pairings and Crust Variations
I usually serve this with simple smashed peas and a big dollop of homemade tartar sauce, but this Baked Crispy Cod is incredibly versatile.
Swapping Cod: Ideal Substitutions (Haddock, Tilapia, Halibut)
If you can’t get cod, don’t stress. Haddock works fantastically; it’s basically cod’s equally tasty sibling. Tilapia or sole can work, but they are thinner and will need their cooking time reduced to about 10 minutes.
Halibut is wonderful but expensive; bake it the same way as cod. The goal is firm, white fish.
How to Store and Reheat Leftovers While Maintaining Crispness
This fish is best eaten immediately. However, if you have leftovers, they keep well in the fridge for two days.
Do NOT, under any circumstances, reheat this in the microwave. It will turn instantly rubbery, and the crust will become soft and chewy. Reheat using the air fryer (350°F / 175°C for 5 minutes) or back in a hot oven (400°F / 200°C) until warmed through and the crust has returned to its former glory.
Preventing a Soggy Underside: Rack vs. Sheet Pan Debate
There is no debate. You must use a wire rack. Period. When the fish cooks, it releases moisture. If that moisture sits against the hot pan, it steams the bottom crust. The rack allows air and moisture to dissipate, resulting in the coveted all and around crunch. If you don't own a rack, go buy one.
They are inexpensive and essential for so many baked goods (like bacon!).
Dietary Adjustments: Going Gluten and Free or Dairy and Free
This recipe adapts really well, which is great news if you’re cooking for a mixed crowd.
- Gluten and Free: Substitute the all and purpose flour for a cup and for-cup gluten and free flour blend. Use gluten and free Panko (it exists, usually rice and based) instead of standard Panko. The results are almost identical.
- Dairy and Free: Simply omit the Parmesan cheese from the crust mixture. It won't brown quite as darkly, but the texture will remain superb thanks to the olive oil and high heat. Use nutritional yeast if you want a cheesy flavor substitute.

Recipe FAQs
My oven baked fish sometimes goes a bit soggy what’s the secret to properly crispy cod?
The key is airflow and dryness, mate; ensure you pat the cod bone dry before coating to eliminate moisture, and crucially, always bake it on a wire rack set over a baking sheet to allow hot air to circulate underneath and prevent a soggy bottom.
If I can’t get hold of cod, can I still make this brilliant Baked Crispy Cod recipe?
Absolutely; Haddock is a top-notch substitute, offering similar flaky texture, but thick Pollack fillets or even firm Tilapia work well just adjust the cook time slightly if the fillets are noticeably thinner.
Why do you specifically recommend Panko over standard breadcrumbs for this recipe?
Panko is made from crustless white bread and processed into larger, lighter flakes that absorb less oil and stick out further, creating a far lighter, shatteringly crisp coating than the fine texture of standard breadcrumbs.
I'm always worried about undercooking fish; how do I know my cod is definitely done?
The safest and most reliable method is checking the internal temperature with a meat thermometer, which should register 145°F (63°C); failing that, the fish should flake easily when tested with a fork and be completely opaque in the centre.
Is it possible to prep the cod fillets ahead of time, and how do I best deal with leftovers?
While the crunch is best when cooked immediately, you can bread the fillets up to four hours ahead and keep them uncovered in the fridge; to reheat leftovers, use the oven at 350°F (180°C) for 8 10 minutes instead of the microwave to properly revive that crispy crust.
Crispy Baked Panko Cod Recipe
Ingredients:
Instructions:
Nutrition Facts:
| Calories | 212 kcal |
|---|---|
| Protein | 31.0 g |
| Fat | 8.0 g |
| Carbs | 3.0 g |
