Coconut Poke Cake: the Queens Recipe for Ultra-Moist Tropical Cake
- Unlocking the Secret to the Perfect Tropical Coconut Poke Cake
- The Science of Saturation: Why This Coconut Poke Cake Recipe Triumphs
- Gathering Your Tropical Pantry: Essential Ingredients for the Poke Cake
- From Batter to Brilliance: Detailed Preparation Steps
- Chef’s Apron Notes: Troubleshooting and Mastering the Coconut Poke Cake
- Preservation Protocol: Storing Your Coconut Poke Cake
- Presentation Perfect: Serving Suggestions and Delicious Pairings
- Recipe FAQs
- 📝 Recipe Card
Unlocking the Secret to the Perfect Tropical Coconut Poke Cake
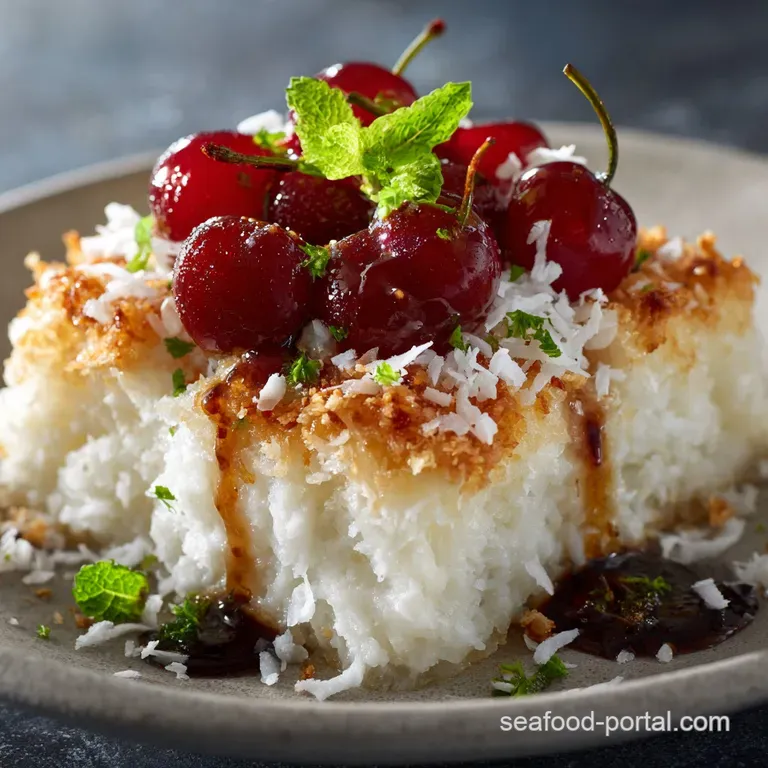
When that rich, toasted coconut aroma hits you, I swear you can hear gentle ocean waves crashing, even if you’re standing in a Midwest kitchen. This isn't just a cake; it’s a tiny, edible tropical vacation, and it is absolutely dripping with creamy coconut goodness.
The texture is the real winner here: a fluffy sponge transforms into an almost pudding like treat after its long, luxurious soak.
Forget those complicated layer cakes that require professional stacking skills and endless chilled butter. This easy coconut poke cake recipe is built in a simple 9x13 pan, making it the ultimate lifesaver for potlucks, family gatherings, or just an emergency dessert craving.
It demands minimal effort for a maximum "wow" factor. Seriously, you can throw it together in 20 minutes before it bakes itself.
I’ve made this Coconut Poke Cake With Coconut Milk dozens of times, tweaking the soak until it was pure perfection. So grab your mixer and your sharpest skewer, because we are diving into the secrets that make this the moistest, most delicious sheet cake you will ever taste.
The Science of Saturation: Why This Coconut Poke Cake Recipe Triumphs
What Makes a Poke Cake Different? (The Saturation Technique)
Traditional cakes rely on fat and sugar to retain moisture, but a poke cake uses physical intervention. We deliberately create channels (the 'pokes') in the hot cake right after it comes out of the oven. This allows the warm liquid soak to gravity feed deep into the structure.
It’s crucial that the cake is still warm ; the heat helps the condensed milk melt slightly and seep thoroughly.
The Texture Trifecta: Fluffy, Saturated, and Crunchy
This recipe balances three perfect textures. First, you need a light, airy vanilla sponge that has room to absorb the liquid. Second, the saturation stage turns that sponge into incredible creamy tenderness. Finally, the toasted coconut on top provides that essential, glorious crunch .
Don't skip the toasting step, please; it adds depth that untoasted coconut simply cannot match.
Quick Glance: Preparation vs. Deep Chill Time
The total time for this dessert is technically about three hours, but don't panic! Active preparation time is seriously short. You spend 50 minutes mixing and baking, and the remaining time is purely the refrigerator doing the heavy lifting.
The deep chill is non-negotiable for the ideal Coconut Poke Cake texture.
The Role of Sweetened Condensed Coconut Milk in Moisture Retention
Sweetened condensed milk is the star player here. It's thick, rich, and full of sugar, which acts as a powerful humectant, trapping water and moisture within the cake cells. By warming it with the cream of coconut, we create a thinner, pourable mixture that penetrates easily, cooling into a luscious, sweet foundation.
This is what transforms a simple cake mix into a rich, almost pudding like dessert.
Balancing Sweetness: The Tangy Cream Cheese Frosting Counterpoint
Yes, the soak is incredibly sweet, which is why we top it with a cream cheese frosting that has a subtle, welcome tang. The cream cheese cuts through the richness beautifully, making the whole dessert feel lighter and more complex than a simple whipped cream topping.
It's that little bit of acid that makes you want to keep eating slice after slice.
Achieving the Golden Toast on Coconut Flakes
You have two options for toasting: the oven or the stovetop. I prefer a dry skillet on medium low heat. Spread the flakes thin and watch them like a hawk! Stir constantly because the natural sugars burn in seconds. Wait for that deep, nutty aroma ; that’s when you know they are ready.
Gathering Your Tropical Pantry: Essential Ingredients for the Poke Cake
For the absolute best results, try to use high-quality ingredients, especially the full fat cream of coconut. If you’re short on time, this recipe works beautifully as an easy coconut poke cake with cake mix (just sub out the dry ingredients for a boxed white cake mix).
| Ingredient Role | Essential Ingredient | Viable Substitution / Tip |
|---|---|---|
| Cake Base Liquid | Whole Milk | Buttermilk (for more tang) or Oat Milk (for dairy-free). |
| Cream Cheese | Full Fat Cream Cheese | Neufchâtel cheese (use this if you want slightly less fat). |
| The Soak | Sweetened Condensed Milk | Vegan sweetened condensed coconut milk is an excellent alternative. |
| Flavor Boost | Coconut Extract | Omit it, or use Almond Extract for a subtle difference. |
| The Topping | Shredded Coconut Flakes | Use unsweetened flakes if you prefer less sugar, but they toast slower. |
Choosing Your Cake Base: Box Mix vs. Scratch Baking
I’ve provided my preferred scratch recipe, which guarantees a tender, light sponge perfect for soaking. However, if Tuesday night calls for emergency dessert, grab a white cake box mix! Just follow the box directions, then jump straight into Phase 2 of my recipe. It saves time without sacrificing much moisture.
The Coconut Injection: Full Fat vs. Lite Milk Selection
For the soak, you need heavy, canned Cream of Coconut or very thick full fat coconut milk (not the kind in the carton). Lite options simply won’t give you that dense, creamy, saturated texture we're aiming for. Go big or go home, I always say.
dairy-free Swaps: Creating a Vegan Coconut Poke Cake
If you need a dairy-free version, use a plant based butter substitute, swap the whole milk for oat milk, and critically, find vegan cream cheese and vegan sweetened condensed coconut milk. These are widely available now, and honestly, the flavor profile remains stellar.
Elevating the Topping: Vanilla Extract and Zest Notes
Don't underestimate the power of pure vanilla extract in both the cake and the frosting. If you want a fun twist, try grating a little lime zest directly into the cream cheese frosting. It adds this amazing, bright layer that really cuts the intense sweetness of the coconut soak.
From Batter to Brilliance: Detailed Preparation Steps
Phase 1: Achieving the Perfect Sponge and Cooling Protocol
- Prep the Oven and Pan: Preheat your oven to 350°F (175°C). Seriously grease and flour that 9x13 pan. No one likes cake stuck in the corners.
- Make the Batter: Combine all the dry ingredients. Cut in the softened butter until it looks like coarse sand. Beat in the egg yolks, milk, and vanilla, mixing just until smooth.
- Whip and Fold: This is the key to lightness. Whip the egg whites until they hold stiff peaks, then gently fold them into the batter in three separate additions. Stop mixing the second the streaks disappear. Pour into the prepared pan and bake for 30– 35 minutes.
- Cooling Protocol: Pull the cake out and let it cool in the pan for exactly 10 minutes. It must be warm for the next step.
Phase 2: The Critical 'Poke': Technique and Tools for Maximum Absorption
- Warm the Soak: Combine the sweetened condensed milk, cream of coconut, and optional extract in a small saucepan. Warm it gently over low heat, stirring until it's smooth and perfectly pourable. You don't want it hot, just warmed through.
- Poke Deeply: Grab a wooden skewer or the handle of a wooden spoon (my personal favorite tool). Poke holes about half an inch apart all across the entire surface. Ensure the holes are wide and deep , reaching nearly to the bottom of the pan; this is vital.
- Pour and Saturate: Slowly pour the warm coconut soak mixture over the entire cake surface, allowing the liquid a moment to fully seep into the holes before moving on. Don't rush this stage; you want complete saturation.
- Chill (Crucial Step): Cover the cake tightly with cling film, pressing it down slightly to touch the surface, and immediately refrigerate for a minimum of 2 hours.
Phase 3: Crafting the Silky, Pourable Coconut Soak
I once tried to pour the soak over a cold cake it just sat on top like a slimy film. Warm liquid is thin enough to penetrate the warm cake structure instantly. This combination is essential for creating that almost custard like interior.
Phase 4: Whipping the Light and Tangy Frosting Layer
- Toast the Coconut: While the cake chills, toast your coconut flakes until beautifully golden brown and aromatic, then let them cool completely.
- Beat the Base: Beat your softened cream cheese until it is incredibly fluffy and lump free. Gradually add the sifted confectioners' sugar.
- Whip the Cream: Now pour in the cold heavy cream and vanilla. Beat on medium high speed until the frosting is thick, stiff, and holds its shape. This mixture is essentially a stabilized cream cheese whipped cream.
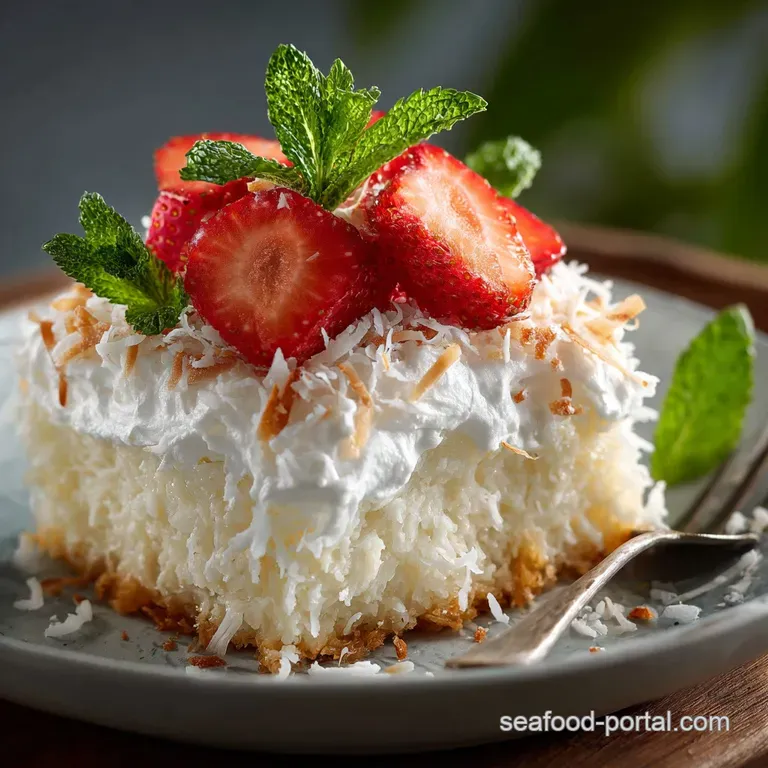
- Assemble: Spread the frosting evenly over the deeply chilled, soaked cake. Sprinkle generously with the toasted coconut.
Chef's Note: If your cream cheese or heavy cream aren't cold when you combine them, your frosting will likely split or become soupy. Keep the heavy cream in the fridge until the very second you add it to the bowl. Trust me on this temperature control.
Chef’s Apron Notes: Troubleshooting and Mastering the Coconut Poke Cake
Preventing a Soggy Bottom: When to Add the Soak
The most common failure is a sticky, soggy bottom layer. This usually happens if you poke the cake too immediately, or if the cake is allowed to cool too much. Wait 10 minutes after pulling it from the oven.
The small cooling time allows the cake to stabilize, preventing the liquid from simply drowning the bottom layer before the top has a chance to soak.
The Importance of Deep Chilling Before Serving
I know you want to eat it now. I understand. But if you try to slice the cake before it's thoroughly chilled ( 2 hours minimum!), the texture will be liquidy and messy.
The chilling time allows the fat in the sweetened condensed milk to firm up within the cake structure, creating that dense, impossibly moist bite.
Fixing a Split Frosting: Temperature Control Secrets
If your frosting suddenly looks grainy or watery (it split!), it's almost always due to temperature shock. If it splits while adding sugar, the cream cheese was too cold. If it splits when adding the heavy cream, the cream might not have been cold enough.
To fix it: Add 1 tablespoon of fresh, cold heavy cream and beat on low speed for 30 seconds. This often brings the emulsion back together.
Preservation Protocol: Storing Your Coconut Poke Cake
Refrigerator Lifespan: How Long Does the Moisture Last?
Because this dessert is so saturated and uses dairy (cream cheese frosting and the soak), it holds up incredibly well in the fridge. Covered tightly, your coconut poke cake will stay beautifully moist and delicious for 5 to 7 days .
In fact, I think it tastes even better on Day 2 after the flavors have truly married.
Best Practices for Freezing Frosted Cake Slices
Yes, this dessert freezes like a dream! Cut individual portions, wrap them tightly in plastic wrap, and then put them inside a freezer safe bag or container. It will keep for up to 3 months. The dense, saturated nature prevents freezer burn well.
Reviving the Cake: Serving Straight from the Chill
When you want a slice, pull it straight from the freezer and let it thaw overnight in the refrigerator. Do not try to thaw it at room temperature, as the high moisture content can become sticky. Serve it chilled, directly from the fridge.
Presentation Perfect: Serving Suggestions and Delicious Pairings
This coconut creation is fantastic on its own, but sometimes you want to take it over the top. Try serving it with a scoop of quality vanilla bean ice cream or a side of fresh, slightly tart pineapple salsa. The tropical acidity balances the heavy sweetness.
If you are obsessed with the poke cake concept like I am, and want to try a different flavor base, check out some of my other favorites:
- For the ultimate chocolate fix, my Chocolate Poke Cake: Ultimate Double Fudge Recipe with Whipped Cream is non-negotiable.
- If you love caramel and chocolate together, the Better Than Sex Cake: The Ultimate Chocolate Caramel Poke Cake Recipe is heavenly.
- Or for a fun, gooey twist, try the Marshmallow Chocolate Poke Cake: The Ultimate Gooey, Sticky Fingered Dessert next time you bake.
Enjoy the compliments, friend! You’ve earned them.

Recipe FAQs
Why is my cake dry, even though I added the creamy coconut poke soak?
This is usually a result of overbaking the original sponge cake or not creating enough holes for proper saturation. Ensure the cake is pulled from the oven immediately when a toothpick comes out clean, and use a skewer or chopstick to poke holes every half inch across the entire surface.
If the holes are too sparse, the soak will pool only at the bottom, leaving the top layers dry.
I cannot find cream of coconut. Can I use regular canned coconut milk instead?
While regular coconut milk will provide some moisture, it lacks the high sugar content and thickening agents necessary for the signature rich texture of this poke cake. If you must substitute, use the thick cream layer from the top of a chilled can of full fat coconut milk and whisk in 1/4 cup of powdered sugar to mimic the consistency.
This substitution will yield a less intensely sweet cake, but still delicious.
What is the secret to perfectly toasted coconut that doesn’t burn?
The key to perfect toasting is consistent, low heat and constant attention, as coconut shifts from golden to burnt very quickly. Spread the coconut flakes thinly on a baking sheet and bake at 325°F (160°C), stirring every two minutes until they reach a light golden hue.
Alternatively, you can toast them in a dry skillet over medium low heat, tossing frequently.
How should I store the finished Coconut Poke Cake?
Due to the dairy components in the soak and the frosting, the cake must be stored in an airtight container in the refrigerator. The cake is designed to be served chilled, as this allows the creamy coconut soak to solidify slightly and maintain the cake’s moistness.
When stored properly, the cake will keep well for 3 to 4 days.
Can I freeze the Coconut Poke Cake, and if so, how?
Yes, you can freeze this cake, but it is best to do so before applying the frosting and toasted coconut. Wrap the fully cooled and soaked cake tightly in plastic wrap, followed by a layer of aluminum foil, and store for up to three months.
When ready to serve, thaw it overnight in the refrigerator and then prepare and apply the fresh frosting and topping.
Can this recipe be adapted to be dairy-free or vegan?
This recipe is easily adapted by ensuring the base cake uses non-dairy milk and butter substitutes, like vegan butter sticks. For the poke soak, replace traditional sweetened condensed milk with a vegan version, or use full fat coconut milk simmered with extra sugar.
Use a whipped coconut cream or vegan cream cheese frosting for the topping.
How long should I chill the cake after soaking but before frosting?
A minimum chilling time of 4 hours is required, but overnight chilling is highly recommended for the best texture. This extended chilling time allows the creamy soak to fully penetrate the sponge and set up properly, locking in moisture and intensifying the flavour.
Do not attempt to frost the cake until the soak has completely cooled and firmed up.
Creamy Coconut Poke Cake Recipe
Ingredients:
Instructions:
Nutrition Facts:
| Calories | 231 kcal |
|---|---|
| Protein | 4.0 g |
| Fat | 4.0 g |
| Carbs | 44.0 g |
