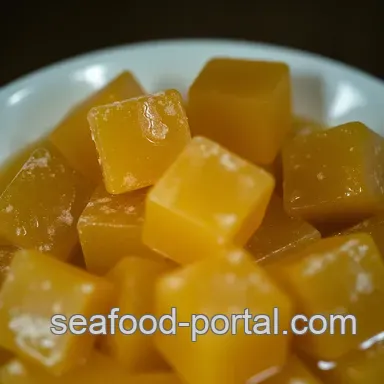
Sea Moss Gummies Recipe

- Look into Into Wellness with Sea Moss Gummies
- What’s in a Sea Moss Gummy?
- Why Sea Moss Gummies Are a Hit
- The Best Reasons to Sink Your Teeth Into These Gummies
- Essential Ingredients Guide
- The Professional Cooking Method: Unlocking Kitchen Success
- Unlocking the Secrets to Sea Moss Gummies: A Treasure Trove of Extra Tips
- 📝 Recipe Card
Look into Into Wellness with Sea Moss Gummies
Oh my gosh, have you ever felt like there’s so much buzz about health trends, and you just wanna jump on the tasty bandwagon? i'm still reeling from when i first discovered the magic of sea moss! it's like the ocean brought us a treasure chest of nutrients.
So, imagine my excitement when i found this sea moss gummies recipe ! not only is it delicious, but it's also a customizable gem loaded with goodness.
If you're looking for a fun the way to incorporate sea moss into your life, stick around!
I still remember my initial encounter with sea moss. sitting on the sugary beaches of the caribbean, sipping coconut water, someone handed me a spoonful of this gel-like substance.
At first, i was a bit skeptical. i mean, what's sea moss, right? but after a taste, i was hooked.
Sea moss has become a staple go-to for wellness ensoiasts, and it’s no wonder! these little gummies can be a blend of sweetness and health, perfect for munching on guilt free during those netflix marathons or right after a workout.
What’s in a Sea Moss Gummy?
Sea moss has been celebrated for ages, especially in caribbean cultures, where it’s known for being both nutritious and tasty.
Nowadays, people are catching on to its health benefits all over the place. with a prep time of just 15 minutes and a chilling time of 30 minutes , it’s as easy as pie (or should i say, gummies?).
And honestly, the best part? you don’t even need to turn on the stove so minimal fuss! yielding around 20 gummies , it’s an economical way to enjoy a nutritious snack.
Why Sea Moss Gummies Are a Hit
Now let’s talk about the perks! for starters, these nutrient packed gummies are loaded with sea moss health benefits think iodine, calcium, and vitamins a and c! perfect for keeping that immune system in-check.
Who doesn’t want to boost their health? and let’s face it, gummies are just a fun way to eat your supplements.
These are not your ordinary candies; you're getting serious health boosts while indulging your sweet tooth.
Looking for a perfect addition to a kids’ birthday party, or maybe a tasty treat when hosting friends? these gummies fit the bill! their bright colors and delightful flavors make them a crowd pleaser.
Plus, they beat trendy sugary snacks any day. don’t be surprised if the kids are asking you for healthy snack ideas instead of their usual candy fix!
The Best Reasons to Sink Your Teeth Into These Gummies
Health Benefits Galore : Rich in dietary fiber , these gummies can help keep your digestion on point.
Customization Options : Feeling adventurous? You can use different juices or flavors for unique tastes. Imagine mango or berry flavored gummies!
Easy to Make : Literally, anyone can whip these up! If you're a novice or an expert in the kitchen, you'll find that this is an easy gummies recipe .
Keep it Vegan : With agar agar substitutes, you can make these vegan sea moss gummies that your plant loving friends will swear by!
Perfect for any occasion : whether it's a snack at home, a picnic day, or even as party favors, these gummies are a versatile diy sea moss treat that can be adored by all ages.
So, are you sold yet? ready to dive into the delicious world of homemade wellness treats? grab your ingredients, and let’s switch gears to how to make these chewy delights.
You’ll be glad you did!
Essential Ingredients Guide
So, you want to whip up some tasty sea moss gummies? you’re in for a treat! not only are they delicious , but these gummies are also packed with nutrients .
But before we dive in, let’s go over some fundamentals that will set you up for success in the kitchen!
Premium Core Components
First off, let’s talk about essential ingredients . for our sea moss gummies, you'll need about 1 cup (240ml) of sea moss gel .
This gem is made from dried sea moss, which has amazing sea moss health benefits like boosting your immune system and packing in dietary fiber.
Next up, you’ll need 1 cup (240ml) of fruit juice . whether you go with orange, apple, or something a bit funky like pomegranate, the juice not only adds flavor but also vitamin c.
Go fresh whenever possible for the best quality .
A touch of sweetness is key, so grab 2-3 tablespoons (30-45g) of honey or maple syrup . adjust that to your taste! when hitting those sweet notes, quality matters.
Look for raw honey or pure maple syrup to really elevate your gummies.
And we can’t forget 2 tablespoons (28g) of gelatin ! if you’re rolling with a vegan version, opt for agar agar instead.
Both help in firming our gummies just keep an eye on the packaging for proper measurements.
Storage is crucial! keep these gummies in an airtight container in the fridge, and they should last about one to two weeks .
Pro tip: if they start getting too sticky, throw them in the freezer for a little bit.
Signature Seasoning Blend
So, how do we add that signature flair? some fun options like a teaspoon of vanilla extract or a dash of turmeric or cinnamon can not only enhance flavors but also bring health benefits.
If you're feeling adventurous, try pairing some herbs! think about mixing in a bit of mint or basil for a refreshing twist.
It's all about finding those flavor combos that you love sugar and spice make everything nice!
Smart Substitutions
Now, cooking is all about flexibility, right? if you don't have fruit juice handy, you could go for smoothies or even flavored sparkling water - it’s all up to what you’ve got around.
Plus, if you need more ideas, think of seasonal fruits that’ll keep things fresh and lively.
If you're vibing on a gluten-free diet or need something for the kiddos, these gummies are perfect! Just make sure to use gluten-free sweeteners and you're solid.
Kitchen Equipment Essentials
No fancy gadgets here just the must haves! a mixing bowl , a whisk , silicone gummy molds , and a pot for your gelatin or agar agar make the perfect team.
Honestly, you don’t even need a stove for the entire process; it’s all about mixing and chilling.
Here's a quick tip: if you ever find yourself without silicone molds, ice cube trays work just as well! just be warned: popping gummies out might get a little trickier, but they’ll still be delish.
Ready to Make Those Gummies?
Now that you’re armed with your essential ingredients , you can feel confident about brewing up your very own sea moss gummies recipe .
Grab your ingredients, mix 'em up, and before you know it, you'll have those healthy snack ideas ready to go!
Whether it’s a sweet treat for movie night or a post workout snack, these babies are not just good for you; they’re downright fun to make, especially if you’re crafting some nutrient packed gummies with your friends or family.
So, let’s roll up those sleeves and get started!
The Professional Cooking Method: Unlocking Kitchen Success
Cooking like a pro isn’t just for chefs in fancy restaurants. it’s about prep, timing, and a sprinkle of creativity! here’s how you can bring those professional cooking methods right into your own kitchen no five star training necessary.
Essential Preparation Steps
First things first, let’s talk mise en place . it means “everything in its place” in fancy french, but really, it’s about getting organized.
Chop your veggies, measure your spices, and lay everything out before you cook. trust me; it saves you from running around, looking for the garlic while your pan’s already sizzling.
Next up, if you think time management is just for office workers, think again! set a timer for each step.
If a recipe says to sauté onions for 5 minutes , don’t hop onto social media instead. you think you can multitask? i thought so too until i turned into a smoke alarm.
Being organized also includes cooking tools. keep your pots, pans, and spatulas where you can reach them. safety is key, too.
Always use mitts when handling hot pans and keep a clean workspace to avoid spills. cooking is fun; it shouldn’t feel like a trip to the er!
Step-by-step Process
Now onto the good stuff! Here’s a clear, step-by-step guide that will have you cooking like a pro in no time.
Gather Your Ingredients : Lay them all out.
Preheat Oven or Pan : Make sure your oven is at 350° F if you’re baking. For stovetop cooking, get those pans nice and hot.
Cook with Precision : Stick to the timing. If something needs to simmer for 20 minutes , set that timer!
Visual Cues for Doneness : Trust your eyes. Chicken should be golden and juices need to run clear, not pink. It’s all about that look!
Expert Techniques
Curious about those secret techniques? Here's the scoop!
One of the critical steps in professional cooking is basting . it’s like giving your meat a spa treatment with juices, making it oh-so-tender.
And remember, not every recipe requires fancy gadgets. a simple meat thermometer can be your best friend, making sure that juicy steak is cooked to medium rare perfection (about 135° f ).
If you encounter a cooking hiccup, don’t panic. overcooked veggies? toss them in ice water to stop the cooking. burnt sauce? try to salvage it by adding a splash of broth.
Know that kitchen disasters are just as much a part of the process as gourmet meals!
Success Strategies
Now, here's where it gets real common mistakes we all make. first up, don’t overcrowd your pan! it’s tempting to throw in everything at once, but it’ll steam instead of sear.
Give your food room to breathe.
Quality assurance is important. taste as you cook! if something feels off, adjust. too salty? a squeeze of lemon can balance it out.
Oh, and don’t forget to keep it simple. not every dish needs five spices. sometimes, salt, pepper, and fresh herbs are all you need.
Want to know a secret? you can make healthier snacks in advance, like sea moss gummies , which are packed with nutritional benefits.
Just think of them as your delicious, nutrient packed gummies that boost your immune system!
And yes, I have a go-to sea moss gel recipe I absolutely love. It’s super easy; just soak that sea moss for 12- 24 hours , blend, and voilà! You’ve got the base for your homemade wellness treats!
Final Thoughts: Additional Information
Embracing these professional cooking methods will not only step up your kitchen game but also make cooking exciting. whether you’re whipping up a classic dish or experimenting with a sea moss gummies recipe , remember, every meal is an opportunity to learn.
You can parade around your kitchen, feeling like a chef in your own reality show. so roll up those sleeves and get cooking!
Unlocking the Secrets to Sea Moss Gummies: A Treasure Trove of Extra Tips
So, you're diving into the sea moss gummies recipe , huh? fantastic choice! these nutrient packed gummies are amazing for your health, not to mention totally fun to make! let’s unravel some pro tips and secrets to elevate your gummy game.
Pro Tips & Secrets
Chef's personal insights
when i first tried out this sea moss gel recipe, i was like a kid in a candy store.
I learned that the key is in making that gelatin dissolve just right. if you don’t, hello lumpy gummy land! always sprinkle it over the water and give it a minute before you heat it.
Trust me, it’s worth it!
Time saving techniques
want to whip these up in a flash? try prepping your sea moss gel ahead of time.
Make a big batch, and store it in the fridge easy peasy! you can even use it in other recipes.
Flavor enhancement tips
oh, and don’t sleep on flavor boosts! a splash of vanilla extract or a pinch of turmeric can really jazz up your gummies.
I’m telling you, a little turmeric not only makes it taste better but ups the health benefits too hello, antioxidants!
Presentation Advice
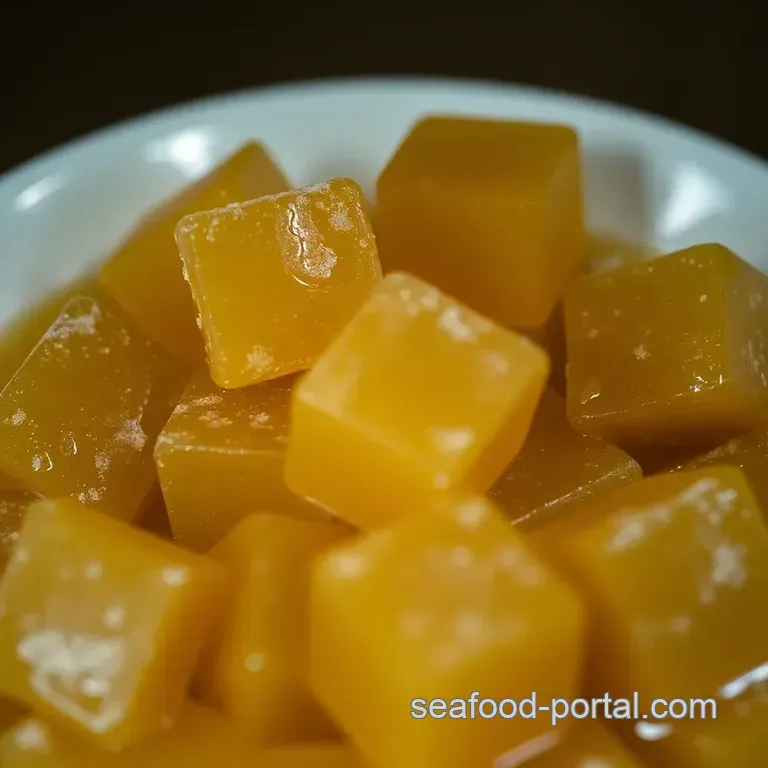
Let’s talk looks. Pour your gummy mix into fun-shaped molds; kids and adults alike will dig it! Seriously, who doesn’t love a star shaped gummy? Plus, if you sprinkle a little zest from a lemon or orange zest on the top before they set, it will look as tasty as it is!
Perfect Presentation
Plating techniques
after you pop those bad boys out of the molds, arrange them on a colorful plate. if you’re feeling fancy, place some fresh fruit around them for an impressive display.
Garnish Ideas
You know what could really make these shine? A drizzle of honey or a sprinkle of coconut flakes on top. It adds a nice touch and makes them Instagram worthy!
Color combinations
think about the juice you’re using bright orange from an orange juice or deep purple from berry juice.
The more colorful, the better, right? your plate should be like a palette!
Visual appeal tips
presentation isn't just a bonus; it makes everything taste better! when things look nice, we enjoy them more.
It's like the food tastes better at a restaurant just because it's presented so well.
Storage & make-ahead
Storage Guidelines
Once you’ve spoiled yourself with these homemade treats, the key is storing them right. Keep them in an
airtight container
in the fridge. They can last about a week!
Preservation methods
if you want to extend their life, you can freeze them! just make sure each gummy is separated in a single layer before you transfer them to a freezer bag.
Reheating Instructions
Quick note: don’t reheat these gummies. They’re best enjoyed chewy and fresh!
Freshness Duration
Remember, these bad boys are packed with natural ingredients, so enjoying them fresh is totally the way to go.
Creative Variations
Flavor adaptations
feel free to switch up the fruit juices. mango or pineapple can add a tropical vibe. if you’re feeling adventurous, mix two flavors! they’re basically a canvas for your creativity.
Dietary Modifications
Got dietary needs? No problem! Use agar agar for a vegan twist or swap honey for maple syrup. You can easily make them gluten-free, too.
Seasonal Twists
As the seasons change, so can your gummies. Think pumpkin spice in the fall or berry bliss in summer. The world is your oyster or should I say, sea moss?
Regional Variations
If you want to channel those Caribbean vibes, add coconuts or tropical fruits to your mix. It’ll transport you straight to the beach.
Complete Nutrition Guide
Okay, let’s not ignore the sea moss health benefits ! these gummies are a great source of iodine, calcium, and various vitamins that are key for your wellbeing.
Each gummy has about 25 calories and 1 gram of protein, making them a guilt free snack. they are also a good source of dietary fiber , which everyone can benefit from!
Expert FAQ Solutions
You might have some burning questions, and I’ve got answers.
- Common Questions: How do I ensure my gummies turn out right? Always dissolve the gelatin well!
- Troubleshooting Guide: If they’re too hard, use less gelatin next time.
- Success Tips: Don’t hesitate to experiment. Each batch is a learning curve!
- Variations Explained: Try adding herbal infusions for extra oomph.
So, there you have it! look into into this sea moss gummies recipe , and don’t shy away from getting creative.
Whether you’re treating yourself or your kiddos, these homemade snacks are not just fun they’re a step toward health! make sure to share your creations with family and friends.
They’ll be begging you for the recipe!
You’ve got this! Happy gummy making!
Sea Moss Gummies Recipe